Weir Pump

Home Model Engine Machinist Forum

Help Support Home Model Engine Machinist Forum:

This site may earn a commission from merchant affiliate links, including eBay, Amazon, and others.

Tony Bird

Senior Member
Joined
Feb 20, 2011
Messages
822
Reaction score
895
Location
Cardiff, South Wales, UK
Hi,

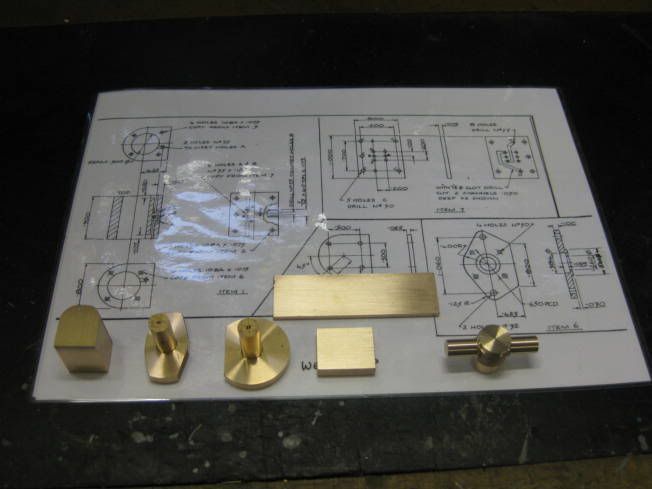
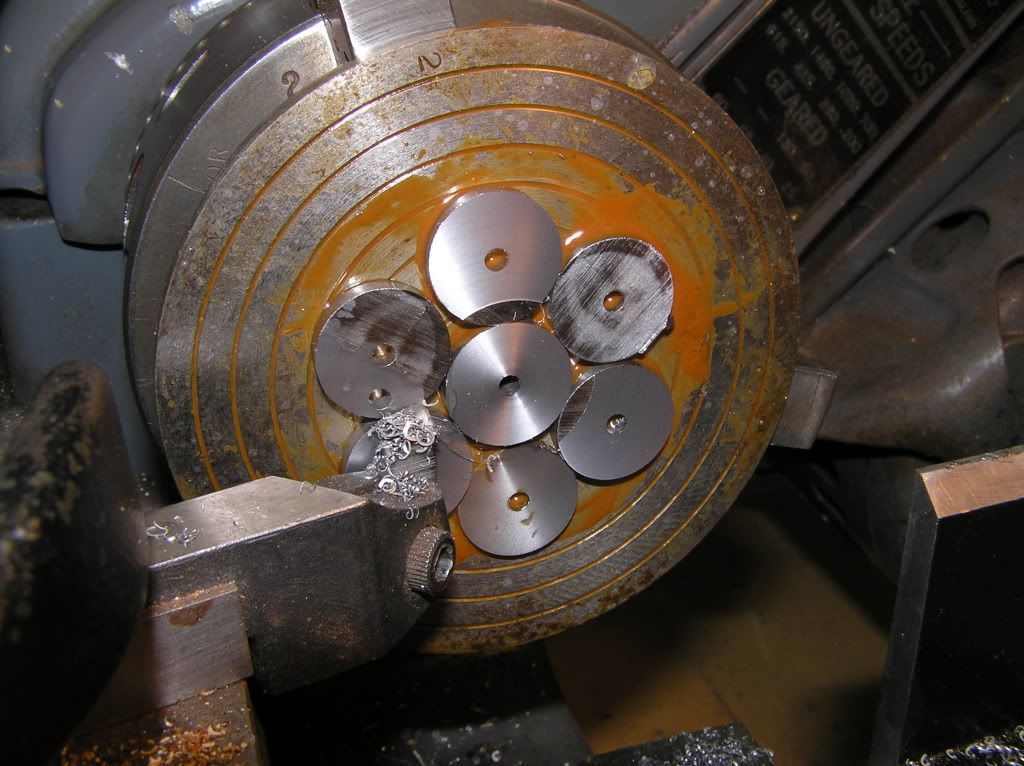
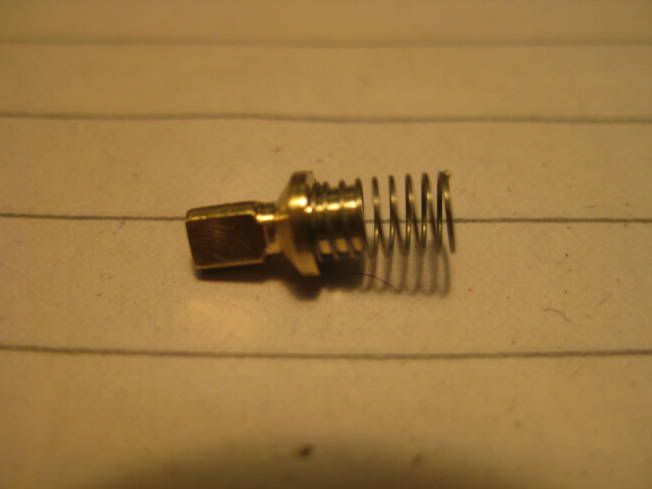
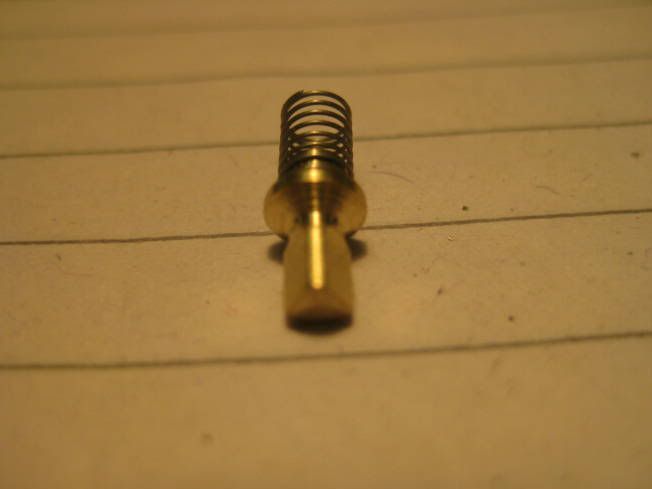
Last weekend while at a Model Engineering Exhibition I bought from Blackgate Engineering drawings and casting to make a Weir type pump. It is the first time in many years that I have used castings in a model, mostly I fabricate. What did I get for a little over £30? Well drawings along with six Gunmetal castings, some '0' rings and springs.

WeirPump001LR.jpg


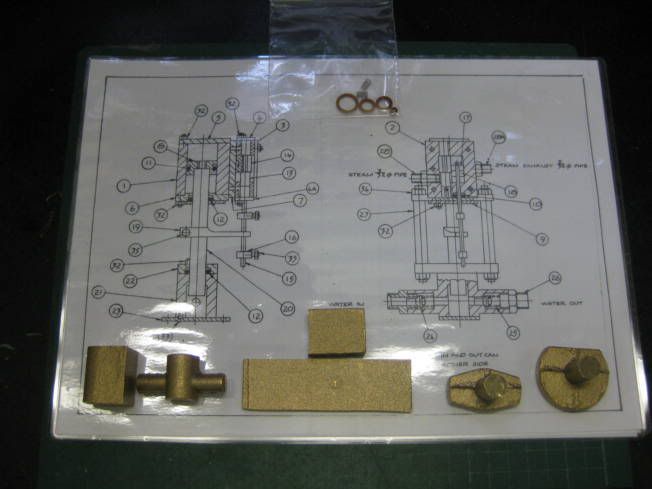
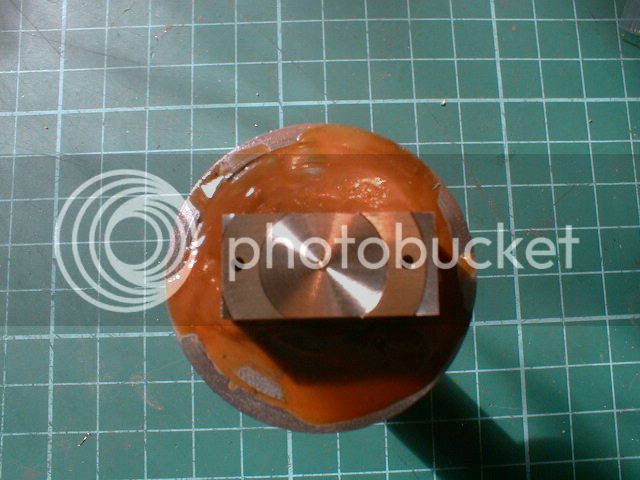
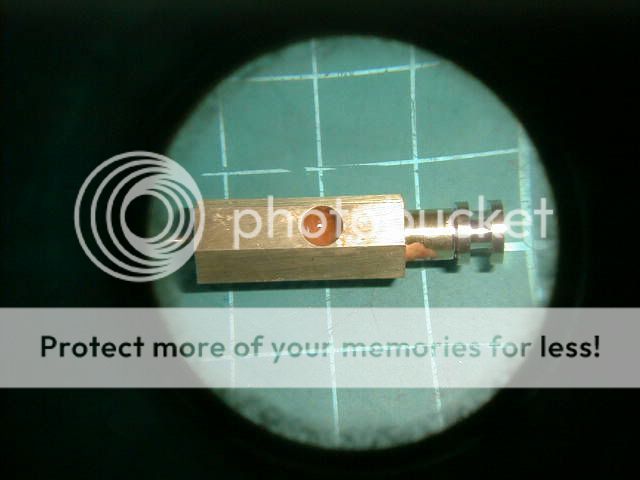
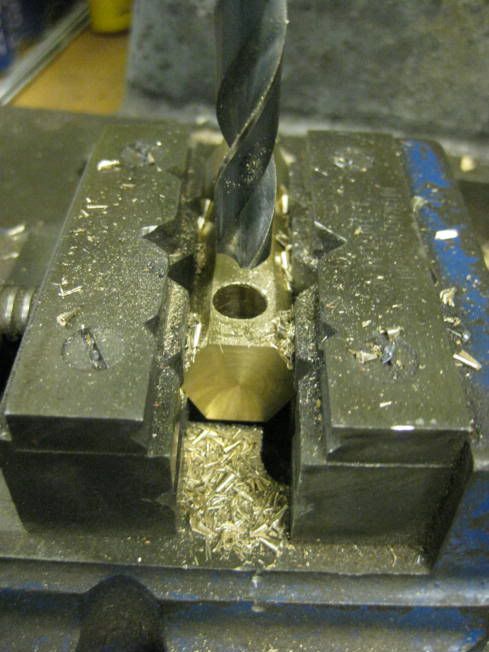
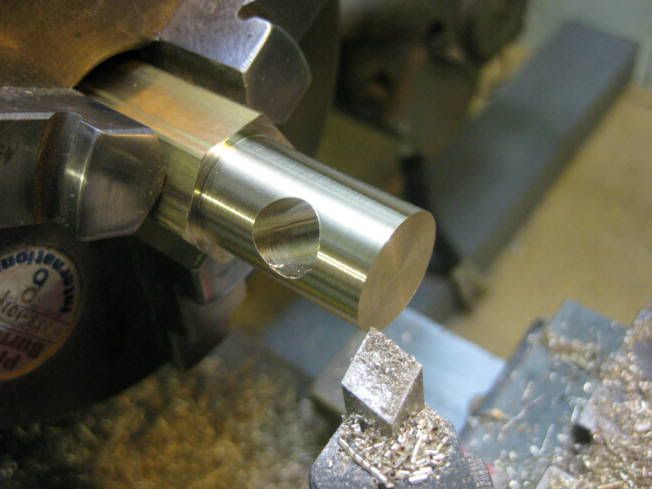
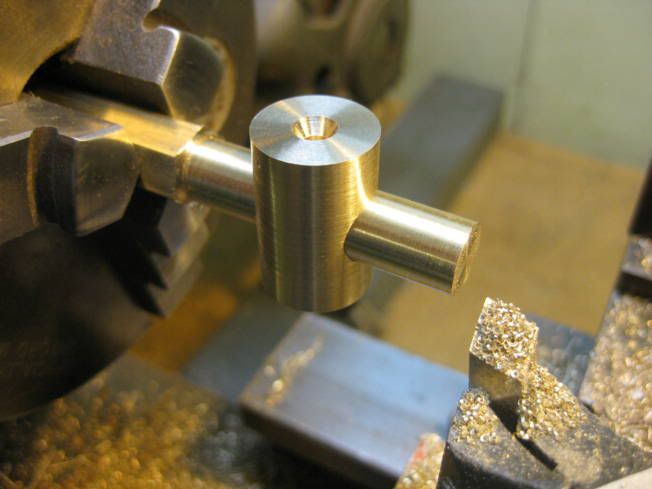
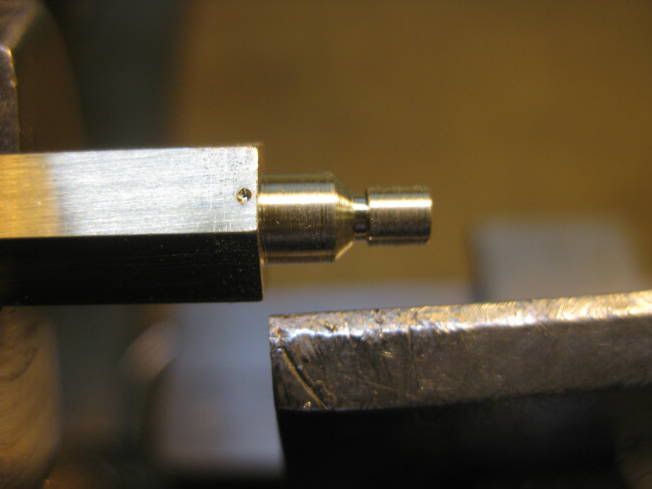
The drawings were copied cut down in size and laminated. The castings were measured to check that it was possible to machine them to size. All of the castings except for one were generous in size. The cylinder casting in its rogh state was a little under size in width. This wouldn't be a problem. So a start was made roughing out the castings before getting down to exact sizes.

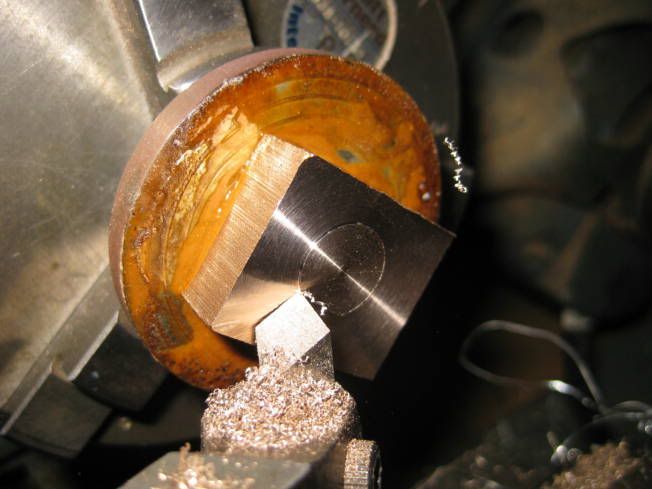
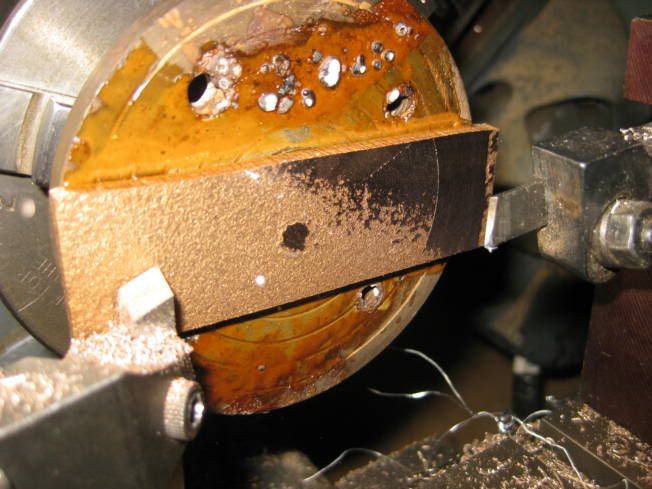
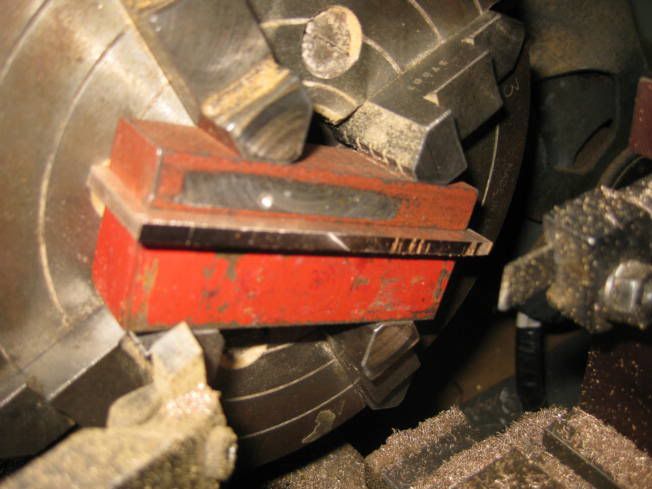
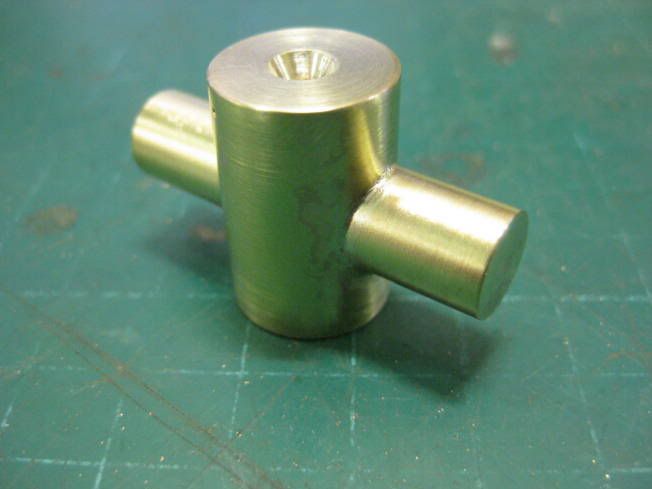
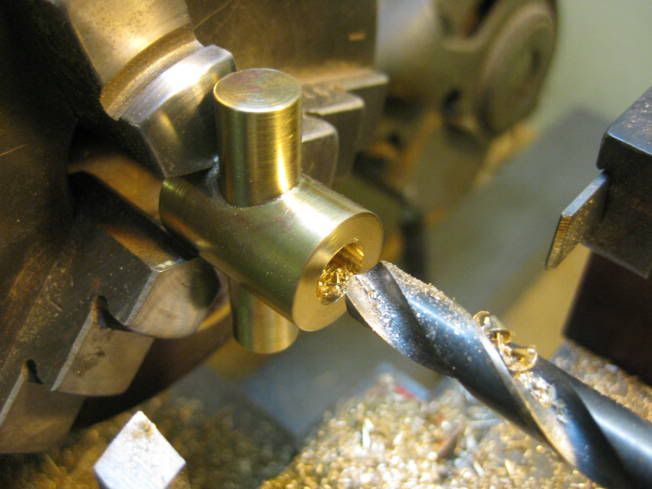
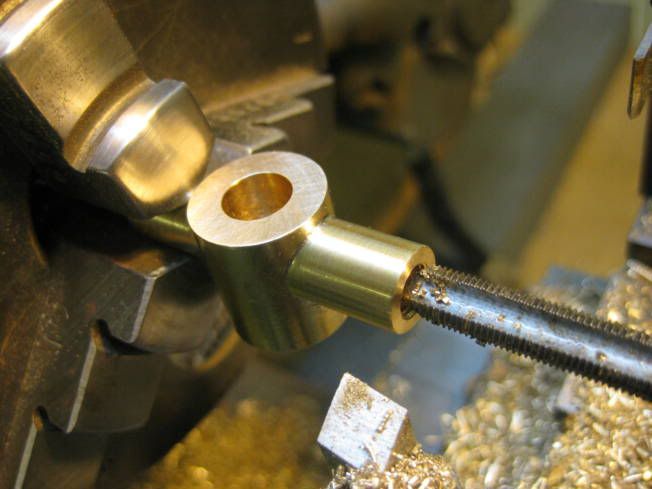
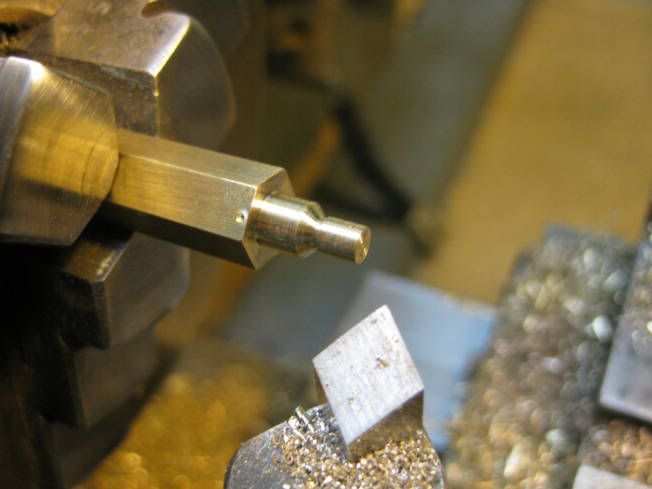
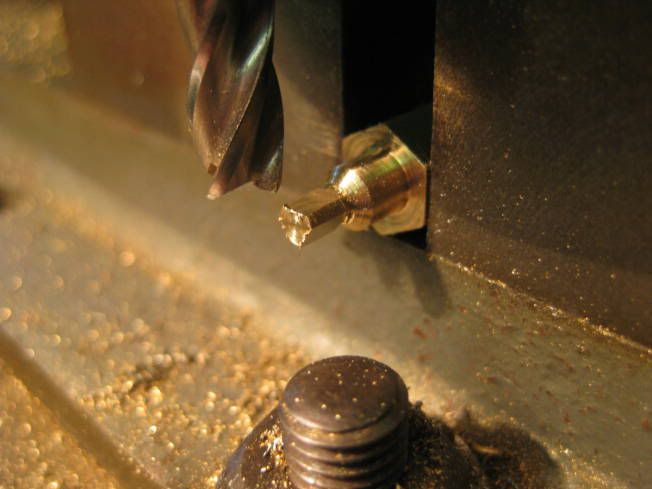
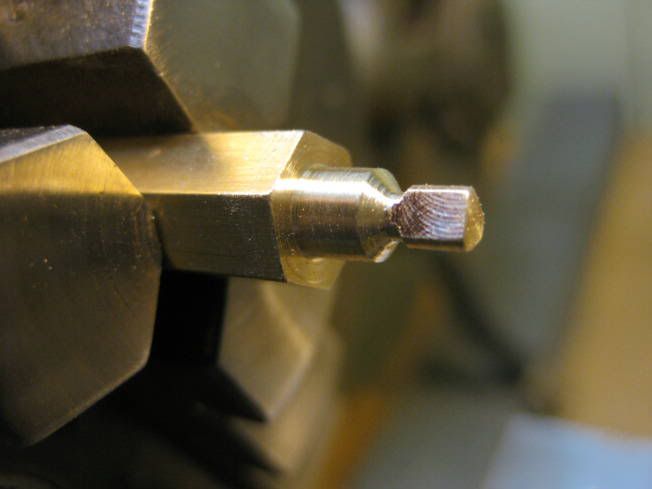
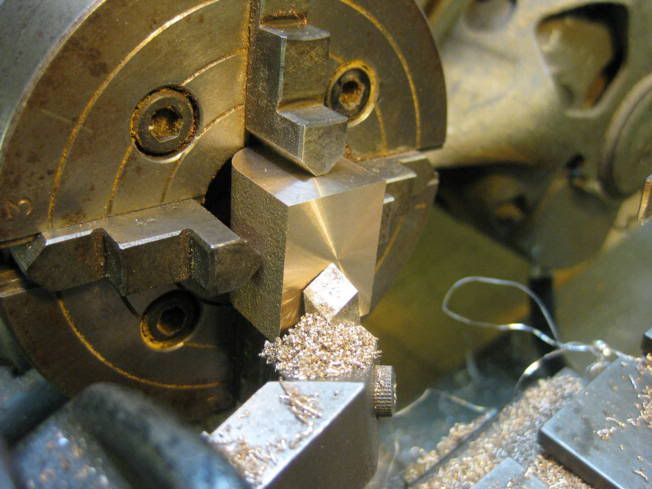
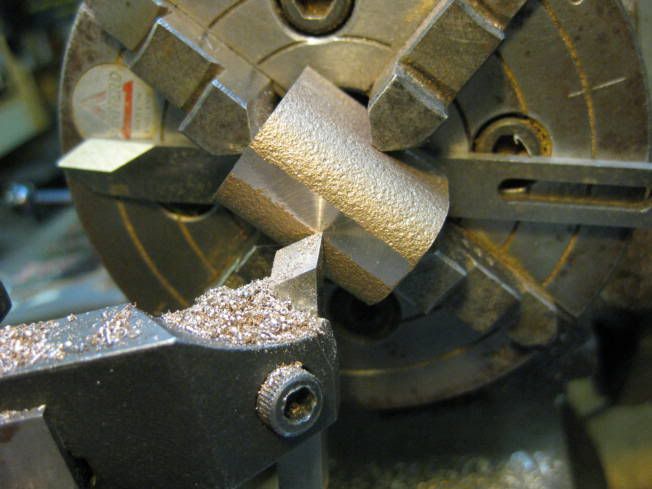
Photographs of rough out the castings.

WeirPump003LR.jpg


WeirPump002LR.jpg


WeirPump005LR.jpg


WeirPump006LR.jpg


WeirPump007LR.jpg


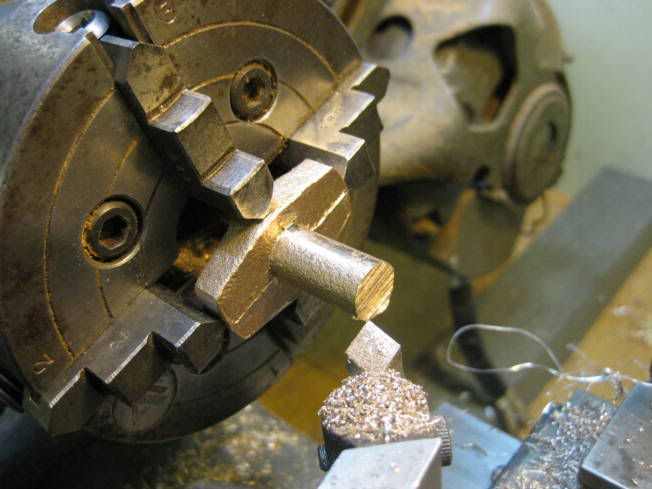
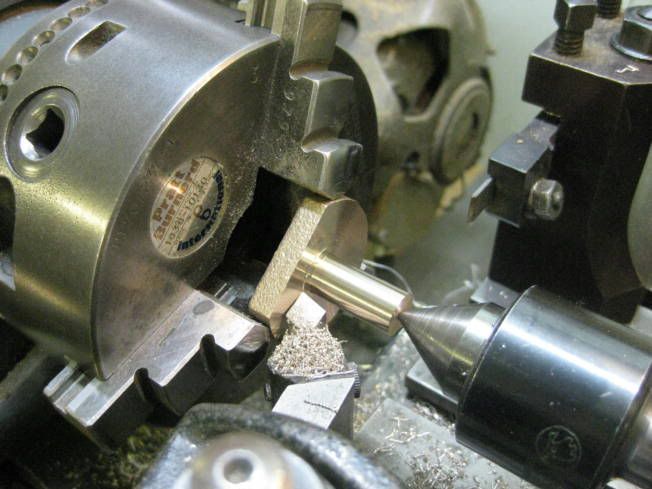
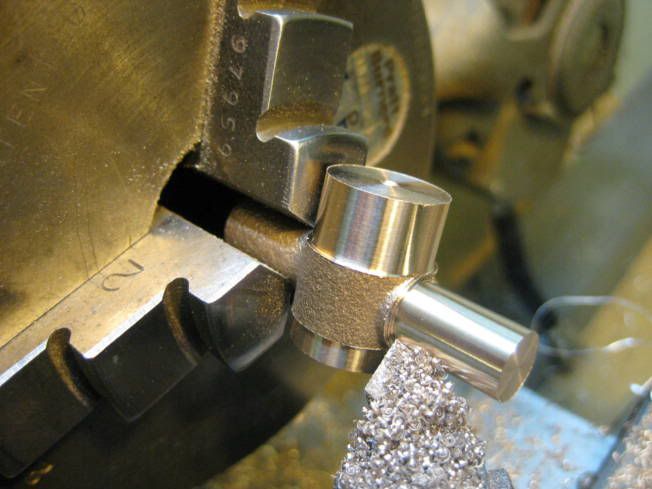
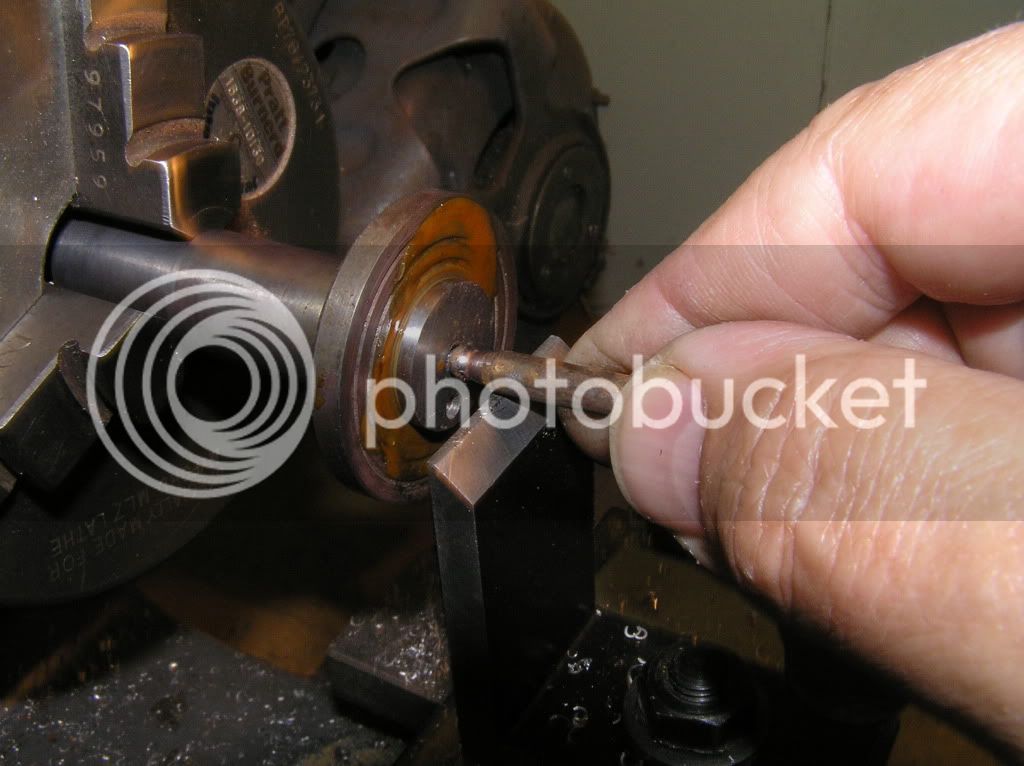
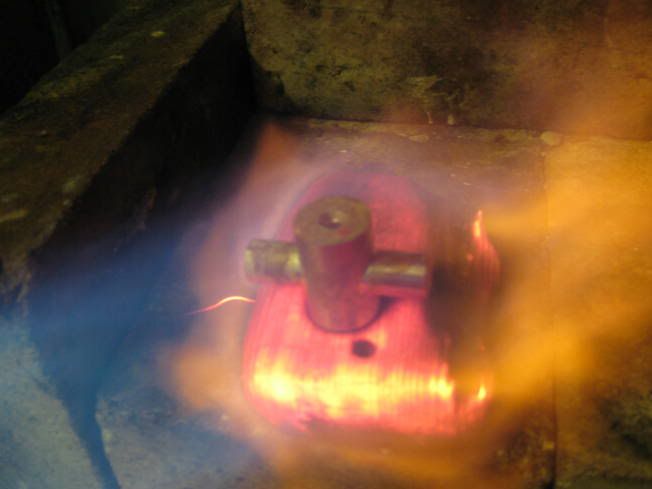
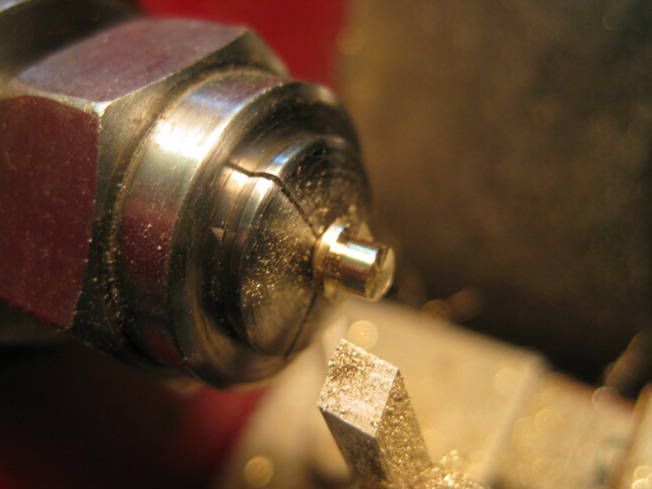
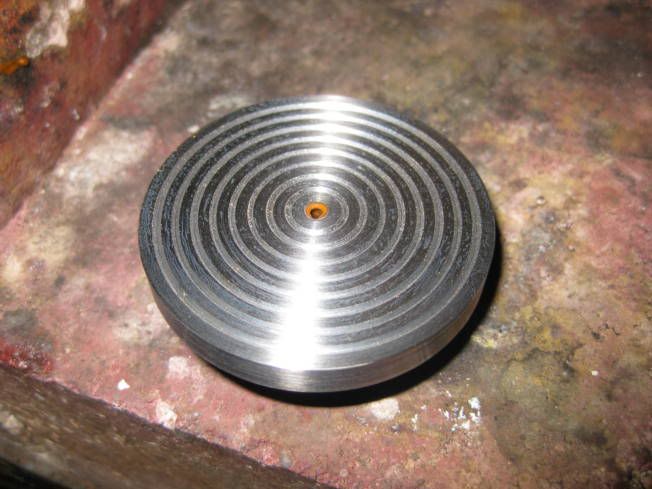
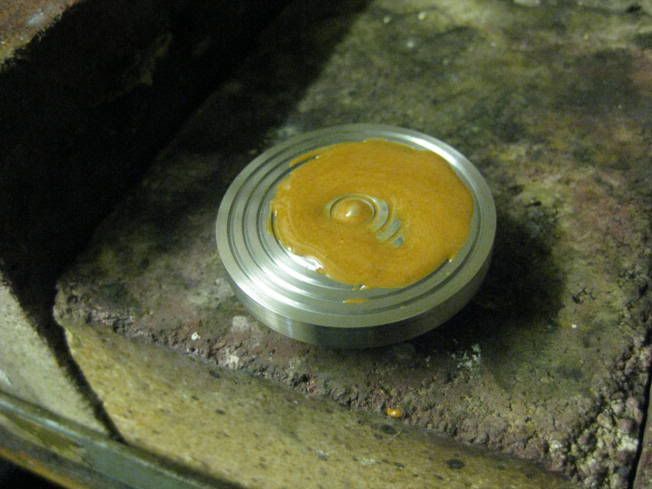
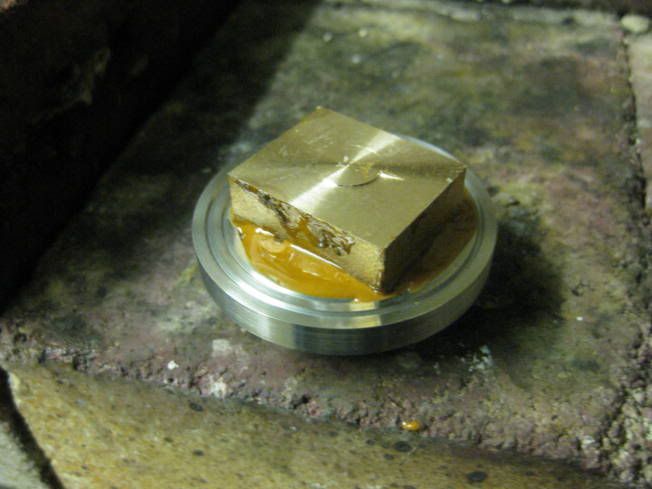
Wax chucks were used for the flat bits.

WeirPump010LR.jpg


WeirPump011LR.jpg


WeirPump012LR.jpg


Some more photographs to follow.

Regards Tony.


Interesting way to take down the width of a bar Tony...and I for one would like to hear more about the preperation and use of wax as a part bonding agent......pretty please?

;D

Dave
 
Hi Dave,
Shellac is used as the adhesive on wax chucks and is available in stick form from horological suppliers. The chucks themselves are usually made from brass or steel. The shellac is melted onto the chuck which has been heated by a blow torch, the workpiece is then placed on the shellac and also heated. Then cool 'Do not quench' the chuck can be mounted in the lathe or mill for machining. Allow about 0.20mm for the thickness of the shellac when measuring off the chuck, to be more accurate allow a portion of the work piece to protrude beyond the edge of the chuck so it can be measured. The workpiece is removed from the chuck by heating and can be cleaned by placing in alcohol for about 30 minutes. The shellac left left on the chuck can be used with the addition of more for its next job. There are several different types of wax chucks some of which I expect I will use later in the construction of the pump. If you have an specific questions please ask.

Regards Tony.
 
Very interesting post. Learned a few new things... :bow:

1. horological suppliers.... had to Google that one, learned what that was. (if anyone else doesn't know I ain't telling)

2. Wax chucks.... I had never heard of this and find it so useful yet so cheap and simple. I could have saved a lot of frustration turning small thin parts with this idea.


One question, when you placed the part on to the shellac does it lay flat? I would think that the shellac might not flow evenly and make one end higher than the other. (Hope that makes sense)
 
Tony Bird said:
Hi Dave,
Shellac is used as the adhesive on wax chucks and is available in stick form from horological suppliers. The chucks themselves are usually made from brass or steel. The shellac is melted onto the chuck which has been heated by a blow torch, the workpiece is then placed on the shellac and also heated. Then cool 'Do not quench' the chuck can be mounted in the lathe or mill for machining. Allow about 0.20mm for the thickness of the shellac when measuring off the chuck, to be more accurate allow a portion of the work piece to protrude beyond the edge of the chuck so it can be measured. The workpiece is removed from the chuck by heating and can be cleaned by placing in alcohol for about 30 minutes. The shellac left left on the chuck can be used with the addition of more for its next job. There are several different types of wax chucks some of which I expect I will use later in the construction of the pump. If you have an specific questions please ask.

Regards Tony.
Wax chuck?? Wow, now there's the new thing for me for today. Thanks.
 
I've read the description before...but I've never tried one....Figured Tony could do better than I

Dave
 
Hi,

One question, when you placed the part on to the shellac does it lay flat? I would think that the shellac might not flow evenly and make one end higher than the other. (Hope that makes sense)

As long as there are no bits in the shellac or on the work piece the shellac's miscus (if this is the right word) is remarkably constant. When the workpiece is heated while on the chuck it is pressed down and some air bubbles usually escape. Some uses for shelac chucks.

051Facing7CrankDiscs.jpg

Multiple machining.

054CenteringCrankDisc.jpg

Special wax chuck with extended shaft. The work piece is fixed on the chuck and as the shellac thickens it is placed in the lathe a small blow lamp is played on the back of the chuck until the shellac is mastic and the work piece is centred using a ball ended punch or piece of wood. Its a bit like a potter centering his clay on a wheel.


022Finishedcylinderportfaceonshellacchuck.jpg

As above to cut recesses in the bottom of a small cylnder.

033Finishedpistonandrodinholder.jpg

Another form of wax chuck used to cut an '0' ring slot in a piston with it is mounted on its rod. Piston rod 1.5mm squares 10mm.

There several other forms of wax chucks which I haven't taken photographs of some of which might be used in the construction of the Weir pump. I am play trains for the next two days then off to Pasta Land for a couple of weeks so it will be a little time before I continue this thread.

Regards Tony.


Hi,

After a few weeks break its back to the Weir Pump. It was decide to start with finishing the pump's body. Alas the drawings were mis-read and the pumps body was made too is too short. So this part of the thread is about fabricating a pump body.

WeirPump015LR.jpg


WeirPump016LR.jpg


WeirPump017LR.jpg


WeirPump018LR.jpg


WeirPump019LR.jpg


WeirPump020LR.jpg


WeirPump021LR.jpg


WeirPump022LR.jpg


WeirPump023LR.jpg


Hopefully there will be now further mistakes or I will end up fabricating it all!

Regards Tony.


A very informative post.
i like the way you placed the solder in the countersink. very neat joint. Must remember that. i always feed in with wire and some times end up with more blob than joint!
Wax chucks as well. that's a technique i'll have to add to the armoury.
thanks for posting, will be following withh interest

peter
 
Really interesting post. I really enjoyed the discussion on wax chucks. Thanks for helping me continue to learn!!
 
Hi,

Made one of the two inlet and exhaust valves for the pump today, they are both the same. They are quite small but straight forward to make.

WeirPump024LR.jpg


WeirPump025LR.jpg


WeirPump026LR.jpg


WeirPump027LR.jpg


WeirPump028LR.jpg


WeirPump029LR.jpg


WeirPump030LR.jpg


Regards Tony.


Latest posts

Back
Top