Stirling engine build

Home Model Engine Machinist Forum

Help Support Home Model Engine Machinist Forum:

This site may earn a commission from merchant affiliate links, including eBay, Amazon, and others.
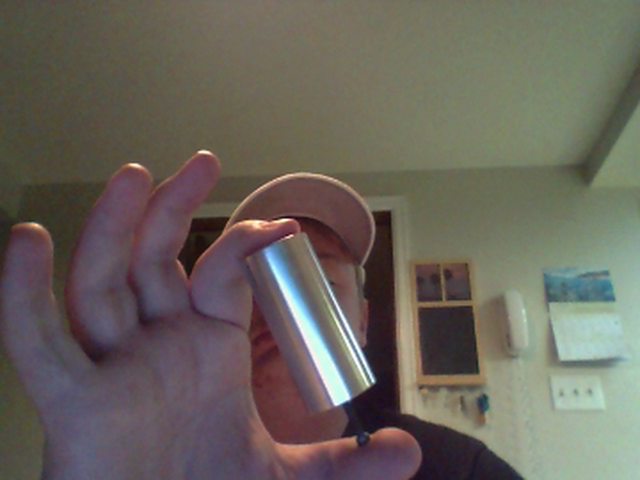
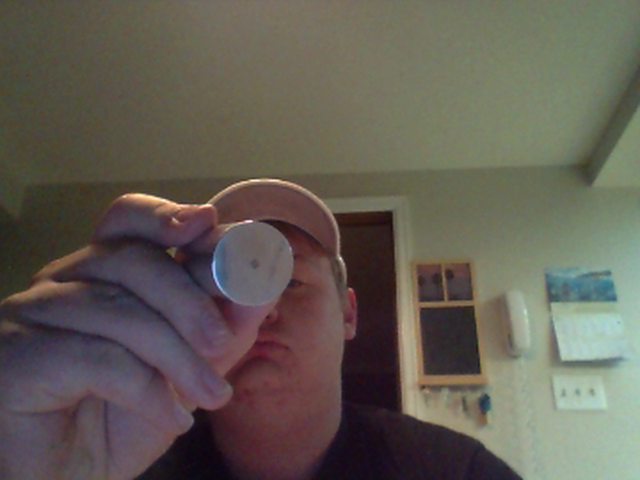
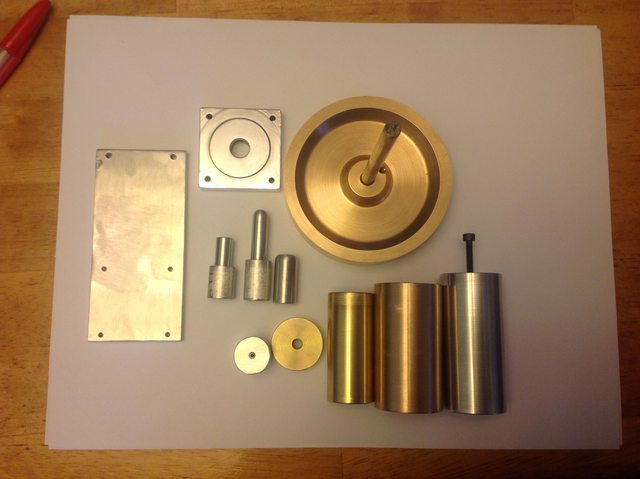
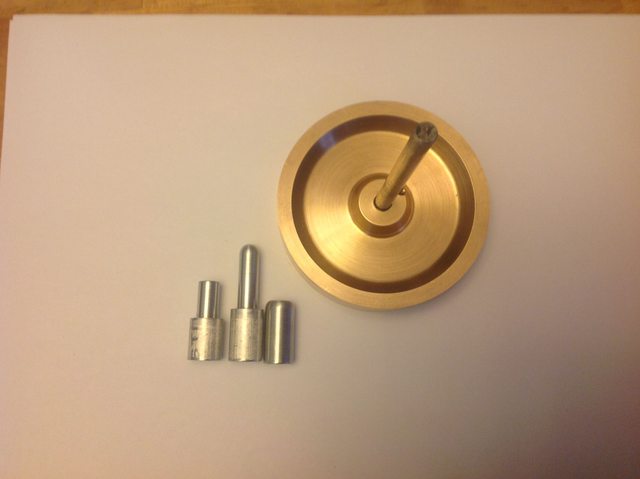
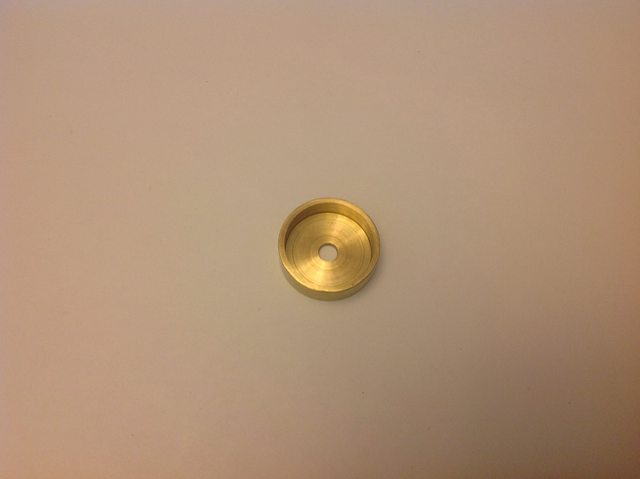
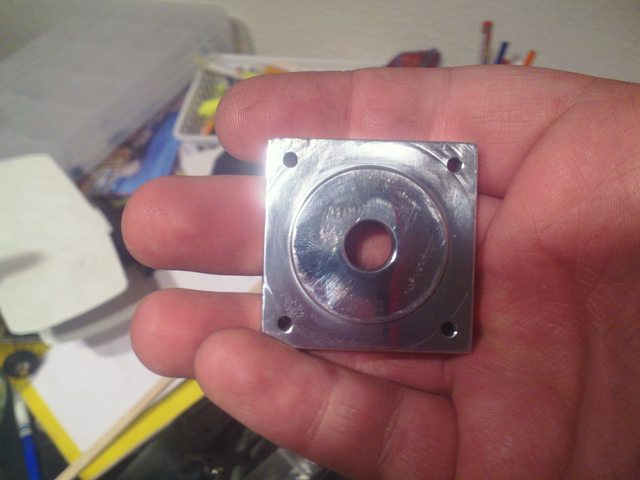
You need to chuck on the outside diameter of the flywheel to turn the recess in. Use some aluminium can packing under the jaws, or hold it direct. You have already turned the outside dia while the wheel was mounted on the shaft, you can do the same thing to take a light cut to remove any jaw marks. A little bit smaller on the OD won't hurt.

Paul.

thanks for the tip paul, that is what i will do. I believe I am still over the 3'' which is the finished diameter of the wheel so any jaw marks will not hurt right now, If those chatter marks were on purpose they would be way cool lol
 
What part is it you have milled? looks a lovely finish.
The Flywheel will come out fine if you grip with thin Ally you wont get any marking and it shouldnt chatter.
Keep the updates coming they are great
 
What part is it you have milled? looks a lovely finish.
The Flywheel will come out fine if you grip with thin Ally you wont get any marking and it shouldnt chatter.
Keep the updates coming they are great

I used a fly cutter at 3200 rpm, the cutter had 3 carbide inserts.
More pics to come later tonight, today i started making the displacer cylinder standard and is almost done, the head is complete and has been polished on the buffing wheel with some rouge
 
I believe I am still over the 3'' which is the finished diameter of the wheel so any jaw marks will not hurt right now,

The 3" diameter is in fresh air, 1/16" or more either way won't make much difference. However, if you are fairly new to machining, it's good practice to aim for a specific size when machining parts that don't matter as much. This allows you to see how tool bit, machine dial, feed rates etc all combine to give the desired size. Later on, you won't have to worry about things that are a nominal size, that run in fresh air, but you will have had practice at obtaining sizes that do matter.

Paul.
 
OhKNQ99l.jpg

iXWAfRFl.jpg

4yiF0ugl.jpg

w6rzSU1l.jpg
 
Mitch,

Forget about polishing parts this very moment. Use every minute of your time to make the engine's parts. Concentrate on the parts needed to have your engine run. Next do the supporting parts and last use the time you have left to make your parts look nice and shiny.

Every year again I have to point this out to my own pupils. Shiny parts look attractive indeed, but is not important. What if you run out of time at the end of the schoolyear.

If in the end you have to defend this project in front of a jury/teachers, they will not bother at all if things are glossy or not. Most important : do you know all there is to know, are you familiar with the machines in your shop, the techniques, do you know your engine, will it run..? Why do some parts have close tolerances and other don't, etc...

Again : very last point on your wish-list should be: make it shine.

Chris

ok, ill put off polishing for now until the end of the project. Dont want to run out of time, then I would be stuck with a pile of metal looking at me all summer
 
Still itd\s looking good and the main thing is you want it to run by Summer so you can test it all holliday long!!;) cheers Frans
 
Mitch,

We still don't know what engine you're making.
Why not make a scan of that page and post it here..?

Chris
 
Mitch,

We still don't know what engine you're making.
Why not make a scan of that page and post it here..?

Chris
oh yeah sorry about that lol, if i remember ill bring the plans home on monday and get a scan of them
Mitch
 
Mitch, I agree with Chris, I'm not a great fan of "bling", in fact I think that it is a little offputting. We're making model engines, the real ones weren't polished to see your reflection in them. A lot of time can be spent to polish out some scratches, where a rub with a bit of fine emery paper can produce a nice look in a short time. Although not available to everyone, a nice sand blasted finish looks great.

Paul.

sandblasting does look great, luckily we have a sandblasting cabinet in my class so maybe when all the parts are done... Ill decide later on
Mitch
 
The engine that I am building is called the "Stirling Hot Air Engine" designed by Ray J. Colin
Luckily I remembered to bring the prints home today, sorry for the low quality pics, I dont have my cam at the moment so I have to use the web cam on my lap top
6KBW7P0l.jpg

URtAKREl.jpg

JYV3eHnl.jpg


Today I started making the displacer piston, It is almost finished at the moment, O.D. is 1.125'' length on the sheet says 2.500" but my teacher and us did the math and found out it should be 2.125'' long. Right now it is 2.493'' so ill ask my teacher some more questions before I decide to shorten the head of the piston down to 2.125''
I buggered it up. I drilled and tapped for a 6-32 screw and accidently snapped the head of the bolt in the top! :fan:
I decided that It should be fine so I face it down so it is all flush, and proceded to drill and tap a 6-32 hole on the other face which turned out perfect :)
ISxdRsSl.jpg

buggered up end..
sgNsVJDl.jpg

finished opposite end...
PZO2oJNl.jpg


As far as the fly wheel goes, I think ill set it up on the rotary table on one of the mills tomorrow use an endmill to square up the grooves that I cut into the face and do the same to the other side that I got the crappy finish on
 
Ok, finished 2 parts today! :)
I finished the power cylinder and Piston for my stirling engine :)
Cjb3FR5l.jpg

3FvboIzl.jpg

EwhALbBl.jpg

hSRgsL4l.jpg

qInjhUYl.jpg

9Uv1VeNl.jpg

the cylinder piston fit is perfect! When i put the piston in the cylinder with the screw in the top of the piston and blow into one end while placing the tip of my finger on the very top of the screw no air escapes! :)
going to make the other two pieces for the piston tomorrow, the part that holds the piston the the connecting rod and the actual connecting rod
 
Are the Power piston and liner both Brass? That plan looks nice , I have not yet made a seperate power and displacer but yours is giving me ideas, just need to tell my Wife a bigger Lathe is nessesary to continued happiness;)
Keep up the good work
 
Are the Power piston and liner both Brass? That plan looks nice , I have not yet made a seperate power and displacer but yours is giving me ideas, just need to tell my Wife a bigger Lathe is nessesary to continued happiness;)
Keep up the good work

the power piston is made of 6061 aluminum and the cylinder is indeed brass
 
WOOO! Class went by quickly today, got one part completely finished so that means the other 2 parts are done :) and also got 3 other parts started and almost completed :)
Here is a picture of all the parts that I have, completed and uncompleted
CFa7XLol.jpg

Here are the parts that are still not done yet
agjInucl.jpg

Here is what I did today (power cylinder cap)
99C3ZT6l.jpg

what got finished...power cylinder piston, cylinder and cap assembly
oIc3DBul.jpg

t8CZ98jl.jpg

kAvcYIVl.jpg


I am going to remake the 1/4x2.125 drive shaft sometime in the next week, finish the 3 smaller pieces of aluminum tomorrow *fingers crossed*
maybe the flywheel on thursday.
Im not sure what kind of finish I want on the parts, but I am thinking
Brass parts will all be polished, aluminum parts with be sandblasted (not the pistons though lol) and the steel/stainless steel parts will be taken to the wheel with the bristols atached so that maybe I can get a finish that looks like a casting. Thoughts, ideas, or advice?
mitch
 
the power piston is made of 6061 aluminum and the cylinder is indeed brass

Hi Mitch,

For that power piston / cylinder good combination to be used in a stirling-engine are cast-iron, stainless steel together with bronze.
I would not use aluminum for that power piston at all, it's way to soft, it will jam.
Coefficient of expansion is a very important issue here...!


Chris
 
Are the Power piston and liner both Brass? That plan looks nice , I have not yet made a seperate power and displacer but yours is giving me ideas, just need to tell my Wife a bigger Lathe is nessesary to continued happiness;)
Keep up the good work

Just remember Obi-wan, with a bigger lathe comes a requirement for a bigger mill!

Greatly enjoying this build Mitch! Good work.

cheers, Ian
 
thanks Aarggh, today i finished the displacer cylinder standard, and sandblasted a couple parts including the one that I made today.
kYY6FITl.jpg

q8Ex3Bal.jpg

sXTUtRMl.jpg

As far as the power piston and cylinder, im a little confused, as the plan shows the alcohol burner goes under the stainless displacer cylinder that I have not made yet so heat should not be to much of an issue with the power cylinder? sorry for the dumb question, i dont really know a thing about stirling engines except that they run on a difference in heat
 

Latest posts

Back
Top