Small V8

Home Model Engine Machinist Forum

Help Support Home Model Engine Machinist Forum:

This site may earn a commission from merchant affiliate links, including eBay, Amazon, and others.
metalmad said:
Hi Steve
It looks amazing :bow:
would u please post a pic showing the fixture in the lathe ,Im not sure I understand how it works :)

I planned to take alot of pics and try real hard to explain this thing. Read the first 1/3 of this article first, it will help alot.

http://www.mikes-models.com/camarticle.html
 
GDay All,

Steve, I just read your article on cutting cams. Brilliant!! Well done and well put together. I'm still not sure I fully understand the process but I will re-read it, model it in 3D, until I do fully understand it.

It seems like it would be fairly easy once one gets their head around it ... :big:

Thank you oh masterful one :bow:

PS: I calculated my compression ratio and it is 9.86 : 1 with a 1mm (0.040in) thick head gasket or 13.66 : 1 with a 0.5mm (0.020in) head gasket. A little on the high side, but at least I got past a really dumb error I was making. When converting mm³ to cc's you don't just divide by 10 .... ::) :big:
 
I couldn't find time to cut camshaft but I did get a few hours. I decided to start making some pieces that will be needed for the spark plugs. The plugs are #8-40 thread. Three steps are turned in the 9/32 hex bar. The first is the surface that will contact the washer. The second step is the threads and the third step, with a little luck, will be cut away and form the ground strap.

DSCN1747s.jpg


The step above the hex gets cut and the threads were made with a die holder that goes into the chuck in the tail stock.

DSCN1757s.jpg


The piece then gets drilled thru.

DSCN1759s.jpg


Then a piece of stock got drilled and tapped and the plug bases are threaded into it to bore the top where the insulator will seat.

.
DSCN1773s.jpg


Thats as far as I got. Now all that is left is to cut out the ground straps. I have no idea how i'm going to do that right now.

DSCN1778s.jpg


I was tinkering with a press to assemble the plugs. After the insulator goes onto the base the press will roll the edge of the base over the insulator. I made a test piece and am happy with the test piece.

DSCN1781s.jpg


Hi Steve,
At one time I had made plugs the way you are showing. To cut the ground strap I made a small threaded bushing and screwed the plug in from the backside leaving the excess stock sticking out of the bushing. I then chucked it up in my dividing head and used a slitting saw to cut away all the unneeded stock. The only problem I had was when I bent the ground strap over some of them would fracture and break. I guess it depends on the type of stock you are using for the plug bodies.
George
 
gbritnell said:
The only problem I had was when I bent the ground strap over some of them would fracture and break. I guess it depends on the type of stock you are using for the plug bodies.
George


I am using 12L14 for the bodies. If I have that problem i'll try heating them red hot. This is why there are alot of extras.
 
Great work on what I am seeing right now!! :bow:
gbritnell said:
The only problem I had was when I bent the ground strap over some of them would fracture and break. I guess it depends on the type of stock you are using for the plug bodies.
George

So is there any reason that you could not just take an endmill the size of the through hole in the plug body and make it flat bottomed without drilling through and then mill off what is not the ground strap? If it is done this way, the ground strap is already pre-bent.
 
GDay All,

Steve, what material are you using for the insulators?
 
techonehundred said:
So is there any reason that you could not just take an endmill the size of the through hole in the plug body and make it flat bottomed without drilling through and then mill off what is not the ground strap? If it is done this way, the ground strap is already pre-bent.


Yes you could. If this method fails, that will be the next option.
 
Steve,
I have bent about 15 ground straps out of 12L14 with out incident. Two I bent wrong the first time and straightened out and bent again. My straps are 0.015 thick x 0.047 wide.

Your project is looking good. I follow along every step.

Gail in NM
 
GailInNM said:
I have bent about 15 ground straps out of 12L14 with out incident. Two I bent wrong the first time and straightened out and bent again. My straps are 0.015 thick x 0.047 wide.


Thats good to hear. Mine are .015 thick and .020 wide. I would hate to think I have 25 scrap bases. I was hoping for 20 good pieces when complete.

 
Amazing work :bow: I have just found this thread a couple of days ago and I am fully up to date now ,
What can i say that has not been said before so from Ireland "Go raibh maith agat" Thank you
Jamie
 
OK! here goes and if you don't understand whats going on here, don't ask me because I don't either!!!

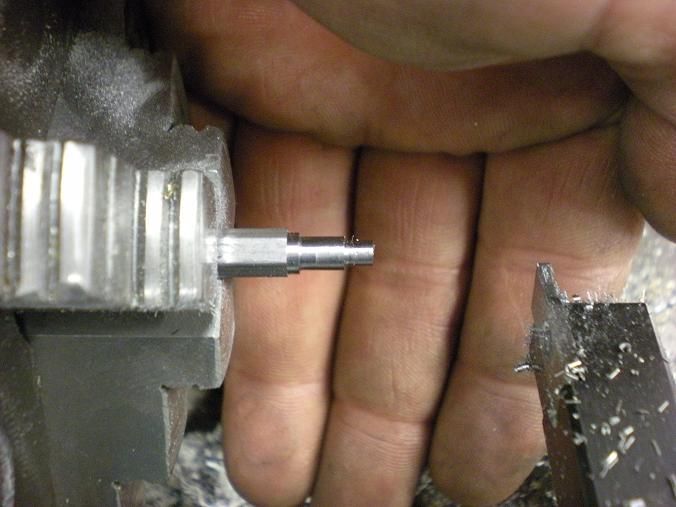
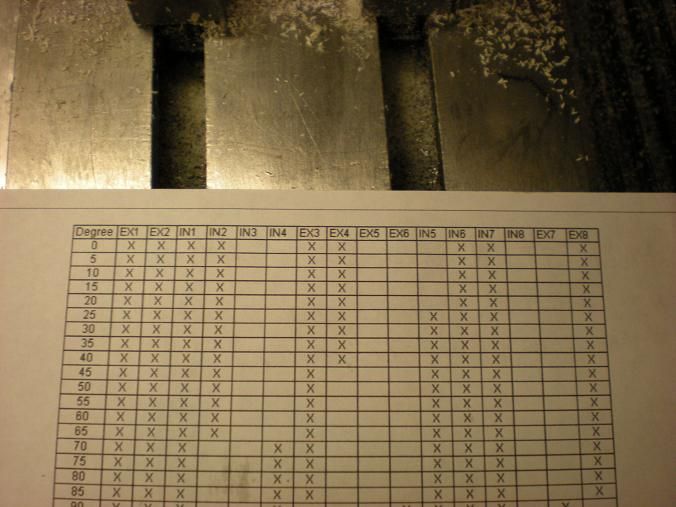
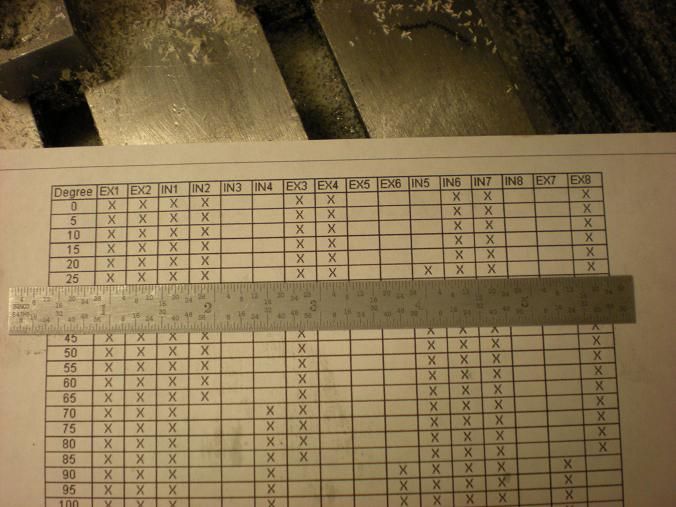
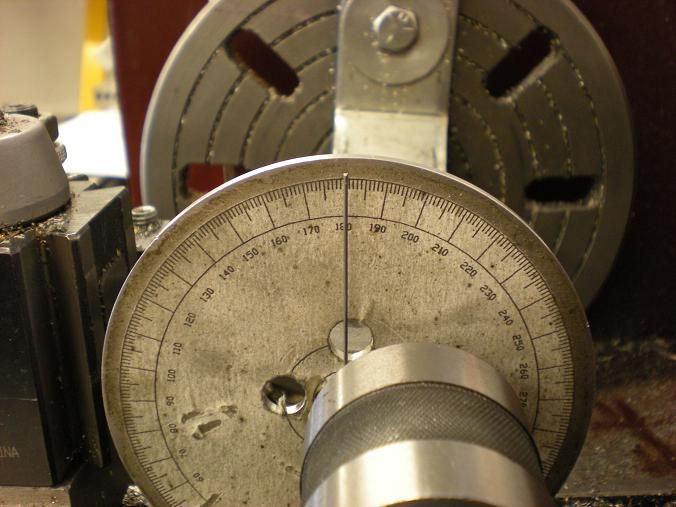
Seriously I had the blank loaded in the fixture and the pointer at zero. In the lathe it goes and looking at the chart there is an "X" when you cut and nothing when you don't. So the chart shows for zero degrees we cut lobes 1, 2, 3, 4, 7, 8, 12, 13, 16

DSCN1788s.jpg


The lobes are cut to a depth that equals the lift. In this case I cut to a depth of .070 inches. I cut the first 4 lobes at the same time in .005 steps until I reached .070. Then the lathe gets turned off and the tool is moved to the next group. I prefer to shut-er-down between moves to keep things from crashing. There is enough to keep track of with the chart so no need to increase my chances.

DSCN1784s.jpg


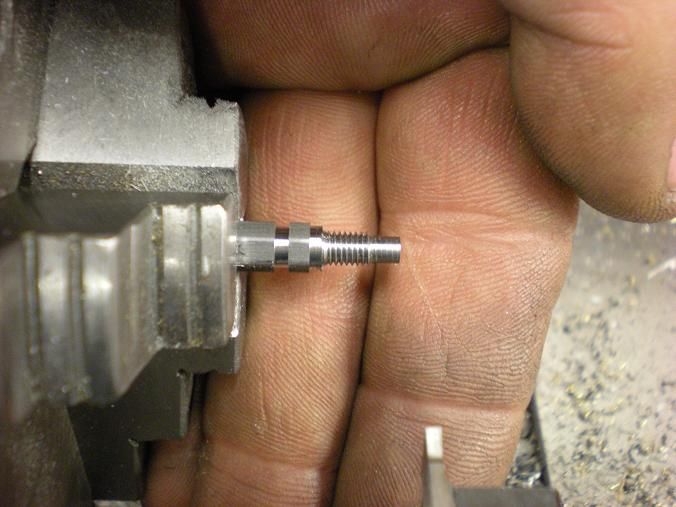
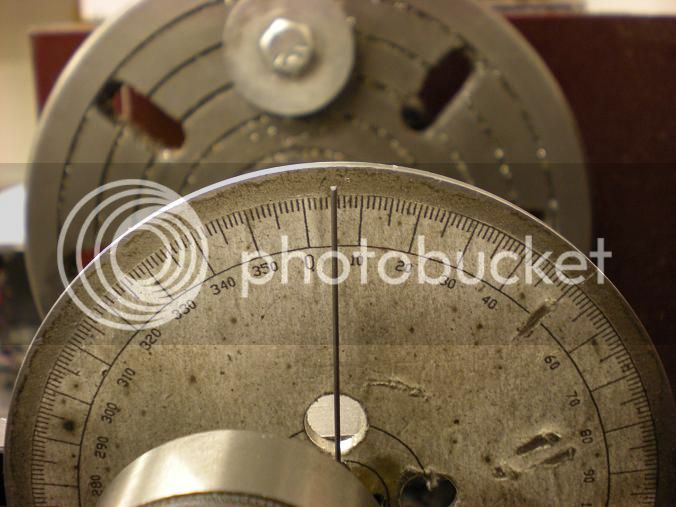
The lathe is again shut down and the set screws in the fixture are loosened. The blank is rotated until the pointer points to 5 degrees. Now when you go to cut, the little nibble that is taken is so small that the tool will be .055 deep before it contacts the work piece. 3 .005 steps and the lobe is done.

DSCN1786s.jpg


The same process is followed until you get to 25 degrees. At 25 degrees intake #5 needs to added so the tool will be backed out to zero again and the #5 lobe is cut down to the .055 depth and again they can be cut as a group.

DSCN1793s.jpg


DSCN1795s.jpg


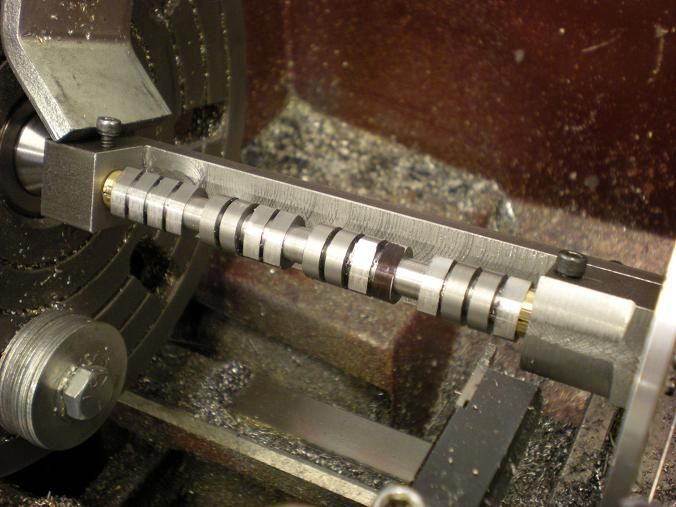
Again the blank is rotated 5 degrees and cut and rotated and cut. At 45 degrees exhaust #4 gets dropped from the group so i painted it with a sharpie to remind myself not to cut it anymore.

DSCN1798s.jpg


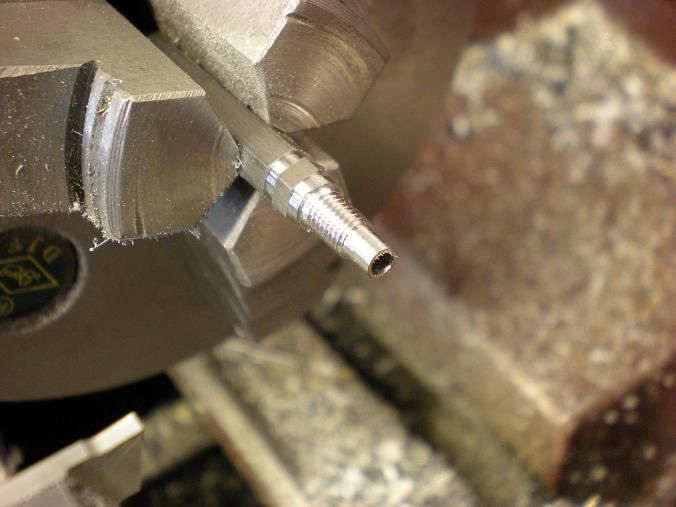
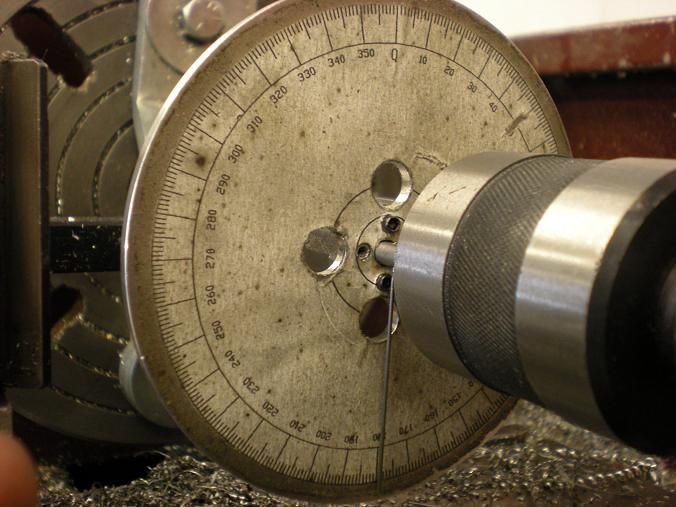
The pointer at some point will hit the live center in the tail stock so i figure 180 degrees is as good as any to stop.

DSCN1802s.jpg


Make sure the cam is snug and cannot rotate in the fixture. The fixture is removed from the lathe. The pointer is removed from the cam blank. The disk gets unscrewed, rotated 180 degrees, and screwed back on the fixture. Then the pointer gets put back in pointing at 180 again. Now you can make another 180 degree swing without hitting the center.

DSCN1804s.jpg


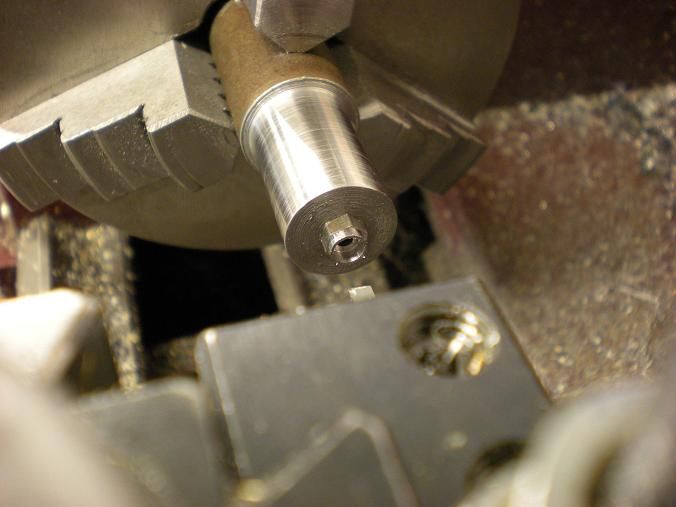
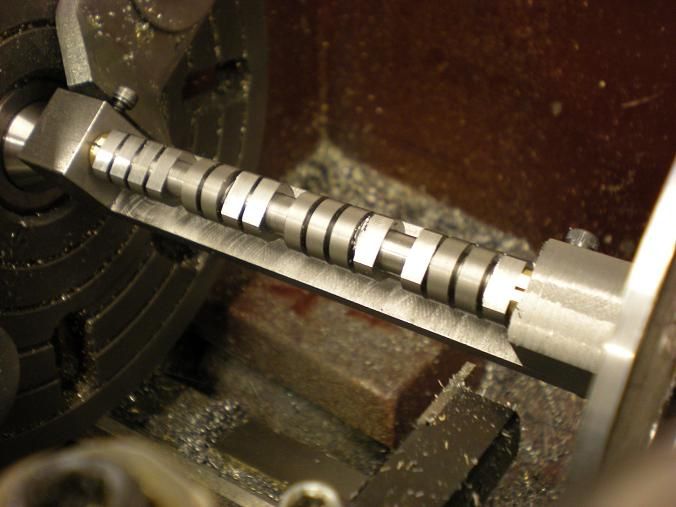
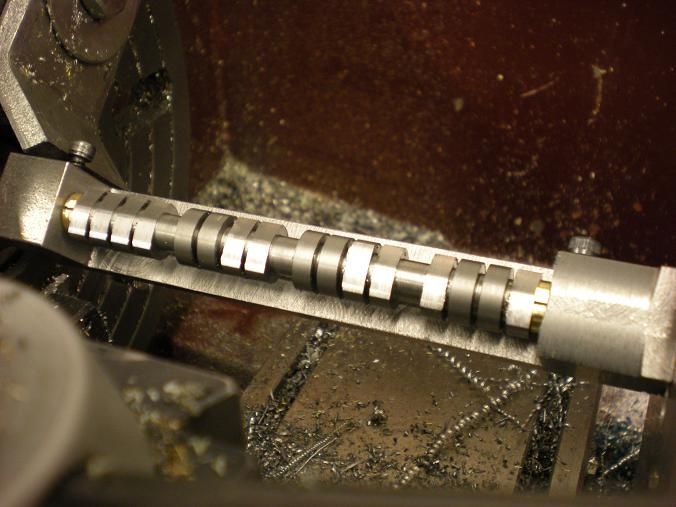
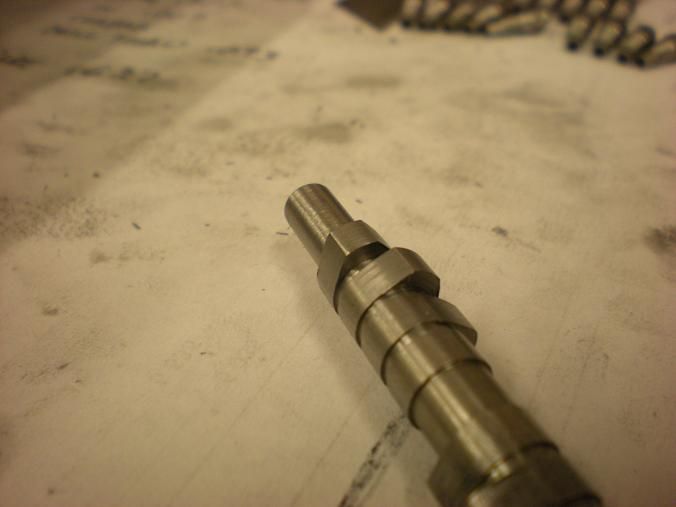
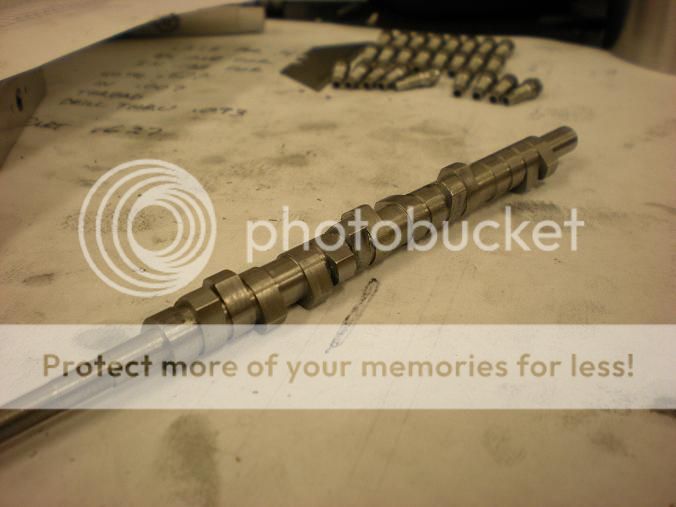
Now the 5 degree process keeps going until the pointer gets to 355 degrees and if the chart is correct, and the chart was followed correctly, you got a cam shaft with some funny shaped lobes.

DSCN1805s.jpg


DSCN1808s.jpg


All the lobes will now be hand filed so they will have a nice nose radius. The entire process took me a good 5 hours.
 
Looks beautiful! :bow:
I followed that procedure right out of SIC once, it does work to make beautiful cams. I tend to find myself making circles in midair while muttering to myself when making camshafts :'(
 
Lakc said:
I tend to find myself making circles in midair while muttering to myself when making camshafts


I have done that myself. I made the cam and had to take the dog to the vet and go shopping for fencing so there were some breaks. Today I did the cam for the blown motor and worked start to finish. Took less than 4 hours. That's not bad for making a V8 cam.
 
I think i'm going to be ok on the plugs. For there size (.020 X .020) the ground straps are pretty strong. It took a little force to bend the little sucker. Now i need to make a little holder to turn the square pieces of corian.

DSCN1823s.jpg


DSCN1817s.jpg


DSCN1820s.jpg
 
I'm really loving this Steve. That cam looks awesome....then you load me up with spark plugs.

I'm so unworthy! :bow: :bow: :bow: :bow:

Dave
 
Ok, sorry I missed that amongst all this camshaft goodness. Do you think you might need to stress relieve them to keep them from moving in use?
 
Lakc said:
Ok, sorry I missed that amongst all this camshaft goodness. Do you think you might need to stress relieve them to keep them from moving in use?


Don't know. Never made a plug before this one.

Metal meeting tonight!! Loc-tite guy is coming with lots of samples!!! Hoping he has a magic potion for putting these plugs together.
 
Back
Top