


- Joined
- Oct 1, 2010
- Messages
- 1,342
- Reaction score
- 395
As soon as I got a mill I wanted a rotary table. But how much would I (Do I?) really use it. It's one of those things that I like to have, but don't use all the time. I didn't want to spend a lot of money and decided a 6-inch size would meet my needs. I ended up with a less-than-perfect Eastern European RT that may have been abused before I got it. Oh well, the price was all right. For the things I have been trying to make I have been fighting the clamps and I also am worried about cutting into the top of the table.
Discussion on this forum has touched on tooling plates for mills several times and I had a go at making one of those: So, make one for the RT.
For smaller clamps I'll use 1/4-20 and I'll make it from aluminum. If it turns out all right and I decide on a clamp-hole pattern I like, I might make another one from another material. This is for light use, so I think aluminum will be OK: If not, more practice for me.
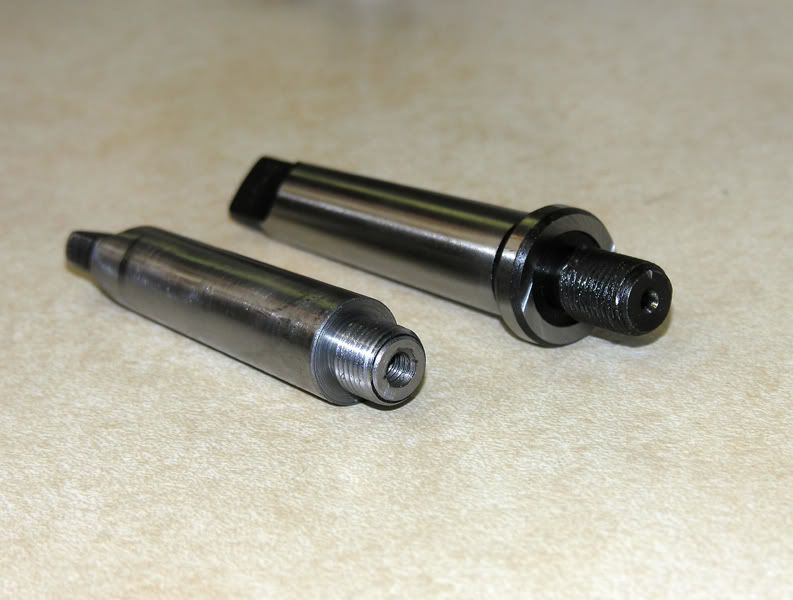
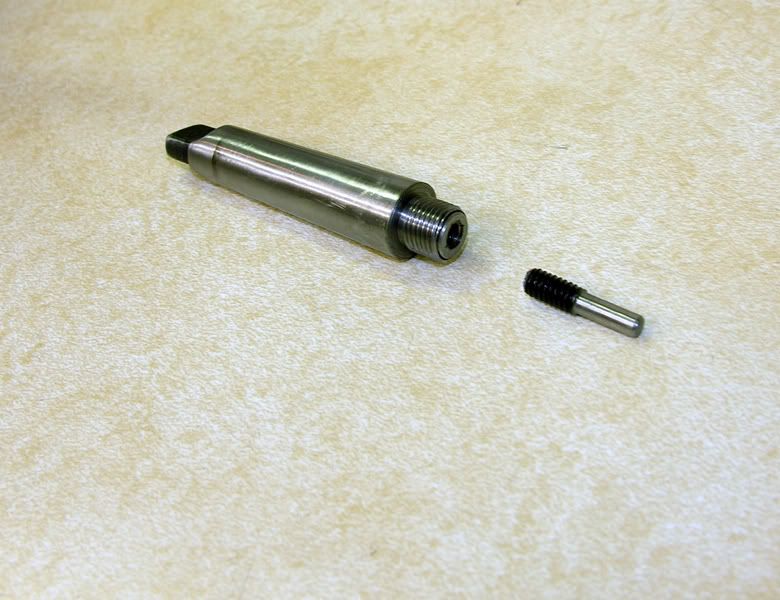
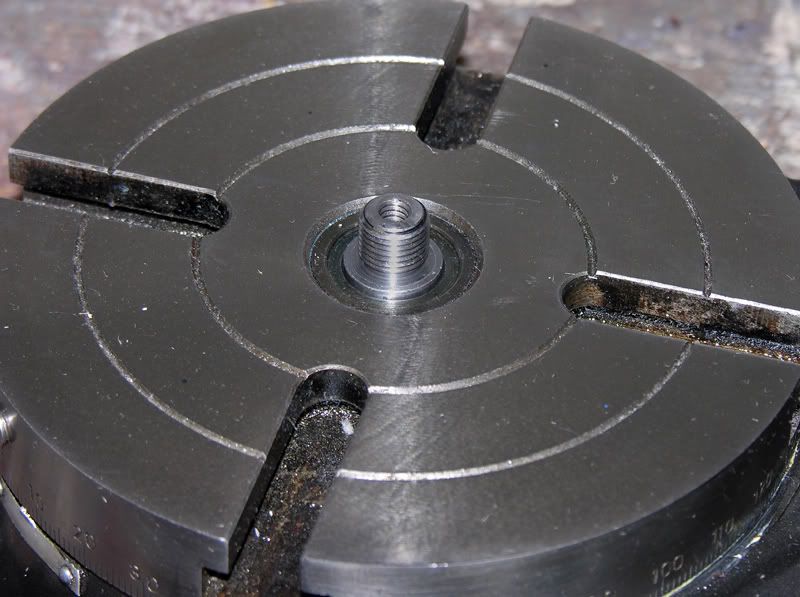
To start machining, I decided to use the MT2 socket in the center of the table as a reference for the build and for setup of future projects. Grizzly has MT2 taper adapters with 1/2-20 threads on sale, so I bought two. One was turned down and rethreaded so it sits at a lower level in the table and can be used to help make the plate. In addition, a 1/4-20 internal thread can be added for a locating pin that will stick above the plate and possibly this will also add a center clamp bolt location.
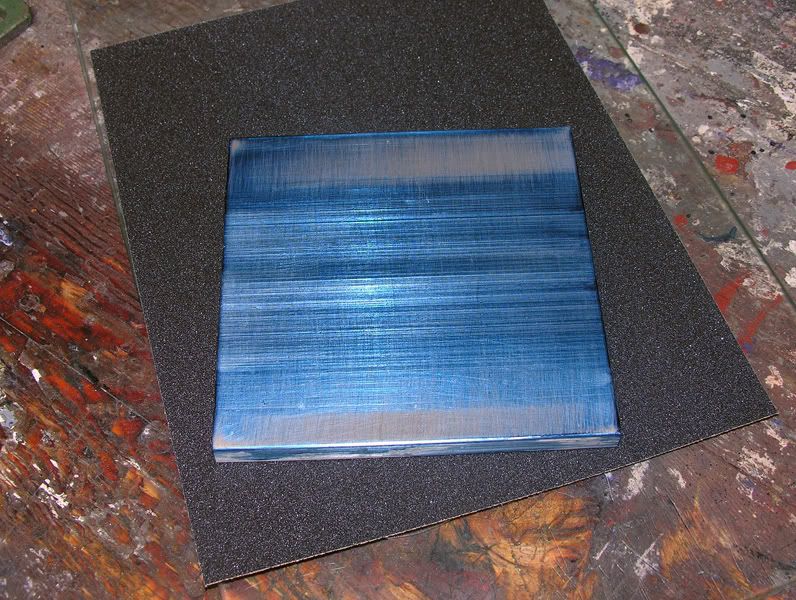
I had some 1/2 x 6 extruded aluminum bar. I started with a 6-inch piece of this and coated with Dychem and sanded over glass on 120 wet and dry paper on glass in order to make one side flat.
Since this was aluminum, I used 1:4 Simple Green as the wet. After banging up and abrading my hands at this I started wishing for a handle. A large handscrew clamp worked well for this.
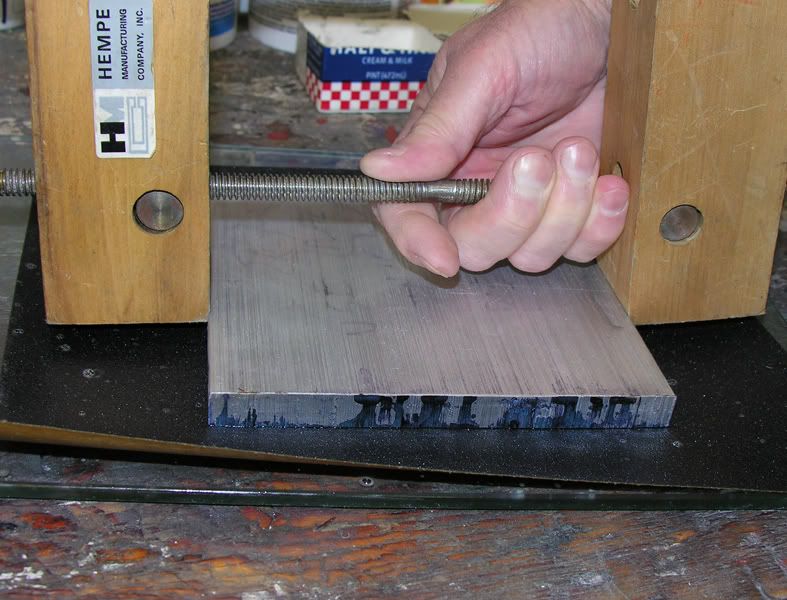
With one side relatively flat (after a boring 6 hours of sanding). I clamped the flat side down on the mill table for a session with the fly cutter.
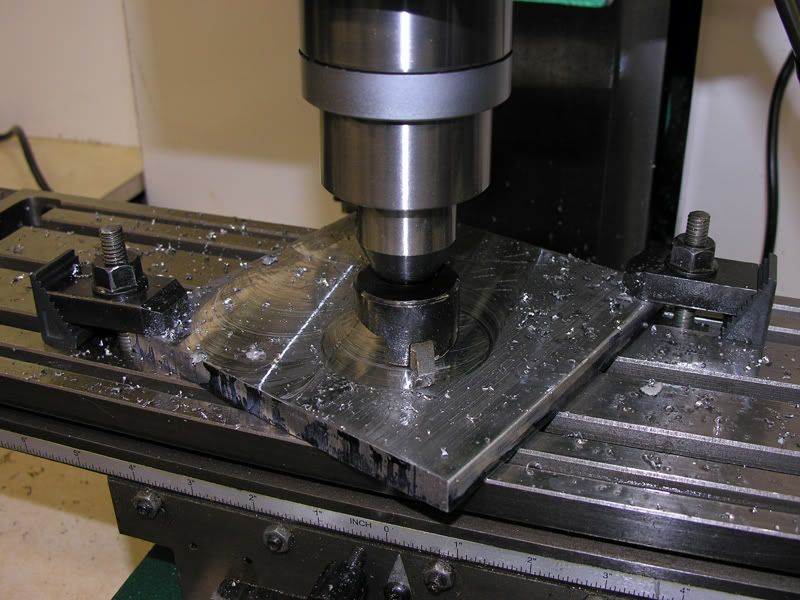
After following the flycutting with more sanding, I drilled a 1/8-in. hole in the center and laid out the outer limit and the bolt-hole circle for the T-slot locations. I drilled the holes. The center hole was tapped 1/2-20 and the T-slot bolt holes were countersunk for 3/8 flathead bolts.

I then centered the rotary table on the mill table and started milling the circle. This was followed by a couple of passes with a 45 degree drill-mill to clean up the edge.
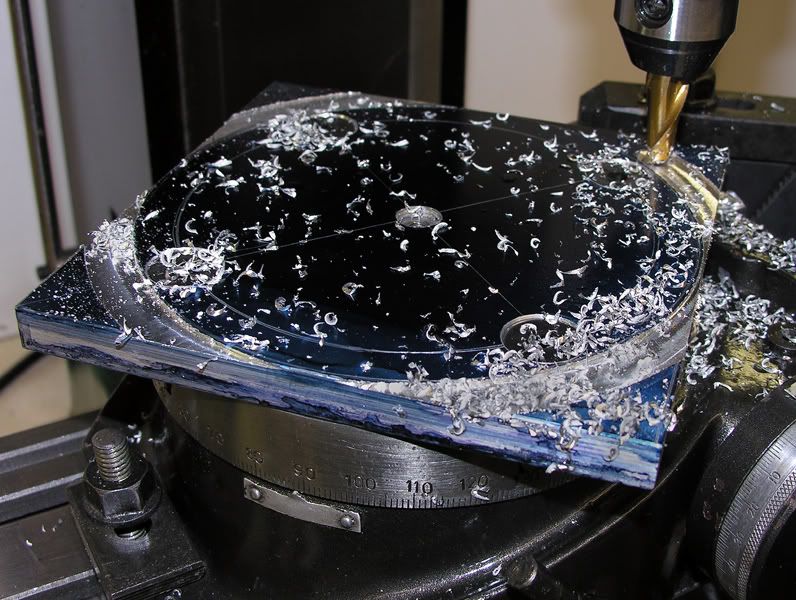
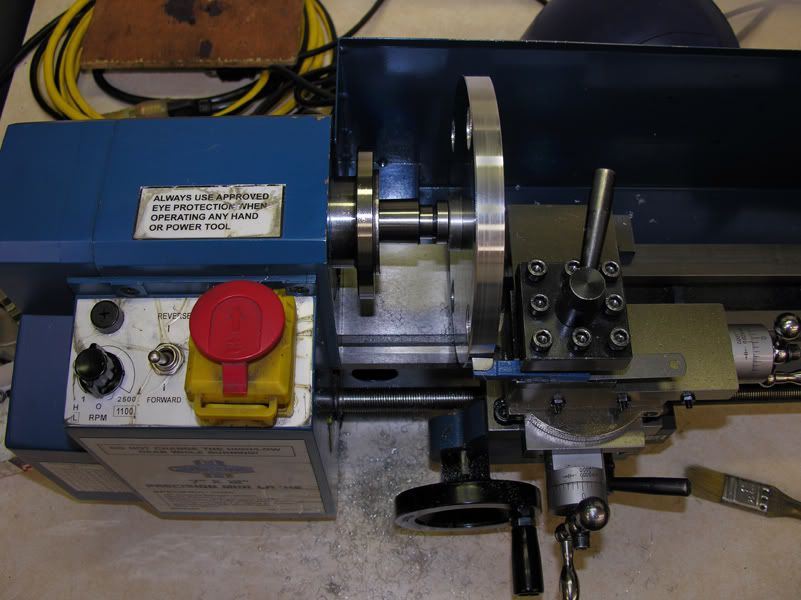
At this point, I started worrying about the "down" side edge burrs and the remaining toolmarks on the edge of the plate and decided to use the MT2 adapter with a morse taper reducer to put this on the mini-lathe to dress the edge. This worked well for cleaning up the edge, but showed me the accumulated errors of all the different centering methods. For those looking to purchase a lathe and wondering about capacity, here is the 6-inch disc mounted in the "7-inch" swing of the mini-lathe and the tool position that results. What this doesn't show is that the back of the saddle is dangerously close. I worked this slowly and traveled backwards away from the headstock.
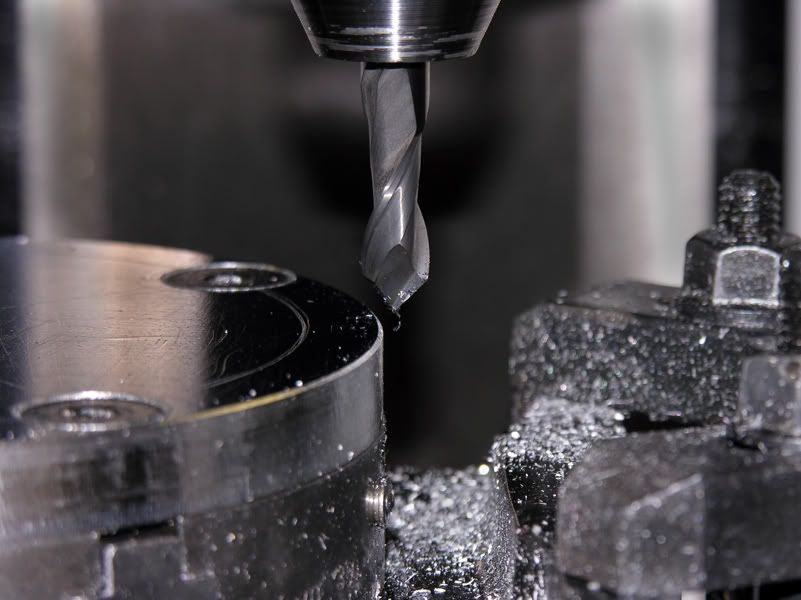
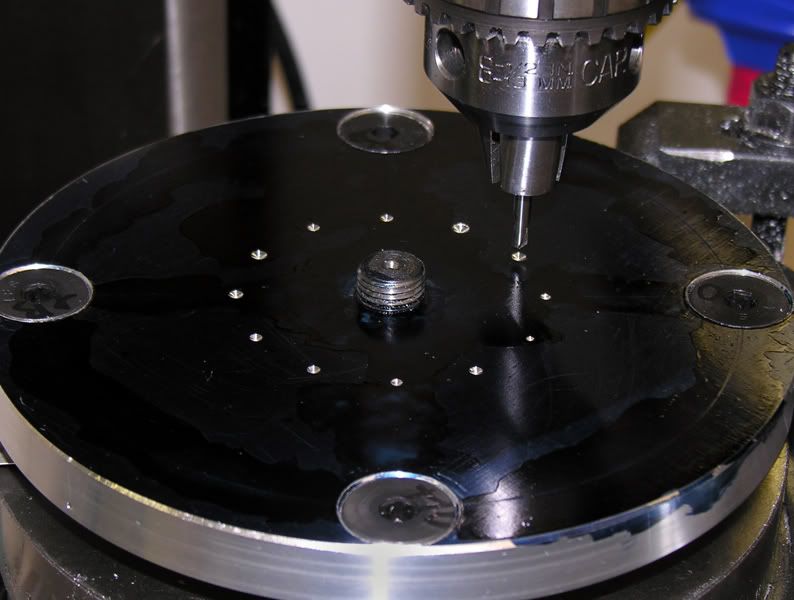
Back on the rotary table at the mill, I used a full-size MT2 adapter and spacers under the clamp bolts to raise the disc about 1/2-inch off the table surface for drilling. ( I made the spacers on the lathe, rechucking and skimming them over and over to get a good match through the set.) First pass on the first circle I wanted was with spot drill. (In the photo, the uglyness on the surface is the Dychem I used to cover my former layout marks. I did not want to mess up by deciding to spot on an old line rather than my degree setting of the rotary table.)
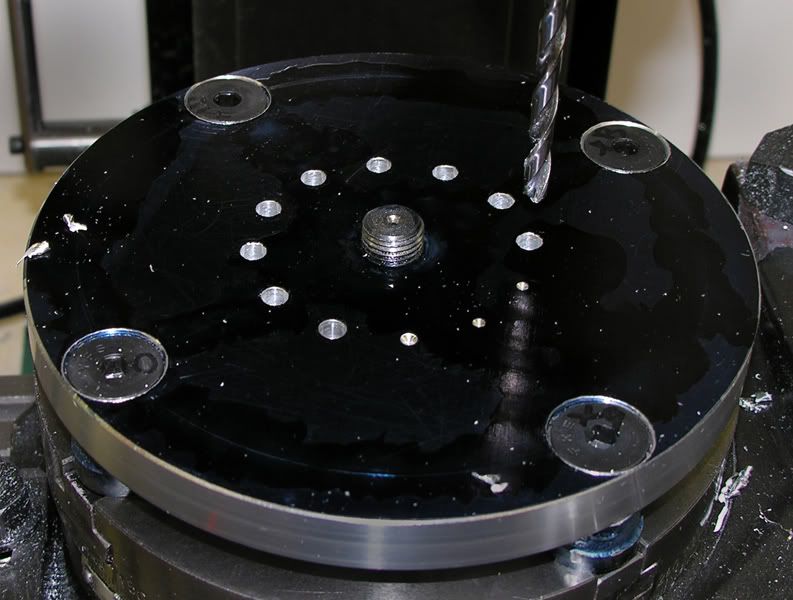
I followed with the Number 7 drill, then the 1/4-20 spiral tap. I really like these spiral taps: They can be used under power to really speed up the process and they do an excellent job. I have many sizes of taps and drills, but buy spiral taps in frequently-used sizes for projects like this.
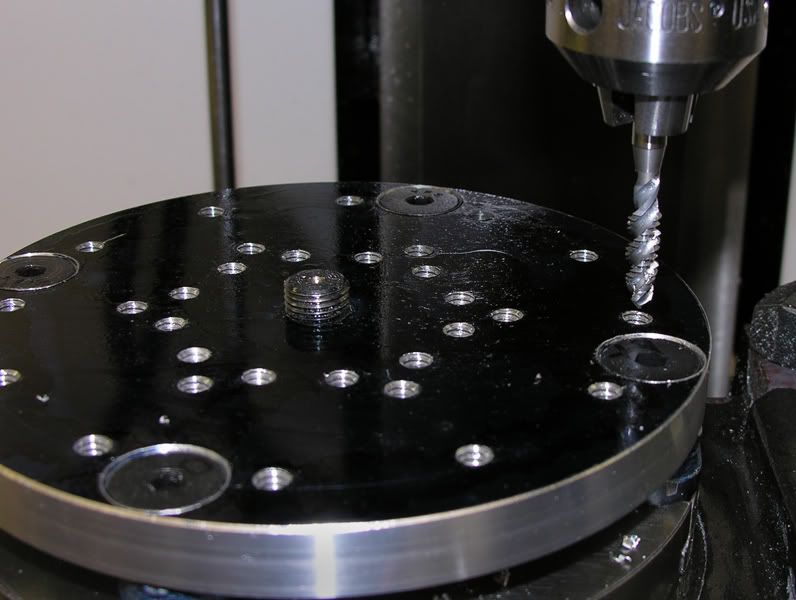
After sanding off the Dychem and burrs, here it is.
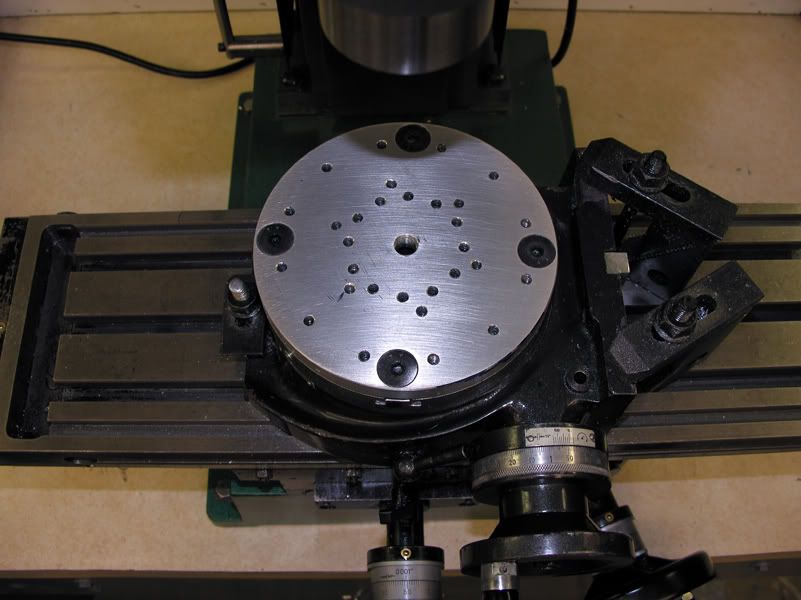
The clamp-hole circles are set up for what I need for the next few projects. I can put in more when I need them, or maybe I need to do this again with greater precision or other material. I will only know after I use it if I chose the best hole locations. A little checking with my test indicator tells me it is not perfect, but I believe that I have improved the deck over the bare rotary table top. I will want to carefully set up for cutting anyway. The choice of full-size clamping bolts to access the T-slots also allows me to put studs down to the T-slots if needed for large clamps.
As it ended up, I can't trust the center hole for centering and my idea to use the MT2 center turned out to be only machining practice. I think a way to fix this will probably come to me at 3:00 in the morning some day. The clamp-hole circles are concentric, so I believe I can trust that. I also put a register mark and center punch mark on the plate to line up with "0" on the rotary table platter, so it does go back in the same relative location. The fit of the T-slot clamp bolts is so close that it fits without any shifting, so I did well with that.
Thanks for watching,
--ShopShoe
Discussion on this forum has touched on tooling plates for mills several times and I had a go at making one of those: So, make one for the RT.
For smaller clamps I'll use 1/4-20 and I'll make it from aluminum. If it turns out all right and I decide on a clamp-hole pattern I like, I might make another one from another material. This is for light use, so I think aluminum will be OK: If not, more practice for me.
To start machining, I decided to use the MT2 socket in the center of the table as a reference for the build and for setup of future projects. Grizzly has MT2 taper adapters with 1/2-20 threads on sale, so I bought two. One was turned down and rethreaded so it sits at a lower level in the table and can be used to help make the plate. In addition, a 1/4-20 internal thread can be added for a locating pin that will stick above the plate and possibly this will also add a center clamp bolt location.
I had some 1/2 x 6 extruded aluminum bar. I started with a 6-inch piece of this and coated with Dychem and sanded over glass on 120 wet and dry paper on glass in order to make one side flat.
Since this was aluminum, I used 1:4 Simple Green as the wet. After banging up and abrading my hands at this I started wishing for a handle. A large handscrew clamp worked well for this.
With one side relatively flat (after a boring 6 hours of sanding). I clamped the flat side down on the mill table for a session with the fly cutter.
After following the flycutting with more sanding, I drilled a 1/8-in. hole in the center and laid out the outer limit and the bolt-hole circle for the T-slot locations. I drilled the holes. The center hole was tapped 1/2-20 and the T-slot bolt holes were countersunk for 3/8 flathead bolts.
I then centered the rotary table on the mill table and started milling the circle. This was followed by a couple of passes with a 45 degree drill-mill to clean up the edge.
At this point, I started worrying about the "down" side edge burrs and the remaining toolmarks on the edge of the plate and decided to use the MT2 adapter with a morse taper reducer to put this on the mini-lathe to dress the edge. This worked well for cleaning up the edge, but showed me the accumulated errors of all the different centering methods. For those looking to purchase a lathe and wondering about capacity, here is the 6-inch disc mounted in the "7-inch" swing of the mini-lathe and the tool position that results. What this doesn't show is that the back of the saddle is dangerously close. I worked this slowly and traveled backwards away from the headstock.
Back on the rotary table at the mill, I used a full-size MT2 adapter and spacers under the clamp bolts to raise the disc about 1/2-inch off the table surface for drilling. ( I made the spacers on the lathe, rechucking and skimming them over and over to get a good match through the set.) First pass on the first circle I wanted was with spot drill. (In the photo, the uglyness on the surface is the Dychem I used to cover my former layout marks. I did not want to mess up by deciding to spot on an old line rather than my degree setting of the rotary table.)
I followed with the Number 7 drill, then the 1/4-20 spiral tap. I really like these spiral taps: They can be used under power to really speed up the process and they do an excellent job. I have many sizes of taps and drills, but buy spiral taps in frequently-used sizes for projects like this.
After sanding off the Dychem and burrs, here it is.
The clamp-hole circles are set up for what I need for the next few projects. I can put in more when I need them, or maybe I need to do this again with greater precision or other material. I will only know after I use it if I chose the best hole locations. A little checking with my test indicator tells me it is not perfect, but I believe that I have improved the deck over the bare rotary table top. I will want to carefully set up for cutting anyway. The choice of full-size clamping bolts to access the T-slots also allows me to put studs down to the T-slots if needed for large clamps.
As it ended up, I can't trust the center hole for centering and my idea to use the MT2 center turned out to be only machining practice. I think a way to fix this will probably come to me at 3:00 in the morning some day. The clamp-hole circles are concentric, so I believe I can trust that. I also put a register mark and center punch mark on the plate to line up with "0" on the rotary table platter, so it does go back in the same relative location. The fit of the T-slot clamp bolts is so close that it fits without any shifting, so I did well with that.
Thanks for watching,
--ShopShoe


