PM Research No. 1 Build

Home Model Engine Machinist Forum

Help Support Home Model Engine Machinist Forum:

This site may earn a commission from merchant affiliate links, including eBay, Amazon, and others.
Still following along Brian and that linkage looks really good!! Am soooo looking forward to seeing this one run.

Bill
 
Well, it was finally time to make the eccentric. The kit comes with the typical casting that has to be drilled, tapped, and then saw cut to create the two halves of the eccentric. First I spot faced, and drilled the stepped hole so that the cap would have a clearance for a 5-40 screw, but the eccentric would have the right tap-drill size.

100_1993.jpg


Then I separated the cap from the eccentric. I decided to use a wide slitting saw here since the plans call for up to 1/8" of material removal. This way I don't have to worry about facing off the two halves which means I won't mess up the alignment of the screw holes. I took 0.010" (0.25mm) passes here with a pretty slow feed rate.

100_1995.jpg


Then I screwed the two parts together and put the assembly in the 4-jaw to bore the bearing surface. No tape in the joint this time. I decided it was time to put on the big-boy pants and just bore to the right size. :)

100_1997.jpg


Then to keep the side perpendicular to the bore, I faced off 1/2 of the material needed to get the eccentric to the right thickness.

100_1998.jpg


I don't have an expanding mandrel, and was too eager to get this part done to stop and make one, so I put the eccentric on an expanding lap I got to finish the cylinder, and indexed it in so that the face I just turned was square. Then turned the other face down until I was at the finished width.

100_1999.jpg


Then all that was left was drilling and tapping the holes for the oiler and valve rod before I could test fit everything. The eccentric has a beautiful silky smooth fit to the hub :big:

IMG_1618.jpg
 
Beautifully done Brian, you have made it look so easy. You really do not have much left to complete. Awaiting your finally.

Don
 
Brian - loved the die in the headstock... never thought of it but it is a GREAT idea!!! Thanks for posting and thanks for teaching us old dogs some new tricks!!!

Harold
 
Aww shucks Harold, I just thought I was abusing my tools :-[
 
rhitee93 said:
Aww shucks Harold, I just thought I was abusing my tools :-[

Maybe.................but in the nicest possible way. Thanks for the tip, I can now join in the abuse. :bow:

Best Regards
Bob
 
My set of castings arrived for this engine today so I will be looking back at this informative thread. Great looking engine.

Brock
 
Hopefully you will find some of my experiences on this build useful Brock. I don't know how soon you plan to start on your engine, but I had planed to post a list of things I would have done differently once I get to the point that the engine runs. However, I can compile that list earlier if you want.

There is probably nothing a more experinced builder wouldn't have seen earlier, but there are some machining steps that I should have done in a different order.
 
No as far as looking at them that is it for me for a while, stick to your plan. I am a bit scared of digging into some castings.
Brock
 
I have been working on a scratch built cylinder head for the last few days. The kit came with a cast iron blank for both the head and steam chest. However the surface finish on these parts is pretty rough, and I decided nice brass covers would be more blingy. Here is a shot of the finished head next to the supplied casting. Tell me I made a good choice please. :)

IMG_1663.jpg


I started out with a piece of scrap 1/4" brass plate. I machined the cylinder side boss on one side and drilled the bolt circle in the same setup to keep them concentric. Then I clamped a piece of scrap aluminum in the vise and machined out a matching pocket for the boss and a matching bolt circle. I tapped a couple of holes and screwed my blank down to the jig.

100_2000.jpg


Then I milled the outer perimeter of the head. I left a little bit of extra meat here that I came back and milled off later. Fortunately the flat spot was mostly cleaned up in the final pass. I should have centered the initial cut better :-[

100_2001.jpg


Then I came back and milled a circle around each bolt hole to create little raised areas for the head nuts. After this step I milled a circular recess in the center for decoration.

100_2004.jpg


I wasn't going to stand for those square bottomed cuts around the raised portions or the center depression, so when I milled those circles I made them 0.062" too large in diameter. Then I came back with a 1/16" ball nose cutter to do a final pass that created a nice fillet at the bottom.

100_2008.jpg


Here is a close up of the final part. I need to do some polishing to eliminate the swirl marks, but then again I have hours of polishing ahead of me on this engine!

IMG_1660.jpg


Here is one more pic with the head on the engine. When I was screwing this part on, one of my daughters came in and asked how much more I had to do. I told her that there was a lot of detail work yet to do, but that if I had a plate to cover the steam chest I could make it run.

IMG_1664.jpg


When I realized what I had said, I ran to the garage, clamped a block of wood over the steam chest opening, held a blow gun nozzle to the steam inlet, and the rascal started to run! :big:

I'll try to get a video tomorrow!

 
Brian that is a excellent make over and a beautiful addition to your engine and I am sure the steam chest cover will finalize it. Waiting to see it run.

Don
 
Really nice job on the head Brian,

I have been enjoying the progress on your engine.

Thanks for sharing,
Dave
 
Thanks Dave & Don. I am driving my family nuts making them watch my engine move. I couldn't wait for tomorrow, here is a video of it running with the block of wood acting as a steam chest cover. There are no packings or gaskets yet, and I am just jambing the nozzle of the air gun into the inlet port. I have no idea what pressure the engine is seeing, but in the video I am just barely cracking the valve open.

I can see now that I am always going to wish I had found a way to hold onto the inside of the rim when I made the first cut on the flywheel. It runs pretty true on the outside, but the most visible part has a lot of runout. Oh well, live and learn :)

http://www.youtube.com/watch?v=hdqDmqVofa8&feature=youtu.be
 
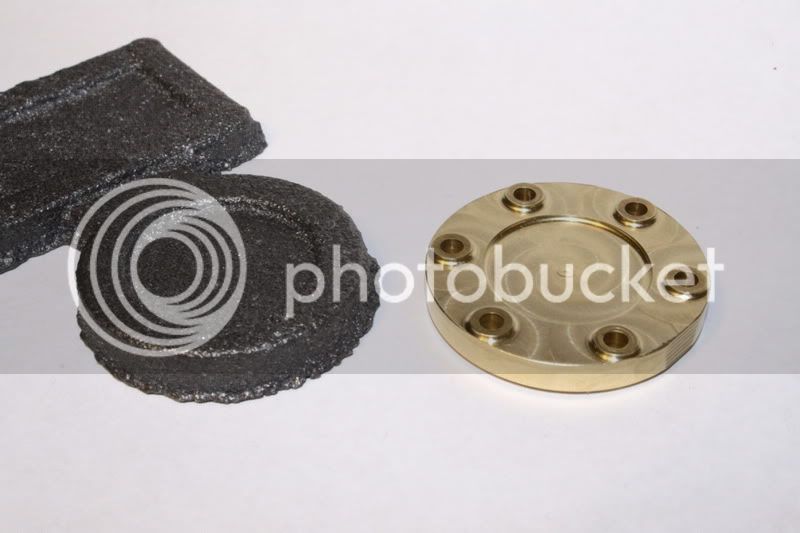
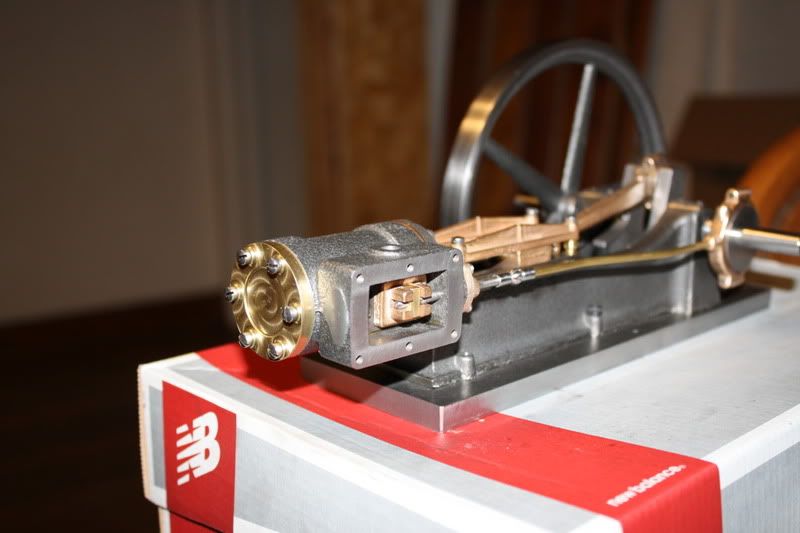
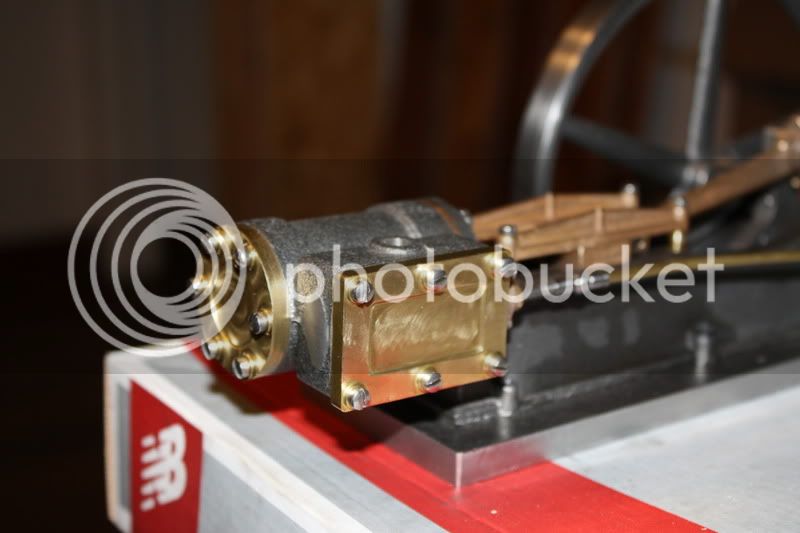
Hi all! I have been swamped with work and honey-dos for a couple of weeks, but I did manage to steel some time away over the last week to make my steam chest cover. Much like the cylinder head, I decided to make this from scratch rather than use the cast blank. I used the same method as the head so I'll just get to the pics:

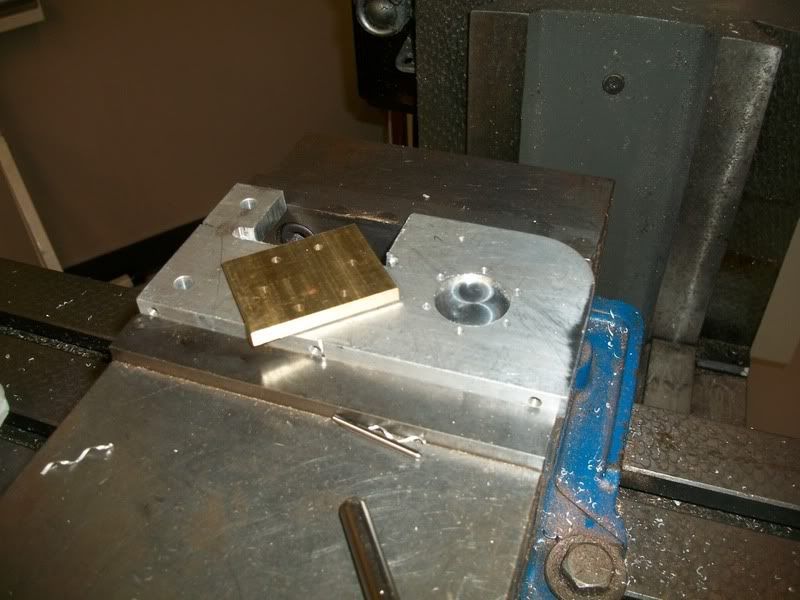
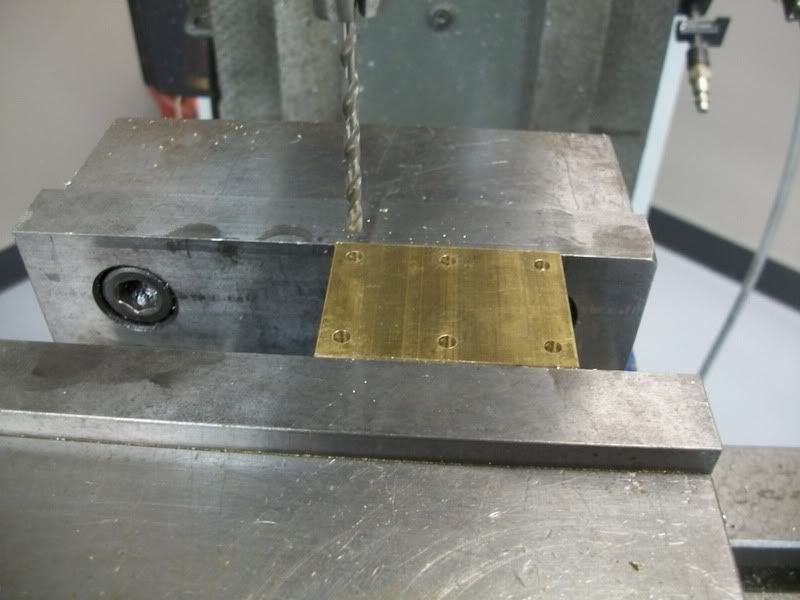
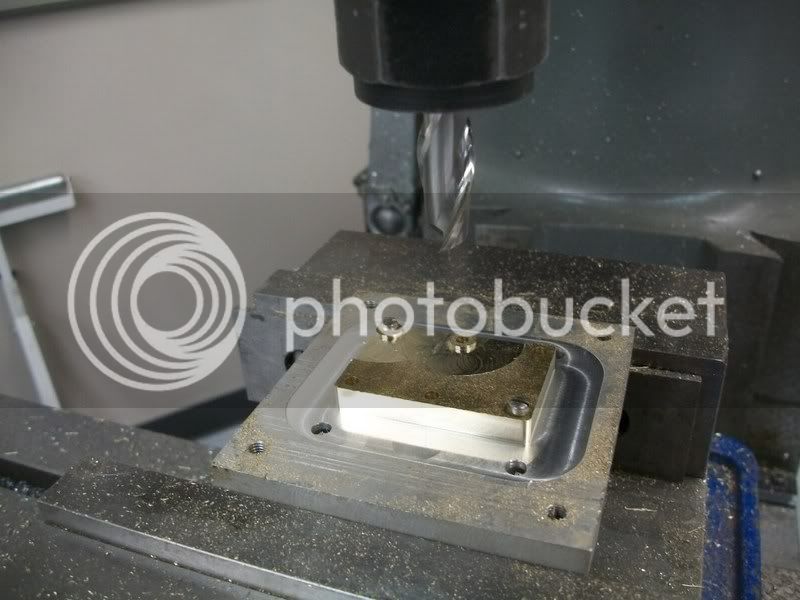
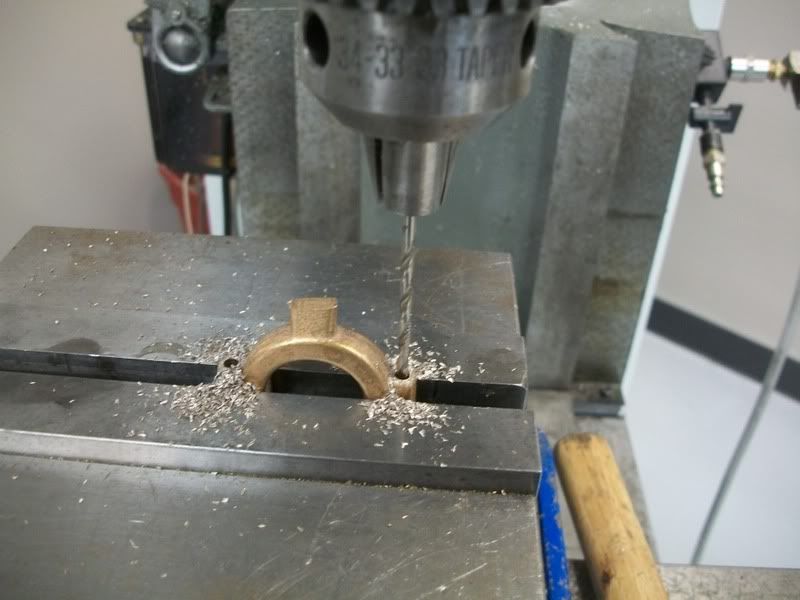
First I drilled out the blank. This would then be screwed down to a piece of aluminum scrap that had a matching bolt pattern drilled in it.

100_2012.jpg


Then time to cut the perimeter:

100_2014.jpg


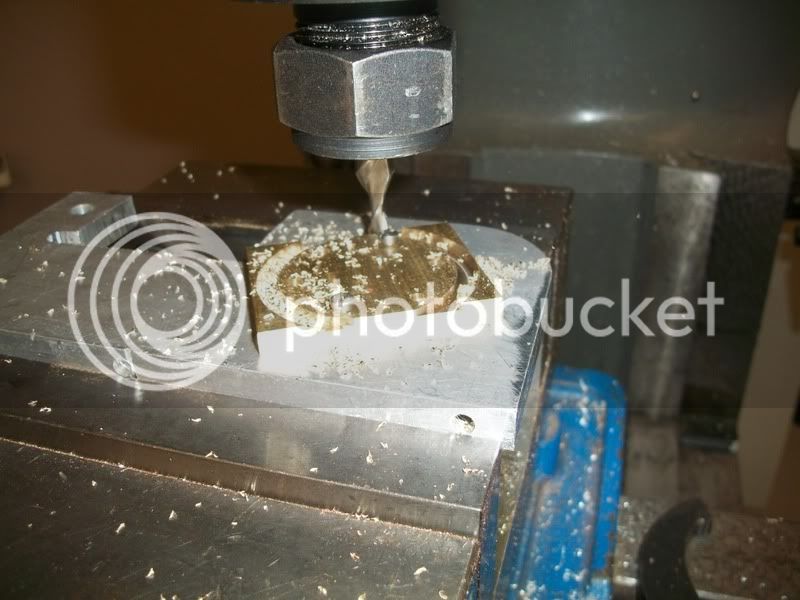
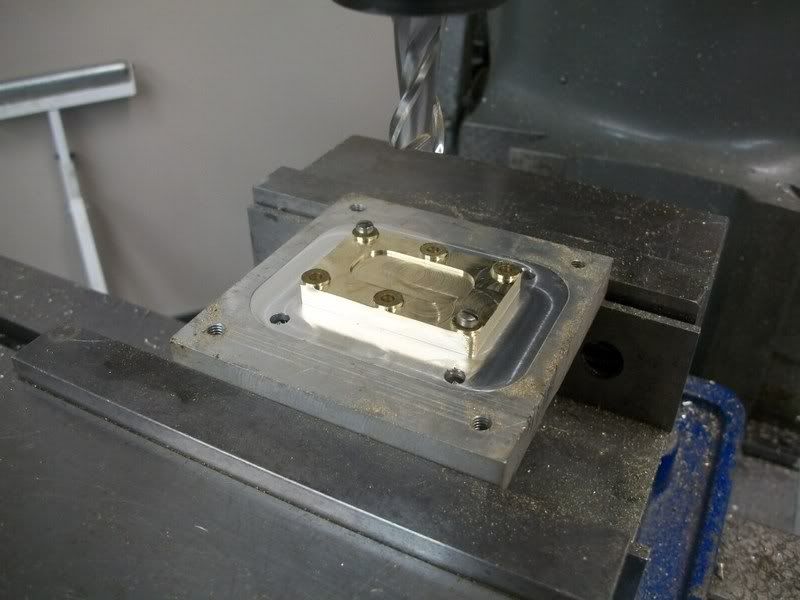
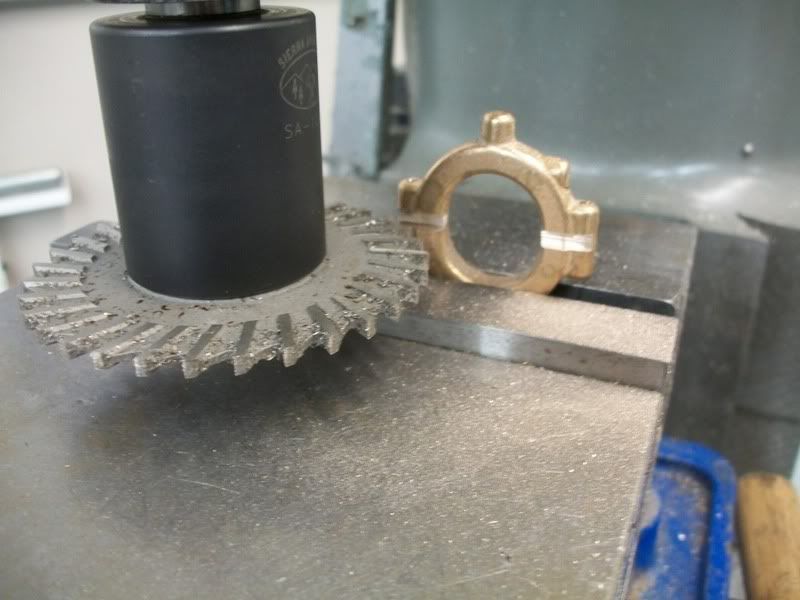
Next to cut the bosses for the nuts:

100_2015.jpg


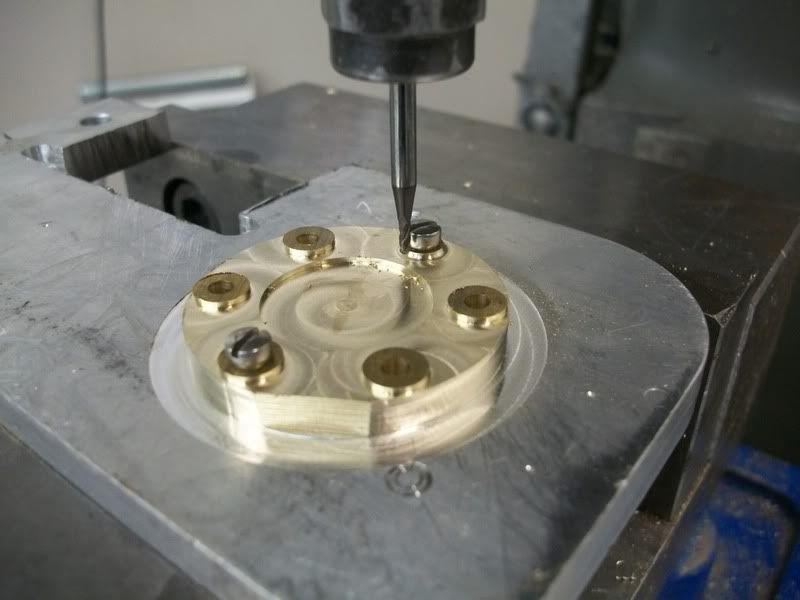
While I had the 1/2" cutter in place, I hogged out the center section:

100_2016.jpg


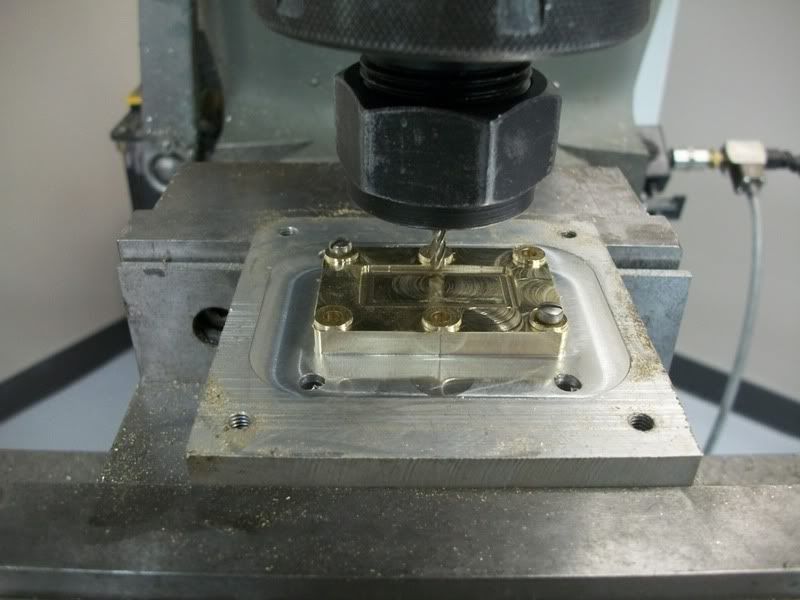
However, I had planned on a tighter radius in the corners so I came back in with an 1/8" cutter to clean them up:

100_2018.jpg


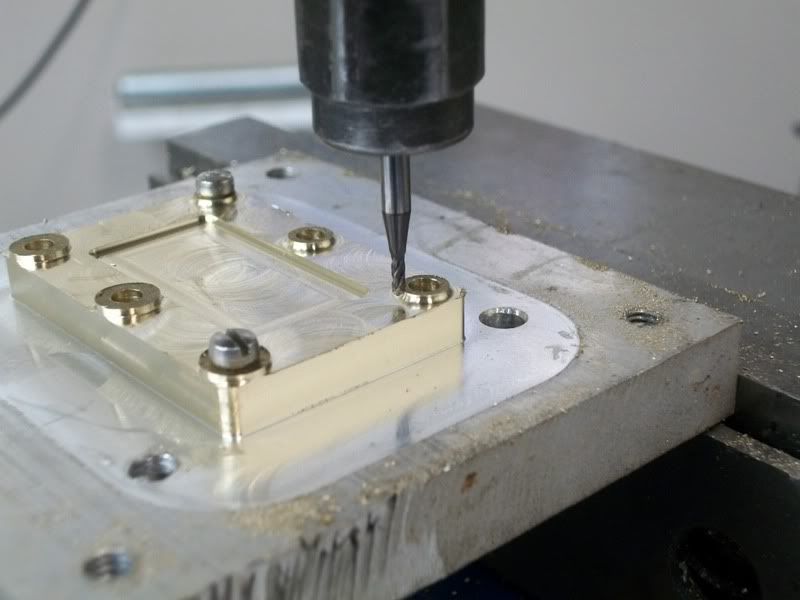
Then, as with the cylinder head, I used a 1/16" ball nose cutter to create a nice fillet on all the inside corners to make the part look more like a casting:

100_2020.jpg


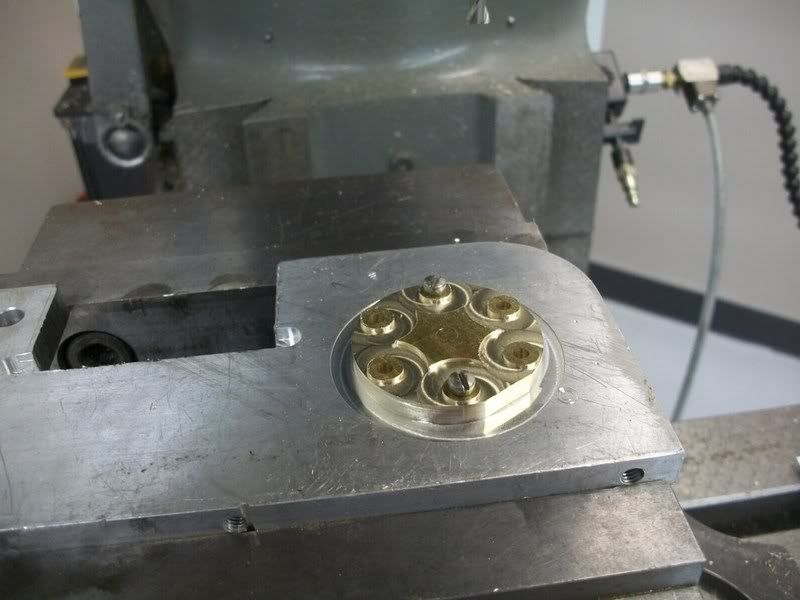
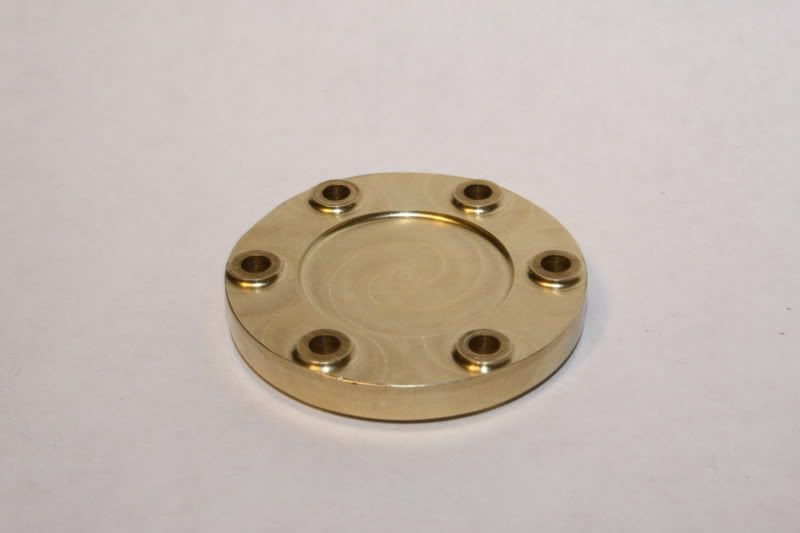
Here is the test fit. I need to shape the outside a bit to get a better fit with the steam chest perimeter. Since the chest has a slightly irregular shape, I left the edges of the cover a bit strong so I can scribe the cover and cut back to a flush fit.

IMG_1665.jpg


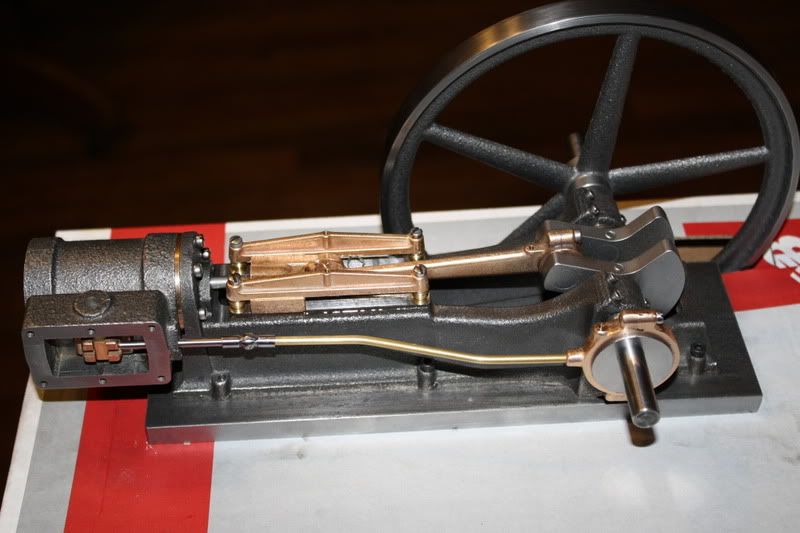
The piston rod packing gland is the last major part to machine. Then there is a double butt-load of studs and nuts to make. Oh, and a few oilers to boot. Then it will be on to the finishing stage.
 
Nice work Brian, can I make a suggestion? If you have a bead blaster, put sand in it an sand blast the brass parts you made to give them the cast look. Will we be seeing a completed video soon?

Regards Don
 
Hi Don, I have been contemplating doing exactly that. However, I am also thinking about trying to polish the other bronze parts. I‘ll have a lot of decisions to make soon.

I'll do another video before it comes apart for finishing. :)
 
Excellent job there, mate. :) I am really impressed at the attention you are paying to the end result. I would probably stick it on the shelf it it ran. (once)


Brian, it just gets better with each new post. The brass head and steam chest cover look great and given the roughness of the castings I think that was a good choice. Take your time on the finish steps, but I know we are all looking forward to a finished video when the time comes. Excellent build and nicely documented as well...it will make a fine reference for those of us "sitting" on these casting sets :)

Bill
 

Latest posts

Back
Top