PM Research No. 1 Build

Home Model Engine Machinist Forum

Help Support Home Model Engine Machinist Forum:

This site may earn a commission from merchant affiliate links, including eBay, Amazon, and others.
I agree wilth Bill Brian you are doing a great job and love your photos. Keep up the progress all will pay off when complete.

Don
 
Dinkum said:
H Rhitee,

Your doing a great job there. Thm: Wish I could do similar.


Please do. :)

Dinkum, Don't sell yourself short. My work doesn't come close to some of the artist that hang around here, but I truly believe the secret to being able to do anything is simply forgetting that you don't know how.

Here is a the close up of my parting tool. I don't know if this is correct in any way, it is just what I have used for years. This one is due to have the hollow re-ground. When it is fresh, the rake is more pronounced. The edge moves back as I touch up the tool, and I'll have to grind it again.

IMG_1602.jpg
 
I decided to work on the spacers for the crosshead slide caps tonight. The attention to detail that the people around here put into their engines has inspired me, and I decided that plain cylindrical spacers wouldn't do. I have never tried to grind a contoured tool before, and my tools to do this are quite limited so I came up with a simple shape that I hope fits well with the engine.

First off I had to drill a through hole for the slide cap screws. This is an 1/8" drill and a piece of 1/4" brass stock.

100_1941.jpg


Next I came in with the custom tool I ground. Here it is just starting the cut:

100_1943.jpg


...and again with the cut complete. It actually worked quite well. I'll have to try more of this in the future.

100_1944.jpg


Then I just parted them off.

100_1945.jpg


Here are all 4 lined up, and a preview of what the will look like on the engine. I have lots of cleanup work to do on the castings yet. I will smooth the surfaces up before the final assembly.

IMG_1599.jpg


IMG_1601.jpg


Those standoffs look great :eek: You really doing a great job on this build. I am not going to miss a single post here. I am taking notes on every step. building the courage to start my pm #1
 
Hi Rhitee,

Thanks for the pic. And yes, I will aspire higher... ;) Also, how did you grind that spherical stand-off tool so perfectly round. Did you use a jig? They look kinda cool!
 
Dinkum,

That was far from a jig :) I was scrounging through my Dremel bits trying to finds something I could use and found a worn out old chainsaw sharpening stone. There was just enough of it left to make that dimple in the tool.
 
Hi all, thanks for all the supporting comments so far. I am having a good time building this engine, and sharing the process has really added to the fun.

I had a vacation day that I needed to burn this month, so today is it. I have some work to do in the yard, but also hope to spend some time in the shop. However before I do that I was hoping to get some advise from the group.

The valve rod link in the plans for this engine is just a couple of square blocks with a pivot. It isn't a bad looking design and is probably more appropriate for the later industrial period, but JasonB's Benson and Ramon's Table Engine have me lusting for long slender/graceful linkages.

I was doodling in cad and came up with the following. I'm not quite happy with it yet, but I though I would throw it out here to see if anyone had some ideas. The plans allow for adjustment by threading the linkages on/off the rods. I can make them much slimmer if I didn't retain that function, and it just now dawned on me that I can still adjust the position of the cross nut, so maybe I can eliminate the flats and threads and just solder these on the rods.

What say you?

LinkConcept2.jpg
 
Hi Brian,
I say with those fancy standoffs...which look great btw...a fancier valve rod link would be very appropriate. This has been a fun build to follow and am looking forward to seeing it run. Enjoy the vacation day :D

Bill
 
I say go for it. If you don't like it you can always do another one. Happens to me often.

Vince
 
The pictured link might look more streamlined if the (yellow) bolt were replaced by a recessed head screw that threaded into the opposite side of the link. Just a thought.
 
Hi Brian

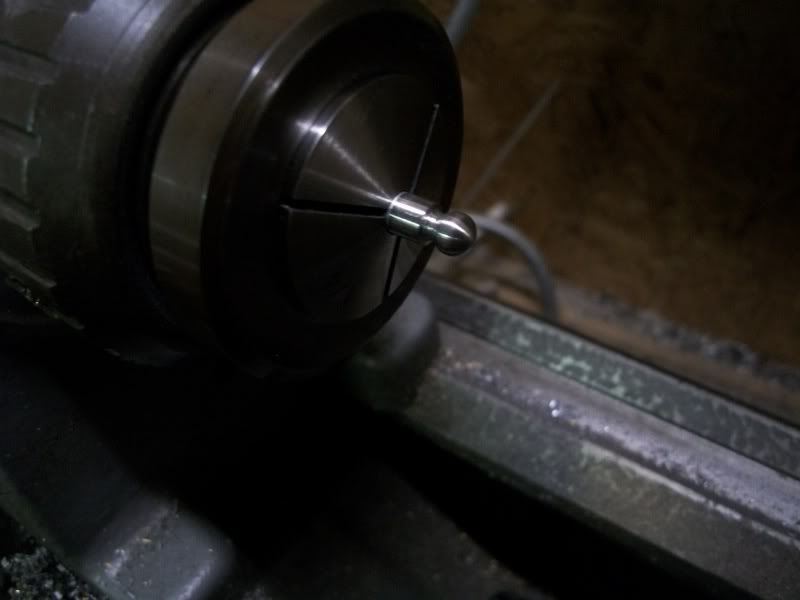
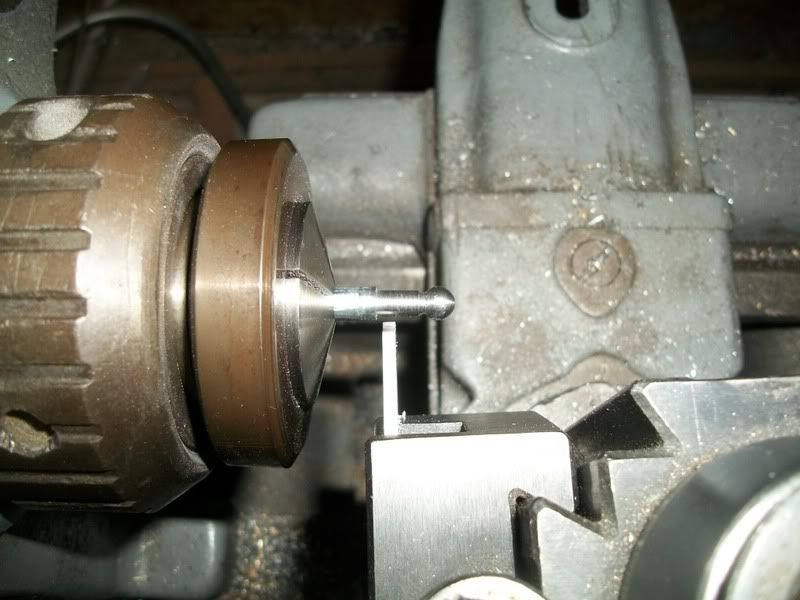
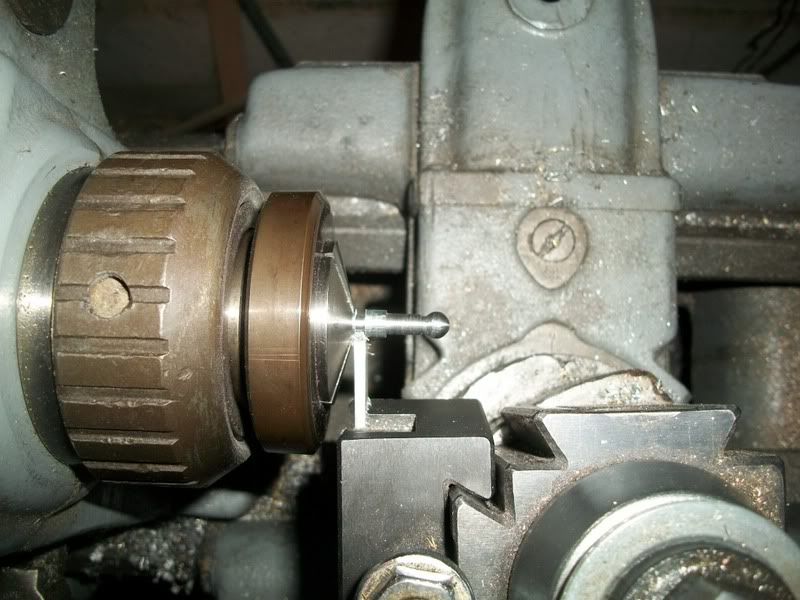
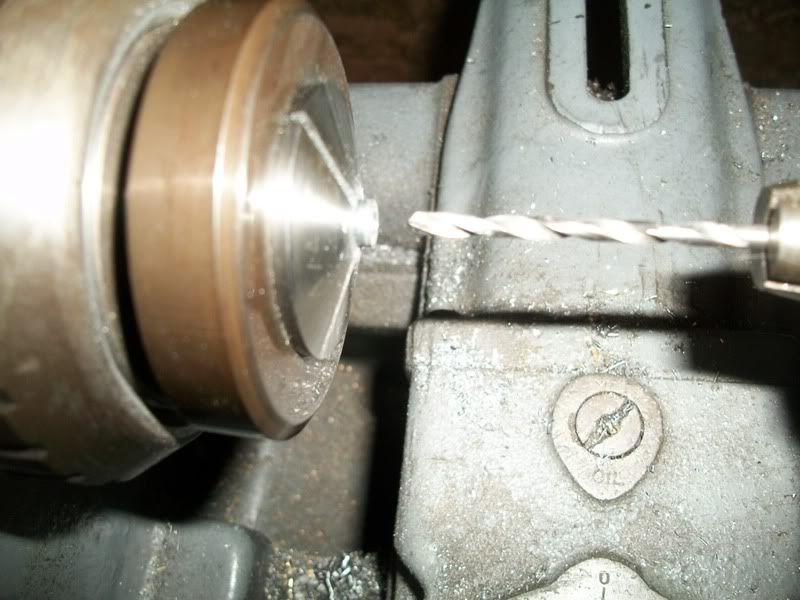
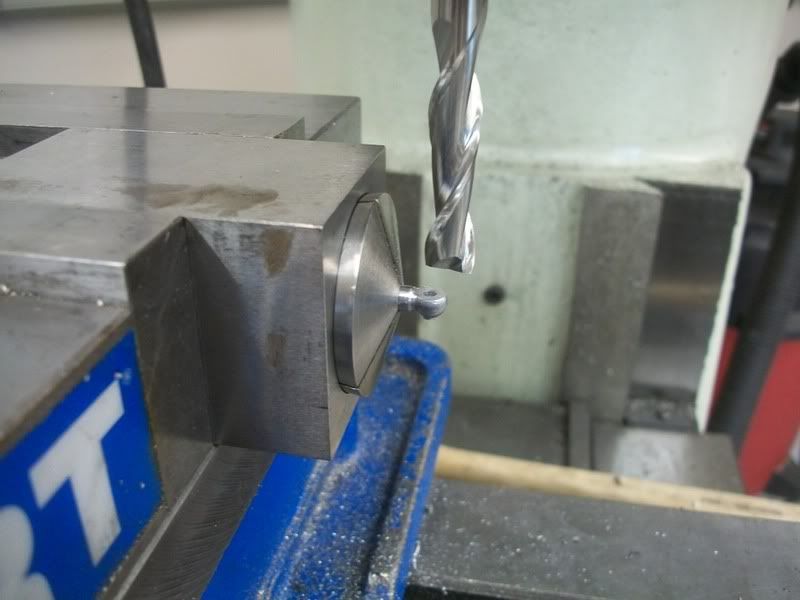
Just got up to date with your build, and so pleased that you changed to embedded pictures, as it makes following the thread so much easier. I was also wondering how you made the D shaped holes in the crank, did you also cut the web profiles with the same tool, they really look perfect. This has been an interesting build to follow and you are doing a great job. I look forward to seeing it running.

Cheers Les
 
Hey there Les, I'm glad you are enjoying the build :) Yes, I cut the web profiles on the waterjet as well. It is a handy machine within it limitations.
 
OK, I really liked Marv's idea about turning the through bolt into a hidden screw, so I built up a joint. I still need to make the pin, but here is what I have done so far:

First I ground a 1/4" diameter ball cutting tool, and plunged into some .25" CRS.

100_1955.jpg


The finish and roundness left something to be desired, but I am happy with the results after some time with a file and emery.

100_1965.jpg


Then I narrowed down the section behind the ball to 3/16". (More abuse of a parting tool)

100_1967.jpg


Then I cut the piece off leaving some of the 1/4" rod in place.

100_1969.jpg


I left the 1/4" material there so I could flip the part around in the collet to drill the 1/8" hole for the valve rod.

100_1970.jpg


Then I flipped the part back around and parted it off. I repeated this whole process to get a couple of (mostly) matching parts.

IMG_1603.jpg


Next I temporarily glued the two link ends to a piece of 1/8" stock to act as a handle. I didn't need this for the machining steps, but I wanted to buff the parts some and figured this was better done wile they were still ball shaped.

Step one was to put the part in a collet holder and index in on the center of the ball. Then I used a spot drill to mark the center of the female link end.

100_1978.jpg


Followed by a through drill for a 2-56 tap, and a slightly larger drill about 1/2 way through.

100_1972.jpg


Then I tapped the hole 2-56...

100_1973.jpg


...and milled a .260" long x 0.94" wide slot down the center.

100_1975.jpg


I repeated the drilling process for the male link end, only I went all the way through with the larger drill. Then I milled the mating part for the slot.

100_1980.jpg


A little time with some wet/dry, and I am at this point. Next I will make a threaded pin that will look like a headless shoulder bolt, and polish it all together.

IMG_1605.jpg
 
Well, yesterday I made the threaded pin for my link. Then I cut it to size and buffed the whole joint tonight. I am a little disappointed with the screwdriver slot, but you can't see it in the fuzzy picture below, so let's just pretend it is the nice 0.020" wide x 0.030" deep slot is was supposed to be :) I had drilled and taped a 2-56 hole with a .095" counterbore in a scrap plate to act as a fixture to hole the pin while I ran across the top with a 0.020" endmill. I should have used some thread locker because the screw turned a bit on me after the 3rd pass :(

This pin isn't very small compared to some of the parts I have seen around here, but it is a new small for me to make. It was originally a piece of 3/16" drill rod...

IMG_1612.jpg


Then the finished link. The rods are still the surrogate handles. I'll install the link on the right rods whenever they get made.

IMG_1607.jpg
 
One more pic for tonight showing my backwards method of holding a die. One of these days I need to make/by a proper set of tale stock die-holders, however this works pretty well. My wrist was getting a work out turning the spindle by hand, and then I remembered I hadn't loosened the belt tension on lathe yet. :-[

This part is the valve rod.

100_1990.jpg


rhitee93 said:
One more pic for tonight showing my backwards method of holding a die.

That's brilliant! I'll have to try that next time. Thanks for sharing the pic. I've been green with envy seeing all these tailstock die holders but that needn't be the case anymore... :D


Hey Dinkum, this method works OK, but it is prone to leaving chuck marks on your part. It is better than trying to start a die by hand.
 
I haven't made much progress in the last couple of days. The real world has been invading my fantasy life again. However, I did manage to make the valve and valve rod. Here are a couple of shots.

IMG_1614.jpg


IMG_1615.jpg


I'd like to get to finish up the valve gear this weekend, but it probably won't happen. Maybe next week I'll be able to get it done.

After that I will make the cylinder head and chest cover. I am going to make these parts from scratch because I don't like the quality of those particular casings. The surface is pretty bad on those two kit parts, and I have a nice piece of brass plate I can cut them from. Once I get them made, I should be able to get the engine to move under it's own power.
 
Hi Brian your project is coming alone nicely. I have been following alone as you progress with interest. Love the photos. I will be with you till you have it running.

Regards Don
 
Back
Top