Open Column Launch Engine from Kit

Home Model Engine Machinist Forum

Help Support Home Model Engine Machinist Forum:

This site may earn a commission from merchant affiliate links, including eBay, Amazon, and others.
It's good that this starts with the mill. I think I have a problem with my lathe. When I face a part...it's slightly convex. That tells me the spindle is not perpendicular to the cross slide. I've seen references on the forum to 'twist' of the bed. I don't know if that's it but my lathe is mounted on a wood desk in a basement and is probably moving around. Help here would be appreciated.

Zee, do you meant to say convex or concave?
 
zeeprogrammer said:
Which to use to feed the tool? Carriage or compound? If I use the compound, it seems a smooth cut is elusive due to up/down or in/out forces from turning compound handle. If I use carriage hand wheel, it seems I get what appears like a very small thread. (I've also used power feed and get a real nice finish...but you can't do this against a carriage stop.) Also...when using carriage...I can move back and forth, back and forth, and still metal comes off. I tried both a HSS tool and a carbide. Light cuts.

Zee,

Unless the compound has been set accurately, it will cut a taper along the part.

The carriage handwheel feed is pretty coarse say 10 times more than the compound handwheel feed. Using power feed with a carriage stop is OK as long as you watch it and disengage just before the carriage/saddle hits the stop, then feed the last itty bitty bit with the carriage/saddle handwheel.

Small parts tend to be pushed away from the tool and even with everything except the work dogged down it will cut until all the spring is out of the part.

Hope this helps ??? ???

Best Regards
Bob
 
Hilmar: Convex (I think). If you take the part and set it on a flat surface...it 'tilts' very slightly. Concave (cave) would be a scallop into the part and it would set flat (assuming the outer edge is a nice circle). I think a concave cut would be noticed if you run the tool past the center of the part...it should start cutting again.

Maryak: I'm thinking it means the compound is not square to the ways. I haven't done anything yet to see where the problem is. I'd be surprised if it has anything to do with the mounting of the carriage to the ways. Could bed twist do this? Hopefully it's not in the manufacturing of the cross slide (but it is a cheapie). Anyone have experience with this?

Flex...I'm still surprised by the forces involved even when making light cuts. It's really not like cutting butter...despite what they say. :)

Newbie question: Are there general rules about direction of feed? I mentioned 'going back and forth'...should one do that or only cut in one direction? Under what conditions is it okay? I would expect cutter type is involved...any thoughts on that?

Thanks very much all.
 
Zee,
Is the tool perfectly on center? If it's not it will give you problems esp with small diameters

Mark
 
Mark,

Thanks. Yes that's another thing. I've been eye-balling it. A number of members have suggested better methods. I hope to try some tonight. I did adjust it once because I saw what appeared to be teeny tiny balls - bits really - that I took to mean metal was being rubbed...not cut...so the tool is too high. A small adjustment made it better but I'm still thinking I should expect a better finish. As some members will no doubt remind me...practice and experiment.

I'm using a quick change tool post but I'm not comfortable thinking I'm using it right. When I tighten down...the tool moves. Should it? And, it seems the knob and nut move.

Thanks for the question.

Carl
 
Ok, addressing some things in no particular order.

Tool on center?

Pinch a six inch scale vertically between the tool and the workpiece. If the scale remains vertical, the tool is on center. If the top of the scale tilts toward you, you're below center. If it tilts away from you, you're above center.

[Aside: Ultimately you may want to build a dedicated tool to set lathe tools on center but the above will work and it's quick and cheap.]

Advance tool with compound or carriage?

If you advance with the carriage, the tool is guided by the ways which are, at least nominally, aligned with the lathe spindle. If you advance with the compound, you're at the mercy of the compound alignment. Typically, the tool is advanced with the compound only when threading or (intentionally) turning tapers.

Cutting direction?

Many lathe tools are ground to cut in only one preferred direction. The nomenclature is oft confusing. A "right hand" tool is meant to cut from the tailstock end of the work toward the headstock end. A "left hand" cuts from headstock toward tailstock.

There are tools that will cut in either direction, e.g., certain round nose tools.

If your cut is producing a thread-like appearance, reduce the feed rate and/or grind a small radius on the tool point. (A rounded cutting tool will "average" over the "threads".)

Concave facing?

Many lathes are set to purposely cut slightly concave when facing so the part will sit flat against a mating surface. If you're getting a convex surface, check that the tool is held rigidly and the cross slide gibs are snugged tight. Ensure that you're using a tool ground to make a facing cut.

Workpiece deflection?

Metal is surprisingly plastic. If you have more than three or four diameters sticking out of the chuck, you may need tailstock or steady rest support to minimize deflection.

I hope at least some of this helps. If you're still having problems, consider taking some photos of your setup. Sometimes a picture will reveal a glitch that doesn't surface in the written description.

 
zeeprogrammer said:
Mark,

Thanks. Yes that's another thing. I've been eye-balling it. A number of members have suggested better methods. I hope to try some tonight. I did adjust it once because I saw what appeared to be teeny tiny balls - bits really - that I took to mean metal was being rubbed...not cut...so the tool is too high. A small adjustment made it better but I'm still thinking I should expect a better finish. As some members will no doubt remind me...practice and experiment.

I'm using a quick change tool post but I'm not comfortable thinking I'm using it right. When I tighten down...the tool moves. Should it? And, it seems the knob and nut move.

Thanks for the question.

Carl

I use a piece of flat stock 'bout 6 inches high, wide enough to rest on the ways. Set it up against the tailstock dead center and scribe a line. Also use same piece set upon the cross slide to scribe another line. Now I have an indicator for tool height covers both port and starboard, inboard and outboard requirements. Works with the QCTP, not with the rocker (not enough hands).

My tool holder also moves when the clamp is snugged down, its just the play in the device. I set the flat stock on the ways, check the tool bit against the scribe mark, adjust the screw as needed, clamp it down, check again and readjust. All depends upon where the contact pin meets the holder, above or below the centerline that causes the tool to nudge up or down when secured. Its just the way of the hobby type tool post.

Knob and nut move, oh ya, tighten the nut to secure the knob and they stay put. have to readjust and well, after a while its uh, hmm, well lets just say I have a few spare knobs now. Could bugger up the thread on the end to keep it from fully coming off, but what fun would I have then denying myself more of the "Where's Waldo game" looking for where off to did it go this time.

Life is to short to be taken seriously, cant solve all the little things so as long as no body parts are involved, enjoy the irony.
 
Marv: Thanks. The use of the scale to center the tool bit was one I was going to try tonight.
Foozer: I'll experiment with the line too. Thanks.

Marv: Advancing the tool. Thanks for using the term 'typically'. It helps to know the 'usual' way of things.

Marv: Definitely convex. I'll look into the tool. It's an area I need to learn much more about. However, I'm having trouble imagining how a tool, on its own, can create a convex cut. I'm still thinking the ways and compound are not square. Wouldn't that explain a taper? I'll try to let everyone know what I find...when I find it...if I find it.

Foozer: So 'quick change' should actually be 'quicker change' or 'not so slow change'. :) Thanks.
 
zeeprogrammer said:
Foozer: So 'quick change' should actually be 'quicker change' or 'not so slow change'. :) Thanks.

That's how I see it, a not so slow change. If I want the tool bit to stay put, well less likelihood of movement I use the rocker post. That thing, altho it keeps the bit closer in within the boundaries of the slides support, did I say I can confuse a rock? anyway it seems to take three hands to get that sucker on center. One to hold the shim stock (that methods works well) one to hold the bit and one to hold the wrench. Coordinated I am not.

Robert
 
Time to stop. It's not been a good night. :mad: (But stay tuned...the story has a twist.)
Although I had some happy time making my first tool (cut-off blade from a hack saw) and using my grinder for the first time...I had crummy luck trying to thread a part with a die. It got worse when I switched to the mill.
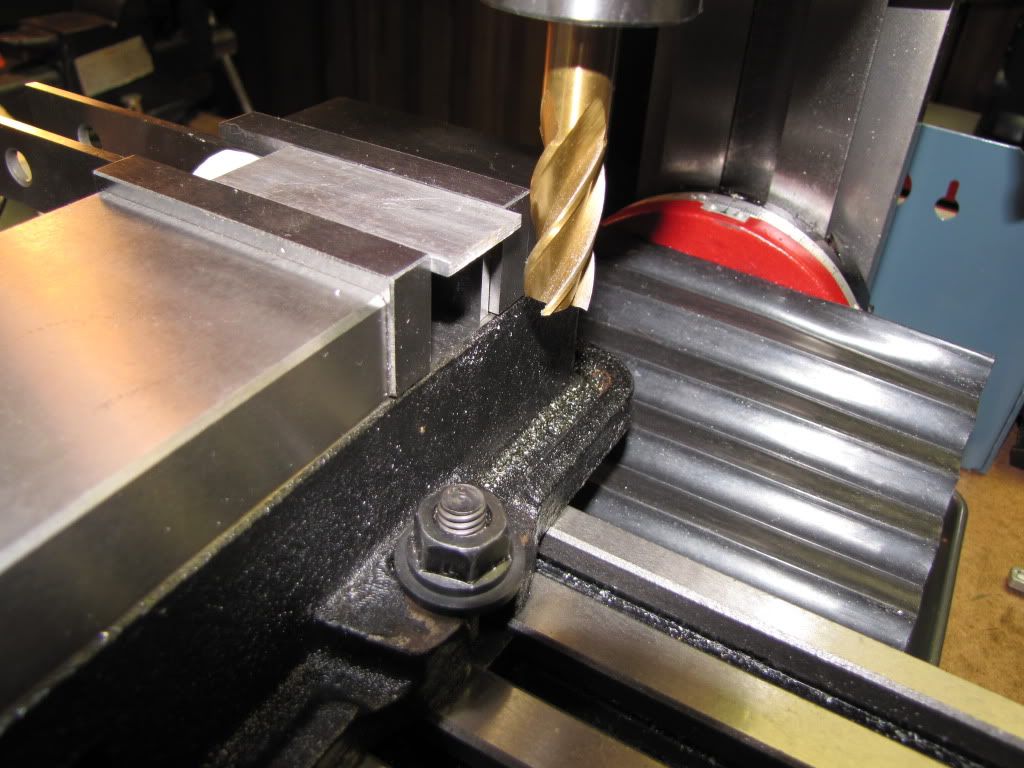
Using my new dial test indicator to square my vise was a (frustrating) experience. After some time I got okay with it. (That or frustrated enough to think 'good enough').

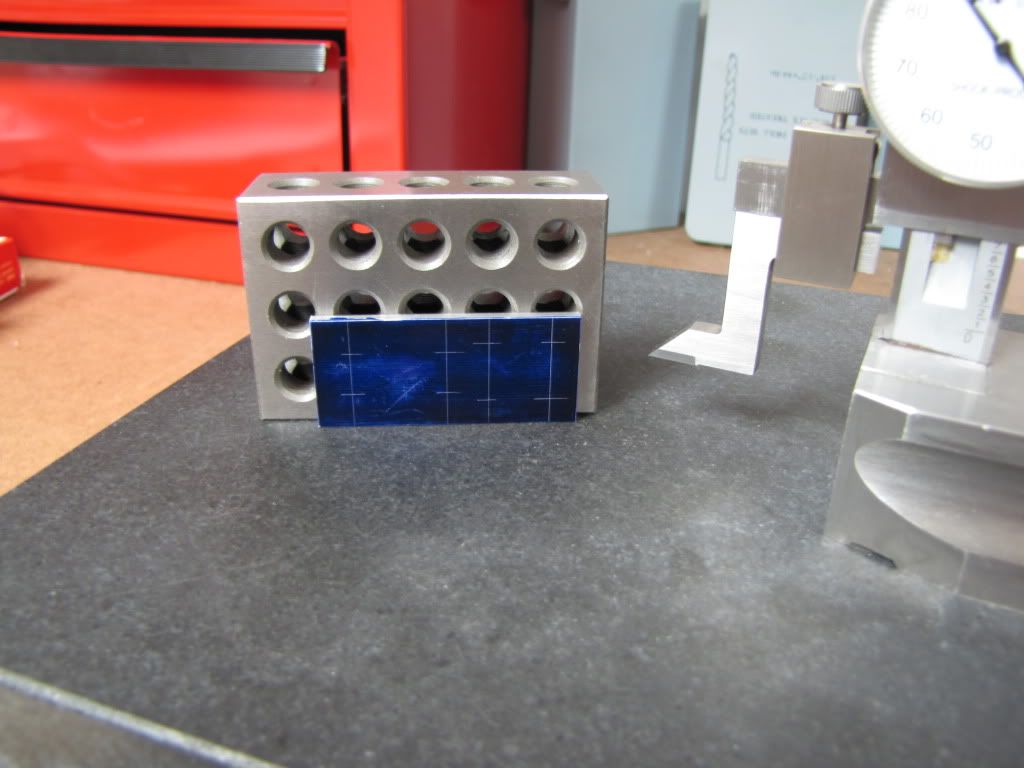
Then it came time to trim one edge of the engine base.

The setup. The white thing to the left is a peanut. Got that from 4156df.

IMG_0105.jpg


No vise stop and maybe that's part of the problem.

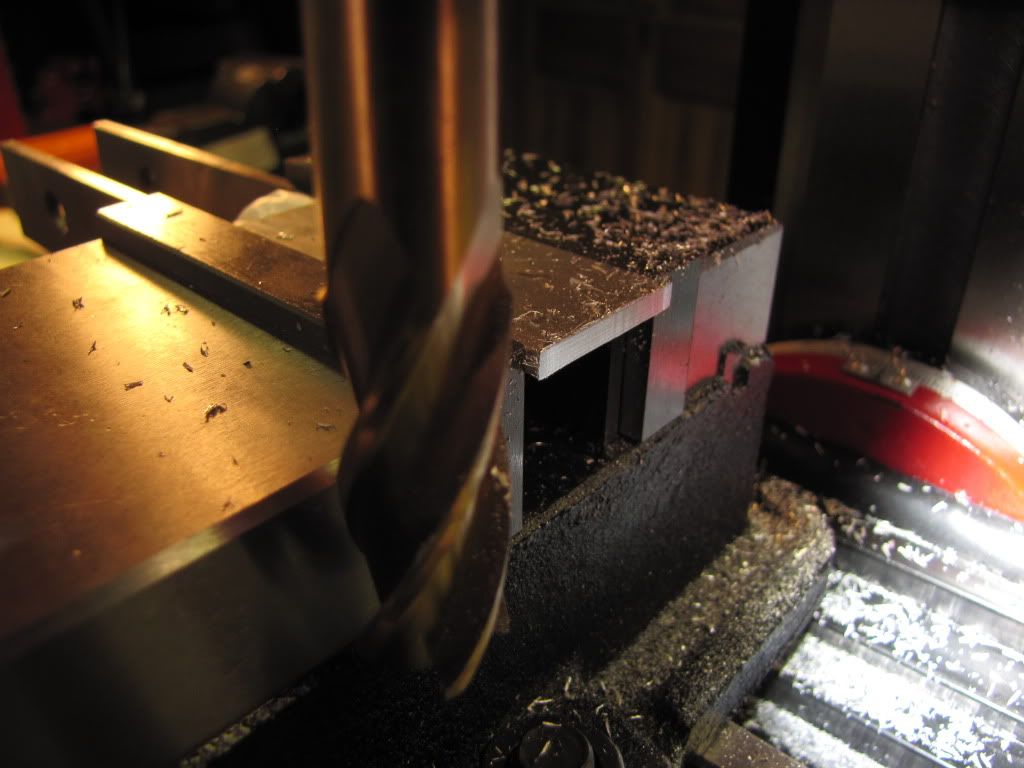
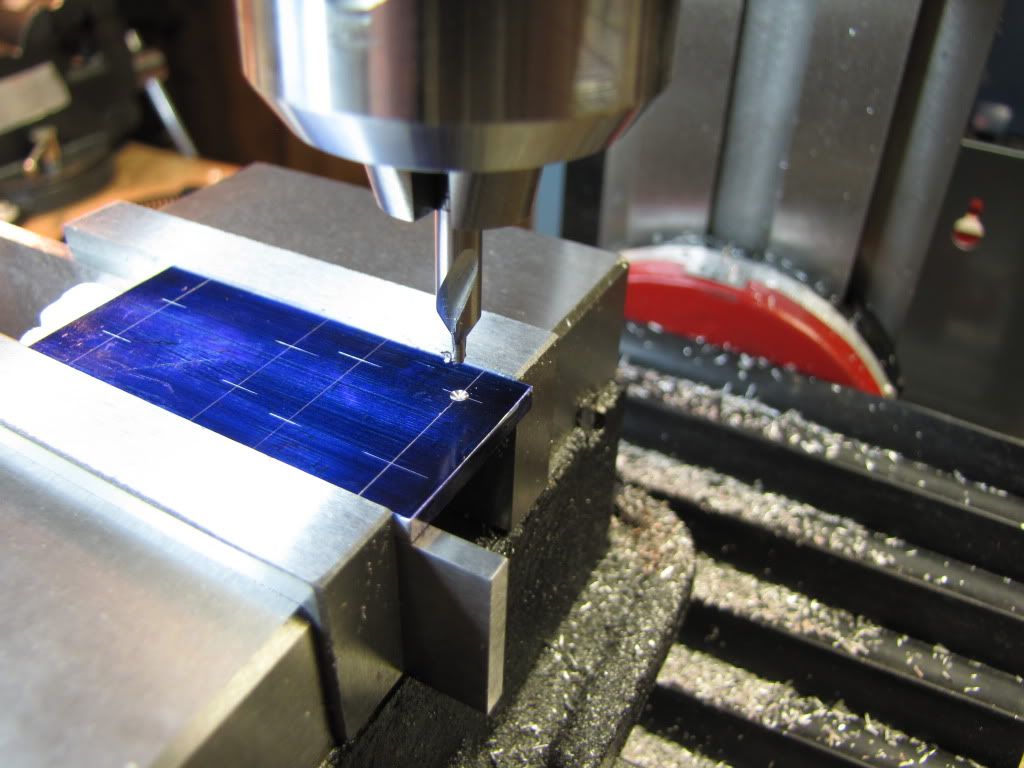
This is after cutting...

IMG_0106.jpg


[Edit: Apparently my comments about climb/conventional milling were wrong. I'm removing them so as not confuse others who may follow. More likely, those that follow are more knowledgeable and I'll just end up continually embarrassing myself.]

See the wavy edge?

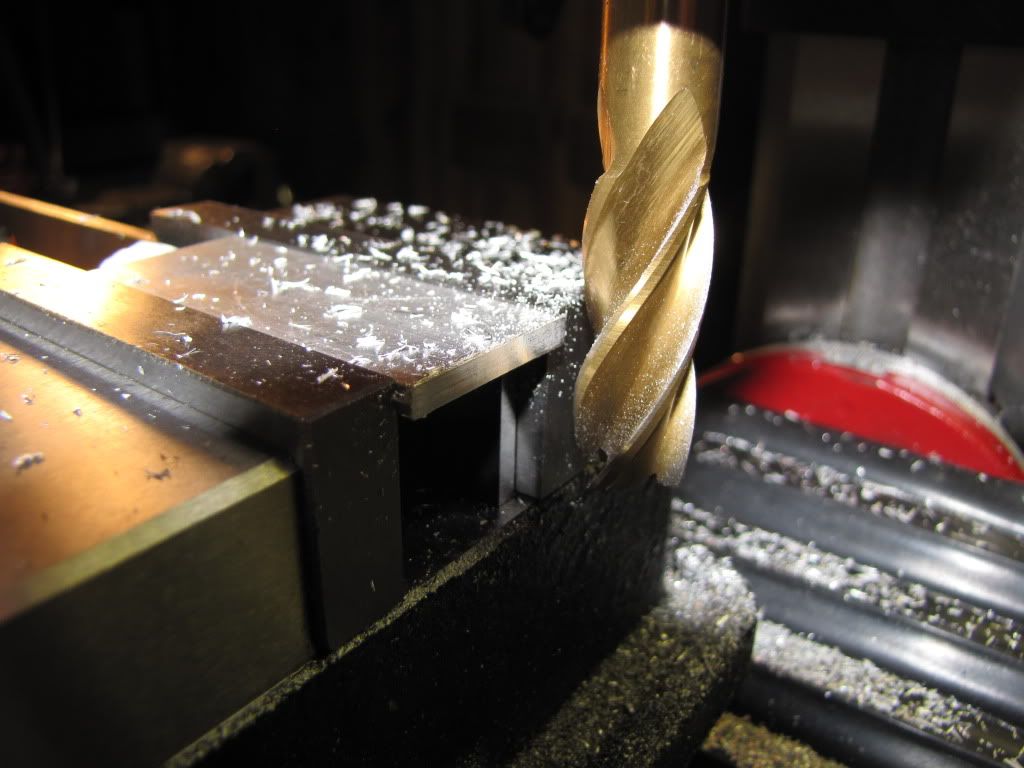
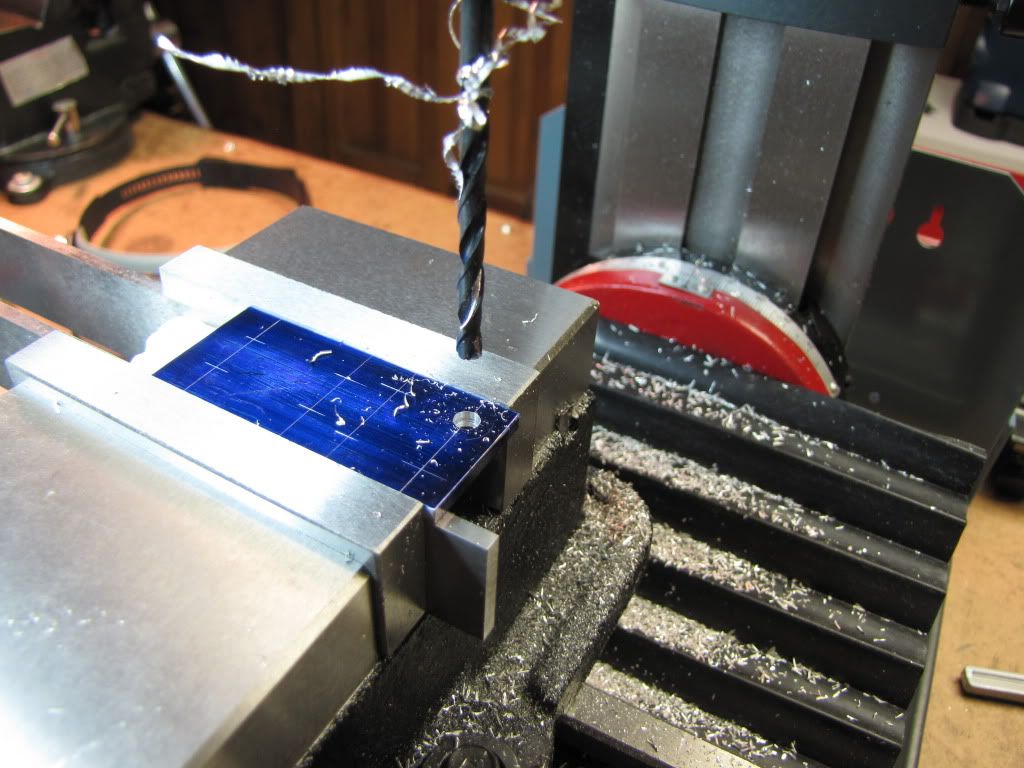
Then I wondered about the lock on the Y axis. I couldn't reach it because of the vise. So I went back. [Edit: Originally said X axis. The lock that affects the X axis is on the Y axis. Sorry.]

Duh. Used an Allen wrench and got to the lock. Locked down the X axis. Didn't even move the X axis - prayed there was some flex that would spring back.)

Result...

IMG_0107.jpg


Seems pretty smooth to me.

[Edit: See where the part ended up? I'm told, and now believe, that's a conventional cut - shovel action. So I should be able to do still better with a final light climb cut. I'll experiment so more.]

Back to happy guy (except for the thread fiasco [Edit: And now the mistakes I've in this post.]).

Stopping while I'm ahead [Edit: ahead? I think not.].

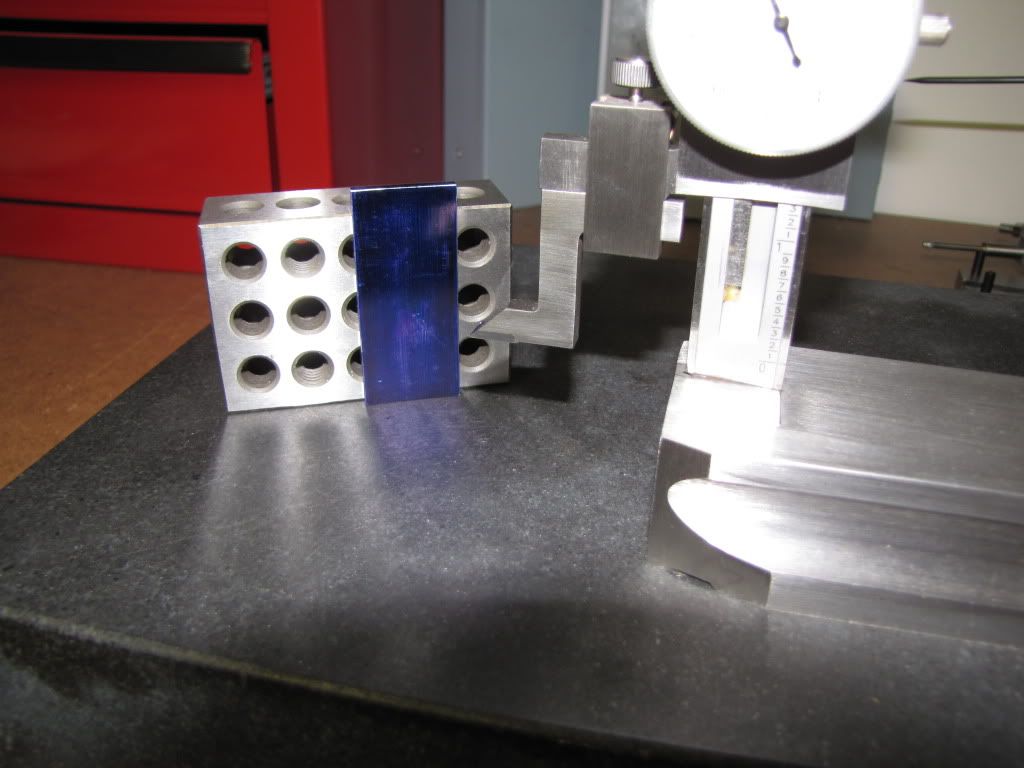
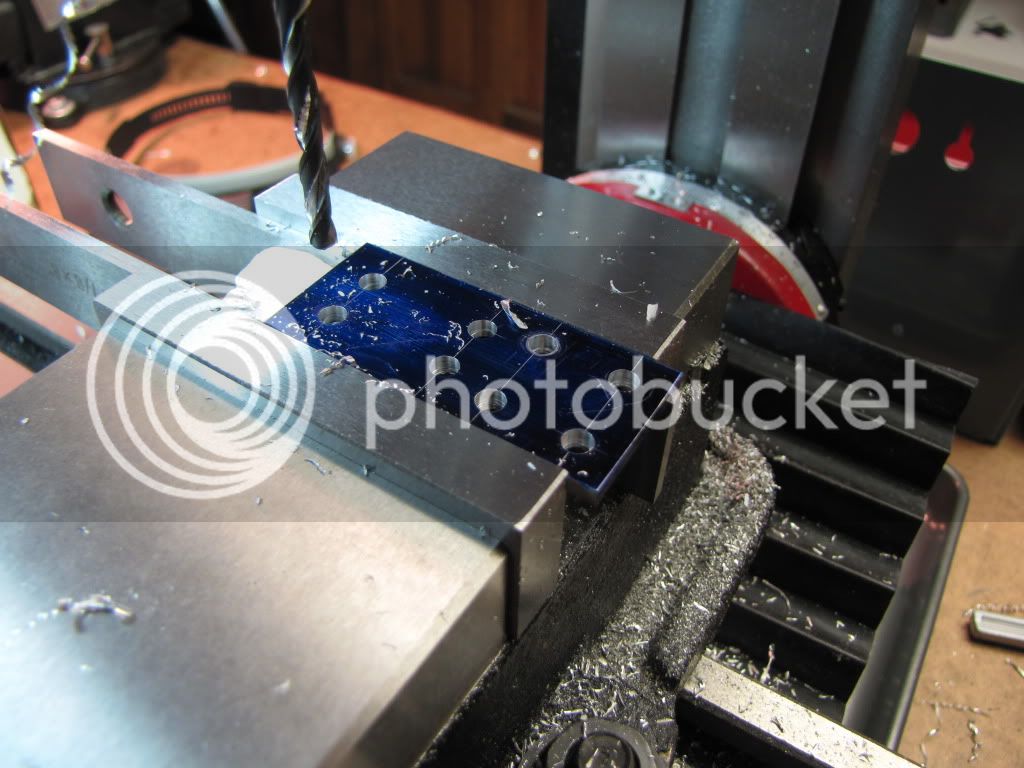
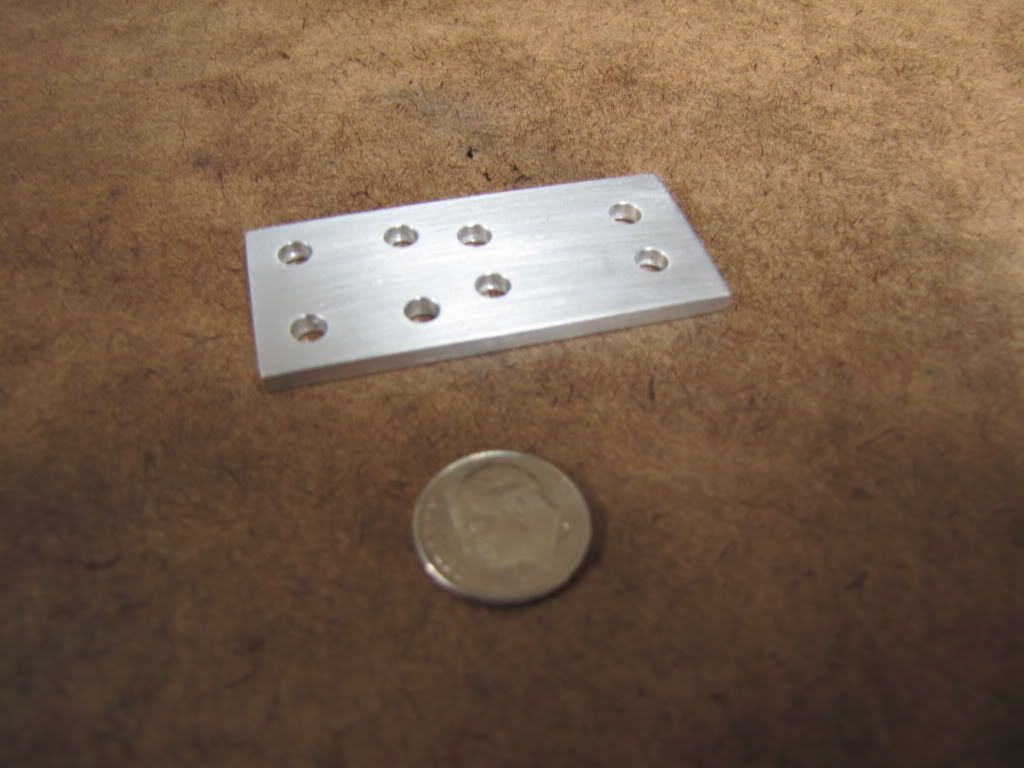
When I remove the part from the vise I'm supposed to file the edges to deburr. I'm thinking it won't look good - that is - not smooth. One thought is to hold the part and slide across sandpaper. Better but there might be a taper to it (one end deeper than the other). I know I don't want to use a deburr tool. Jumpy. Any suggestions? ???

Thanks! ;D

 
Carl

I'll leave the climb/conventional question for someone who can explain it better than I... but for the de-burring: lay a piece of emery cloth (300 - 400 grit) on a flat surface (a left-over pane of glass is good to have for this) and lay the work piece on this and move it about. Don't get lazy and just whap the emery down on the work-bench as this guarantees that you will find all the little bits of swarf that you thought you'd swept up.... trapped under the emery cloth,giving you a very bumpy ride! (No need to ask why I know this :big:) If you go through progessively finer grits of cloth, to 600 or 800 grit, and pay strict attention to the direction you move the work-piece, you can achieve a nice "brushed" finish with this technique.

Joe
 
Zee,
If you look at the endmill from the top of the mill, and it is turning clockwise, and you are on the right side of the stock cutting in the Y axis:

When the cutter is turning clockwise if you move the table towards the column you are feeding the work into the rotation of the cutter. This is climb milling. I can produce a fine finish with light cuts but the cutter will pull the stock towards the column. If you have backlash in the Y screw it can drag the piece out of the vise if it is not tight. Care should be taken to make sure you are taking light cuts and the locks are slightly snug on the Y axis to prevent this.

When the vise is moving away from the cutter you are moving the stock into the endmill teeth. This is conventional milling and it will remove more material faster at the expens of a slightly poorer finish. Adjusting to less feed with more speed on a light finishing cut can help here.

Hope this helps,
Sean
 
Joe: I was really just talking about getting rid of the burr. However, I'll need your suggestion for when it comes time to 'finish' the part. I do my sanding on a different table but even that's not really smooth. I like the glass idea. Thanks.
 
Seanol. Thank you. I went back to my post and edited it. I have no problem embarrassing myself but I detest giving bad information.

At least the exercise demonstrates the need to lock unused axes down.
 
Zee,
No problems. The only way to learn is from experience; yours or others. I have found other peoples experience is far cheaper but my experience usually does not need a repeat engagement!

Sean
 
Continuing...1st part completed...the base.

Trimmed the other end to size. 2.25". Well...2.255" if I believe my ability to measure. Now to drill the 8 holes used to mount the pillow block, port block, and cylinder. (I can use some of the terms...I just don't know what all of them mean yet. Pillow? Port?)

The instructions called for using an edge finder and moving the center drill as required. But the instructions also called for using scribe lines and a height gauge. Their idea being to use the edge finder and see that you're over the scribe mark. I can't say I understand that. I don't know how to use an edge finder yet and this would have been a good time to learn. But I went for the scribe lines only.

The instructions used an angle plate to set the base against for scribing. I don't have one so I used a 1-2-3 block.

IMG_0108.jpg


Completion of scribing...

IMG_0110.jpg


Touched and check...

IMG_0111.jpg


First hole. You might not be able to tell but just to make sure I didn't hit the parallel, I moved it away. That leaves the corner I'm drilling 'floating' but it's aluminum and I took it carefully. When I did the two holes on the right, I reversed the placement of the parallels (the left one back up and the right one back). The four holes to the left are inboard enough to leave the parallels fully supporting.

IMG_0112.jpg


All drilled...

IMG_0113.jpg


Sanded down and scotchbrited...

IMG_0114.jpg


Polishing is another area I need to improve. But I'm happy.

Doesn't quite compare to what other members do on this forum but it's a far sight better than those who do nothing!

Slow going. I'm coming across yet more tools I need to get (some would argue make) before I can do much more.

Thanks all.
 
zee

One step at a time grasshopper one step at a time...you'll get there. :big:

Regards

Philly
 
PhillyVa said:
zee

One step at a time grasshopper one step at a time...you'll get there. :big:

Regards

Philly

Man did that bring back memories. My wife used to call me 'weedhopper'. I guess she stopped once I couldn't hop no more. ;D uh...no...that's not what I meant...

Thanks. That put a smile on my face.
 
Here ya go Carl:
[ame]http://www.youtube.com/watch?v=f0od-cp_9dg[/ame]

Mark
 
Back
Top