my attempt to make the steam engine from oldboatguys plans

Home Model Engine Machinist Forum

Help Support Home Model Engine Machinist Forum:

This site may earn a commission from merchant affiliate links, including eBay, Amazon, and others.

ariz

Well-Known Member
Joined
Mar 9, 2009
Messages
388
Reaction score
5
hello to all in this great forum!
well, I don't know if this is the right section for this post. probably I can't document every step of the work, because I get some photos only by chance, when I remember to do it...
and I have nothing to teach to anybody! I'm new to this hobby, this is my second engine, the first being the steam engine from the brian rupnow plans.
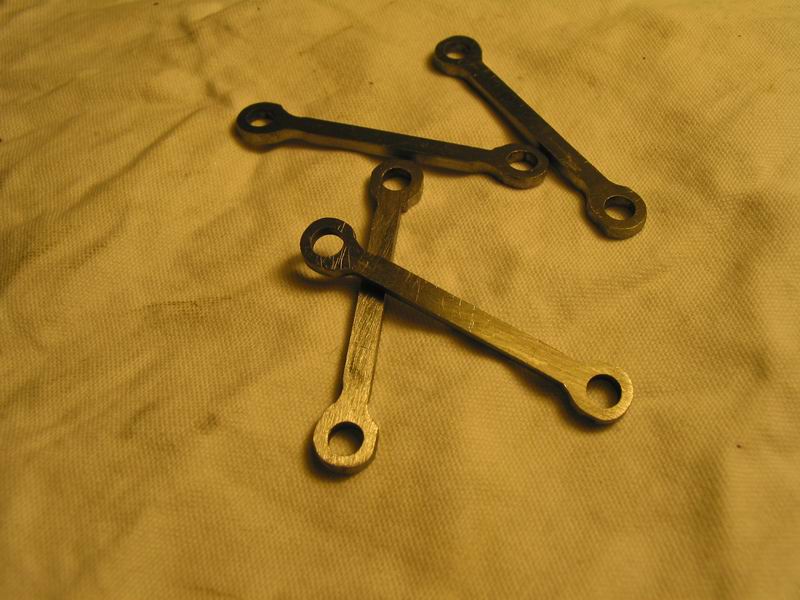
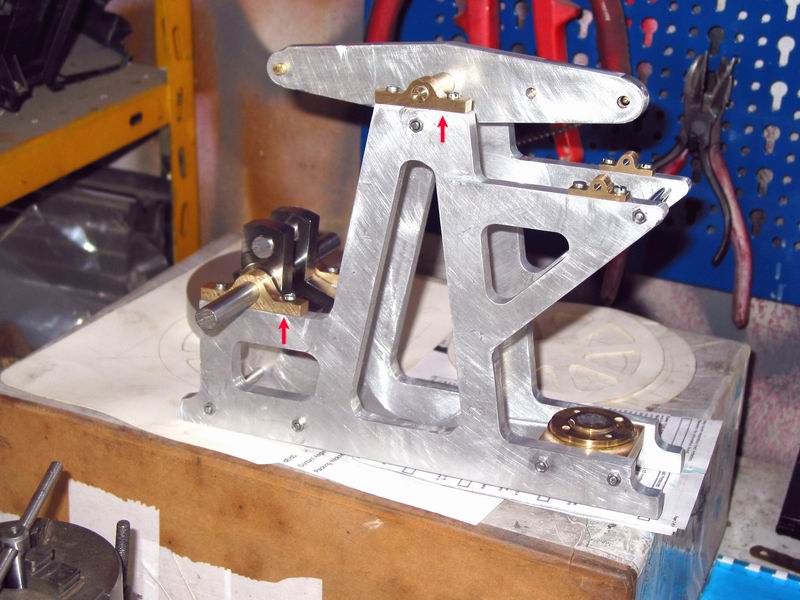
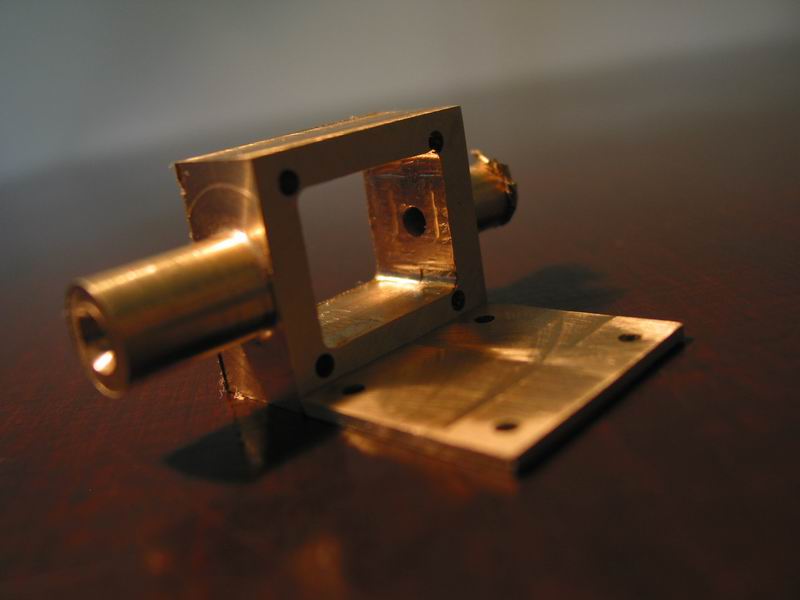
but perhaps sharing this work could be interesting anyway, so here there are the pieces I have done till now

engine_obg4.jpg

oldboatguys (obg from now) suggested to have these parts realised with lasercut, but I made them with the mill


engine_obg_2.jpg


obg_engine6.jpg


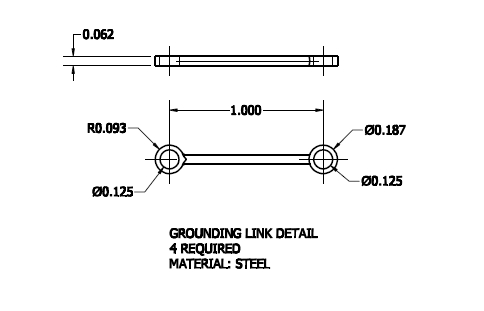
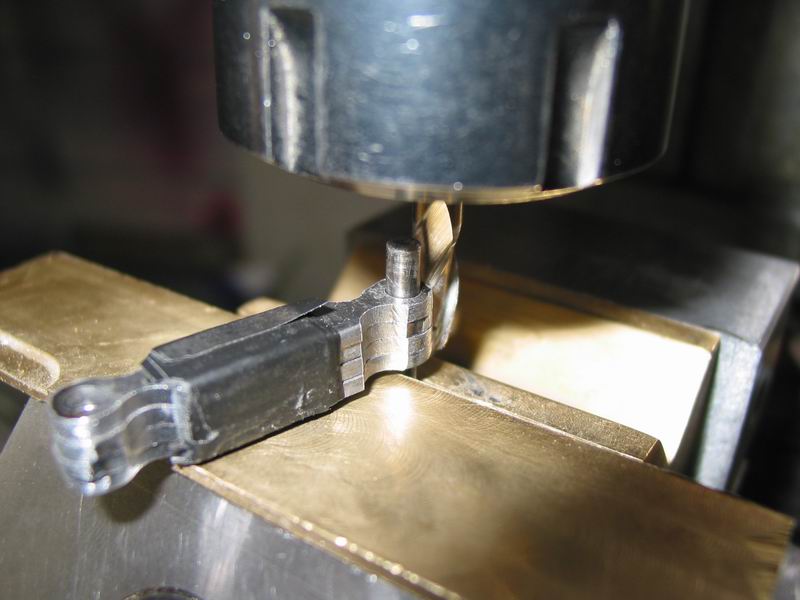
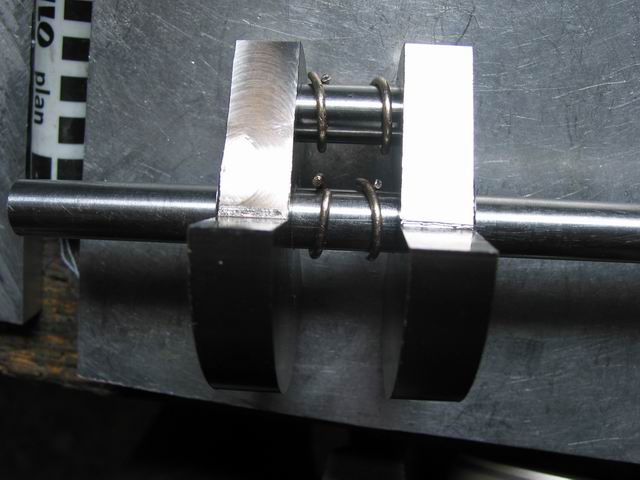
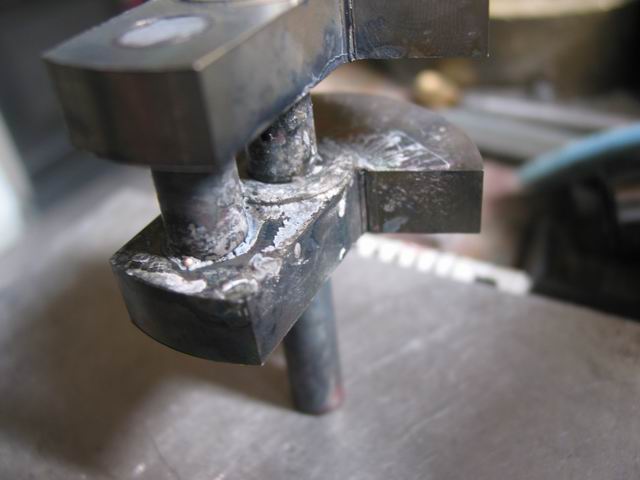
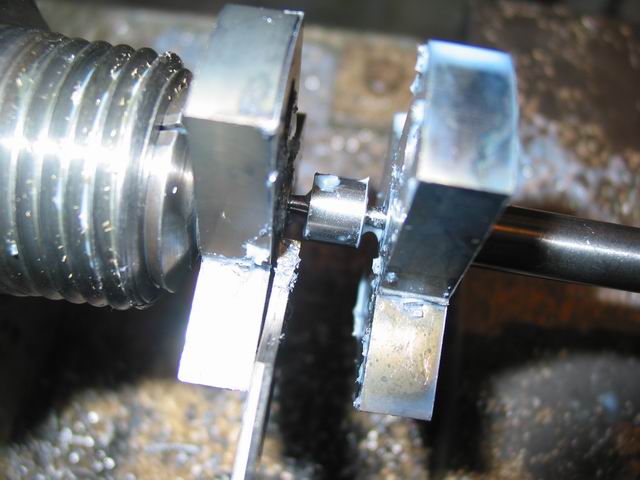
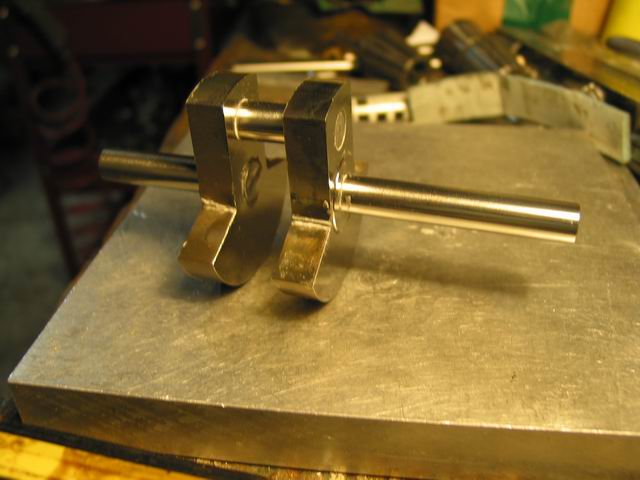
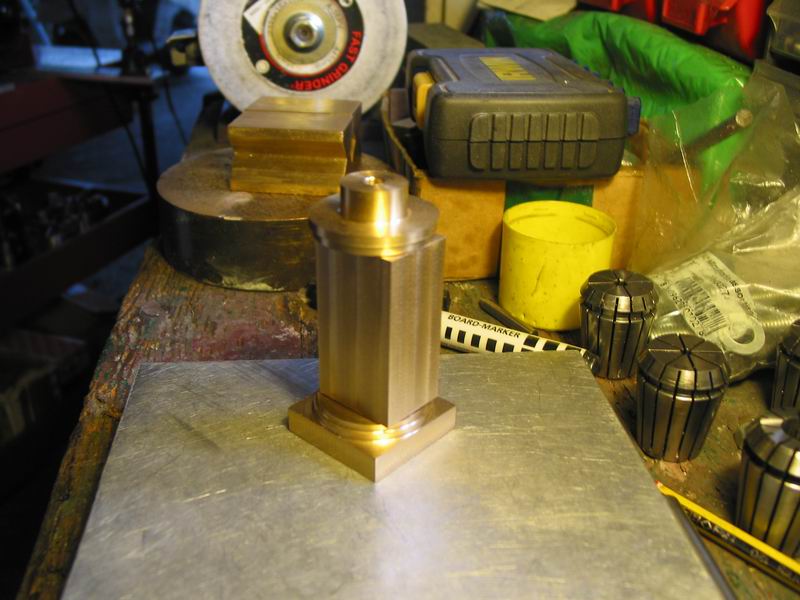
this is the crankshaft, obg said 'process using laser burned throw plates'... I didn't understand what this means, I made it with lathe and mill from a piece of titanium
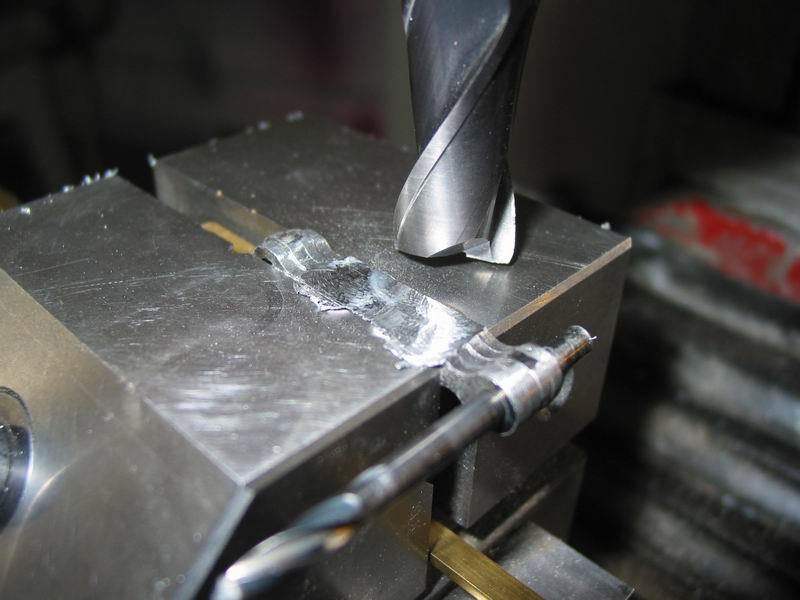
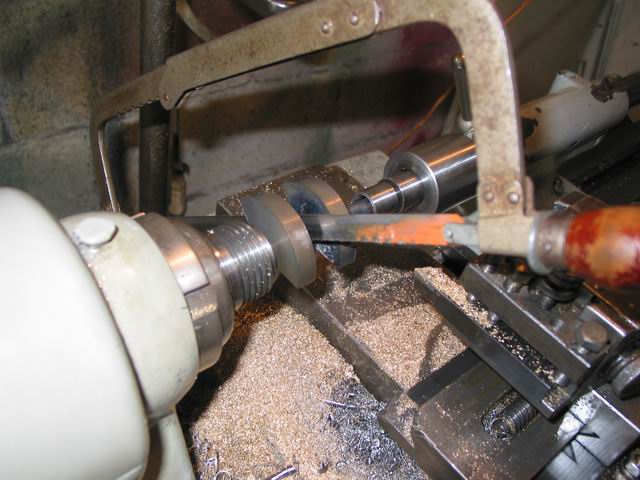
I can manage it well with the lathe, but with the mill (X2) is another story!

engine_obg_3.jpg


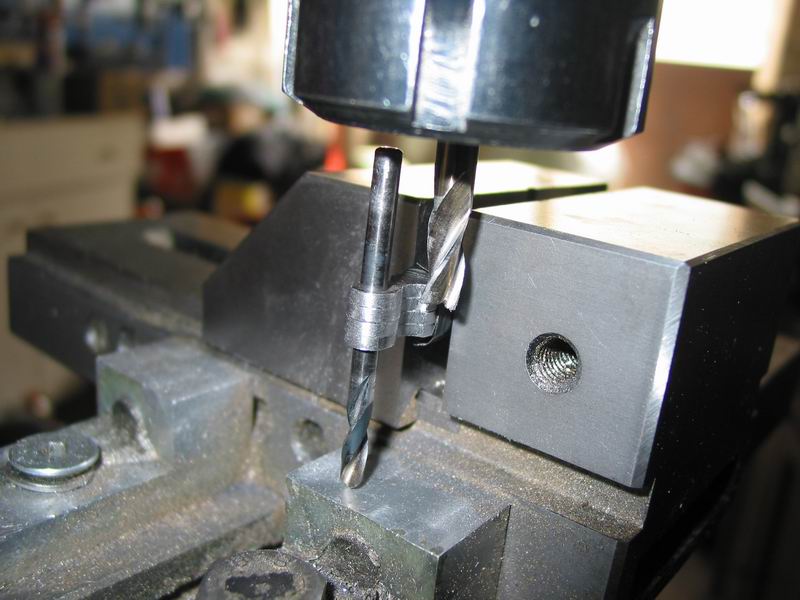
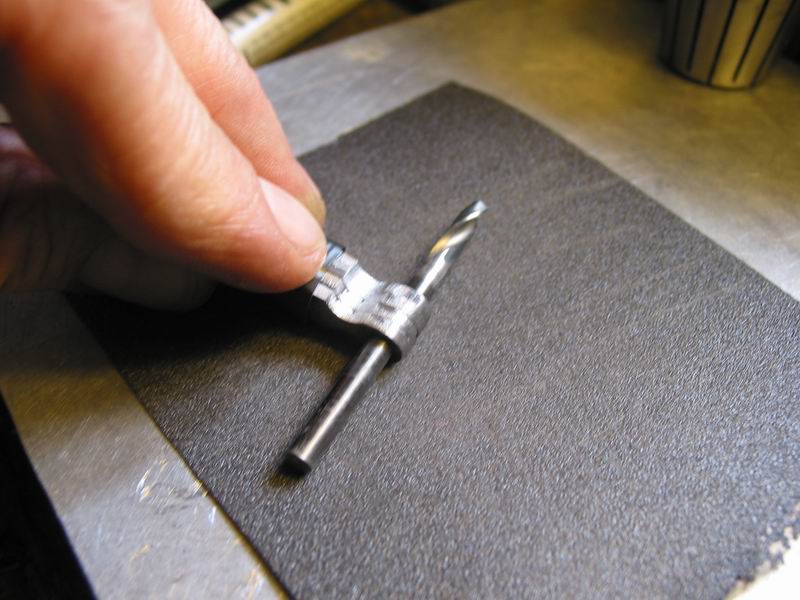
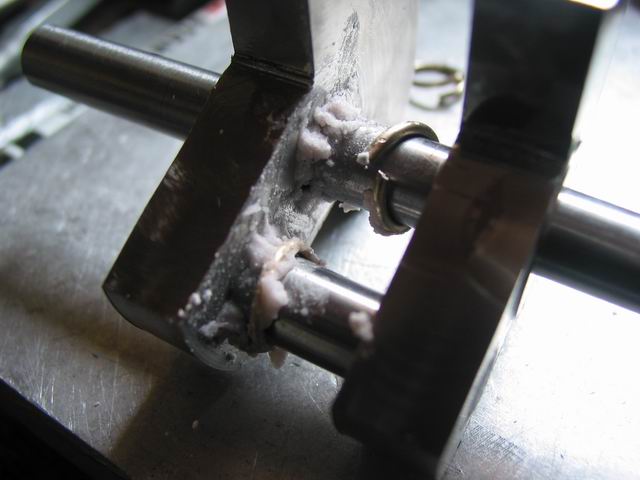
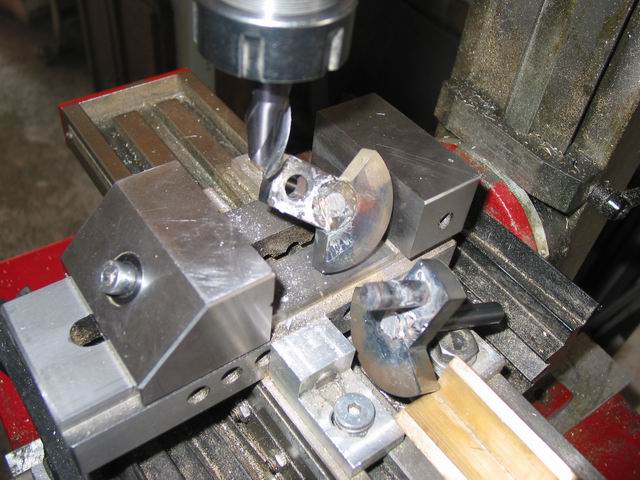
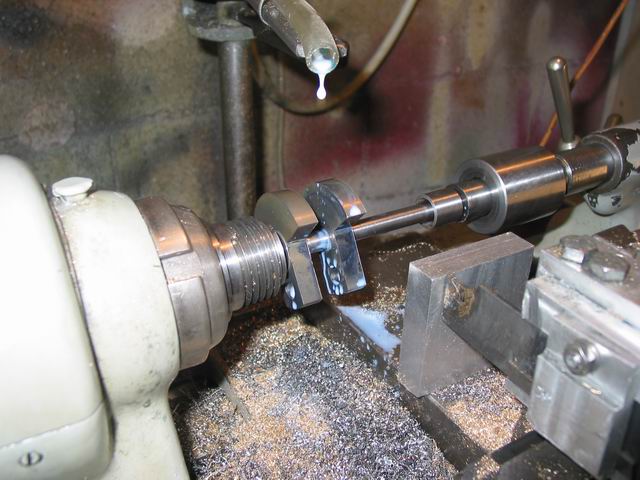
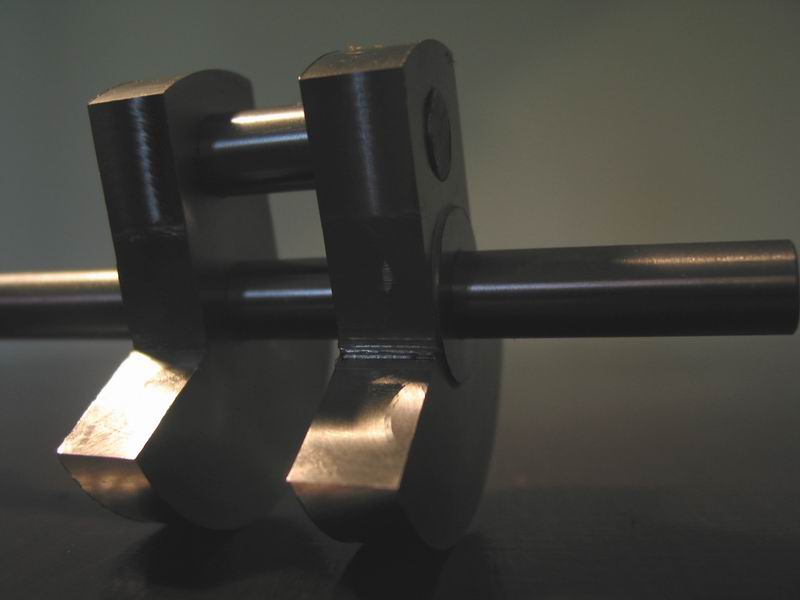
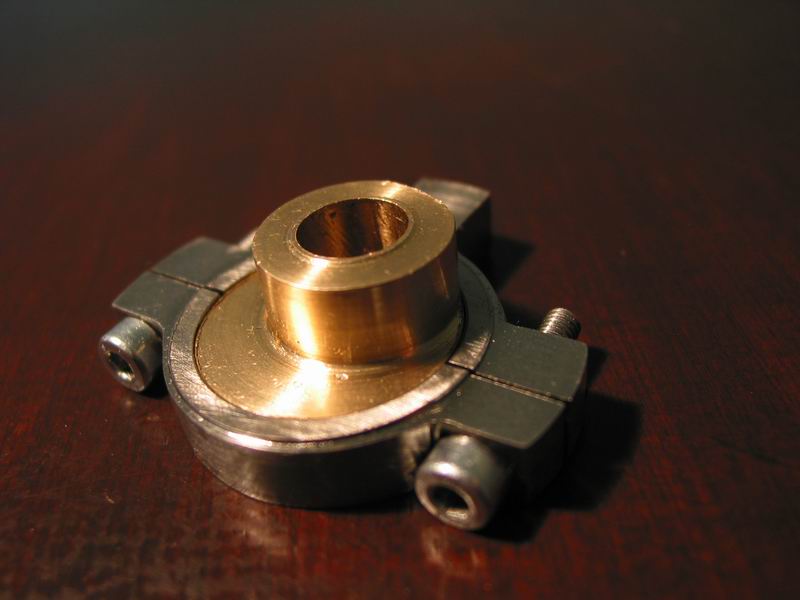
also the eccentric strap was made of titanium, and was a real pain
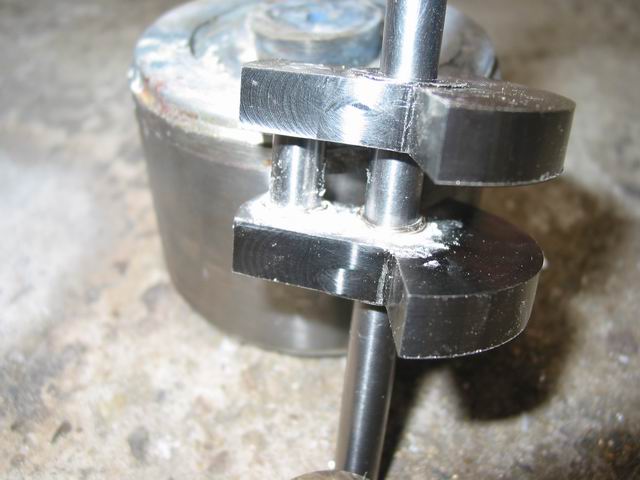
another pic of the eccentric
obg_engine7.jpg


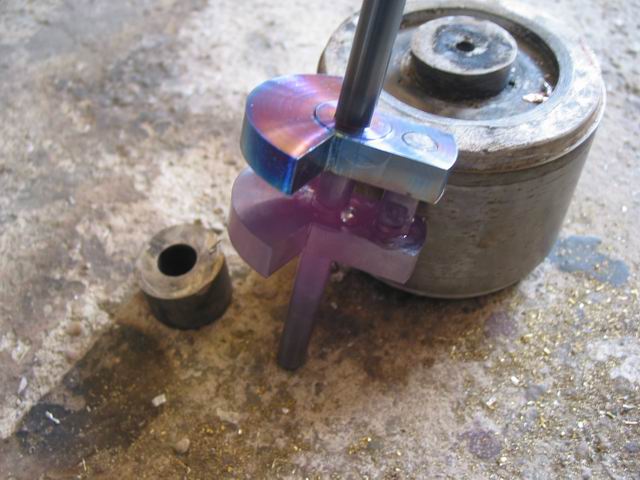
no problems on the cilynder

engine_obg6.jpg


engine_obg7.jpg


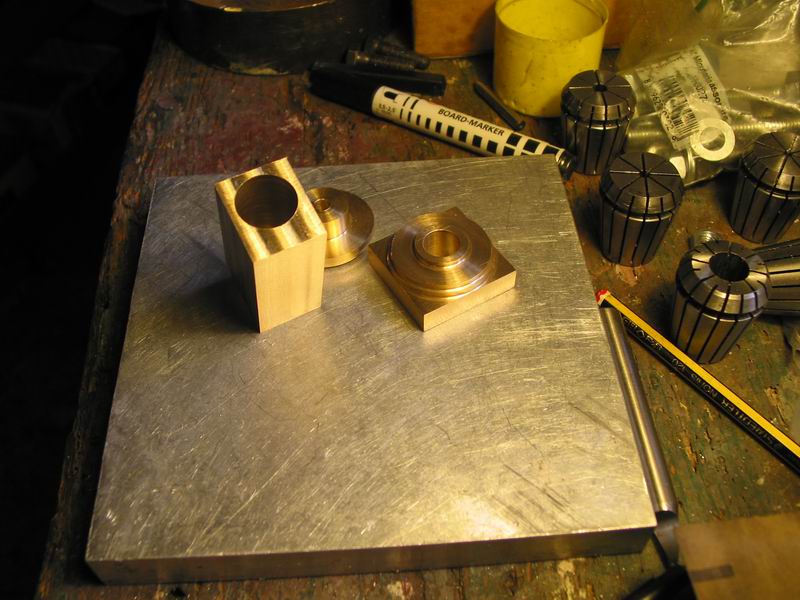
nor on the steam chest

obg_engine8.jpg


I'm here for now, they remain many parts to do
but the obg's plans are missing of some parts (in fact there aren't the page n 7 and others), so I have to design the parts that are missing

that's all. if I did something wrong in this post (too many pics?), please let me know
if I did something wrong with the engine, let me know too!!! ;D

thank you


Welcome ariz ! Great start on the engine !! Don't worry about too many pictures. We all LOVE seeing pictures of engines and especially as they are being built :)

Do you have a link to the plans we can check out ?

Mike
 
Looking great and welcome to the board airz. We diffiently want pictures here!

Edited to add: BTW how does the titainium to machine?
 
thanks

titanium likes high speed, cut and feed. this is the only manner to obtaining good results
if you don't go in this way, the finish is poor
working titanium produces high temperatures, so HSS tools aren't the best choice. go with inserts instead
and it is flammable! I didn't think so, it is a metal, how can it burns? but it burns!
if you machine it with light cut, the fine chip (that seems something like wool) catch fire easily
all these facts regarding the lathe. and IMHO

with the mill I never obtain good results, but my english is too poor to try a description here :)


Very nice start!!! :bow: Looking great and welcome to the board airz.
Cheers Paolo

 
grazie Paolo
sono felice di vedere un altro italiano sul forum; ammiro i tuoi lavori e le tue capacità, magari ti chiederò consigli in futuro...

while I'm replying to Paolo in italian, I wish add that I converted the measures of the obg's plans to metric, and multiply them for 1,5
I'm not ready for high precision fits, like requested on very small pieces, and I like to see large engines, they seem more... more important to me :)

 
Thanks a lot ariz... Maybe we are tracing the route for others Italians enthusiast!!
Cheers Paolo
 
Benvenuto e vi prego di postare un sacco di foto. Noi tutti possiamo imparare da nessuno, non importa come nuovo!
 
Metal Mickey said:
Benvenuto e vi prego di postare un sacco di foto. Noi tutti possiamo imparare da nessuno, non importa come nuovo!

And the Yahoo Babel Fish translation is "Welcome I pray and you to mail a bag of photo. We all can learn from nobody, we do not import like new!"

Hmmmm, I'm not sure that that is 100% correct ??? seems a little odd ;D

I don't speak or read the language, so I had to go the fish.

Phil
 
Goole translation:


Welcome and please post lots of photos. We all can learn from anyone, no matter how new!
 
Hi ariz. Your project is going well. I'm following your build with great interest and look forward to your posts.

If I may, I have a question about your crankshaft.

How did you line up the parts and assemble them? I don't see any trace of solder or brazing.

Thanks.

-MB
 
thanks to all :)

well, i worked the crankshaft on the lathe (diameter and center hole) and the mill (the other hole) in ONE PIECE, to be sure that everything was perfect, and AFTER I parted it on the lathe again

I saw here in the forum that there are other ways to do crankshafts precisely, but a few weeks ago I didn't know them ???

because the fits are very precise, for now I had not soldered the crankshaft to the shaft, and I'm not sure to do it anyway, because I don't know how titanium will react
probably I'll use some loctite instead

 
some other parts finished, but I'll post the pics in the next days...

today I worked on these 4 little pieces, and wish to report this experience :)

001.jpg


I don't like this type of work, rounding the OD of the link extremity, perhaps because I'm not very good in this performance :)

Started with the usual approach

01.jpg


I have learned after numerous errors and reading in this forum that in this situation the climb milling is to avoid like pest
in the pics above, and below, only the left half of the mill plate is safe: if you move your piece (and fingers) to the right, forget them all!

02.jpg


to refine the curve on the inner part of the link I made this set up

03.jpg


and to mill the straight part went in this way

04.jpg


a final grinding with emery paper...

05.jpg


and these are my 4 links: not perfects, but the critical measures (the holes) are ok

06.jpg


in another post someone asked about the missing page (n. 7) in the oldboatguy's plans...
nobody has seen that page, but I suppose that there were the draws for the mounting block of the 2 main shafts, because they are missing
I made them anyway, they are marked with a red arrow in the pics below

07.jpg


I don't know if they are correct, when everything will be connected I'll know :(


Hey Ariz;

Been following your post from day one and I admire your work I have been wanting to build that same engine but I have been holding off on starting tell all the plan's are there but have finally decided to go ahead and start as soon as I get my lathe up and running. but that is another story. I thought what wasn't there I would just make on my own. Being a machinist for thirtysome years I should be able to figure out something I even sent oldboatguy a personal message about those missing plan's but didn't here anything back from him. Cliff
 
Thank you Cliff
I'm sure that you have the experience to make this and others engine as well

what is the problem with your lathe?

oldboatguy doesn't frequent this forum from a while and nobody of us can reach him

other persons wrote to him for those missing pages, but he didn't reply to anybody

regards
 
Hey Ariz

I have a Smithy Three in one machine that was setting out behind the garage it the bench I built for it and some other things were all covered up out of the weather but some how they got uncovered and due to health issues I couldn't get out there to look after it but things are different now my health issues are in proving to where I can do some things I got the lathe in my garage along with the bench which is ruined so I am getting ready to make a new bench and recondition my lathe so I can use it I got some engine's I want to build I am planning on making a post when I build my bench and rebuild my lathe Cliff.
 
pleased to hear that your healt goes better

we are waiting for your post about reconditioning the lathe and bench and (after that) on your engines

good luck

 
disaster today

attempt to silver solder the crankshaft: steel shaft and titanium counterweight

after having thoroughly cleaned the parts, positioned 2 circle of silver near the final position (the pic shows 4 circles, but only 2 were used, to solder first one side and then the other)

s-sold01.jpg


after that, applied the flux


s-sold02.jpg


then pushed the 2 circle of silver lower


s-sold03.jpg


at this point I started to heat the parts, the shaft of steel and the lower counterweight of titanium, as for instructions and like I made a couple of times with others materials, obtaining good results


s-sold04.jpg


I repeated the sequence with the other side, and this was the result:


s-sold07.jpg


everything seemed ok, so I started to cut the unnecessary part of the shaft. I soldered the shaft in this way to better take the parts in line, instead to solder the 2 part of the central shaft already parted

s-sold08.jpg


but the disaster was imminent: as soon as I put the piece on the mill for a light touch to clean the splitted parts, the whole damned crankshaft broke as a cookie :'(

s-sold09.jpg


so, in my experience titanium is a metal that doesn't solder
don't know why, but I think to have soldered the parts in the right way. or not?
anyone can make some suggestions about my negative experience?

anyway, after a moment of dejection I decided to join the parts with 'Attak' or 'Loctite'. Then I cut the parts in this way

s-sold11.jpg


s-sold12.jpg


this is the final result: it isn't so bad, but the silver soldering joint was been preferred

s-sold13.jpg


bye


EDIT (a day after):
I suspect that I failed to silver solder the crankshaft because of a wrong flux.
I had not the flux for silver, so I used another flux for brass: I think that this flux works at different temperature, probably at higher temp
May be that a wrong flux was the reason of the mistake?

thank you
best regards
ariz
 

Latest posts

Back
Top