Mega Cyclone

Home Model Engine Machinist Forum

Help Support Home Model Engine Machinist Forum:

This site may earn a commission from merchant affiliate links, including eBay, Amazon, and others.
I think it will be around 10" in diameter Chuck. I got the metal for the con rods cut out today. In the morning I'll start squaring up the blocks.
 
Ugh... con rods are my least favorite things to do. Very nice when done right, but a lot of work. I probably need to spend some time standardizing my methods and making some jigs.

Chuck
 
I've only made a few engines. I think Con rods are my least favorite part. These won't be too fancy. They'll be on the inside. I seem to have a hard time making them look nice. Maybe these bigger ones will be easier?
 
Was I reading that right? 0.125" off the diameter in one pass? That must be a sizable machine...I get scared around the .01 mark with my mini-lathe.

Appreciated seeing the video. It helps me a lot as I've still got a lot to learn about speeds and feeds.
 
We have an Ameraseiki CNC lathe at work with a 30 HP spindle motor on it. 2 weeks ago we were roughing some shafts with 1 inch cuts off the diameter. Other than it sounding like someone was shooting gravel at the door you couldn't tell that we were taking such a big cut. The load meter was hitting 110% at times ;D

If you have any questions Zeep just ask. But experience is the best teacher. You just have to make lots of chips.
 
The crank valve has been bugging me so I decided to work on that some today. I set up my dividing head and lined everything up.

Crankvalve002.jpg


I set up my height gauge to the center of the valve then scribed some indexing lines on it.

Crankvalve003.jpg


I couldn't find my edge finder, So I used a piece of paper. That will be close enough for these slots.

Crankvalve004.jpg


I then started machining key ways around the shaft the "hard way". It went pretty good. My Chinese end mill went dull, but I made it through.

Crankvalve005.jpg


After I had the keys machined I needed to drill a port to connect the intake port to the hole in the center of the shaft. I started with a center drill.

Crankvalve006.jpg


I then drilled the hole to size.

Crankvalve007.jpg


Here Is what I have now. There are a few more holes that get drilled and tapped yet. It will take a few more setups to get them though.

Crankvalve008.jpg
 
Powder keg said:
I'm making this engine twice as big as the plans call for. This engine is neat because the engine spins and the crank is stationary.

I found this funny because I am about 95% done with a 5 cylinder that works like yours only i shrunk it down from mega to 1/3rd size.

I'll be watching!

 
Thanks for the progress shots, Wes.
Man, I hate it when an end mill starts giving up the ghost in a cut. That's how it always happens. ; )

Dean
 
I managed to donate 2 con rods to the scrap bin today. Having troubles. I have a .3125" reamer that is chattering BAD!!! I was going as slow as my mill will go????? I might just drill the holes? Maybe I'll do a few more test holes???
 
Sounds like time for the mythical D reamer, Wes.
: )

Can you drill them large enough to bush them, and save the ruined rods?
 
Wes,

A short steep taper at the start of the hole sometimes helps get a reamer started without chatter.

Hope this helps and bad luck about the rods.

Best Regards
Bob
 
I'll have to look into those D reamers. I have a heat treat oven now\o/ I could have a chance to use it ;D There's not enough room for sleeve I don't think?
 
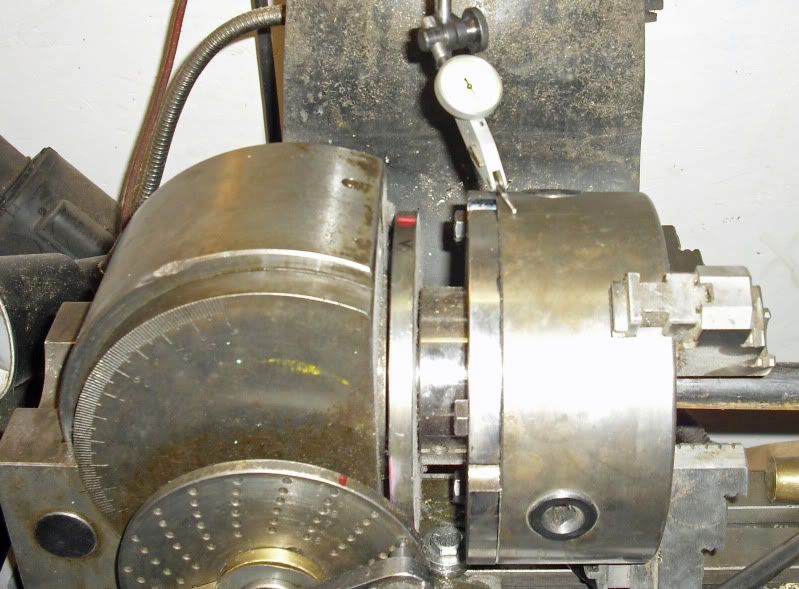
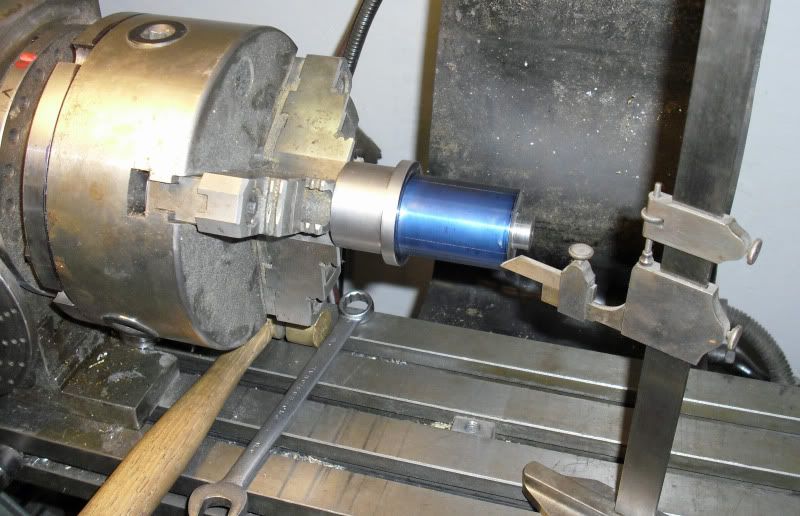
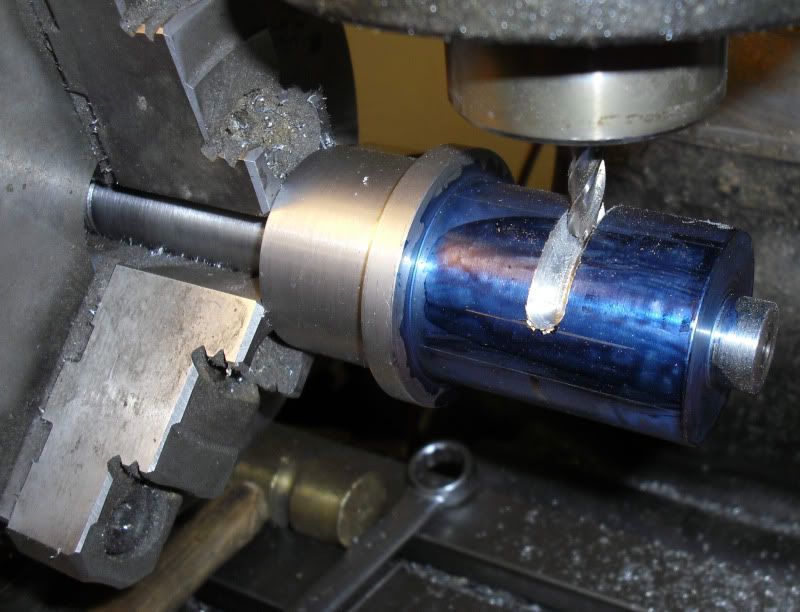
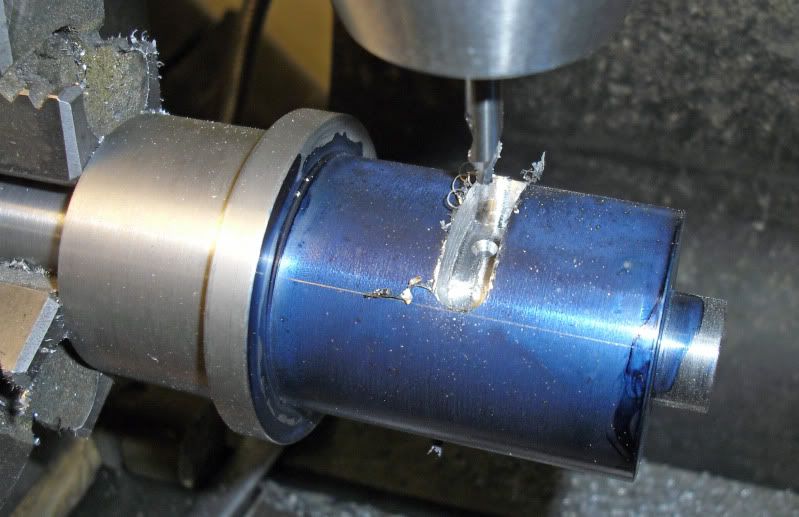
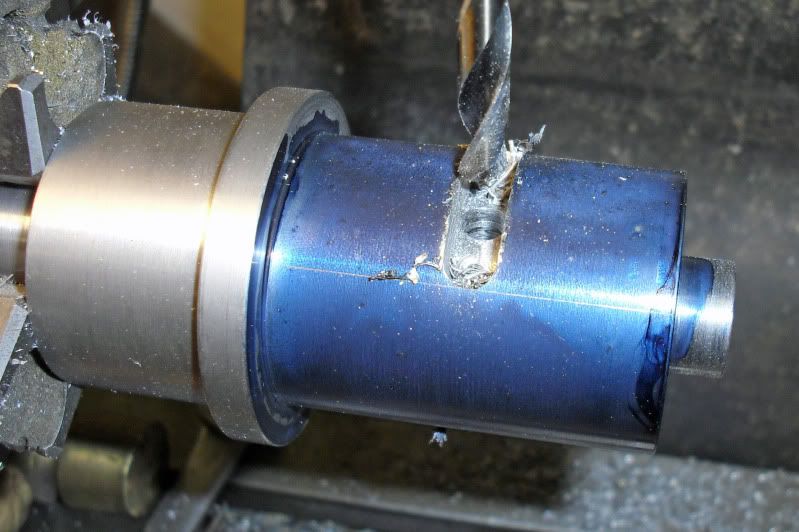
I made a d bit reamer for my rocking engine bore and it worked perfect. It was brass though.

I followed the instructions given here before and had no problem making it.

I did file the relief on the front and side before heat treat and I used water hardening rod, quenched in oil with no temper done.

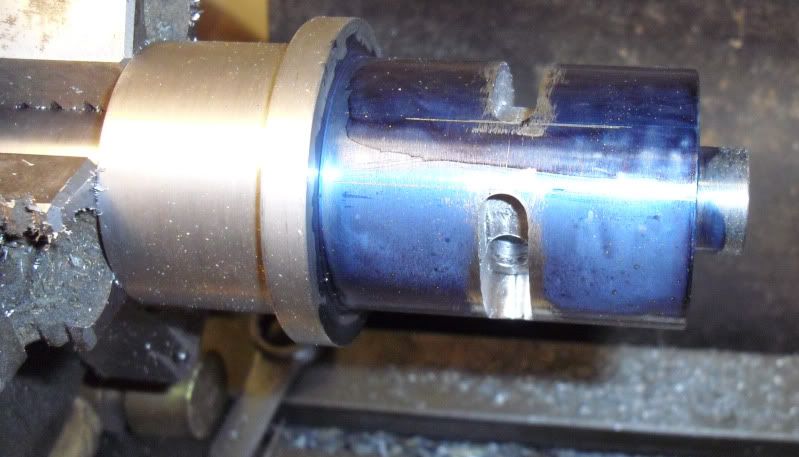
Worked really well. Another way to go might be a tool makers reamer. Just remove metal on the bias, like slicing a rod on the diagonal.

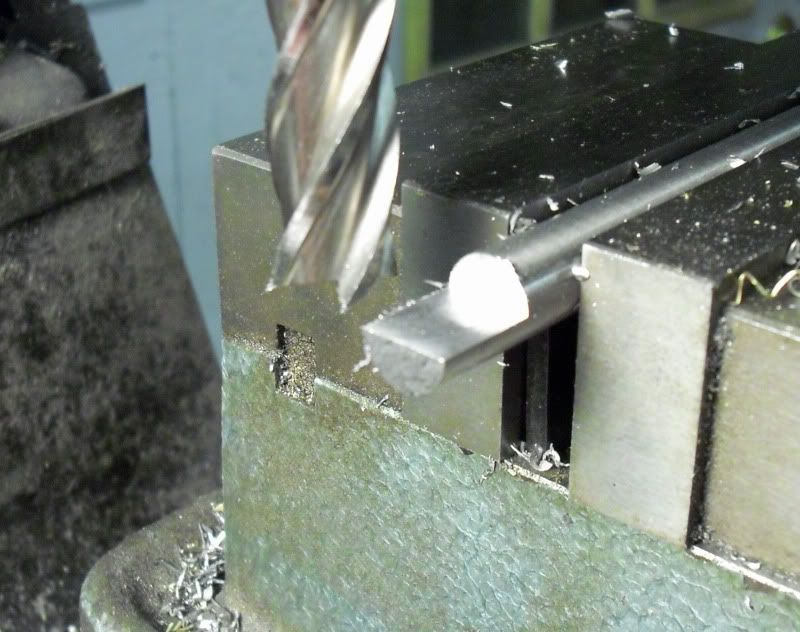
Haven't tried that yet.

Good luck, and sorry about the rods,

Sean
 
Well I have some drill rod to make the D bits out of. Just no time now ??? Maybe after work tomorrow? I'm curious to see how they work now. It can't be much worse than the reamer I used thats for sure\o/
 
PK;

When you make them, could you take some pics? I like to see how you go about doing that.

Matt
 
I have a good start on my D bit reamers.

Dbit001.jpg


I just need to grind the end relief on it. I don't think I'll even heat treat them? I'm just cutting brass.
 
Wes,
You might want to mill the side, not the top. That will give a gradual taper to the tool instead of an abrupt end. This stress riser could make the tool prone to crack at that joint.

I heat treated mine because I wanted it around for a long time. I don't know if it will matter otherwise.

If you need a pic I will get one up tomorrow as the camera is at work ::)

Sean
 
Thanks for the tip Sean. I'll reember that for the next one:eek:)
 
Tried a couple test holes. the bits need to be heat treated. I messed the bit up that I made. Well, I decided to go back and see what's up with the reamer. Turns out that I drilled the hole to small and the reamer was cutting too much. I now have three Con rods drilled and reamed. I think I'm going to finish them up on the rotary table.
 
Back
Top