Well, I was able to spend a little time on the Otto this afternoon and nailed down the vapor tank. It works excellent and looks good to boot!
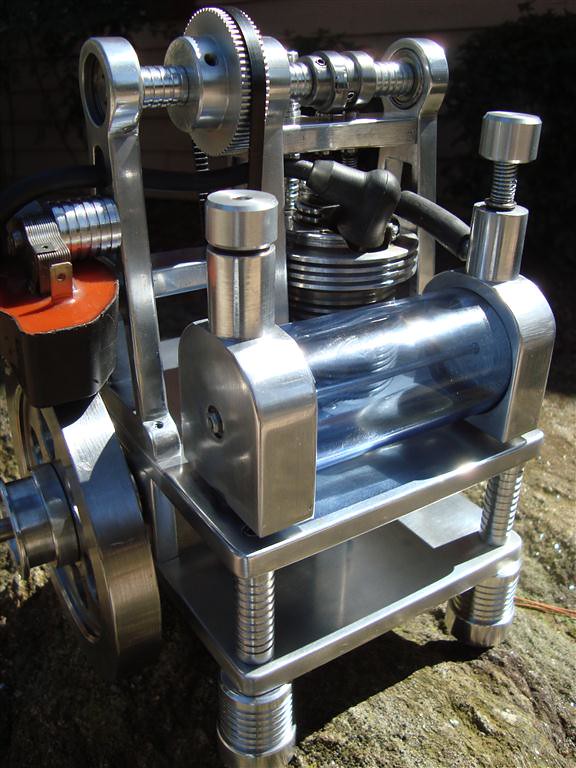
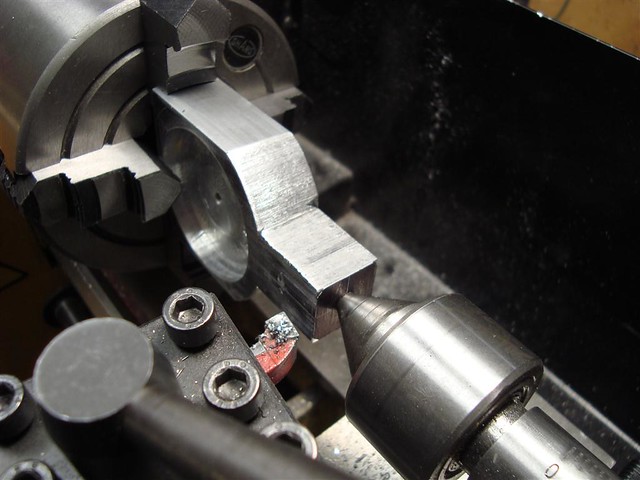
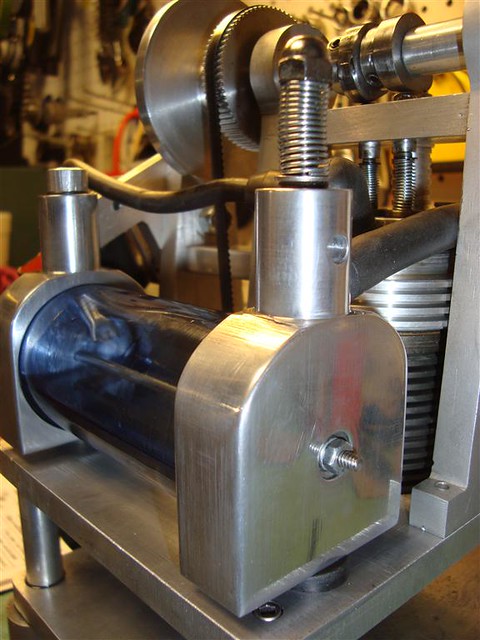
I roughed out the sides and then turned the top portion on the lathe. It serves no real purpose to be round, I just thought it would look better.
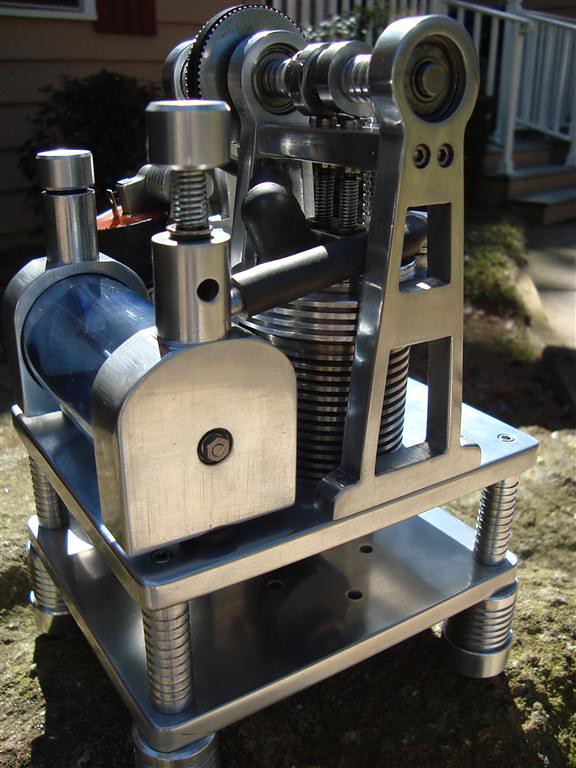
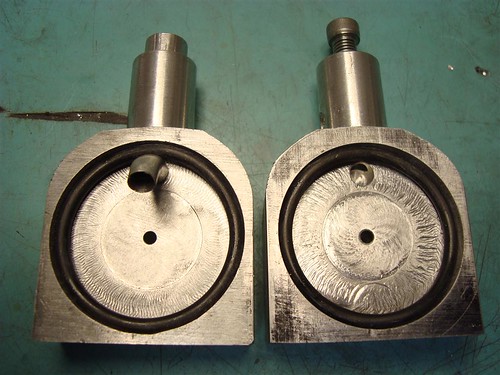
The insets were milled with my new rotary table. There is an o-ring that goes between the sides and the 1.75 od glass.
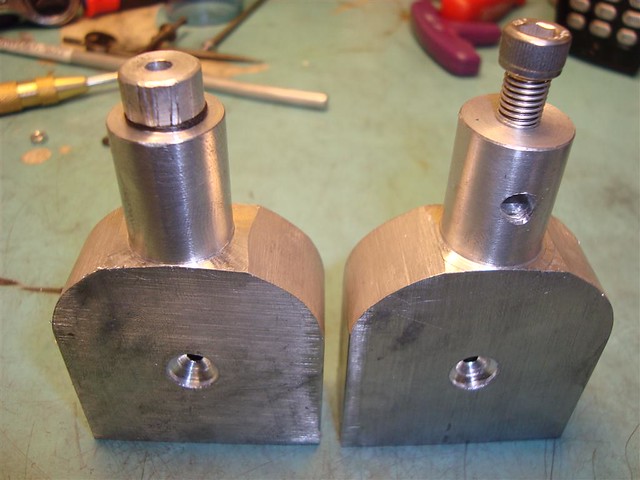
The throttle/air mixture is controlled with a socket head that screws down and covers the air bypass hole. The other side is the filler.
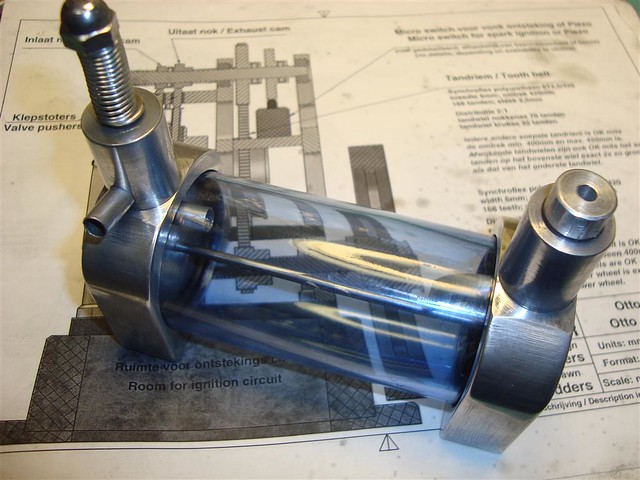
The Vapor tank finished. The glass was a bud vase and has a blue tint.
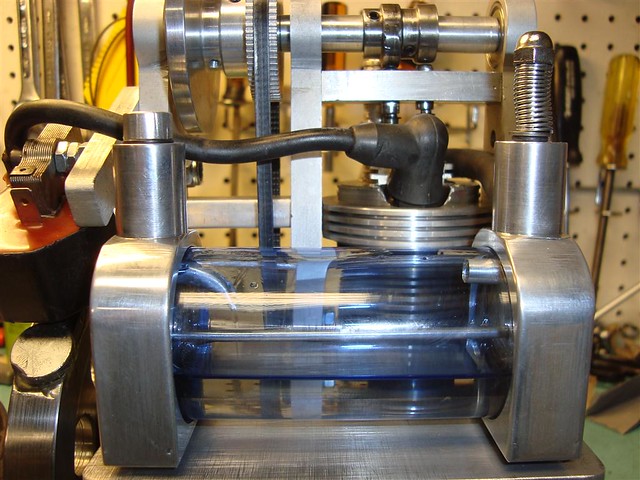
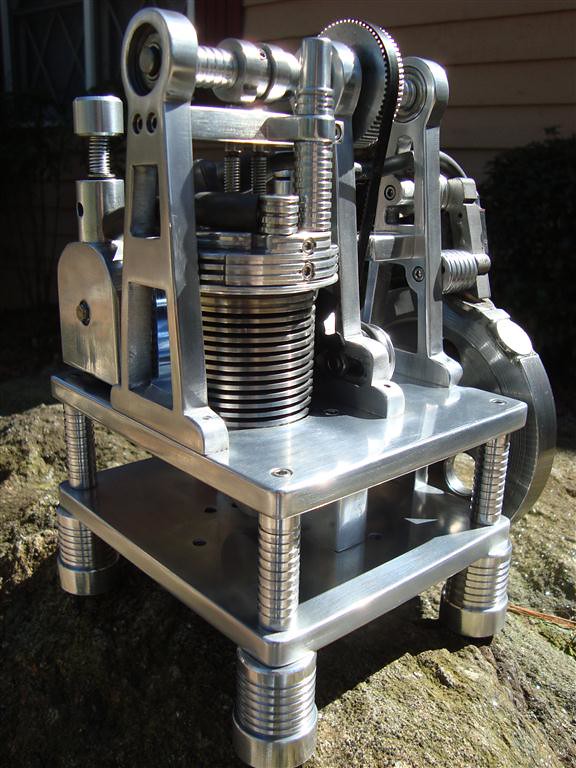
The engine running with the new tank and magnets set into the flywheel for balance. The motor now has full control of the idle with the mixture and it will rev from 800 RPM to 3500 pretty quickly.
[ame]http://www.youtube.com/watch?v=hn7zR3ZTI6M[/ame]
You can control the Revs with your finger covering the air bypass hole. With it open, it is too lean so it slows to an idle. With your finger over it, the mixture enriches and she speeds up.
[ame]http://www.youtube.com/watch?v=llP3vhi8jkM[/ame]
Now to make a permanent mount of the coil and then pull it all apart and polish it all pretty.
More to come...
Doug
I roughed out the sides and then turned the top portion on the lathe. It serves no real purpose to be round, I just thought it would look better.
The insets were milled with my new rotary table. There is an o-ring that goes between the sides and the 1.75 od glass.
The throttle/air mixture is controlled with a socket head that screws down and covers the air bypass hole. The other side is the filler.
The Vapor tank finished. The glass was a bud vase and has a blue tint.
The engine running with the new tank and magnets set into the flywheel for balance. The motor now has full control of the idle with the mixture and it will rev from 800 RPM to 3500 pretty quickly.
[ame]http://www.youtube.com/watch?v=hn7zR3ZTI6M[/ame]
You can control the Revs with your finger covering the air bypass hole. With it open, it is too lean so it slows to an idle. With your finger over it, the mixture enriches and she speeds up.
[ame]http://www.youtube.com/watch?v=llP3vhi8jkM[/ame]
Now to make a permanent mount of the coil and then pull it all apart and polish it all pretty.
More to come...
Doug