DRILL JIG--45 DEGREE ELBOWS

Home Model Engine Machinist Forum

Help Support Home Model Engine Machinist Forum:

This site may earn a commission from merchant affiliate links, including eBay, Amazon, and others.

Brian Rupnow

Design Engineer
Project of the Month Winner
Joined
May 23, 2008
Messages
14,991
Reaction score
8,285
Location
Barrie, Ontario, Canada
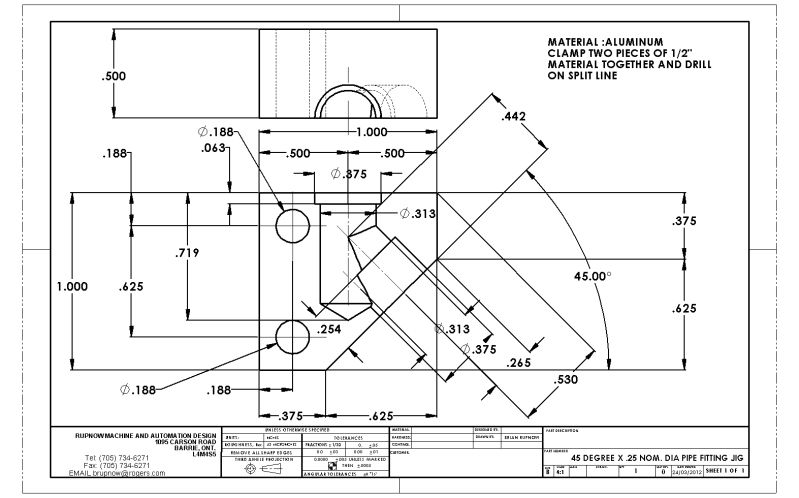
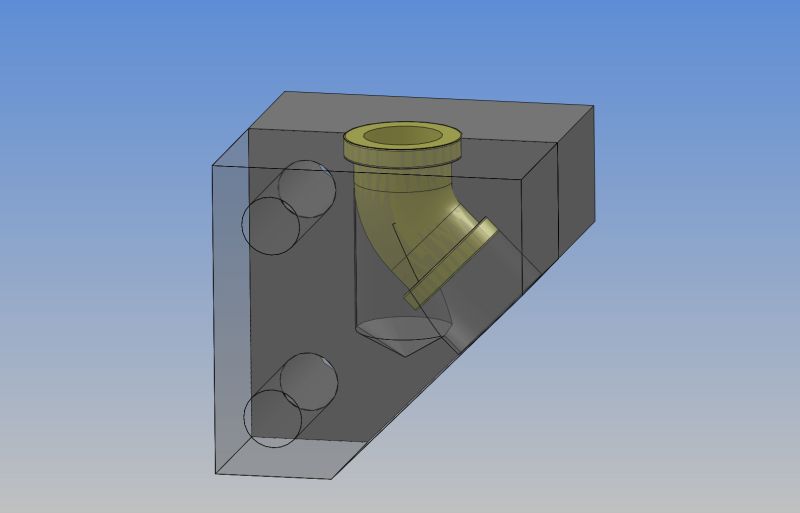
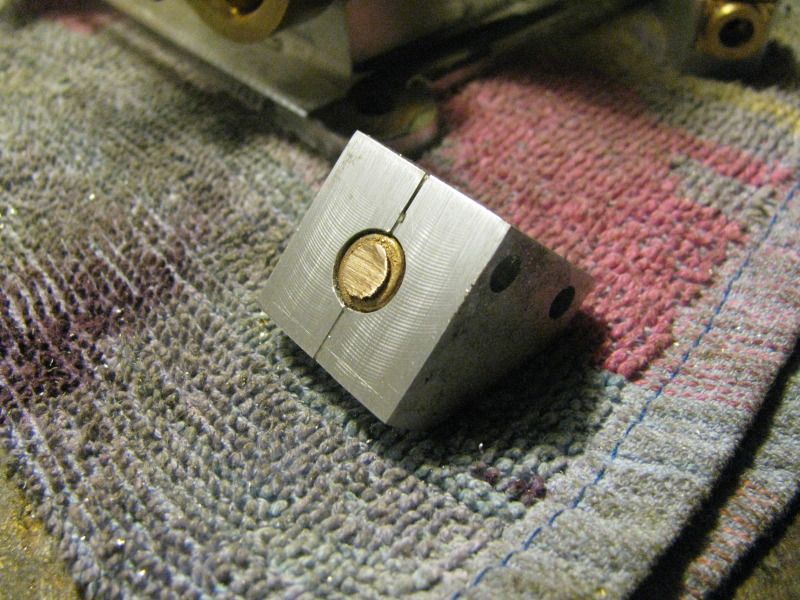
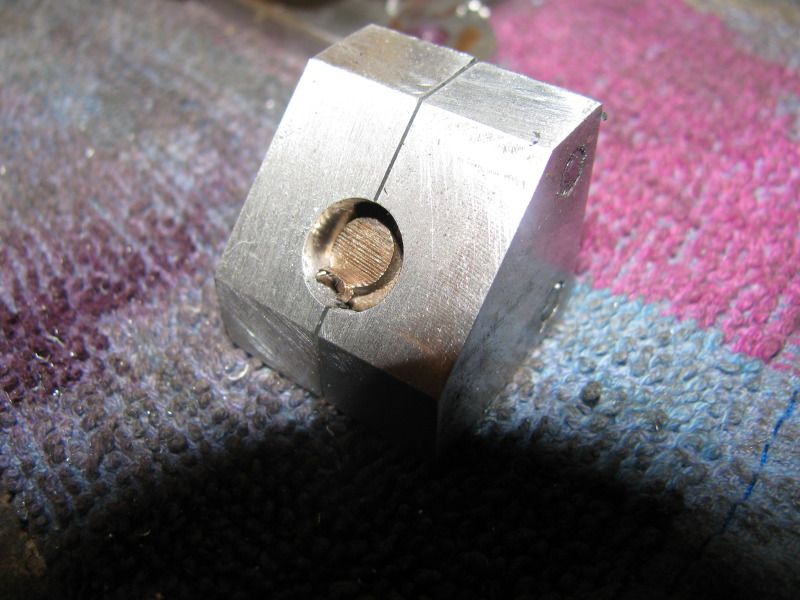
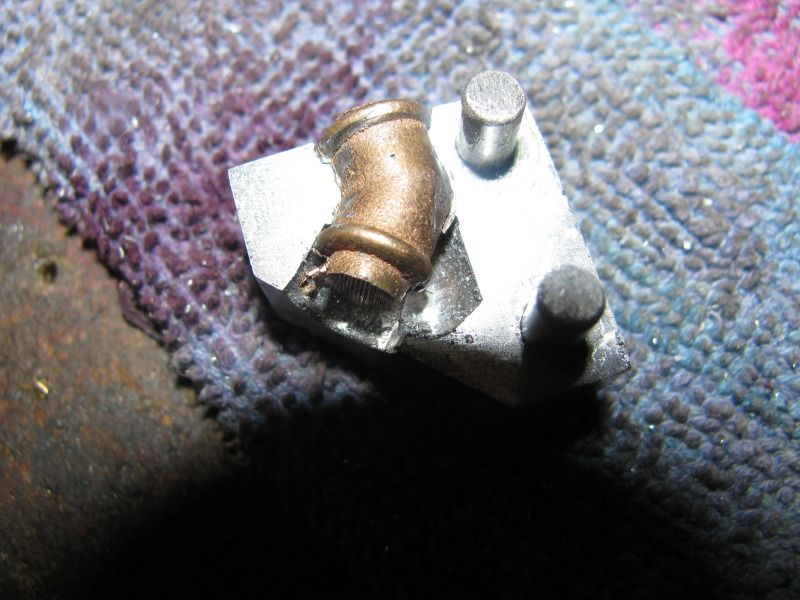
Earlier this week I fabricated and used a simple drill jig designed by MetalButcher to machine and drill some 1/4" x 90 degree PM Research elbows. It worked very well, and now I am faced with doing the same machining and drilling/tapping some 45 degree x 1/4" elbows. I have put together a quick and nasty jig drawing so I can do my 45 degree elbows now. Unfortuanately this jig will allow me to do only one side of the elbow, then I will have to open the jig and flip the elbow around to do the other end. There are reasons why it is like this, mostly having to do with the fabrication of the jig itself. I will make one according to this drawing and show you my results.-----Brian
45DEGREEX25NOMDIAPIPEFITTINGJIG.jpg

TEMP45DEGREEJIG.jpg
 
I built the jig to the drawing and it got me 90% of the way there. The other 10% was "fine tuning" with a Dremel and a file. I think it will work fine, considering that there is a lot of flash and "non uniformity " to these small castings. There certainly is no other good way to hold these things for machining where you can be sure they won't move part way through the operation. Don't expect these fittings to "fall" into place in the jig and let you close it by hand. The last 3/16" of gap is closed by putting the jig in your mill vice and giving it a good squeeze.----BUT----With a good squeeze it does close the gap 100%.
45degreeelbowjigpictures001.jpg

45degreeelbowjigpictures003.jpg

45degreeelbowjigpictures005.jpg
 
Quick yes, but nasty , no!
another idea to file away.
thanks for posting it

yours
peter
 
This was one of those great ideas that didn't work out so well. I think that removing the part from the jig and flipping it end for end before drilling the other end was a bad idea. The jig is accurate, but the drilled parts were all "off" in terms of the included angle. I think that if I use this jig again I will modify it to allow all the machining and drilling and tapping with the part never being removed from the jig.---Brian
 
Brian,

Why go to great lengths to do a very easy operation.

I haven't tried it out, but surely, a jig made up like the C-o-C shown at the bottom would cope with EVERY type of joint. Just one for each size.

There is no need for orientation, as all you are doing is drilling a hole straight down to join another hole.

I will most probably have to make a jig up just to prove it's worth on the 1/8" fittings I have.


John

Drilling Jig.jpg
 
Bogs as I said in the 90-deg elbow thread I don't think its worth using a jig as the castings vary. At least without the jig you can eye ball the hole central on each fitting, looking a Brians jigged ones several are off where the fitting has sat cocked in the jig.

The problem of distorted castings gets worse as the size comes down, 10thou mould shift on a 1/4" elbow looks a lot better than the same 10thou on an 1/8" fitting :(

J
 
A timely topic as I have a number of 5/16 elbows to drill and tap for my loco coming up. Bogs' COC plan looks like an easy one to try out.
 
With no experience to point to, I think I would screw a 2 inch nipple into the first tapped end and use that to gauge the angle for the second end. It would seem difficult to spot mold shift with the part buried in the mold.

Jerry
 
Jerry, that's just what I did, just left a tap in the fitting and used that to reference to when I set up for the second hole.
 

Latest posts

Back
Top