Crusader .60s (x2)

Home Model Engine Machinist Forum

Help Support Home Model Engine Machinist Forum:

This site may earn a commission from merchant affiliate links, including eBay, Amazon, and others.
wareagle said:
Well, my goal of having this engine completed by the end of the year is now looking to be in jeopardy and the ability to pull it off is swiftly eroding away!

Don't sweat it
f.gif


When the time is right the time is right.
hammer.gif


Deadlines are only an aid to being dead before your ready
mghyper.gif


We are all pulling with you on this one
hugs.gif


Best Regards
Bob :)
 
Phil & Bob,

Thanks for your words of encouragement! I am not giving up by any means, just a bit disappointed that I won't have it done as soon as I had hoped. With as busy as things have been over the past couple of weeks, I have been way too tired to be safe and productive out in the shop when I have had that bit of spare time. ::)

The next month will be very busy for us and it doesn't look like things will let up until the middle of January. Hopefully between now and then I can finish this one up, have the required video up and be starting on the next one. Aside from the small little fixtures and other odds and ends that will be made on the machinery, I am planning on one engine project per year for at least the short term future.

Maybe I need to get some coaching from Brian!!! He sure has been able to knock one out with much quickness!!

Thanks again guys!! :bow:
 
WE .............. the guys are right .......... (much) better late than never ;)

just take your time and it will all come together when the time is right

just my take ::)

CC
 
WarEagle

What your doing is looking great so far and I'm sure that when finished it will be impressive. Remember that his is your hobby and is supposed to be fun and relaxing. If you don't get it finished till Xmas 2009, then that is fine by me. Work on it at your own pace and it will all work out for the best. When ever it shows up we will all be here to look it over.

cheers :bow:

Don
 
It is funny how life works its way into things. Work, family, spouse, friends... Pretty soon, the days turn to weeks; the weeks to months; the months to years. A lot has transpired since then, but it hasn't involved much in the way of working with the machinery. Nonetheless, life has been good for us, so no complaints.


Well, after reading this topic here on HMEM, I have been inspired to jump back on the Crusader project and see about wrapping it up. When I started this project over 2 years ago, I had started taking the HMEM community along with me. So, here we are a bit over two years later... Resurrecting a "dinosaur" thread!


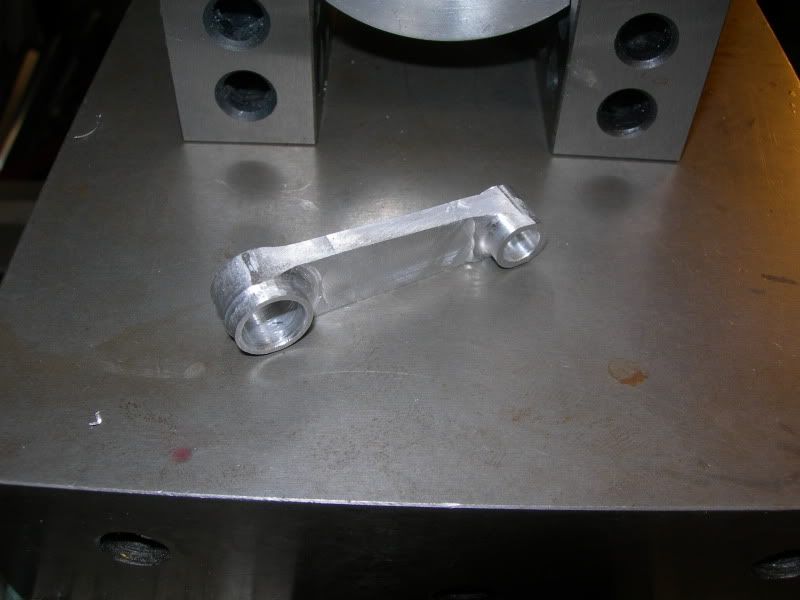
Okay, so back to it. This evening was spent going over the pieces that have been made, checking measurements, reviewing the plans and getting a feel of where I left off. The remaining items are the piston, connecting rod, valve and bushing, exhaust manifold, bypass cover, carb assembly (which may go commercial), hub, spinner, and some misc. hardware items.

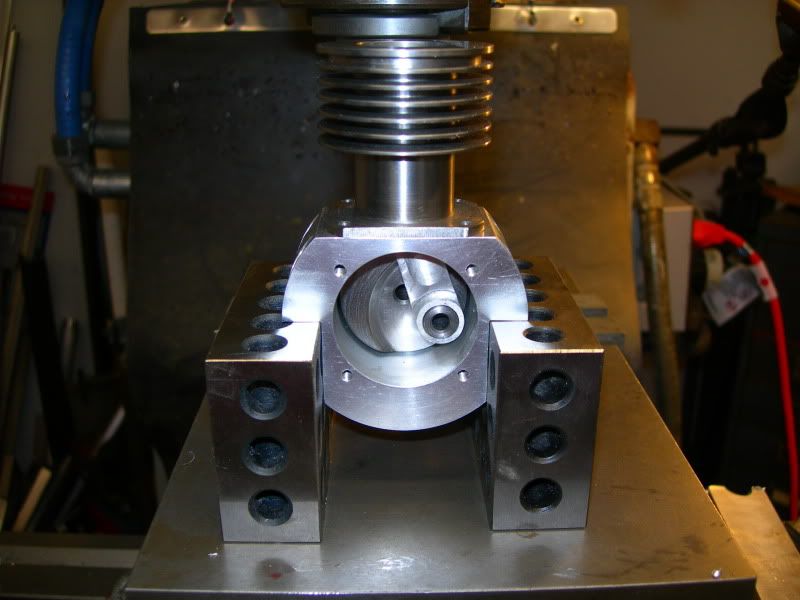
Existing parts that have machining (beyond drilling/tapping) left are the head, rear engine plate, and cylinder.

When I had to set the project aside, I took the time to put a light coat of oil on the pieces and store them in plastic bags. A quick cleaning and we are where we left off without the issues of corrosion and dust.

There are a few things I need to gather up in the way of bar stock, so a trip to the local metal supplier is in store. I'll get by this week and gather up some materials, and hopefully have some pictures with fresh chips to share in a few days.

'til then,
An excited and reinvigorated Wareagle!


Wareagle

Glad to see that you are getting back to the Crusader build. I will be following along as you progress. Best of luck in 2011. :bow: :bow:

Cheers :)

Don

 
I was reading the other day, came across one of your posts, and realized I hadn't seen you for a while.

Glad you're back!
 
WE,

I hope the Grizzly can handle the shock ::) Nice to have you back in the saddle.

Best Regards
Bob
 
zeeprogrammer said:
I was reading the other day, came across one of your posts, and realized I hadn't seen you for a while.

Glad you're back!

It is great to be back!

Maryak said:
WE,

I hope the Grizzly can handle the shock ::) Nice to have you back in the saddle.

Best Regards
Bob

Bob, if the ole Griz can't handle the shock, then we'll find one that can! ;D I imagine it will be like rekindling an old flame; great in the beginning, but fizzle back to the same old arguements (just won't leave 'er in the ditch this go). LOL!


Well, the trip by the metal place yielded a disappointment... missed them by about ten minutes! Oh well, tomorrow is a new day and it will give me a chance to work on the pieces I have started. Let's see what I can accomplish (or scrap) this evening...
 
Well, I was finally able to get by the metal place and pick up a few odds and ends. I thik I now have the majority of what I need to complete this project.

And... A few chips have been made as well. (Bob, I am happy to report that the Griz was happy to see me.) Started machining the piston by facing and turning down to the OD. The plans call for the piston to be made from fine grain cast iron. Rather than reinvent the wheel, I am going with what the author specified. I figure that the piston could probably be made from 2024, but that may be an experiment for a rainly day.

Not a whole lot of progress, but progress nonetheless! ( no pics... nothing really to show :-\ )

Today, I had grand visons of chips flying through the air while singing the praises to the machinery gods, but another project was placed in front of the Crusader that demanded my attention. Not of the honey-do variety! This one was with my boy. He is in scouting and this is the time of year for the Pinewood Derby.

So, instead of making chips I was making dust. He and I did manage to get a rough shape of a car for his project, and he is now trying to figure out what color he wants it to be (oh, the difficult decisions in life!). It was a great day spending time with him in the shop, coaching on how to work with a file, making sure to sand with the grain, checking the all important weight and other various tidbits.


DSCN4085.jpg


We'll have to see what he decides for a paint scheme. He has already said it has to have flames on it. Almost brings a tear to my eye. ;D Over the next few days, hopefully we'll wrap that up and I can get rolling at a steady pace on the Crusader.

Oh, how sweet it is to be making some chips!
 
Thanks for the picture of the Car!....Cool... needs a skull on there somewhere too I think..don't you?

You gotta put a hemi in that too....you just gotta.. ;D

Dave
 
Glad to see you back at it WE.

I built one of those cars with my Dad. We put bearings in the axles and everything. Got beat by the ugliest, ricketiest one out there! Got any lead handy?

Have fun!
 
steamer said:
Thanks for the picture of the Car!....Cool... needs a skull on there somewhere too I think..don't you?

You gotta put a hemi in that too....you just gotta.. ;D

Dave
I am sure mommy wouldn't appreciate the skull business on Mini-Me's car. Especially considering that she rolled her eyes when he asked for a flame job! But, yes this one is screaming skulls!

As far as the hemi, great minds think alike. I had contemplated buying a plastic model of a dragster and widdling out enought wood to get the engine in it. I figured that little car would look bitchin with a huffer sticking out of the hood and zoomies on the sides! A parachute would add something as well, I think. Holding myself back... This is his project, and I have another engine project myself... Restraint! I must use restraint! ;D

KustomKB said:
Glad to see you back at it WE.

I built one of those cars with my Dad. We put bearings in the axles and everything. Got beat by the ugliest, ricketiest one out there! Got any lead handy?

Thanks! Yeah, we drilled holes in the car and have filled them with enough lead to get it to the 5 oz. maximum weight. We are going to dress the axles (no bearings allowed), true the wheels, and see how we do. Some of the guys are extremely competive, so I am sure it will be an interesting day when we race. It is two weeks away, so I'll report the results... or outcomes of the fights!
 
A bit of free time was discovered this evening, so why not make a few chips? I have a start on the piston, but need to make a holding fixture to continue the work on it, and really didn't want to spend the evening making tooling. I figured the connecting rod would be an easy enough part to work on, and though not expecting to be able to complete the part it would have a large portion of the work done.

I also have plenty of aluminum on hand, so mistakes wouldn't necessarily be a costly event (other than time lost). I started this with locating the RT to the spindle (centers) on the mill. Subsequently a piece of aluminum was fastened to the RT and a hole was drilled for the crankshaft journal.

DSCN4086.jpg


The hole is drilled out and reamed to .500. The next operation is to move the RT off center and cut a relief of .160 around the journal to a diameter of .500. Yes, the dummy operating the mill drilled and reamed the hole to .500. :Doh: The hole is supposed to be reamed to .375 (ID), and the diameter (OD) is supposed to .500. Reading is a wonderful tool! Maybe I should use it sometime! :wall: Oh well, no big deal. Plenty of material on hand, so we will just move the piece and have another go at it.

Piece moved, the hole is drilled and reamed to the proper size and the offset is calculated for the relief. A check and double check here! After all, I have made it past the first hole!

The relief operation goes without a hitch down to the finished depth. So now the end of the rod is being plunge cut with the end mill and all is going well. Until… movement. The holding method, while adequate for light cuts, just wasn’t up to the task of keeping things in place while cutting around the end of the connecting rod. It’s another silly mistake, but one that could have serious consequences (broken tooling, ruined part, both, impaled object, etc.). This time I am lucky.

DSCN4089.jpg


Starting the connecting rod for the third time will wait for another day. At this point, I am tired and have had enough for a night. Even with the bone headed mistakes and nothing to show at the end of the night, it was a whole lot of fun making some chips for a change!
 
It worked out that time allowed the opportunity to have another run at the connedting rod. And this time we have success. At least partial success... Still a lot of material to remove, but it is off to a much better start than yesterday! So far, everything is dead on.

DSCN4092.jpg


If I am able (or paroled by Mrs. WarEagle :hDe: ) to get some time this evening, I will machine around the top of the connecting rod and get it closer to being liberated from the plate.
 
Parole was granted by Mrs. WarEagle, and the connecting rod is all but finished. It looks rougher in the picture than it is for some reason. The tooling marks will be polished out and I will likely break the edges a bit more. Not a lot of progress, but it is more more piece.

DSCN4097.jpg


The rod is a slight bit tight on the crankshaft, but a little massaging will cure that. The build article mentioned that the crank case would have to be relieved to allow the connecting rod to clear. In putting the rod in and moving it to the collision spot, it looks like about .050 give or take will be enough to let it swing. There's plenty of beef in the crankcase, so no fear of breaking out of the side.

DSCN4094.jpg


In further consideration, the carb will most likely end up being a manufactured unit. I gathered up a prop and a fuel tank today. For now, I'll use a plastic fuel tank, but will eventually fabricate a brass tank for display (and running).

Next up: piston and wrist pin
 
Casey

Glad to see that all worked out this time around. One piece at a time and before you know it it will be time to give the prop a flip and listen to it scream. :bow: :bow:

Cheers :)

Don


dsquire said:
Glad to see that all worked out this time around. One piece at a time and before you know it it will be time to give the prop a flip and listen to it scream. :bow: :bow:

Yeah, boo-boos and blunders are still in plentiful supply in the "Eagle's Nest". It is great to know that the old man is still alive and kicking... as in Mr. Murphy! The old bastage. ;)

I have had some good quality time on the machines this evening. At the moment I had to take five and answer an email, but if all goes as it has so far, we'll have a rotating assembly (crank, c-rod, & piston) mated together. The wrist pin is done, and the piston is about 75% complete. I'll update this tomorrow with some pics and a report of where we left of for the evening.

'til then... I hear the machines calling my name! ;D

 
W/E,
It's good to see you back in the shop and moving on with the Crusader.

Are you still planning to build two of them?

Sorry I haven't commented till now. I've been watching but time is in rather short supply the last few months.
 
ksouers said:
W/E,
It's good to see you back in the shop and moving on with the Crusader.

Are you still planning to build two of them?

Sorry I haven't commented till now. I've been watching but time is in rather short supply the last few months.

ksouers, I can't imagine why you haven't had time to post! ;) You're in my boat; trying to squeeze 28 hours into 24. Doesn't leave much for the important stuff!

The second engine was being done by a close friend. His schedule changed not long after we started them, and I continued on until my schedule halted me on mine. Hopefully he can get back on his before long and start catching up.

And yes, how great it is to be one with the machinery again! Thanks for the response!


After several productive hours, the piston is done and has now been lapped to the cylinder. No pics... Not a darned one came out in focus. th_wtf1

The was an issue with the connecting rod hitting the bottom of the cylinder, but some rough file work cleared the interference. The c-rod will have to be prettied back up, or remade. But, the assembly rotates very smoothly.

The design calls for some brass buttons to press into the ends of the wrist pin to avoid scarring the cylinder as it is a full floating w-pin. I am not sure I like that, so I may look into an alternative solution. Maybe some spring clips in piston to capture the w-pin, although I am not sure how the best method would be to machine the groove in a .250 hole. ??? Probably isn't worth the trouble and effort, but...

A neighbor who has flown RC airplanes since Edison was an infant stopped by after hearing of the project to scope it out. His first question was "why", and after explaining to him the engine was meant as a challenge to make it run from bar stock he looked the plans over for what seemed to be an hour. We spoke a little while longer about how I was going to display the engine, what I was going to do for the fuel system, and other misc. questions on materials and such, and he left. About thirty minutes later, he showed up with a carburetor off of a .60 airplane engine. I am not sure what it came off of and neither was he, but that will solve the dilemma of the carb.

This machining stuff can be addicting! ;D Next up: completing the crankcase and cylinder.
 
Back
Top