Hi Rob
Your Taking the Micky I reckon
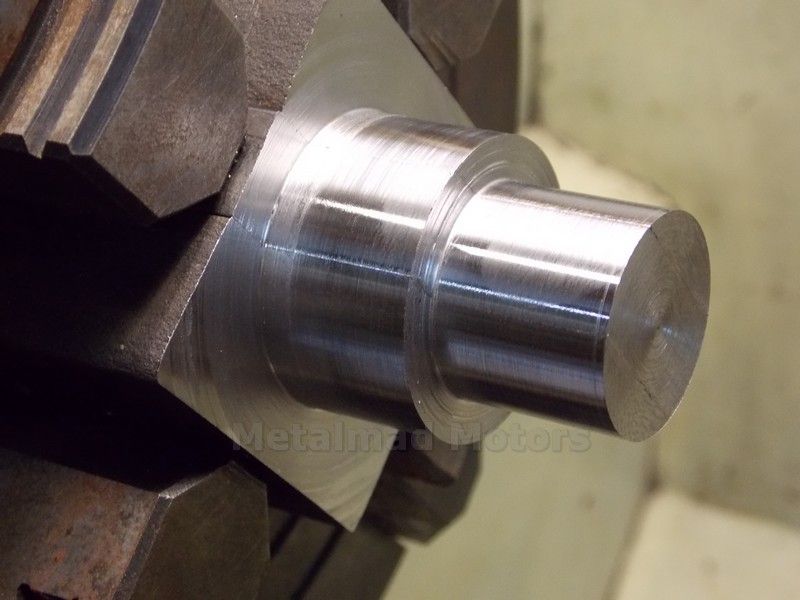
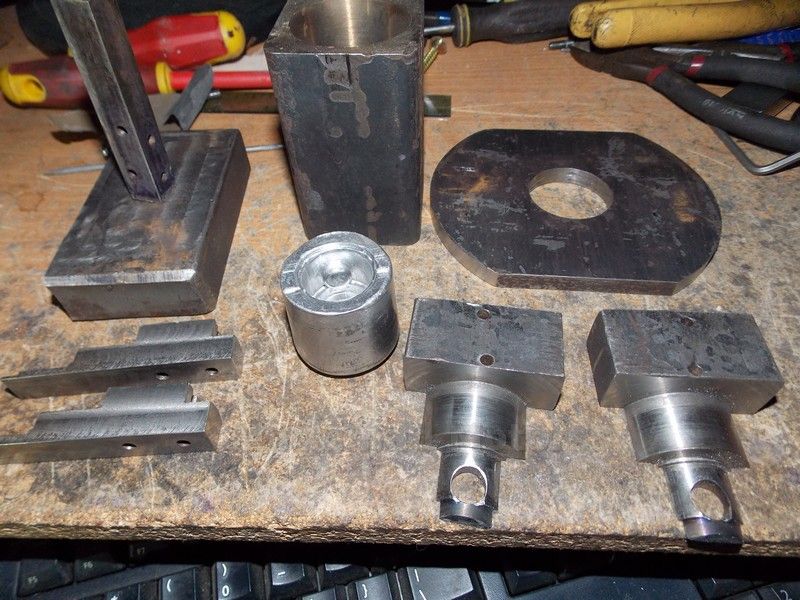
I did a little more on my piston mold today.
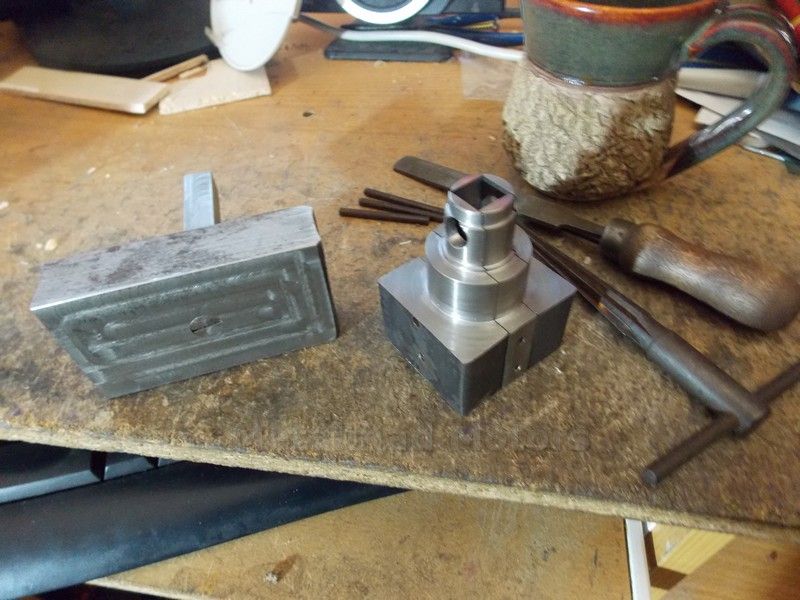
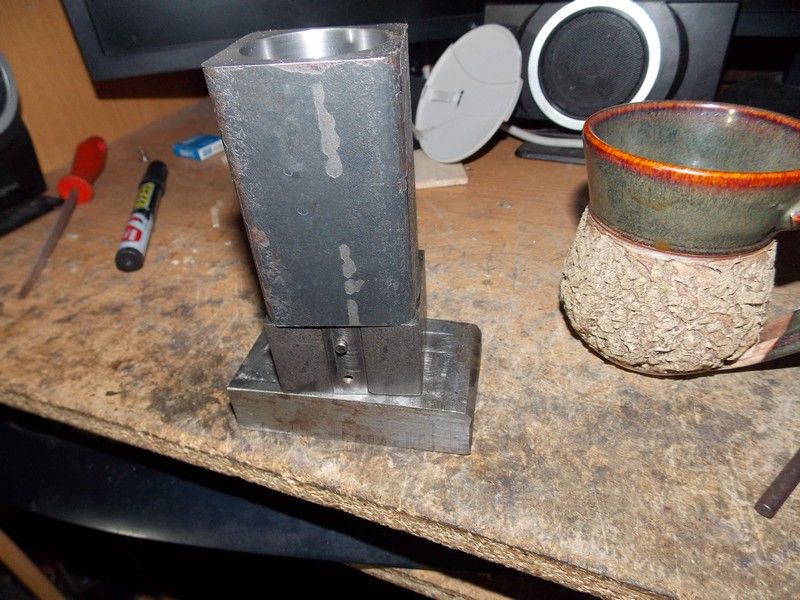
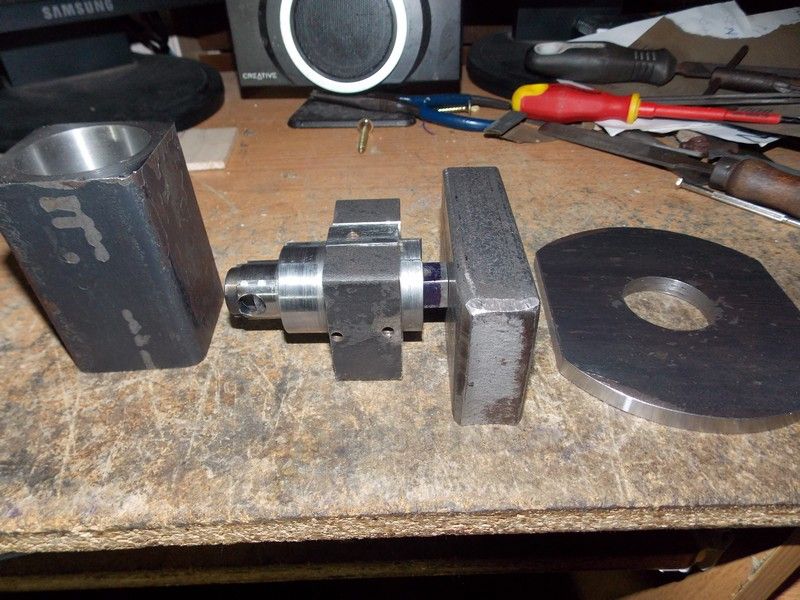
The part in the lathe is made up of 5 parts held together with 4 pins and the center half inch square bit will bolt on to a base which will sit in a vice.
A outside shell will but up to the last shoulder, which has a 6 degree inclusive taper to allow piston release.
At the moment the Core section is at 1.00" so I better remember to take it down a bit or there is going to be a Tardis Moment when I turn down the outside of the piston. LOL
Pete
Hi Guys
Im almost ready to do some trial pours for my piston mold, Im hoping to come up with an easy way of pouring high quality pistons.
If all goes to plan, Im hoping to be able to pour all the pistons in one melt.
Pete
For some insight on how to cast pistons check out this post on the hamb from member Dolmetsch, he does some trial and error but makes some very nice racing pistons.
Hi Guys
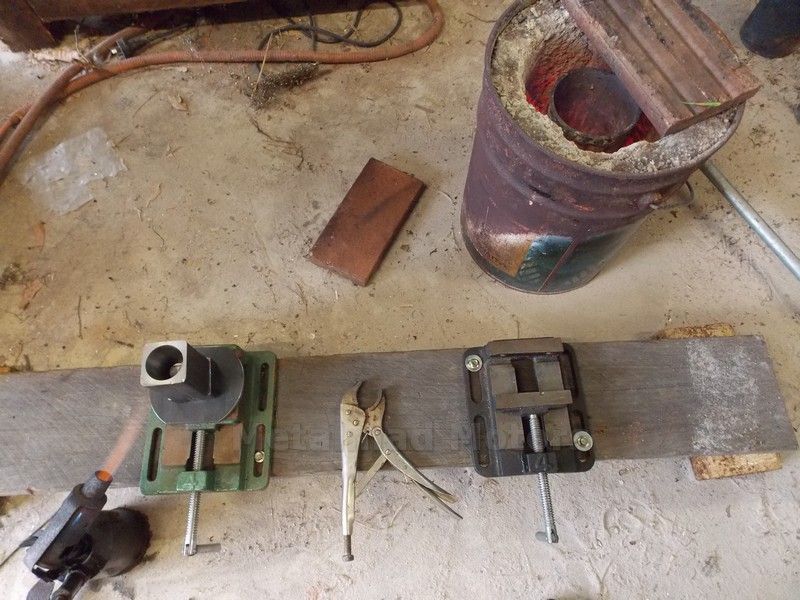
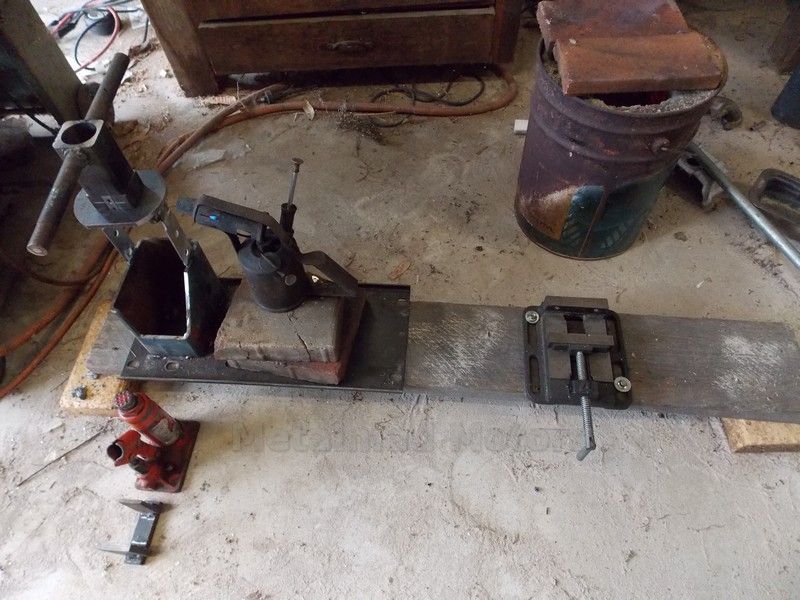
I did do a trial pour over the weekend but unfortunately ran out of gas.
I was able to learn a few things, firstly the metal froze basically on contact even though the mold sat on top of the furnace during the melt so I will need to get a ladle that Carry's enough metal for the piston, it will have to be poured quickly.
I also had a lot of trouble removing the center core rod so today added a stripper plate, but found a lot of filing was still needed to remove the core rod even cold.
If I have any more trouble next time ill add a hydraulic jack to push the stripper plate off the core rod:fan:
Pete
Hello Pete,
I guess the video sure makes it look easy. I hope you get everything right on the pistons, Like the frog in the Cranes beak, the frog holding on to the cranes neck say Never Give Up.
Looking good pete
Hi Luc, cool Video Mate
Hi Danny
I think the mold is ready to go now but I still need to set up a mold preheat burner and find some sort of suitable Ladle as well as buy gas etc
I feel my first trial proved the concept but still have to sort out a few details, I also want to wait till I have a helper as two burners will be used.
I have an old pump up blow torch that looks like it runs on kero or something similer and im going to try that if I can find out how it works.
Pete
Hi Guys
I hope to get some gas etc tomorrow so as soon as I have everything set up ill do a piston pour.
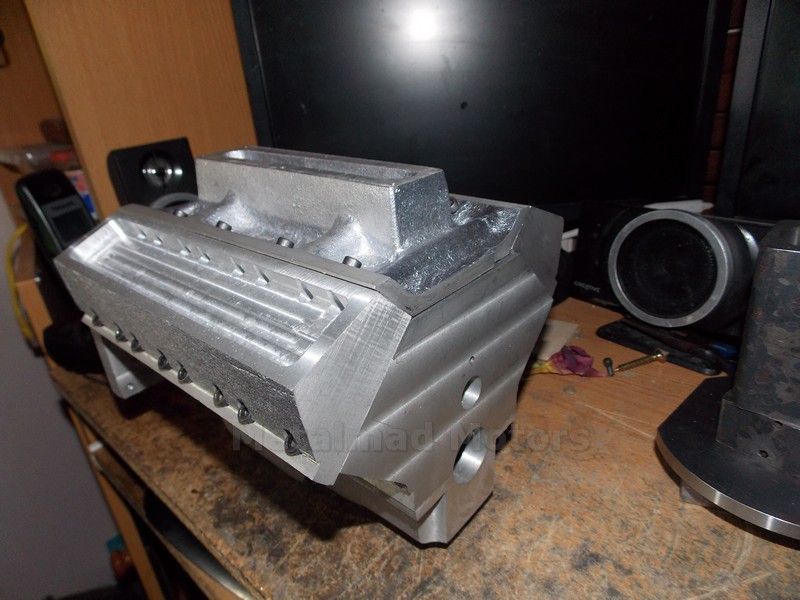
In the meantime I did a little more head work today and then did a trial fit to make sure all the head bolts lined up, even after robbing all the sump bolts, I'm still 10 head bolts short
Pete
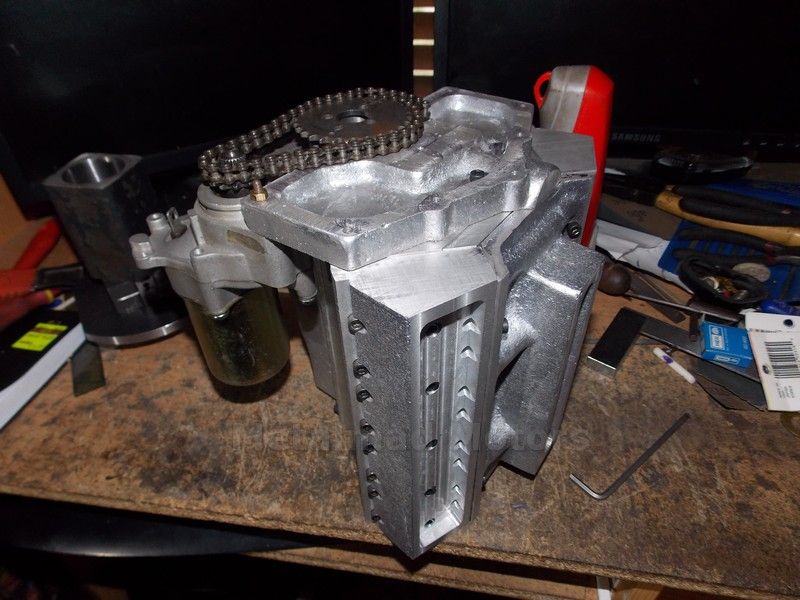
Hi Luc
Will this one Do?
At this stage I plan to pivot on the top bolt and have a slotted adjuster on the bottom and Im hoping the bell housing will totaly inclose the gear end of the starter.
Pete
Hi Luc
Will this one Do?
At this stage I plan to pivot on the top bolt and have a slotted adjuster on the bottom and Im hoping the bell housing will totaly inclose the gear end of the starter.
Pete
Each photo you post is a benefit to us watching this build. First scalemodel engine I have seen with a starter built on. I believe you will get thebell housing to cover up the starter chain.
It is looking real nice. I know about robbing bolts, I had to change somearound to get things moving on my end. I then had to go purchase more andreplace the ones I robbed.
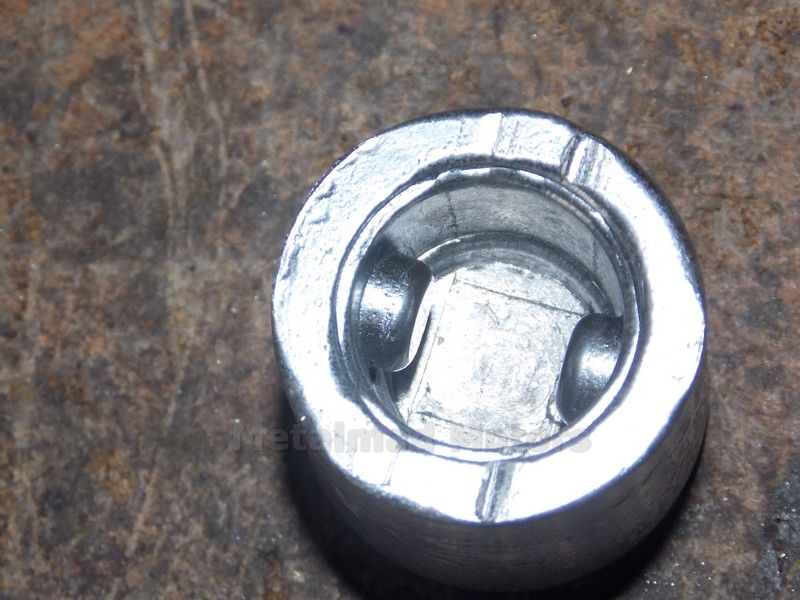
This arvo, I was testing out the old kero blow torch and decided I may as well do a pour since I already had one of the blowers going.
While I proved the concept with a near perfect piston, I had a lot of trouble with the center core again and have decided to add hydraulics before I go any further, Once the middle core was out the other middle bits came out easily but the outside ones were very difficult so I filed a bit of relief on the ends of those for next time.
The little marks on the end of this piston will not happen once the mold is releasing like it should.
Pete
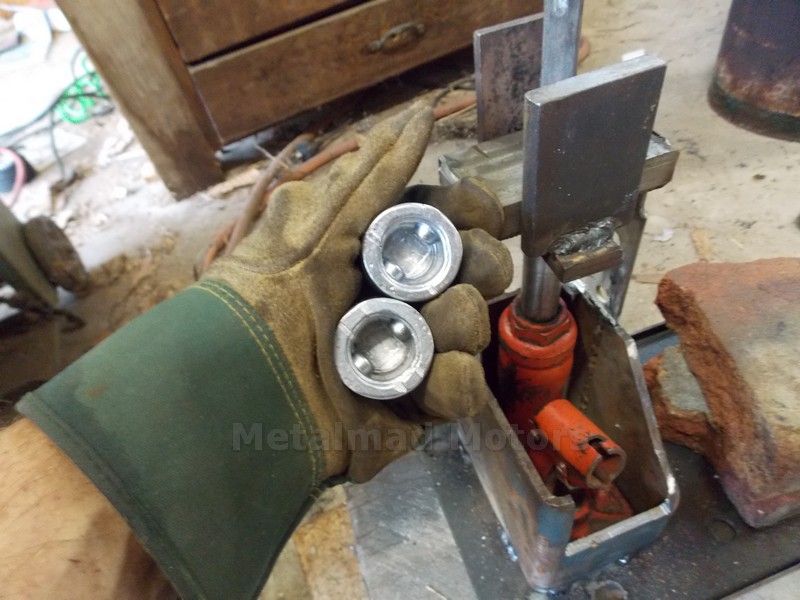
Yes I'm very pleased with how it came out, its about .870 on the inside and if I can solve the mold release problems I should do the rest this week sometime.
I think if I jack out the center as soon as I pour it should be a go.
I'm hoping to get a nice light set of thin wall pistons that all weigh the same after machining.
Pete
I made up my hydraulic stripper thingy and did another trial pour,
the jack just striped it out of there no problem, but to my surprise the middle bits were hard to get out and I'm wondering if its due to the draft I put on the end of the outers :shrug:
I could have done another pour but wanted to evaluate what Ive done and look for any informative witness marks on the piston ETC
At this stage I'm planing on milling a small slot on the inside of the middle bits for screw driver leaveage before the next trial.
I only need another six pistons by the time I get all the bugs out of the system, I wont need it anymore :lolb:
Pete


")