3cc Diesel - My first ICE

Home Model Engine Machinist Forum

Help Support Home Model Engine Machinist Forum:

This site may earn a commission from merchant affiliate links, including eBay, Amazon, and others.
Bob,
great work and great pic's

am learning a lot just watching.

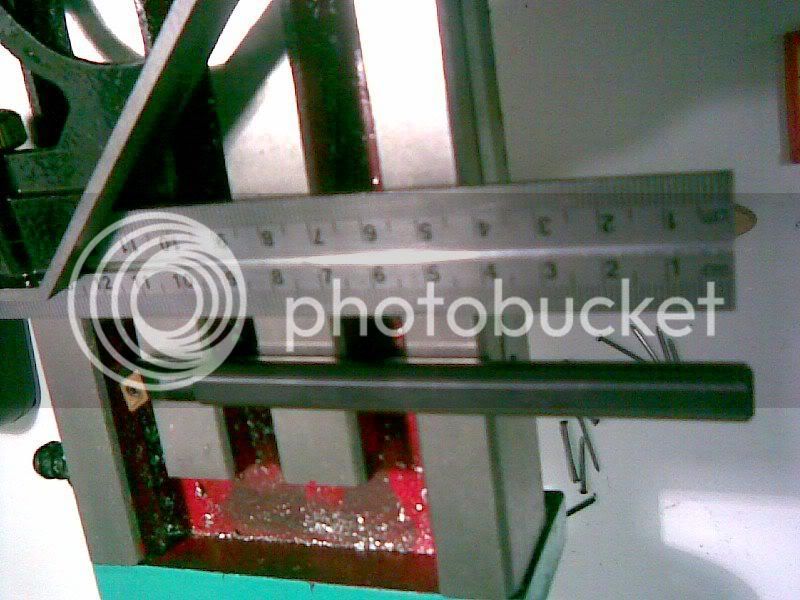
I have a boring bar if you like.

In NSW i cant make pistols ( licencing issues anti gun Nazi types not honouring federal licences etc etc) so this is pretty useless and it will be a few years until i get back to Adelaide where my master smithing ticket stands up

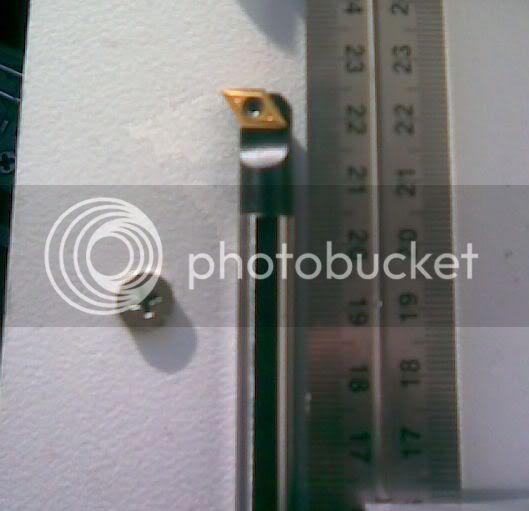
if you want it let me know and it'll toddle its way via austpost its BOW brand and i've got my last new Valenite insert in it ready to go and i have the spanner for it ( i dont think i actually used this one but cant remember i usually use the bigger brother for .40 S&W , my standard size, this one will do .32 and up but have not done a .32 in 15 years and this is only 3 years old)

Indexable8mm.jpg


indexable1.jpg


cheers

jack
 
Jack,

Thanks very much for your generous offer :bow:

I have quite a few boring bars mostly bigger up to 2" dia bar + the tool insert.

Your bar would not help because, I had to face off the back square to the bore, hence the maximum width of tip + bar needed to around 3/16" as its not a through bore:)

Thanks again but keep your bar for your next barrel.

Regards
Bob
 
Bob,
I have been following this build with great interest, you are doing a fantastic job.
What is the purpose of the main piston/dummy piston arrangement? Is it to allow the main piston to be easily replaced because of wear? Or is it for adjusting the compression?
 
Macca,

Thanks for your support and interest.

Not 100% sure myself but I think the idea is to provide for maximum seal between the piston and the bore as there is no through hole for the wrist pin in the main piston. How this stacks up against a hole in the top of the main piston, where there is max MEP, who knows. ???

I have been pondering how best to seal that little sucker for some time. ::)

Please guys any suggestions ??? ???

Regards
Bob
 
Bob, how do the pistons fit each other? Do they utilize a sliding fit or is it a press fit? I am trying to figure out the reasoning behind the design myself. The only thing I can come up with is to make the piston in this fashion could theoretically be lighter than out of a single piece of material, but this is a WAG at best.

Your project is coming along nicely! I have no doubt you will have yourself a very nice runner!
 
Normally designers use the inner piston to carry the gudgeon pin so it is captive and can't score the sides of the bore or get jammed in the ports.
 
W/E,

Thanks for your continued interest and support.

In the interests of being able to disassemble/reassemble the engine, without damage to the main piston, I elected for a neat sliding fit,which I managed to fluke ;D

Also re-read the articles in the 1947 magazine which a guy sent me when I was researching and asking questions about small ICE's and this seems to fit with the original approach. In addition the recommendation for sealing the CS bolt in the piston top is plumbers or tinmans solder.

Jones,

Thanks for the information on the whys of this design. Is there a reason why its not threaded and screwed in ??? getting rid of the need for the CS bolt and this soldering business.

Would somebody please enlighten me what is plumbers/tinmans solder - not silver solder by any chance ??? ???
 
Arrived at my shop to find this outside the door with a note from my partner in crime which said ,

"Bob, this came off rail last night, please fix ASAP"

Aaagh, the GENTLE ;) men of railways, it's not the first and won't be the last. :eek:

100_0447.jpg


ASAP took all morning and some of the afternoon and I was knackered after up and down each end of the tank several times ::) ::) Like I said before I'm supposed to be retired, but it's nice to feel wanted ;D

Fixed!!

100_0448.jpg


Hence today's progress Nil, Nothing, Zip, Zilch :'(

Have a great weekend.
 
I think the inner piston isn't screwed into the out piston because it could unscrew during running. There is nothing stopping the main piston rotating.

That is a HUGE tank.
 
Jones,

26000L and you'll see on the side written ALCOHOLIC BEVERAGE :eek: :eek:

Why doesn't the little 1/8" CS bolt unscrew? especially if the solder doesn't penetrate all the way through both pistons ???

Regards
Bob
 
T/S -Dave

Maybe, as long as not too many guests ;D

Regards Bob
 
Another week and off to a good start ;)

The Dummy piston was transferred to the mill

Cross drilling the dummy for the wrist pin.

100_0449.jpg


Set up to mill the conrod slot.

100_0450.jpg


The completed conrod slot.

100_0451.jpg


Tapping the dummy for the wrist pin lock.

100_0452.jpg


The dummy ready for parting off.

100_0453.jpg


Tapping the top of the dummy 1/8" for securing to the main piston.

100_0454.jpg


Trial assembly of the main and dummy pistons.

100_0457.jpg


The contra piston OD complete.

100_0458.jpg


Counterboring the contra piston.

100_0459.jpg


Parting off the contra piston.

100_0460.jpg


The piston parts completed.

100_0461.jpg


Old copper dolly to make the piston lap.

100_0462.jpg


The piston lap ready for boring to a neat fit on the piston.

100_0463.jpg


The sun was over the yardarm so I called it a day ;)
 
Today saw the piston lap completed, ready for lapping tomorrow

Test fit of the piston in the lap

100_0464.jpg


Set up to mill the lap slots, one all the way through and two half way through.

100_0465.jpg


The milling of the slots completed.

100_0466.jpg


The lap and piston.

100_0467.jpg


The lap with its' adjusting wedge fitted.

100_0468.jpg


After lunch, I made a mandrel on which to mount the pistons, but clever me left the camera at home ::)

Piccys tomorrow ;D
 
Looks like another Sparey lap design! I like it-- you are sticking with the original spirit of the engine.

George
 
George,

You are correct and thanks for your continued support. :D

Best Regards
Bob
 
Hi All,

Having read the idiots guide to good lapping, (but not carefully enough - more later). I went to the Tallow Terminal at the Harbour and obtained a couple of samples of tallow for use in the final mating of the piston to the cylinder.

100_0469.jpg


The piston mounted on its' mandrel for lapping.

100_0470.jpg


Charging the lap with fine valve grinding paste using a piece of 3/8" round HSS.

100_0471.jpg


The piston just entering the cylinder.

100_0472.jpg


Time to change to Dremel polishing compound - note the careful lap clean up for change over.

100_0474.jpg


At this point things started to go pear shaped - literally ::)

100_0478.jpg


As I mentioned earlier I had not read the instructions thoroughly enough and I had things upside down, i.e. the lap was bigger than the piston and it should have been smaller. :mad: :mad: Fortunately smaller is easier than bigger ;D

100_0475.jpg


Cleaning up the new improved, (I fervently hoped :-\), piston lap.

100_0476.jpg


All squared away again :D but much more due to good luck than good management ::) and a test fit of the cylinder on the piston using tallow.

100_0480.jpg


Whilst I could not feel it with inside calipers after lapping the cylinder, the fit of the piston revealed that I do in fact have a slight taper in the bore :eek: Again entirely due to good luck this is in the recommended direction, i.e. the cylinder is slightly smaller at the top than the bottom. ::) ::) ::)

Switched the lap to Brasso and had hours of fun getting the piston far enough into the cylinder where it is shown and its pretty tight.

100_0481.jpg


A final mating of piston and cylinder was carried out at slow speed with nothing other than tallow and VOILA, HARASHO, WHOOPEE it's done ;D ;D ;D

100_0482.jpg


After all that excitement I came home to write it all down and relax - leaving the contra piston for tomorrow :big:


W/E,

Thanks mate for your continued encouragement :bow: Today was a hit and miss day but the exhaust was closed more than it was open hence more of a hit than a miss. ;)

Best Regards
Bob
 
So does the piston go all the way up the bore to where it's meant to without binding?

How long did it take to lap the piston like that?!

I am thinking I may have to do this when I make my first IC engine.

Regards,

Nick

ps keep up the good work. I admire people that post their experience and write ups along the way on here, I can barely find time to make anything let alone write it up on here!
 
Back
Top