3cc Diesel - My first ICE

Home Model Engine Machinist Forum

Help Support Home Model Engine Machinist Forum:

This site may earn a commission from merchant affiliate links, including eBay, Amazon, and others.
Maryak said:
Sorry about slacking off yesterday :eek: ::) ;) :-*

No worries! We all do it from time to time.

CrewCab said:
That's the good thing about a hobby mind ............ you could do that every day if you really wanted ;D

This is true, but don't let it happen again!! If it does, we'll take it out of your pay!
1459.gif
072.gif
045.gif
1142.gif


In all seriousness, you'll get there one piece at a time! Just keep going!!!!
 
W/E,

Thanks again and you'll be pleased to know minimal distortion of the cylinder. ;D :eek:

Regards
Bob
 
Sorry Guys,

Slacked off again today, (or should I say I received strict instructions on where to be and at what time ::))

SUCCESS SUCCESS, well at least with the silver soldering - See below.

Making a Locator for the Cylinder Inlet Stub from Aluminium - Why Alu - well because I read somewhere that it doesn't like silver solder and that's what's needed here.

100_0387.jpg


Tapping the Locator for the draw bolt

100_0388.jpg


The Stub and Locator

100_0389.jpg


Test fit of the stub on the cylinder using the locator.

100_0392.jpg


Washing the parts 1-Kero (paraffin for the poms), 2 Thinners, 3 Soap and Water.

100_0393.jpg


The Transfer Cover ready for Silver soldering - Note the sophisticated brazing hearth ;D

100_0394.jpg


The soldered Transfer Cover

100_0396.jpg


The Inlet Stub ready for Silver soldering.

100_0397.jpg


And after,

100_0398.jpg


Checking for cylinder distortion - I'm very pleased to report that things still seem to be within 0.001" :D

100_0399.jpg


Shaping the Transfer Cover - Great tools these Dremels ;)

100_0402.jpg


Test fit of the Transfer Cover on the cylinder using a boilermakers micrometer 8)

100_0403.jpg


Am I glad that 50% of the dreaded soldering saga is over :eek: :eek: :eek:

 
Hi Maryak,

you are indeed making very good progress, congratulations.

I am sure the project will end up a great success.

One minor point to consider though...... when it comes to silver soldering..... the use of aluminium as a NON-STICK fixing aid is frought with danger.... the typical melting point of ALI is around 660deg C .

I don't know which grade of SILVER SOLDER you are using, however, assuming that you are using something like EasyFlo 2.. 42% silver content + it has 25% cadmium in it's make up, then this melts at around 610 deg C - 620deg C...pretty close to Ali.

If, as I suspect, cadmium based solders are not available in OZ then the nearest equivalent CADMIUM free type SILVERFLO 40 (40% Silver) then this melts at 650deg C - 710degC.

SILVERFLO 24 (24% Silver) melts at 740deg C - 780deg C.

Obviously you have got away with it in this instance, however, I thought it worth warning you of the possible problem.

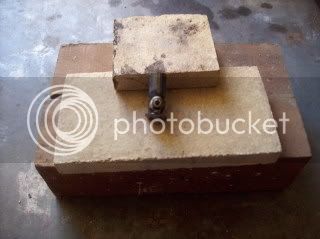
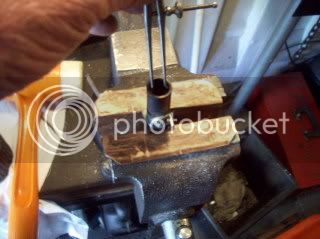
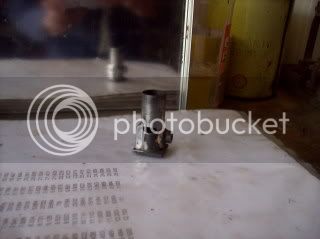
When you come to solder on the transfer passage I would suggest you fit a RUSTY bolt and nut through the inlet stub just to make sure it does not move when re-heating, and use some soft iron wire, bound round the cylinder to hold the transfer passage in place.
Don't push your luck and try using an ALI clamp or fixture.... I would hate to see all that good work wrecked for the sake of using the wrong method.

Please don't think I am being critical, nothing could be further from the truth, I am just pointing out a possible problem area for you and others who may be following this thread to consider.

Best regards.

SandyC ;) ;D

 
SandyC,

Thank you ever so much for your input to my project. Yes it was pretty close as it turned out and yes I did get away with it this time ::). and No I won't push my luck in future.

It's always great to learn something new :bow:

The product I used was Prosilver 45 from BOC Gases.

I have read some of your other posts re boilers and a boiler for my mill engine is down the track for me so look out mate because I'll definitely be seeking lots of help with that ;) ;) ;)

Regards
Bob
 
Can I ask something? Is this a published engine design, or is it a homebrew? I am really enjoying this thread-- I love it when someone makes such an effort to detail a build.

George
 
Serceflyer,

It's a published design from a British Magazine "Model Engineer" April 1947.

I've modified the port locations a little and altered the design of the Carburettor and intake. :p

Due to my total lack of experience with these engines, don't know yet if these will be good or bad ???

So far it's been:

1. A ton of Fun.

2. An incredible learning experience.

3. A challenge to my metalworking skills.

4. A great sharing experience with some very valuable lessons learned from other members of this forum who are helping and guiding me along the way. :D

Regards
Bob
 
After yesterdays fiasco, (see the break room), today saw progress :eek:

EUREKA - The soldering is complete and the transfer cover is on. ;D

A special thanks to SandyC for his advise which made things Oh so much simpler and safer. :bow:

A polishing kit for the Dremel pick up for $30, when you think that each tool with an arbor is $9.75 each, I thought it was good value and will be a great help at the finishing stage.

100_0405.jpg


Preparing the cylinder for soldering on the transfer cover.

100_0406.jpg


And the transfer cover.

100_0408.jpg


Side view of the cylinder with the stub and cover in place.

100_0409.jpg


The other side.

100_0410.jpg


And looking down from the top.

100_0411.jpg


I spent a little time playing with the polishing kit and think I may be able to achieve a reasonable result.

Went on a material hunt to find stuff for the cylinder lap.

Decided to stop and calm down because I was so relieved and excited to have finished the soldering without melting down the cylinder. :fan:

Long week-end here, (Labour Day), so Tuesday should see the lap made and a start on lapping the cylinder.

Avagdweeknd
 
I can't wait to see this thing run.

How does the cylinder attach to the head? I don't see any threads at the top of the cylinder.

What sort of lapping compund do you plan on using? Some recommend diamond paste. I've had better luck with a product called "Timesaver." It's a non-embedding compound that breaks down into a polishing compound as it is used up.

George
 
The design uses through bolts from the top of the head to the crankcase.

Lapping compounds will be

1. Fine grade auto valve lapping compound

2. Dremel paste.

3. Brasso.

Apart from diamond I am open to suggestions to improve on the above.

Regards
Bob
 
Hi Guys,

Help please ??? ???

Attached is a PDF of the carburettor I have designed for this engine.

Will it work ??? ??? :-\

If not please tell me what's wrong.

Thankyou
Bob

View attachment Carby.pdf
 
Thanks,

I was a bit nervous that I had the venturi in the wrong place

Bob :)
 
Maryak said:
Thanks,

I was a bit nervous that I had the venturi in the wrong place

Bob :)

Bob ........... I'm guessing a little here mate .......... so please feel free to correct me if I'm wrong ......... but ..... ??? I have a feeling Rick is telling you the pdf file has uploaded fine, but I feel you are asking for comments on the design .......... mmmmmm this could be a good time to run and hide
sterb163.gif


;) CC
 
Wasn't sure myself what Rick meant but yes, I am seeking help/confirmation of the design. ???

Regards
Bob :)
 
Bob, the venturi and fuel inlet area are in the same spot with the published design that I have. I will also add that as long as I have been around engines, I haven't seen a design much different than that. I say you are good to go.
 
W/E,

As usual your prompt and informative reply have set my mind at rest :bow:

Thanks Again!

Bob :)
 
WE is spot on Bob imho :bow: .............. however I do have a query sir 8) .......... are you proposing to form the bell mouth air inlets in a tapered / conical shape as per the drawing .......... and if so ......... how ???

Thanks Bob ......... whatever the outcome, I'm just happy to be along for the ride ;)

CC
 
CC,

Yes I'm going to have a go using form tools which I will have to grind up.

Will be a good exercise for my tool bit grinder/end mill sharpener.

Reckon I'll probably start with a hefty piece of brass and make lots of swarf. ;D

Regards
Bob :)
 
Bob

looks ok here mate, as others have said its inline with others that are about, so not reinventing the wheel helps

side question.. did you use to be at the SA maritime museum ( maybe i have the name confused )

regards

Jack
 

Latest posts

Back
Top