x2 belt drive pulley material

Home Model Engine Machinist Forum

Help Support Home Model Engine Machinist Forum:

This site may earn a commission from merchant affiliate links, including eBay, Amazon, and others.
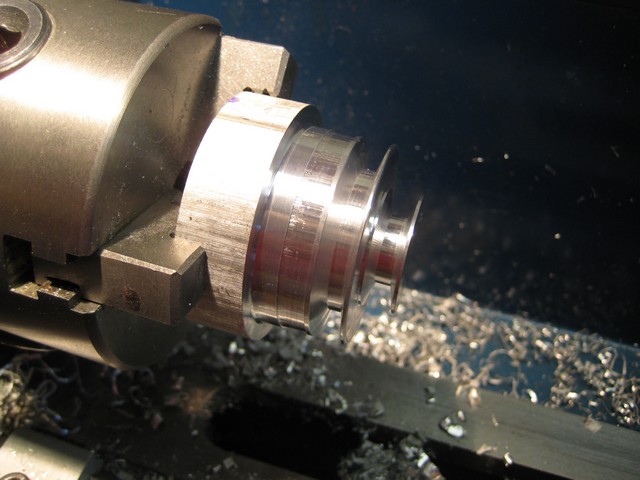
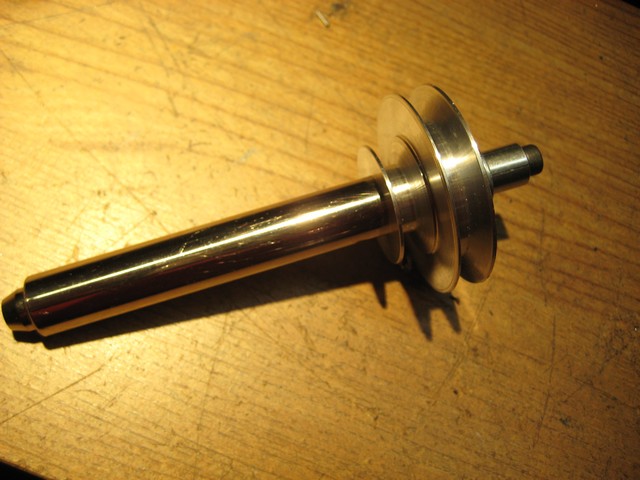
I finally finished the large pulley.

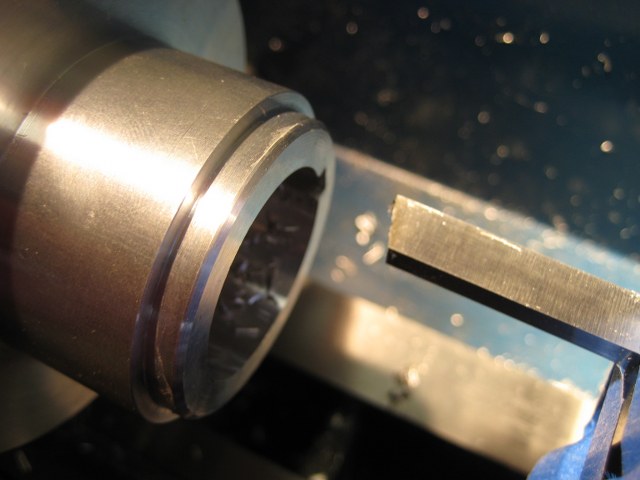
To cut the keyway I ground down a tool blank as pictured below.

img_9831.jpg


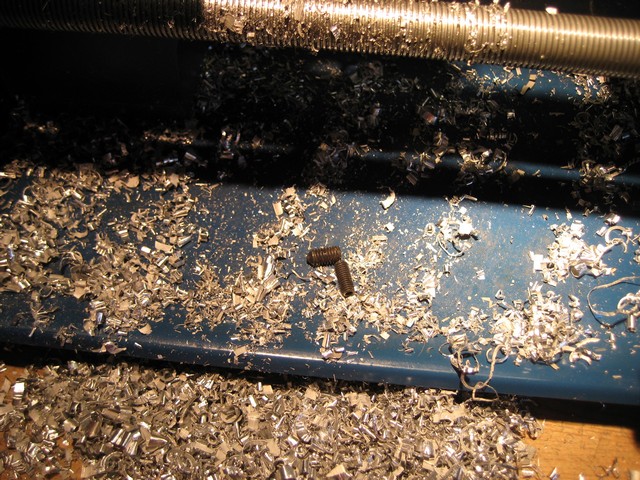
This worked pretty well, except every once in a while, the tool would dig in pretty bad. I would be forced knock the chip out with a punch, back up 20 thou and try again.

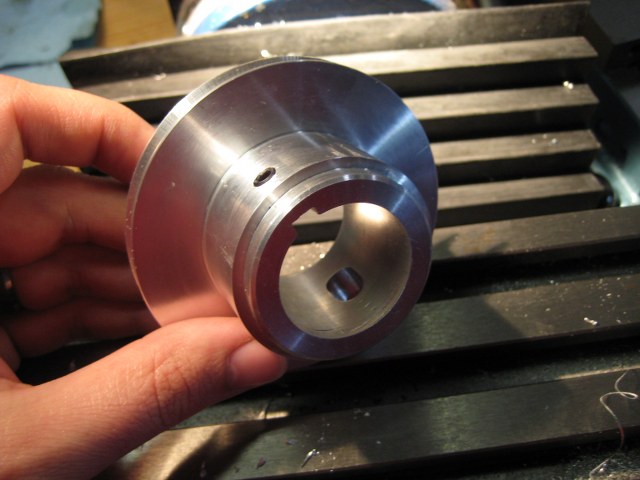
The other problem I had, is the keyway got slightly twisted. I didn't lock the spindle, and I wonder if that had anything to do with it. I had to clean up the twist in the keyway with a file.

After some light filing and sanding the pulley seems to fit well.

img_9833.jpg


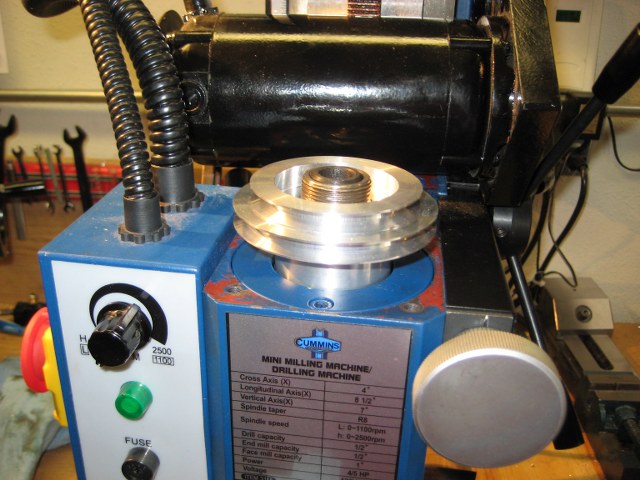
After I was sure the pulley would fit, I tapped the 6x1 grub screw hole, and cut the slot for the spindle lock.

img_9835.jpg
 
I started on the small pulley yesterday. For the most part things went pretty well. Cutting the groves in the large pulley seemed kinda hard on my little machine. I decided to cut the groves on this pulley before removing any other material to maintain rigidity.
img_9847.jpg


I had some pretty good squealing and chatter going on at times. I can only imagine what my neighbors think i'm doing. After cutting the grooves I grabbed my shop vac hose to suck up chips. I was just about to start vacuuming when I noticed something else in the chip tray.... WTF?

img_9842.jpg


Looks like all that vibration knocked a few parts loose. After looking around, and not finding their home, I started dissembling things. First the apron came off, and next I removed the saddle. After taking the saddle off the ways, I found the set screws home. One set screw fell out of the quick change tool holder, and the other from the carriage hand wheel. Doh! :wall: Oh well, the saddle and half nut needed a cleaning anyway.

For this pulley I decided to take John's advice, and turned up an arbor. I finished the lathe operations, and drilled the set screw hole while mounted on the arbor. The arbor was so much easier to work with, and the parts finish doesn't get destroyed. Thanks John.

img_9853.jpg


Now I just need to cut the keyway. I haven't decided if I'm going to use the lathe again, or just hand file it.


Looking good...

Once it's fitted, up and running you wont look back....Oh.. the peace and quiet...


I changed the bearings on mine to taper rollers after the belt drive mod.
 
Your belt picture shows a 2L belt and Machinery Handbook shows the following groove specs:
under 1.5" diameter - 32°
1.5" - 1.99" - 34°
2.0" - 2.5" - 36°
over 2.5" - 38°

HTH Stan
 
The arbor looks like the way to go.
One alternative to that with your original setup: With part chucked in 3-jaw, run a bolt through the part and out the back of the spindle, using a big rigid washer on the part face and spacers and nut as needed on the back end. Much quicker than making an arbor, and firms up the mounting.

Whose plans are you using?
 
Stan,

Thanks for the info on the belt angles. What handbook are you looking at? I might have to get it. I ended up grinding my tool to 33 degrees instead of making one at 32 and the other at 34. I hope that doesn't cause an issue for me in the future. I can always make a new pulley if it doesn't work.

AR1911,

That is a good idea to put some more pressure on the work piece. I'll have to try that in the future. I'm using the plans that are posted in the files section off this yahoo group.

http://groups.yahoo.com/group/GrizHFMinimill/


Boy that sure is nice work. :bow: I believe the book Stan is refering to is Machinery's Handbook from Industrial Press.

Cheers,
Chazz
 

Latest posts

Back
Top