TB2 - Cylinder shaft

Home Model Engine Machinist Forum

Help Support Home Model Engine Machinist Forum:

This site may earn a commission from merchant affiliate links, including eBay, Amazon, and others.

ksouers

Well-Known Member
Joined
May 24, 2008
Messages
1,347
Reaction score
8
I don’t have stock yet for the cylinders but I thought I should probably start tooling up. One of the steps in making the cylinders is drilling a hole for the steam ports at a 15 degree angle away from the cylinder centerline. Since I have to repeat this step several times I didn’t want to have to measure the angle and re-center the drill for each hole. So, I made an angle gauge.
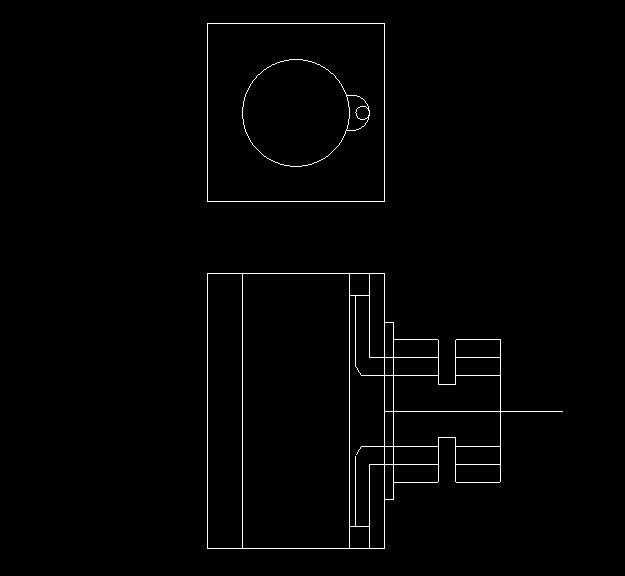
The dimensions aren’t critical, however, the angles are. This piece is roughly 1 1/2x 7/8x1/2 inch. The critical angles are the bottom 90 between the vertical and horizontal faces, and the 15 degree face that departs from vertical.

First, start with a piece that is square and parallel. I set the 15 degree angle on the protractor and lined up the work in the vise. I had originally marked out the work with a small foot at the bottom of the angle that would have been 90 degrees from the angled face but afterwards thought a straight face would be more useful for any future set-ups.

tn_angle_15_1.jpg


The block was marked for future reference, a few strokes across some sandpaper and a quick wipe of some furniture wax for protection and it’s ready to go!

tn_angle_15_2.jpg


tn_angle_15_3.jpg


In use the block will be set vertically against the vise stop and the front face (large bearing) of the work piece leaned into it against the angled face. If all goes well the drill should always be right above the mark.

 
Brass is scheduled to arrive Wednesday. Then you'll really get to see how I can F... things up!

If there's a way to make a mistake, I'll find a way to make two of them.
 
I know what you mean about tiny LOL These are probably the smallest parts I've ever produced a quantity of. Yours are looking nice!

Wesley
 
nice fixturing, I like to flip around symmetrical parts too, I am about to start on my batch of cylinder shafts and I was wondering if you are going to add the 3/16 shaft onto the square section, if so how? I was going to cut my stock slightly over 2.531.

Thanks,

-Kevin.
 
Hi Kevin,
I like the name...

I'm planning on drilling about 3/8 deep through the back then friction fit and silver solder a brass shaft, then drill and ream the cylinder. The end of the shaft will end up somewhere inside the cylinder so it won't make any difference to the inside wall once it's reamed.
 
A good name indeed,
thats a good plan, save quite a bit of turning, My soldering skills are not up to par so I think I'll
stick to a solid piece.

Thanks.
 
I got to spend some more time in the shop yesterday. This time to drill and tap the holes for the studs on the cylinders. Again I relied on the symmetry of the part to make the set-up easy. And the same routine; drill-flip-drill next part drill-flip-drill, move to the next hole and repeat. The holes were drilled with a #50 drill, .270 deep, to be tapped 2-56.

tn_cyl-5.jpg


Here’s a handy little gadget I use when tapping on the mill or drill press. It’s just a 3/8 inch shank from an end mill that’s been ground to a point. I didn’t make this but picked it up along with a box of stuff from an estate sale many years ago. It is probably one of the more frequently used shop-made tools I have.

tn_tap1.jpg


The back end of my tap handle has been center-drilled and the point fits nicely into it.

tn_tap3.jpg


After drilling, leaving the chuck aligned with the hole, simply replace the drill bit with the centering point. It keeps the tap handle aligned vertically with the hole; pressure can be applied as needed to start the tap and advanced as the threads are cut. The set-up looks like this:


tn_tap2.jpg


64 holes, drilled and tapped. Time was about 3 hours total.

tn_cyl-6.jpg


A keen observer with a sharp eye, if he looked closely enough, might notice one of the blocks has already been drilled and had the shaft pressed into it. That is the next operation.
 
Well, I have some bad news. I made some scrap.

I found out quite by accident yesterday that I have an alignment problem with my mill

Detailed here.

I ended up drilling holes in the wrong place. Significantly wrong. So, until I get this resolved I won't be making any more holes in anything with the mill. Apparently this is a manufacturing defect and didn't show up until I started using a long drill to make holes.

This is also going to cause me to go back and recheck the parts I've already made in a lot finer detail. Hopefully I'll only be delayed a week or two.
 
Well, I've got the mill sorted out. I've started remaking the parts that I scrapped from that problem.

Now another one popped up.
My lathe carriage stop slipped while turning the bearings on the good blocks, so I ended up cutting one of the bearings too long scrapping another piece. Seems the locking bolt worked loose.

Bloody Hell.

At this rate I'll end up remaking all the pieces.

tb2_blocks.jpg
 
Ok, I'm completely hosing up this project.

It looks like early on when drilling the angled passages I wasn't quite where I was supposed to be. The angled hole is supposed to be right on the edge of the cylinder bore. I ended up being about 15 thou closer to the bore than at the edge. As a result when I drilled and reamed the bore I opened up a goodly amount of the passage. There should have only been a small opening at the top of the bore, instead I have a long scar down it's length.

Sorry about the crappy pic, it was dark and I had to use the flash.
tn_bore_scar_2.jpg


So, I now have more parts to remake. I don't think I can salvage these. All told I think I am remaking 6 out of the eight pieces.
 
I don't think they look that bad, from the pic. it looks about the same amount exposed as mine,
(I hope mine are okay) Could a guy put a little JB weld in there and ream it out again.
If these are running on compressed air wouldn't it just consume a little more?

Thats alot of work to re-do, theres got to be a fix :)
 
Kevin,
Theres lots of meat in the cylinder block. You could bore them out 3/64 or 1/16 oversize and put a sleeve in the block. If you finished up the bore in the sleeve and milled or filed a notch in the end to connect to the existing drilled hole you would be home free. A small restriction in the passage will not hurt anything. Put the sleeve in with a bit of sleeve/bearing mounting grade of Loctite (609/640/68 etc) and it will never move.
Gail in NM,USA
 
Thanks for the suggestions guys.

I intentionally bought the stock for the pistons oversize, just in case it wasn't round or some other farkle. I guess this is the other farkle.
It's 7/16 so I should be able to plug the bore and redrill and ream it. I hope. I'll try one and see how it turns out.
 
Well, I tried another one. This was one of the previous batch, not a remake.
Same problem but not as pronounced as the others.

tn_scar_3.jpg


I measured the "ports" from the other stuff-ups, they ranged from about .150 to .200 inch.

Before actually boring the cylinder I had estimated the port would be about .030 to .050 long, so anything that didn't fit that was taken as an error.

Gail,
Here's my thinking: the head protrudes into the cylinder 1/32 inch, the piston is 3/16 thick, I'm going to take a guess and say there is 1/32 inch clearance between the piston and head at TDC. That gives 1/4 inch from cylinder end to bottom of the piston at TDC. I know we don't want the piston to go past the bottom of the port, so lets say the bottom of the port only comes to the middle of the piston or 5/32 from the end.

So, using the above logic anything that is .150 inch or less should be workable, though way less than .100 would be better.

Or am I way out in left field?


Kevin,
Have you measured your ports? Any idea how long they are?
 
Kevin,
I just did some calculations, and I think you will be OK at anything up 3/16 depth on the port. I did my cylinders a little bit different so I did not run into the problem.

If you had the machining spot on to the drawing, the port would break into the cylinder 0.120 down, so it is down more than you had estimated it would be. The piston will be at .094 from the cylinder end at TDC and if we say that one half of the piston could be exposed, then it would allow the port to come down to .187. Another thing that helps is the valve does not open for admission until after 21 degrees after TDC and that moves the piston down an additional 0.016 inch.

If everything else is spot on, I think that the engine would run fine with the port down up to 0.200 inches, but we will probably lose a little bit because of some of the other parts, most of it being in getting the piston centered on the piston rod during assembly. So I would target 3/16 inch as a max acceptable number.

Gail in NM,USA
 
Thanks for the advice, Gail.
I didn't realize this part was going to be so tricky. And actually it wasn't up till now.
 
Good explanation Gail, I also get 0.1207 according to my cad model but I will double check the actual size when I get a chance. Gail, could you expand on the approach you took for your original cylinder?
Thanks,

Kevin.
 
I did a quick sketch of what I did as I remember it. The great computer crash of "02" took it's tole on the original drawing and I have not bothered to recover it. But this is a standard method for me. I did not bother to put cross section lines in the drawing, but you should be able to figure it out. The vertical portion of the passage was drilled with number 56 or 3/64 drill about .235 from the center of the cylinder and then opened up to the cylinder with either a 3/32 or 1/8 end mill about 1/16 deep. Just have to be carful about how deep you drill the 1/16 inch horizontal holes so you don't break into the cylinder.

CoomberCyl.jpg

 
Ahh, good thinking, that is a much safer approach. Thanks.
 

Latest posts

Back
Top