


zeusrekning
Well-Known Member
- Joined
- Dec 21, 2007
- Messages
- 448
- Reaction score
- 0
I actually made parts to day!!! And got to shoot tons of $#!? with Cedge. First off, this is my first engine and I'm realizing that documenting the process is almost as much work as making the parts. Well here we go.
I did the turning work on both the cylinders and the pistons today.
Both required basically the same operations. I faced, turned, grooved, bored, then cutoff the pieces. All tooling was standard except for the boring I used a modified HSS center cutting 2 flute endmill for the cyl's and a 4fl center cutting endmill for the pistons.
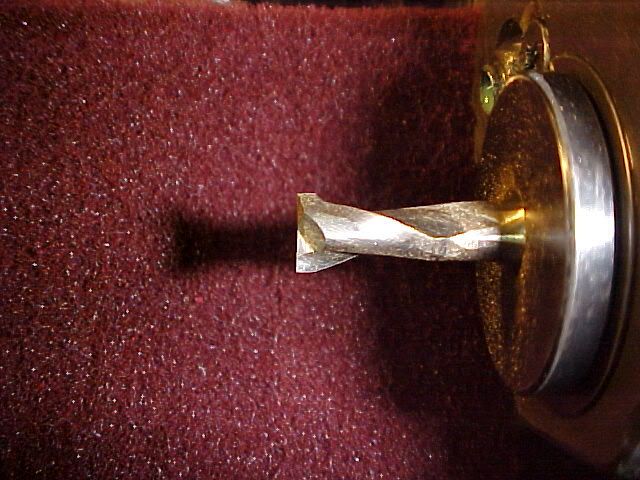
Here is a pic of the modified EM. What I did was grind the flutes off starting .07" from the end up to the start of the flutes for the groove in the top of the cylinder. I cut to depth at center come out, moved up to my finish diameter, fed to depth again, moved up in X to cut the groove, moved to X0 the retracted the endmill
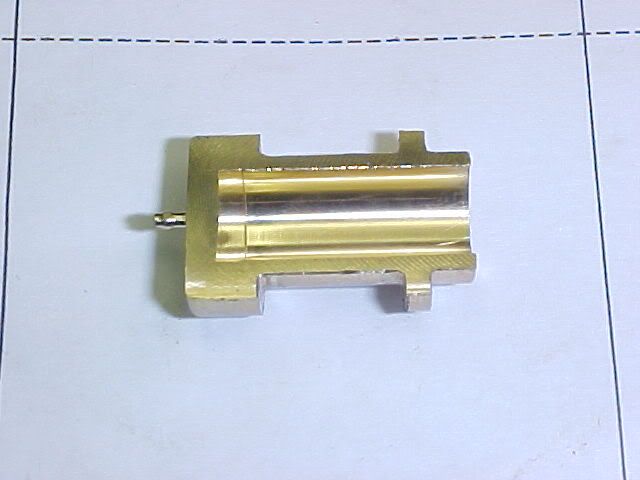
The only issue I had was on the bore. I wound up getting a step about 3/4" into the bore. I fixed this by adding more pecks with my endmill. Here is a part after being cut in half to inspect finish and the groove in the bottom.
Everything else was straight forward. I was polishing the tit of my extra part (part #13)when it hit me that I was only supposed to make six sets. ???

Everything seems to have come out okay. I have about .001-.0015 clearance on the piston to cyl fit. It is what felt right???
Tim
Side note. Steve took some really good pictures so look forward to those. Also I am going to post some pics of a couple engine he brought by.
I did the turning work on both the cylinders and the pistons today.
Both required basically the same operations. I faced, turned, grooved, bored, then cutoff the pieces. All tooling was standard except for the boring I used a modified HSS center cutting 2 flute endmill for the cyl's and a 4fl center cutting endmill for the pistons.
Here is a pic of the modified EM. What I did was grind the flutes off starting .07" from the end up to the start of the flutes for the groove in the top of the cylinder. I cut to depth at center come out, moved up to my finish diameter, fed to depth again, moved up in X to cut the groove, moved to X0 the retracted the endmill
The only issue I had was on the bore. I wound up getting a step about 3/4" into the bore. I fixed this by adding more pecks with my endmill. Here is a part after being cut in half to inspect finish and the groove in the bottom.
Everything else was straight forward. I was polishing the tit of my extra part (part #13)when it hit me that I was only supposed to make six sets. ???
Everything seems to have come out okay. I have about .001-.0015 clearance on the piston to cyl fit. It is what felt right???
Tim
Side note. Steve took some really good pictures so look forward to those. Also I am going to post some pics of a couple engine he brought by.