Tandem Compound Poppet Valve Steam Engine Build, ala Cedge

Home Model Engine Machinist Forum

Help Support Home Model Engine Machinist Forum:

This site may earn a commission from merchant affiliate links, including eBay, Amazon, and others.
Steve,

When you come to make your new wheel aligning tool, make it double ended, so you have a wheel sticking out of either end of your tool holder.

That is so you can straighten up from both side and face, just by dropping the holder onto whichever face off the toolpost you need to use without having to turn the tool around in the holder.

I am still threatening to make mine.

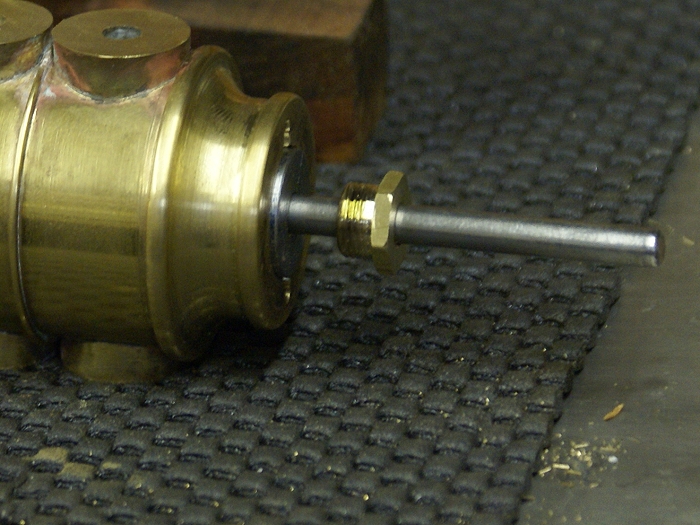
Are you using silver or soft solder in all those joints? If it is silver solder, you have really got it down to a tee now, very nice work indeed.

But on the other hand, that is just what we would expect from you now, perfection and close control of fine detail.


John
 
John
Great idea on the wheel tool. Now if I can get a round tuit....LOL

Since there is no structural or pressure related stresses on the parts, I've opted to use a soft solder with moderate (7- 10%) silver content. I'd use silver solder if it were otherwise. I've not had any failures so for the difference in price alone its been quite a workable solution.

Thanks for the vote of confidence. It's always good to hear a mentor say something nice....LOL

Steve
 
Not a mentor any longer Steve, you are surpassing me every new day, and it will stay that way, I am slowing down just too much nowadays to keep up.

I can remember your first tentative steps into making things, and once you had things nailed down, there was no holding you back.

The saying about old dogs and new tricks has definitely been proved wrong. You are teaching me new things all the time.

Keep up the great work.


John

 
Wow...Wow....I am speechless.
Thanks for the detail, thats and incredible process.

Kel
 
That sure turned out pretty, Steve. This is going to be another one of those threads where we run out of
superlatives right quick like. Such nice work, here.

Dean
 
OK Steve, I know how you feel about those of us using dial-up, but I have to tell you it is the best way to get maximum enjoyment from your posts. While the picture is downloading and I have only your words to read I find myself trying to figure what it is exactly that you're doing.

Then all of a sudden, bingo, there's the photo and I'm totally amazed at the work you had to do on those crosshead guides to get that really elegant relief (is that the word?) effect.

Truly a master at work here :bow: :bow: :bow:

Cheers,
Phil
 
Phil
Glad we got that all worked out....LOL I didn't get to take a photo yet, but the hand filing is done and the edges are all nicely rounded off now. I'll shoot it tomorrow and post the finished look.

Steve
 
I didn't get a lot done today, but what was accomplished tied up a few loose ends that were bugging me. The windows on the cross head guide are now filed and rounded to their final size and shape. They turned out to be a somewhat delicate feature that added a nice bit to flair the project. The second engine's guide will begin tomorrow and I'm hoping it will turn out even better than this one.

guide-13.jpg

http://cedesign.net/steam/images/misc/multi-valve/build/guide-13.jpg

The rest of the progress was limited to getting the gland nuts made and fitted to the glands. These were turned from a 1/2 inch piece of hex brass that made it easy to make.... you got it.... hex nuts....(grin)

gland-2.jpg

http://cedesign.net/steam/images/misc/multi-valve/build/gland-2.jpg

You'll notice the gland nuts are flat on the thread ends. When I drilled the holes to thread the gland body, I left the taper the end of the drill bit created. The flats will press the packing into the taper and against the piston rod as the gland nut is tightened. Since I used a 3/8 x 32 TPI this arrangement will allow me very fine adjustment to control how snug the packing is compressed. the nuts were drilled .010 over the size of the 3/16 piston rod. Since the gland was reamed to size, it will hold the rod concentric, negating the need to add additional friction points in the nuts.


gland-1.jpg

http://cedesign.net/steam/images/misc/multi-valve/build/gland-1.jpg

Here are the two gland nuts were what had me a little worried about the length of the original spacer between the cylinders. They even added something to look at through the small windows. Looks like I'll need to center them up a bit before I'm done.


gland-3.jpg

http://cedesign.net/steam/images/misc/multi-valve/build/gland-3.jpg

The strange silver looking string is the graphite impregnated material Zeusrekining shared with me during the Water Pressure Engine project. This stuff makes perfect stuffing for the glands and acts as a lubricant was well. It remains low friction even after it has seated and worn in. It's available from McMaster Carr as well as Smallparts.com.

gland-4.jpg

http://cedesign.net/steam/images/misc/multi-valve/build/gland-4.jpg

Here are the pieces all fitted up and awaiting the stuffing.... among other things....(grin)

gland-5.jpg

http://cedesign.net/steam/images/misc/multi-valve/build/gland-5.jpg

Steve
 
Steve, thanks for the updates and the heads up on the packing material. :bow: I'll be in need of some of this stuff shortly as I plan to run a few of my model engines on steam.

Cheers,
Phil
 
Steve, I am blown away by how you so effortlessly (yeah right :D
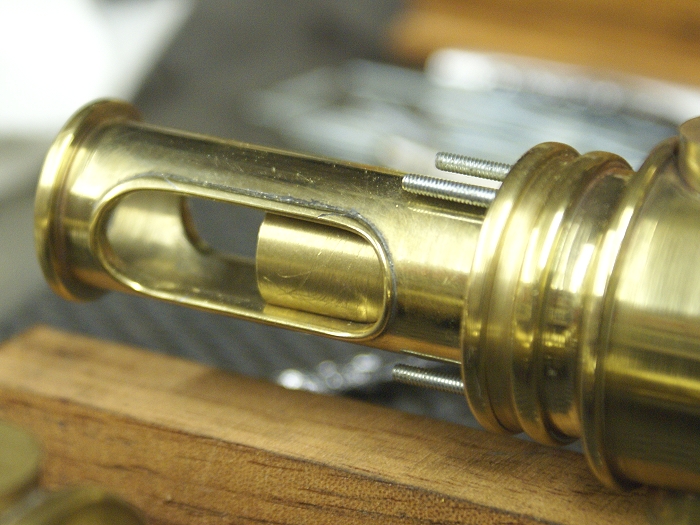
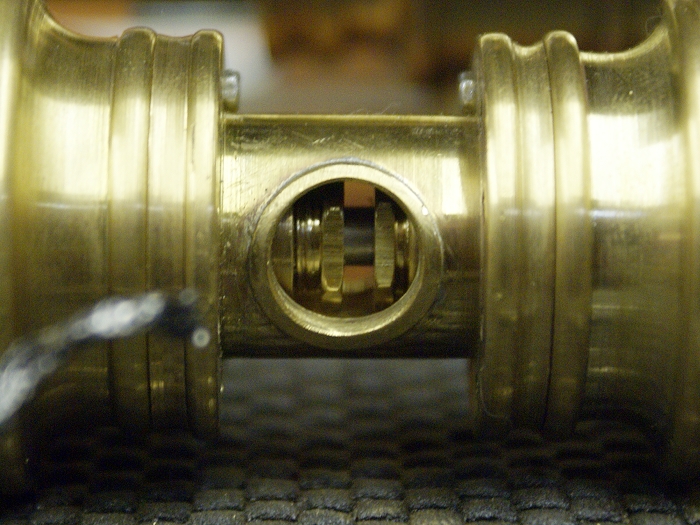
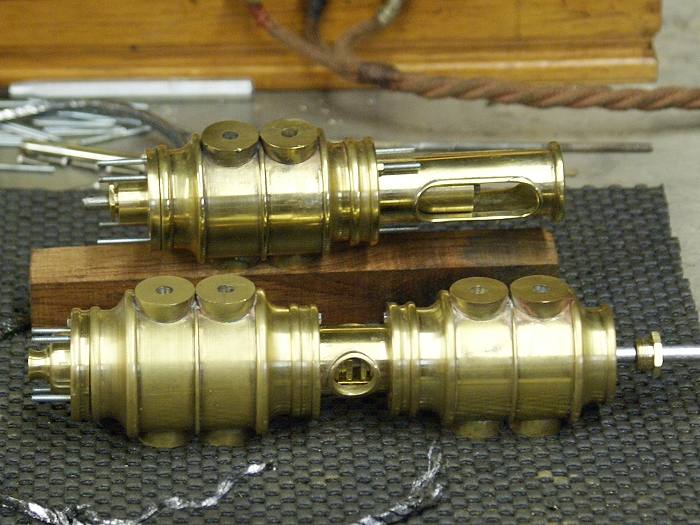
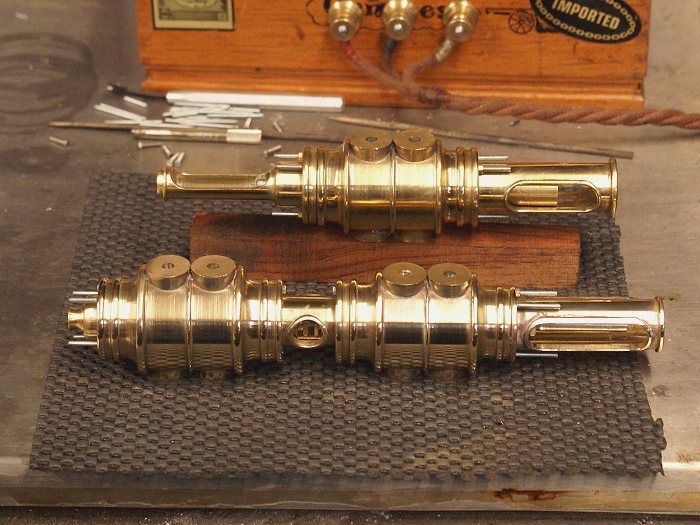
) have fabricated those elegant rims around the crosshead guides. I have scratched my *ahem* head for quite some time in an attempt to figure out a means of doing that and you have just delivered the answer on a silver platter. My thanks :bow:. Your project is turning into yet another epoch display of machine work and talent. Well done.

BC1
Jim
 

Super nice work Steve!

Coming along ever so nicely.

 
Jim...
That was my reaction to seeing how it was done, as well. I'd scratched both ends raw trying to come up with a solution until I saw how it was done. Definitely an AHA!! moment.

So many people have shared tips, tricks and techniques with me that I'm trying to document some of the things I've learned as I go along. The difficult part of that is to spot when I'm doing something a new guy might not have seen before. Some things become habitual enough that you do them without really thinking about it, while some poor schlub is out there struggling with the same technique. If it seems I'm over detailing my comments, at times, this is the reason for it.

I'd like to say it's all effortless, but like anything else, it takes a bit of patience, some brain sweat and copious amounts of elbow grease. The end product usually justifies the expenditures.

Steve

 
Steve,
Please don't worry about overdetailing comments and pictures. I can't tell you how often someone's "routine" comments and photos have helped me over a rough spot. The only problem is tips like these rims make me want to start over on my cross head guide. :D No wonder projects go on forever.
Dennis
 
Cedge said:
You'll notice the gland nuts are flat on the thread ends. When I drilled the holes to thread the gland body, I left the taper the end of the drill bit created. The flats will press the packing into the taper and against the piston rod as the gland nut is tightened. Since I used a 3/8 x 32 TPI this arrangement will allow me very fine adjustment to control how snug the packing is compressed. the nuts were drilled .010 over the size of the 3/16 piston rod. Since the gland was reamed to size, it will hold the rod concentric, negating the need to add additional friction points in the nuts.
Steve

Steve,

Beautiful work. :bow: :bow:

Just a suggestion - gland nuts/ followers usually have a matching reverse taper to the stuffing box base. That way the packing is more evenly and easily compressed against the shaft.

SB.jpg


Best Regards
Bob
 
Bob
Thanks for the tip. I typically deburr holes with a countersink, which leaves a taper in the end of the hole.... so I guess I do add a bevel in the nut without really thinking about it. See what I mean by habitual things are difficult to document?

I'm trying to keep these two engines fairly close to the same level of completion, as I go along. That means that I have to consciously stop and assess what is falling behind on one or the other as I work my way through test fits and such. Today I managed to bring both engines to the same place and got a lot of small things accomplished.

The second crosshead guide is almost done, needing only a bit of hand work on the window and some cleaning and polish. It was a little tricker to make since the bead on the end of the cylinder was intentionally cut smaller than the rest of the ends by a full 1/8 inch. Lucky for me my calculations were right on and I didn't have to change the hole pattern to make it work.

While the engines are of the same basic design, I've decided to give them different details. The single cylinder version will have the piston rod exposed on both ends just to give it a bit more motion when running. The tandem engine now has a longer crosshead window which will hopefully allow me to use a novel oiler system. Other small things will receive cosmetic differences as things progress.

Here are the two engines as they sit a the moment. Sorry, but the things I accomplished over the past couple of days were simply repeats of things in previous posts. No one wants to see photos of all of the nearly 150 small holes the project has required so far....LOL

chg.jpg
 
Steve, I haven't responded much to your build but I have been following it. As per your other work it has the Cedge touch to it, by that I mean it has that Victorian style with the radii and fillets. Your work is first class and I enjoy your documentation efforts as I know how much time it takes to do this.
George
 
George...
I do love the old Victorian stuff. It's a tough style to emulate but I'm having fun trying. As you know, putting it all out in the open, on line has its own challenges. You can easily wind up being the bug instead of the windshield if you aren't careful.....LOL Thanks for following along. Nothing like having a master of the trade looking over your shoulder..... no pressure.... LOL

Sam....
Thanks.... the positive comments keep these projects going.

Steve
 
Steve,
I'm following along and what can I say? Beautiful work and an inspiration to us all to do our best. It really is in the details and you're showing us what is possible. :bow:

Cheers,
Phil
 
Codge,

Nice job! I guess the world still has a few Master Craftsmen around. Just like the other comments you've received, I'm learning new things with every post you make.
Thanks,
Rich
 

Latest posts

Back
Top