Swarf Mountain Express

Home Model Engine Machinist Forum

Help Support Home Model Engine Machinist Forum:

This site may earn a commission from merchant affiliate links, including eBay, Amazon, and others.

IronHorse

Project of the Month Winner!!!
Project of the Month Winner
Joined
Mar 3, 2008
Messages
243
Reaction score
20
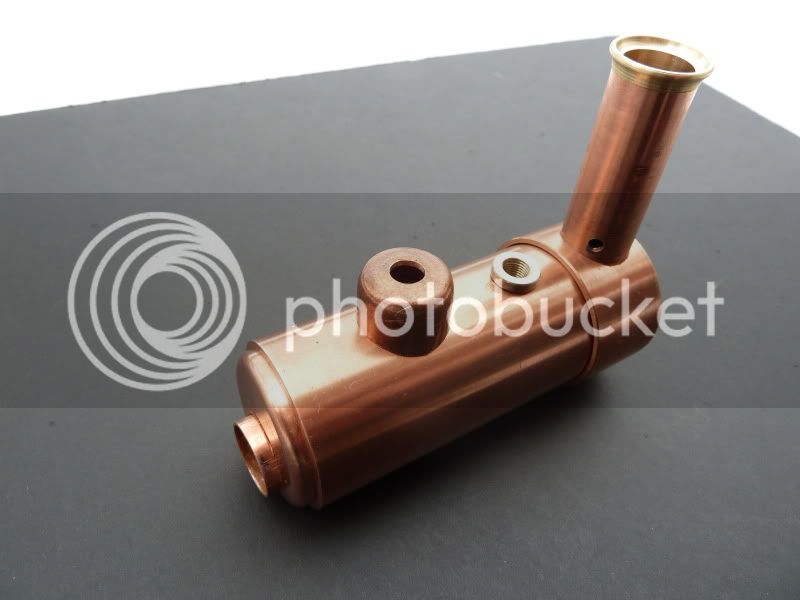
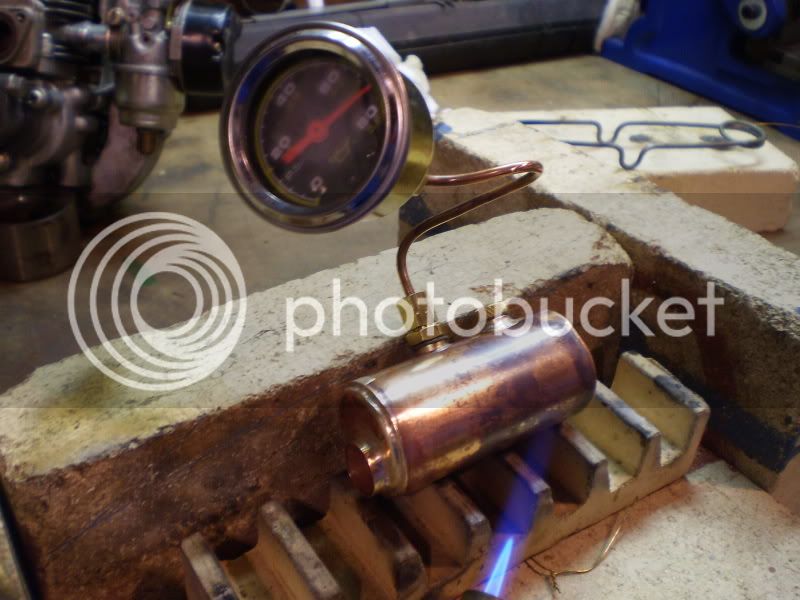
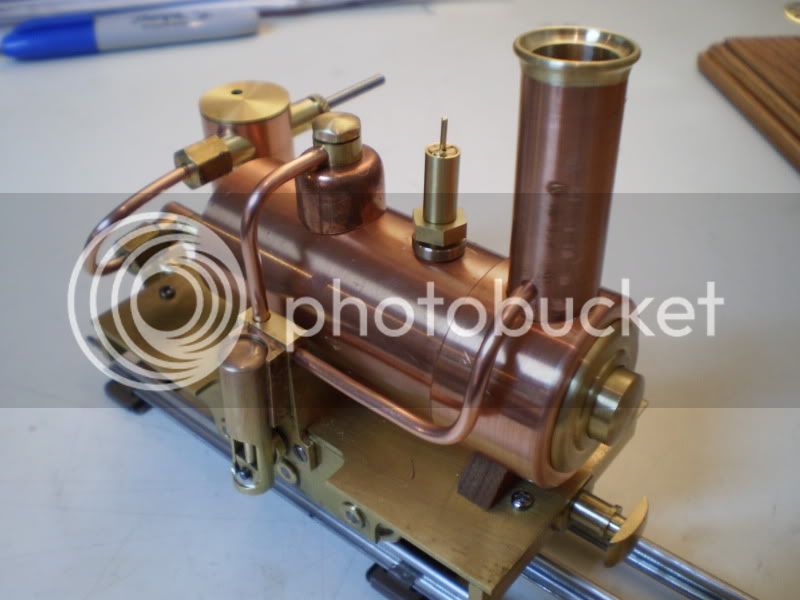
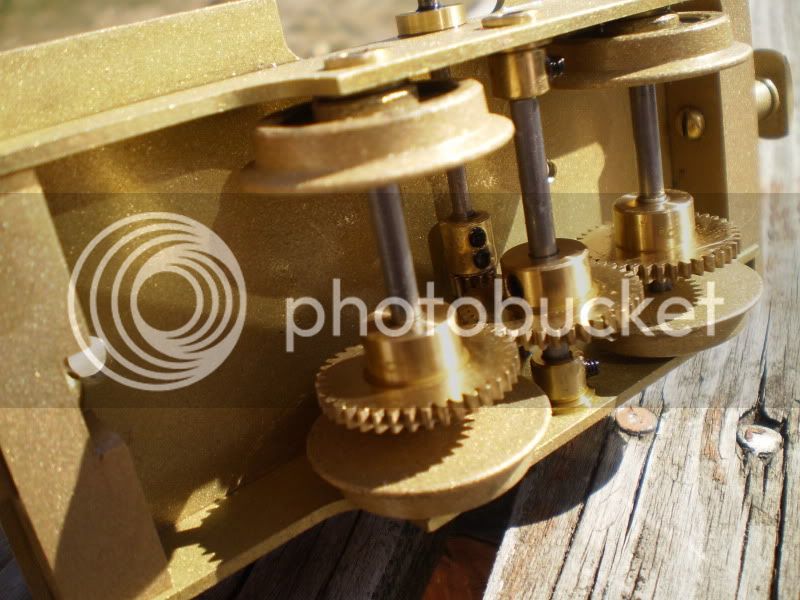
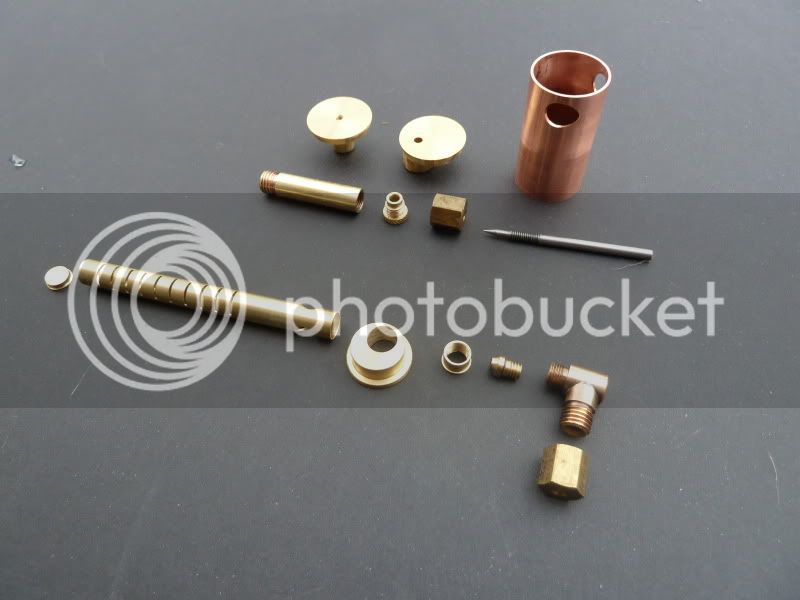
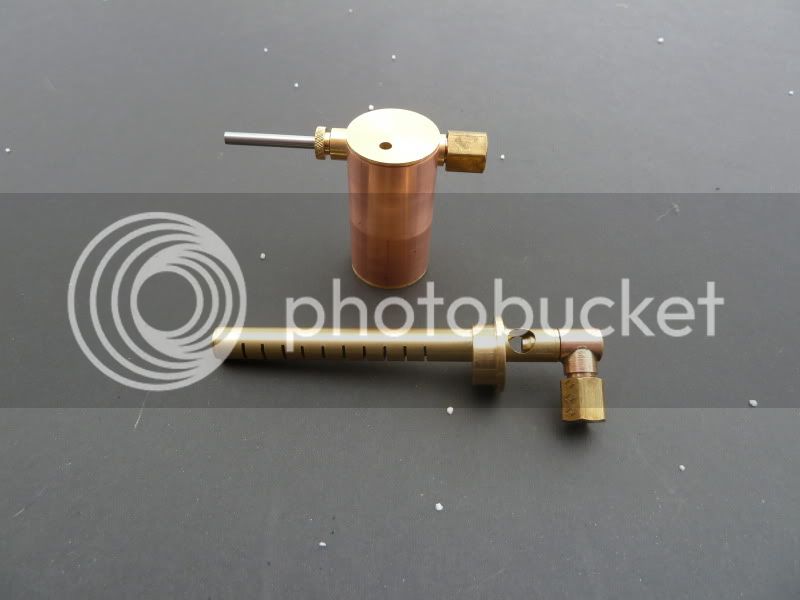
Here is my latest project....A CRACKER.

CrackerMountianExpress.jpg


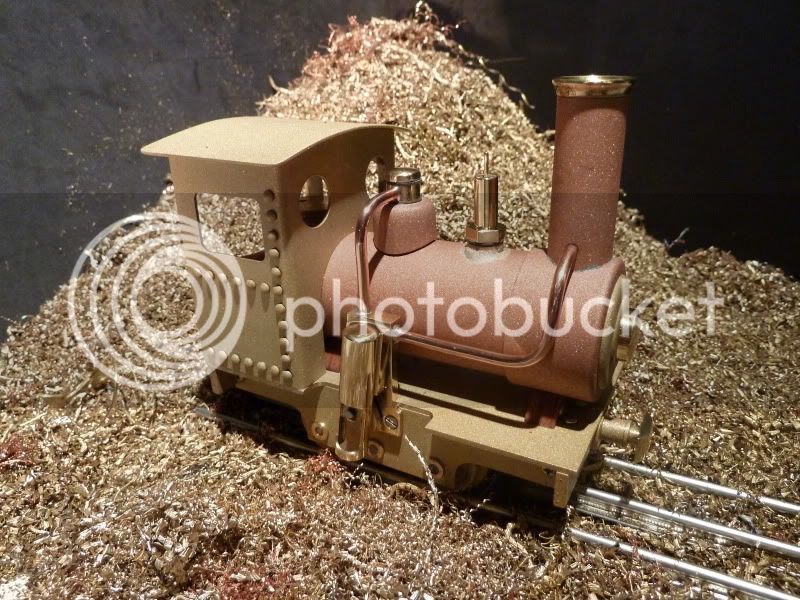
I built this for 3 reasons:

1. It's neat!
2. Even though I am not a big rail fan, I wanted to get at least one build under my belt.
3. It answers the age old question: What does it do?.........I find people just don't get the stationary engine stuff (like we do ;D)

It may look done, but I still need to finish the burner and gas tank. I have tested it on air, but I will test with steam soon.

SwarfMountainExpress2.jpg


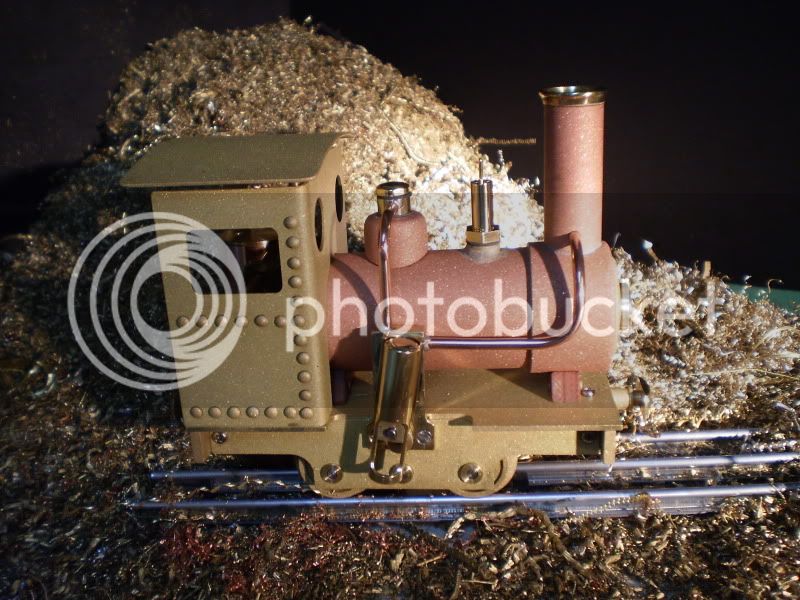
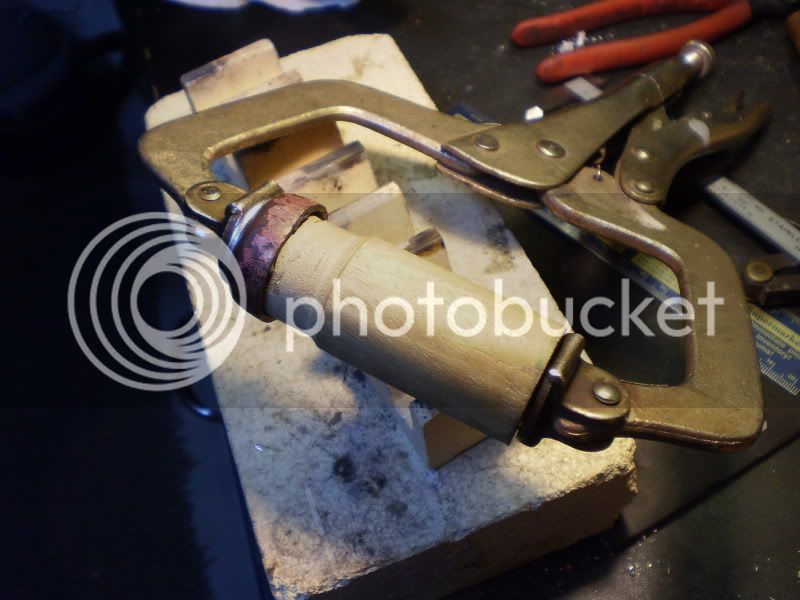
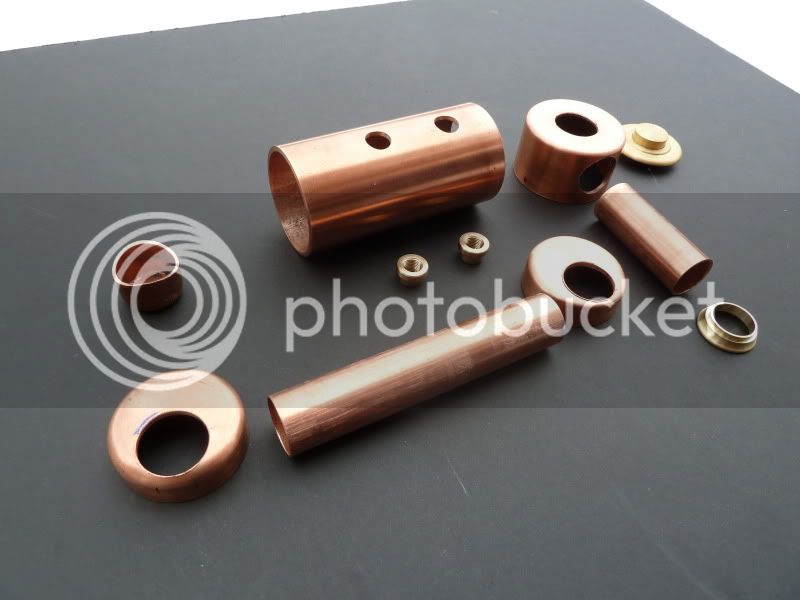
I did not do a step by step build, because it has being done before. I will post more pictures soon of the finished parts before assembly.

IronHorse


IronHorse

Very nice looking engine.and a very catchy name. Now I know what you have been up to on those long winter nights in Hogtown. I'll be watching for some further pictures as she is finished up. Just don't let the swarf overtake her. :bow: :bow:

Cheers :)

Don

 
Looks great! The blasted finish contrasts nicely with the polished parts.
 

Nice job, it looks really great!
 
Outstanding! A nicely finished loco you have there IH. It is funny to see so many Crackers being made and yet they are all different in character. Each one is unique and yet they are all the same basic design. I like that! This is truly one of those that brings out the builders artistic and creative sides. Will we see a video of this one on the mountain? ;D

BC1
Jim
 
That's a winner IH. Love the contrast of the various finishes as well, and the idea of snapping it with the mixed swaft is great too. Looking forward to a vid when finished.

Bill
 
Excellent work!!! Thm:
Love the contrasts between the sandblasted parts and the polished parts!

Would love to see a vid of it running on steam!!

Andrew
 
Thanks for the comments.

Andrew: Yes I decided to blast it because after I spent 3 weeks polishing my last project, I vowed never to do that again! Also I saw that a lot of guy's had trouble with paint on these engines.

Bill: I was lucky that I have kept all the brass swarf I have made over the last 4 years!

Jim: I think why there are so many variations, is that the plans are very basic and they are just begging to be modified.

Don: Ya, its being a long cold winter, even snowed last night, I get lots done with weather like that.

Here is how I formed the end plates. I just used a piece of wood dowel and beat it into submission. I had to anneal the caps about a dozen times during forming.
PB060078.jpg


Here is a shot of the boiler parts
P1010963.jpg


And before soldering
P1010966.jpg


IronHorse
 
IronHorse

That sure has come out nice. Looking forward to the video!
I can relate to the long cold Toronto winter, spent 5 years of my life in Scarberia ;D

Cheers, Joe
 
Had to look, thought it was a singing group - "Swarf Mountain Express" - but it was better! There was a steam locomotive involved!!!!

BillC
 
For the rivits I used small brass echelon pins I found at the hardware store. I just drilled some holes and soft soldered the pins in and then ground off the excess on the back.
 
Nice cracker build. Maybe someday!!

It answers the age old question: What does it do?.........I find people just don't get the stationary engine stuff (like we do Grin)
I know what you mean sometimes I am tempted to say they are politicians . they run on hot air get folks attention get them excited but do not really do anything. LOL
Tin
 
Here is how I tested the boiler. After filling with water and making sure there is no air inside, I gently heat up the boiler and watch the gauge. You have to heat it up slowly, especially on a boiler this small.
P2260179.jpg


In this shot, I am mocking up the assembly to check the fit. This is where I noticed a design flaw: There is no way to remove the cylinder without removing the boiler or pulling the motor off with the crankshaft. The clearance between the nut on the pivot shaft and the side of the boiler will not allow you to reinstall the nut. I saw a picture somewhere that had the pivot shaft held by a set screw in the cylinder base. This would allow it to be reassembled easier. I usually like to clean all the water out after I run a steam engine and re-oil all the joints, but the way it is, it is just to complicated to do this everytime.
P2060170.jpg


IronHorse
 
First I have to say your engine looks great. The picture you were looking at was shred's build. I did the same as he did. The pivot pin is held with a 2-56 set screw. It makes it easy to remove the cylinder.

Dave
 
Dave: It looks looks like a good idea, I am modifying mine now.

Here is a shot of the gears. I bought these from SDP (http://www.sdp-si.com/) in the USA. I ordered 3 A1B2MYK05040 and 1 A1B1MY05010. The larger gears had a 3MM bore that I reamed out to 0.125", but the small gear was hub-less. I made a small hub and silver soldered it to the gear. I ran in the gears by hooking up my hanging motor to the crankshaft, and ran it at a few hundred RPM's for a hour.
P3270206.jpg


The burner is the last part I need to make. I cut the slots in the K&S brass pipe with a regular hacksaw blade. The orifice was recycled from a old propane torch. I need to bore and thread the cap to take the Ronson valve. I have a cheap Ronson torch that I will try to salvage the valve from. I hear these are a fine metric thread that is not very common. I will measure the one I have first to make sure.
P1010942.jpg


And the dry fit:
P1010947.jpg


IronHorse
 
It's great watching such project come together with such obvious quality. ;D I have resisted locomotives in general, but there's something about them... hard to resist!
 

Latest posts

Back
Top