Steam engne 001

Home Model Engine Machinist Forum

Help Support Home Model Engine Machinist Forum:

This site may earn a commission from merchant affiliate links, including eBay, Amazon, and others.
Ralph...

Thats pretty cool. Are you going to do more to the flywheel?

Eric
 
Ralph your looking a little sloppy there.
Can't you get that thing to shine a little? :eek:

Amazing work as always! :bow:

Looking forward to MORE!

Rick
 
Eric, as stated
I finished this evenings session of shop stress relief with a bit of emery shaping and a quick polish
(It's not finished yet but it won't look too far from what it does now)
Do you want to borrow my glasses?!?! :big: ;D

I have no idea where to go with it just yet.... but it will come to me... I may fit a hole between the ali' insets ? It will have a stainless spinner of some sort too.... I need a little time to think and sleep on it ;D


Rick, Thank you and.... see above! ;) I promise it will be all shiny and loverly when I finish it, I got some styling ideas floating around in my head ;D


Ralph.
 
Divided He ad said:
Eric, as stated Do you want to borrow my glasses?!?! :big: ;D

...

Doh! I saw that too... Was hoping to draw the secret out ;D

You should get involved in one of the team builds already!

Eric
 
John
You need to have a word with Ralph about showing up his peers. He's advancing way too quickly...LOL

Steve
 
Steve,

Just remember, it was you who warned Ralph Da Blingmeister about me trying to pass over my bling king crown. Now look what has happened. Just as I predicted.

Good job Ralph, keep on polishing.

John
 
Eric, Sadly repeatability is not in my repertoire just yet... I am a one of a kind type of guy! 8)
I have thought of the team build but would hate to let you all down with probable inconsistency's to my work.


Steve, I'm just plodding along in my own little world.... No idea where I'll end up tomorrow? :D

John, I'm not trying to steal your crown... just trying it on for size while your shop is down ;D
(The repeatability is a question for when your shop is up and fully operational ;) )

I might get a little more done today since it is raining hard outside... I'll see what hits me?!

Ralph.
 
Ralph,

It isn't a case of you stealing my crown, you can have it with pleasure.

I've been trying to get rid of the damned thing.

Now you've got it, don't let Steve try and take it away from you.

John
 
Ralph ::) .......... every time you post the goal posts get moved further away :eek:

I'll just keep watching and learning for now .....

...... I eventually finished the Doughnut, now on with a "Ball Turner" which I hope to finish over the weekend ......... seems like I'll have to buy a big tin of metal polish so I don't fall too far behind :big: :big: :big:

Very (very) nice work mate, look forward to seeing the finished product :bow:

CC
 
Well CC (as you now are!?) You do not have to stretch very far to reach my level of machining. I believe it is known as 'artsy fartsy' !! ;D

I have learnt much of it by trial and error (that'll cheer up the purists among you!) I make what I can with the tools before me and as close to what is in my mind as I can achieve. (The secret... good music, I'm not the kind of guy who usually says this kind of stuff but if the music is good, you just create better work!)

I was taught the 'very' basics 15+ years ago and over the last 2 years I've restarted my machining. I've broken more than a few bits of tooling along the way and damn near left my skin at times when an 'incident' has occurred.

I do my very best to stay safe and will talk myself out of anything that looks like it might not work and into a safer solution... It may take me longer but I am currently still here and able to use all fingers, eyes and my brain (enter brain joke here!).

You are taking the same basic re-learn curve I did, make the compound clamp then a ball turner....Now all you have to do is sit down design and draw out a few little projects to create... something with threads that fit together and some soldering and.... oh wait you could just make one of those engines I keep seeing the plans for !!! :big: (If you haven't already got some I have some simple plans I could send you)


I'm of to re-think some of my artsy fartsy stuff and ponder what I can do since I still don't have the replacement drills I ordered!! :(


Hope you have fun with your ball turner project, post us a pic when it works ;D


Ralph.


Very true Ralph, it is a learning curve ..... or re-learning curve, in my case from just over 40 years ago :eek: .......... but I'm enjoying it, which is what counts for us all methinks.

Ball turner was just about finished (very basic ......... no bling factor as yet) ........ however on the last operation, I've just managed to break off the 4mm tap in the hole for attaching the carbide tip :fan: :wall: :wall: :wall:

There's a tiny bit sticking out and it seems to move a little when I can get a grip with a mole wrench but it don't seem to want to come out ........... any suggestions gang :( ........ apart from start and make another part ::)

CC
 
A perennial problem. Some things to try ...

Penetrating oil (Kroil is the standard on this side of the pond) to help it come free.

Heat the part to help the penetrating oil penetrate and to help free the grip on the tap.

And my personal favorite...

Having done all of the above, vibrate the tap with one of those electromechanical engravers while gently trying to unscrew it. If necessary, grasp the protruding fragment with some junk pliers and apply the vibrator to the pliers while gently twisting.

Tap extractors - the type with the fingers that fit into the flutes - have never worked for me. YMMV.
 
Thanks Marv .......... 8) ......... but the tap won :wall: ......... no surprise really, ..... OK ..... no more 1/2" plate left so will commence battle with the ball turner in a few days time once I can pick some up :mad: .......... 'spose I'd better get a new 4mm tap as well ???

Have fun gang ;)

CC
 
CC,

You may want to consider using less depth of thread (i.e., bigger tap drill) on your next try - the tap has to cut less and thus is driven with less torque, ergo less chance of breakage.

You can go to 55% DOT with little loss of thread strength.
 
Considering I was not really using a lot of force on the tap that's a point I will try and remember Marv ;) ........... minor problem really, but annoying..... well, annoyed with myself really :wall: .....

Having tapped a few holes today .......... which did raise my body temperature somewhat ??? ........ is this chart I'm using accurate :mad:

Tapping Drill Sizes

Many thanks

CC (Dave)
 
Dave,

The chart you're using is nothing more than the ordinary approximation:

TD = MD - P

where:

TD = tap drill diameter
MD = major diameter of tap
P = pitch

and takes no account of the depth-of-thread.

Since you're working in metric all dimensions above would be in millimeters.

The corresponding equation for Imperial taps, where depth-of-thread (DOT) is accounted for, is:

TD = MD - 0.013*DOT/P

where DOT is expressed as a percentage and P is in tpi (threads per inch). The factor 0.013 arises from the American National thread form and is equal to 0.75*tan(60)*0.01 where the 0.01 converts the DOT, expressed in percentage, to a conventional fraction.

Aside: It's common for us to use the approximation TD = MD - 1/P (same as the first equation above). This is equivalent to setting 0.013*DOT = 1 and, if we solve that equation, we find that the simple formula will always produce a TD that corresponds to a 77% DOT, which is a bit high for tough materials.

Now, here's where things get fuzzy for me. If the metric thread form is sufficiently close to the American National, one could use the second equation to account for the DOT in metric tapping. If that's not true, you'll need to research the proper form of the equation.

Perhaps one of our Euro-experts can chime in here and set both of us straight. To be explicit, what is the accepted metric equation for calculating tap drill diameter where depth-of-thread is explicitly accounted for?
 
Marv
What I usually need is to find the value of "F2"..... you know.... the fudge factor :big:

Steve
 
This might sound a bit heath robinson but... I take the pitch from the thread dia which gives me the drill size.

I.E. M10x1.50 take the 1.50 from the 10 and you get 8.50 ... Personally I would use a 8.8 (unless I was really going for super strong thread?!)

It has worked for me so far... only one broken tap in 2 years, M4x0.7 oddly enough and that was into stainless 6mm deep hole
That was with a 3.5mm hole... I now use a 3.7mm and it holds well enough.


Anyway... Back to my post!!

I spent a few hours in the shop this eve' Some time desoldering old circuit boards, LED salvage mostly. I just need the space they take up.
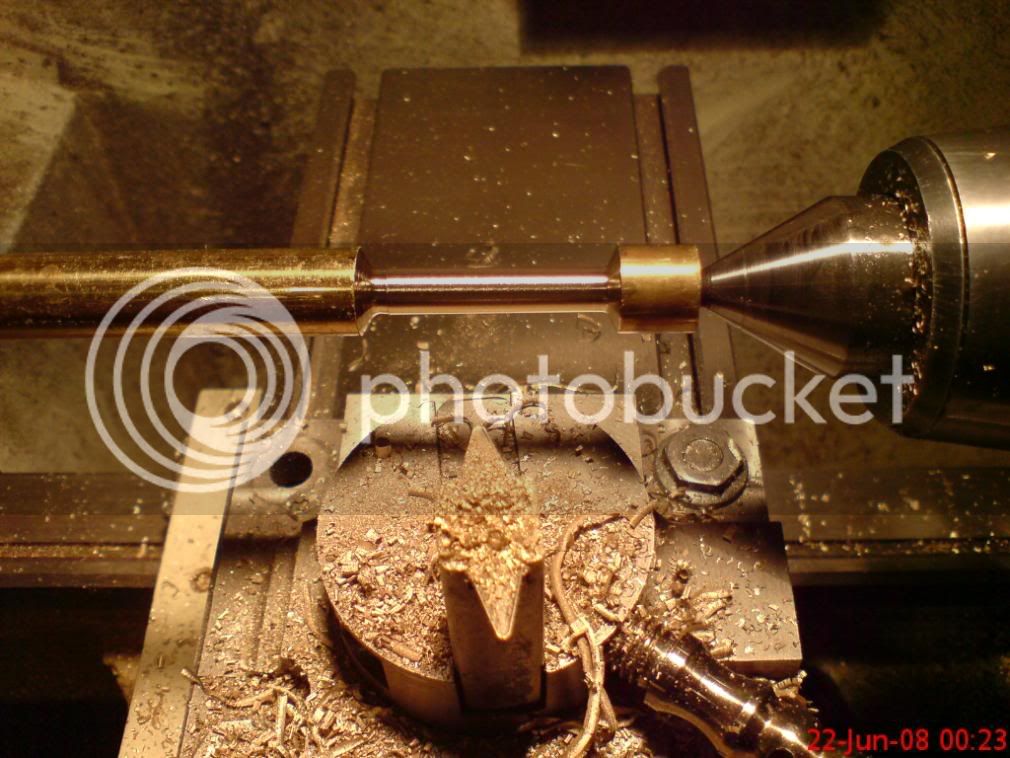
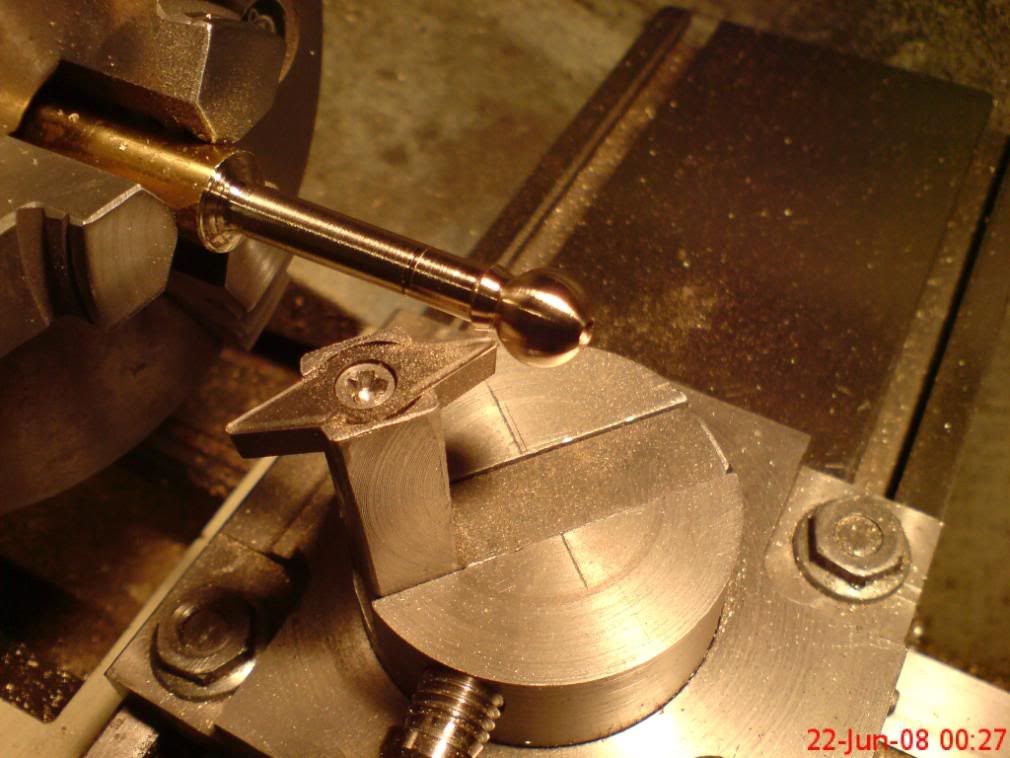
The rest of the evening went to my engine.... The piston to be more precise :) (yes time and date are correct... I'm just insane!! :eek: )

I decided to make it one part rather than the 2 in the plan...
DSC01785.jpg


DSC01786.jpg


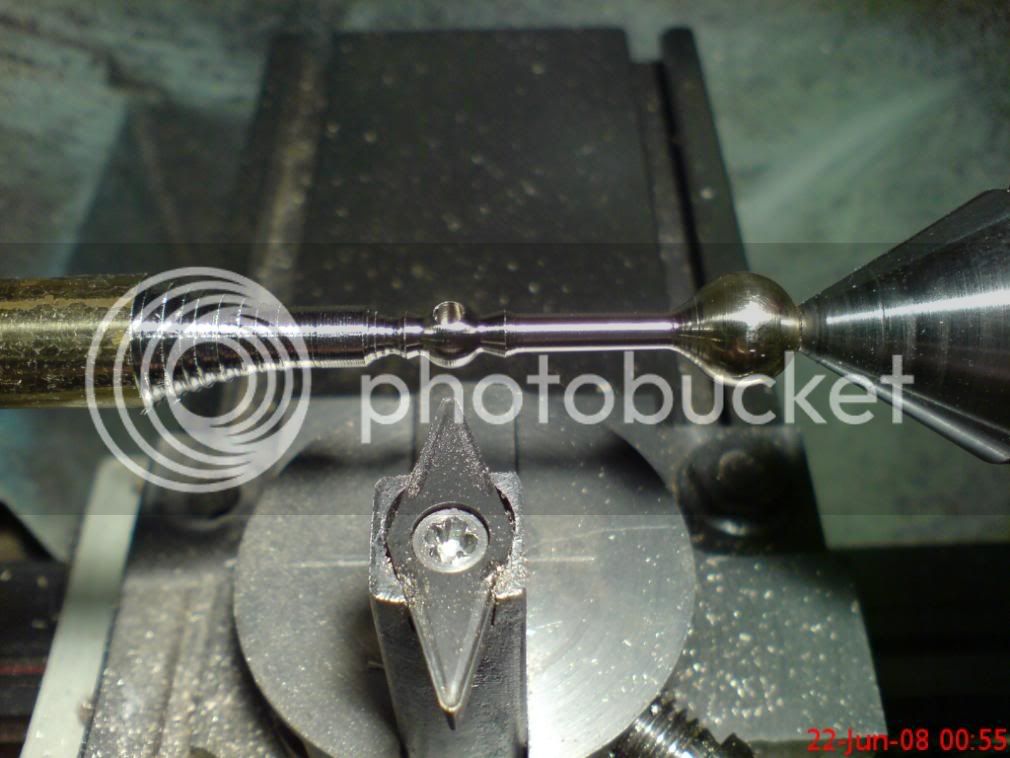
Once the ball was to the correct dia for the cylinder the part was transferred to the rotary table set up on the mill which was still set up from the drilling of the flywheel (not an accident, I made sure I had done all I could before setting the mill up this way to save all those heavy vise/RT changes) and then drilled the hole for the crank pin. Then back to the lathe for shaping....
DSC01789.jpg

DSC01790.jpg


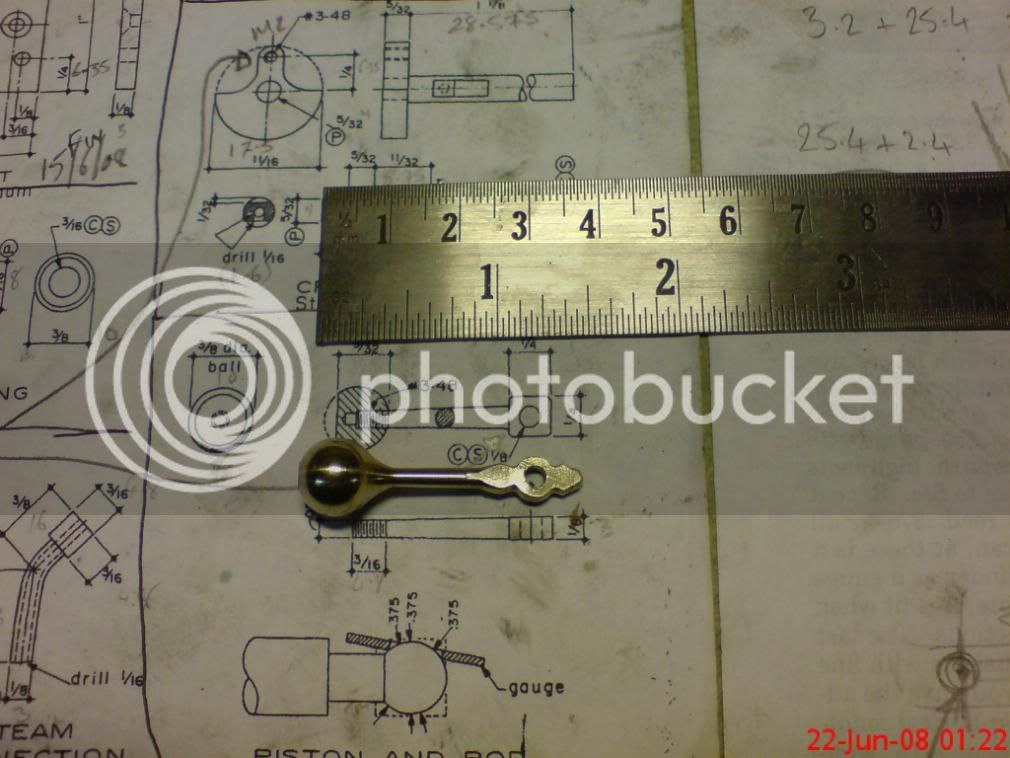
Then my camera seems to have not wanted to save the photo's taken at the mill!?!? but basically I flattened off the sides of the conrod and then parted the piston ass'y off....
DSC01794.jpg


Just needs a little flat and polish on the milled end and the piston is finished ;D


Now you can carry on with the threading issue ;) ;D


Ralph.


Ralph,

You be the blingster, no doubt. That piston looks like a copper bell clapper. Don't understand the "copper clapper reference? Take a look at:

[ame]http://www.metacafe.com/watch/42943/johnny_carson_copper_clappers/[/ame]

This might sound a bit heath robinson but... I take the pitch from the thread dia which gives me the drill size.

Look a little closer at what I wrote. That's exactly what the first equation says.

The thrust of what I wrote is how does one calculate the correct tap drill diameter if one wants to take into account the desired depth-of-thread? Subtracting the pitch from the major diameter doesn't address depth-of-thread at all. SWAGging it is fine if you know what you're doing but novices need to learn how to do it correctly if, for no other reason than to stretch their brain cells and learn that, deep down, there is logic to all these rules-of-thumb the old-timers use.
 
Sorry Marv, I get lost in calculations very easily! ??? I have told you before I have a form of mathematical dyslexia... I don't know why I just can't understand what are apparently simple mathematical solutions to problems!

Still I can appreciate a good comedy sketch when I see one :big:

I'm not sure I was trying for the copper clapper look but if that is what I got then that's what I got!

I think it will do the job of a piston just nicely ;D

Oh and Marv, it's not about Bling..... Just pleasing to my eye. When I look at something I make I want to smile and be happy with it, nothing more :)


Ralph.
 

Latest posts

Back
Top