Start on a long term project

Home Model Engine Machinist Forum

Help Support Home Model Engine Machinist Forum:

This site may earn a commission from merchant affiliate links, including eBay, Amazon, and others.
Looking good Ron Thm:

And good luck !

As to the rivets vs bolts to hold on the beams, from what I can see either way would work well. Tapping the beams might involve more work though; you'd have to drill tap-size holes through both the beams and the angles, then when done, clearance holes for the bolts in the angles, and then tap the beams... Rivets would be one set of holes, some hammering & filing, - done.

Regards, Arnold
 
It's all looking quite familiar, Ron!

I riveted my buffer beams. I'd drilled all of the holes in both the angles and the beams using the DRO in the mill, so the holes lines up (for once ;D). You still need about ten hands to do the riveting though... even using clamps. From memory, it took me about two mornings of noise to get both beams rivetted on.

Thanks also for the link to Baggo's site. I had looked on there about a year ago, but he's done a fair bit since then.

Someday I'll post some pics of my chassis... I'm working on axles and axleboxes at the moment.

Keep up the good work Ron!


Thanks Zee,Arnold ,Gordon.

I'll ponder the the rivet thing some more.

Ron
 
Nice work Ron, :bow:

We have a few examples of Simplex in our club - very nice looking and powerful engine, also pretty heavy to lift once it's finished.

Will be watching this one.

Nick


I haven't posted on this for a while so thought I would get you up to date.

Made the buffers for the buffer beams.

Started by making the bumper part of the buffers


DSC02797.jpg


DSC02798.jpg


DSC02799.jpg


I was stuck on how to form the convex on the face of the buffer until Tel's friend DrJ poited me to this site.

http://www.baggo.copperstream.co.uk/me/locos/25inch/helen longish/helen7.htm


Go about half way down the page to where he talks about the buffers. Worked really well.


Check out the rest of the site too. Tons of info on Locos. Zee you will love it.


DSC02800-1.jpg


DSC02801.jpg


I had to put packing in front of the headstock to get the right length of rod for the radius I needed
Thats the reason for the wood clamp in the pic. It's clamping the packing to keep it in place. This is
result.

DSC02802.jpg


Ron


Forgot to take pics of making the receiver part of the buffer. I made it in 2 pieces as I didn't have any square stock big enough to turn from. I think the 2 piece bit worked better anyway.


DSC02809.jpg


Checking fit of buffer into reciever.

DSC02807.jpg


Here is an assembly view


DSC02808.jpg


I mounted them on the buffer beams and tightened up the 3/8 nut on the buffer to hold everything in place and drilled the 4 holes in each square plate and buffer beams. Threaded the beams for 4-40 for 4-40 bolts. I am using round head machine screws to hold things now but I have scale hex head 4-40 bolts for final assembly.


DSC02811.jpg


On the frame temporarily.

DSC02813.jpg


Till next time.

Ron


Those buffers look very nice, Ron. Good turning work!

Dean


Thanks Dean, that means a lot. Still have a long way to go. Can't even consider myself an apprentice yet.

Ron
 
Thanks for the link Ron. You were right...it's fantastic. I only looked at a few pages so far but it's a nicely detailed build.

I like the buffers. As simple as it sounds, they have a special place in my heart...probably because of several memories I have as a kid.


Hi all, I got a little more done on my loco build.


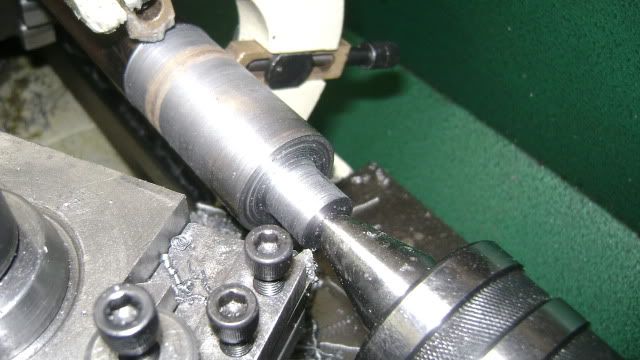
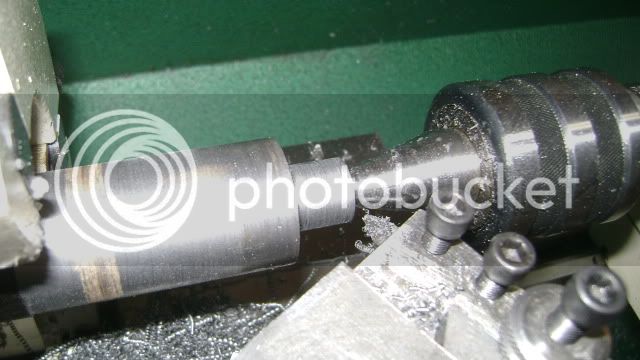
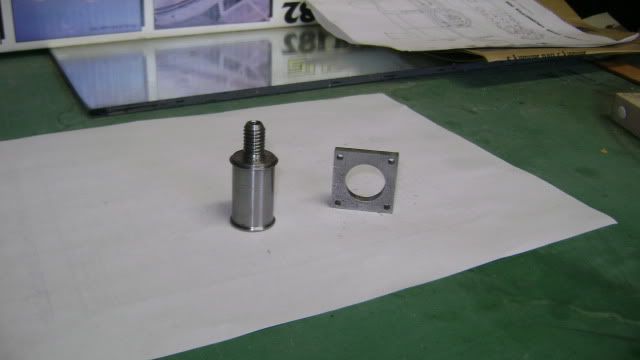
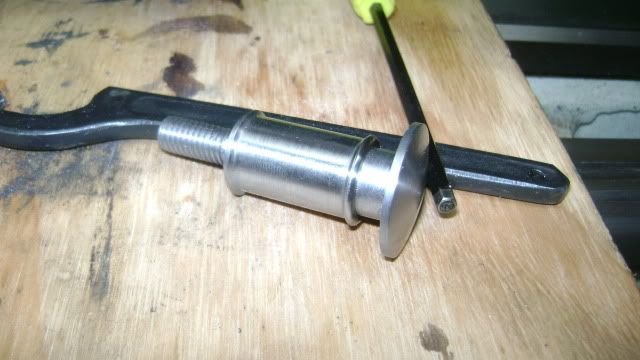
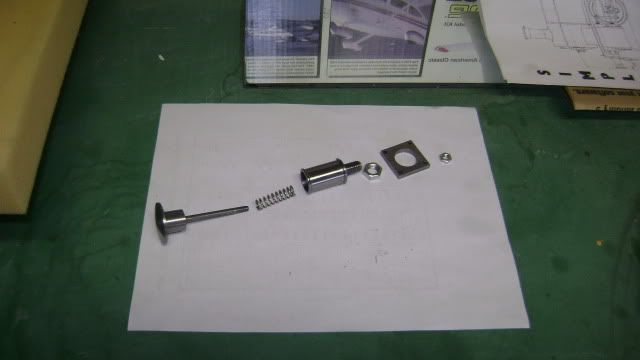
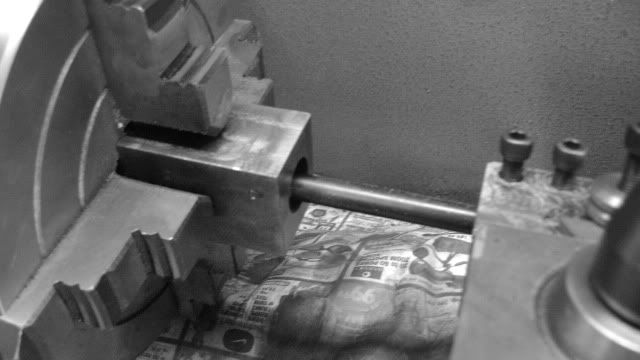
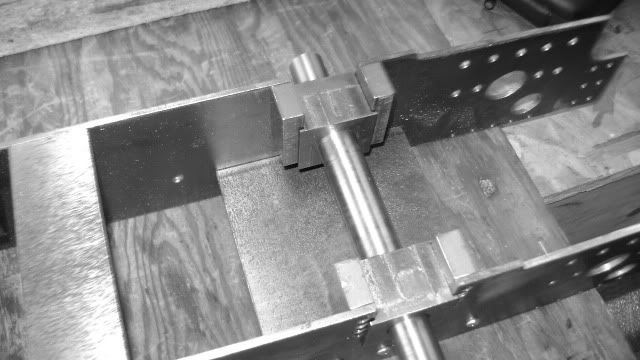
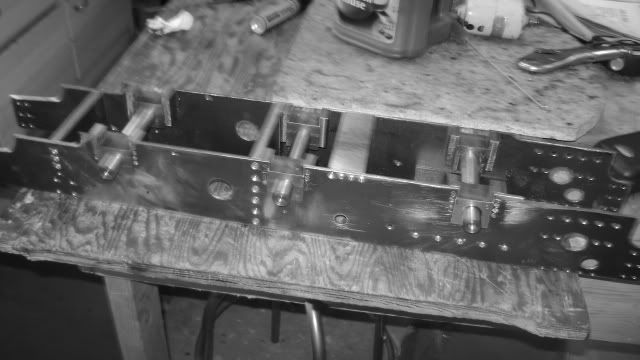
Made the axles and axle boxes. The axle boxes are cast iron and the axles are made from a long bolt made by Caterpillar Machinery. Don't know what it was for but it sure turned nice on the lathe with a very nice finish.


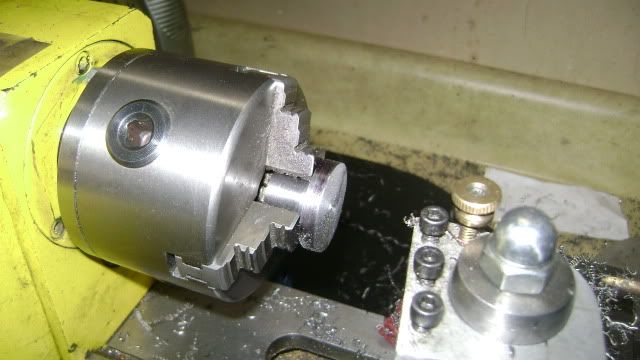
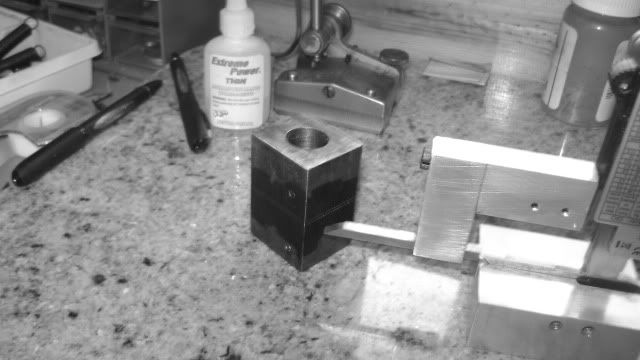
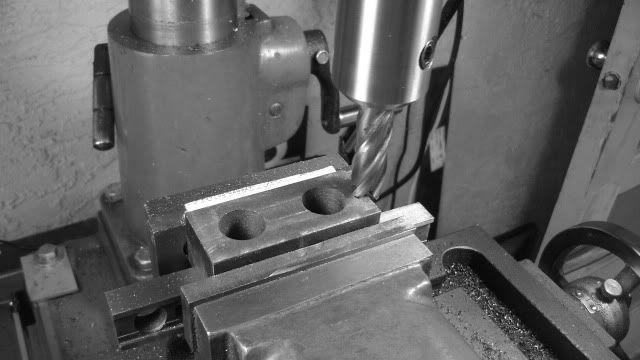
I squared up stock for the axle boxes long enough to make 2 aout of 1 piece so that the hole would be concentric in both the left and right boxes. I drilled to 11/16 then bored to size.

DSC02831.jpg


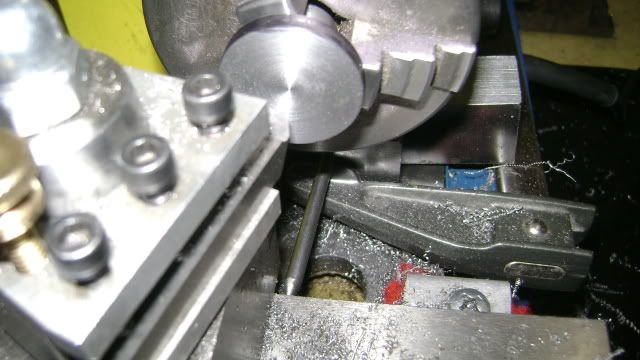
I then marked out the boxes and cut in half.


DSC02832.jpg


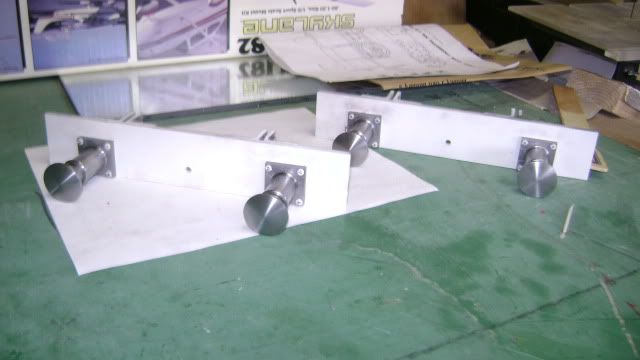
Put them in the mill and trued up the saw cut ends and brought to size. Then marked out for and milled the grooves to slide on the horn plates.


DSC02833.jpg


Then a lot of filing to get the boxes to fit well.

DSC02835.jpg


DSC02834.jpg


Now a question, I know that the distance between the axles have to be really close as far as the distance between ,say, the leading axle and the drive axle. How big a variance is to much between,lets say, the distance from the leading axle to the drive axle on the right side as compared to the left side?
I hope I'm not confusing you with my description.


Thanks for looking in.

Ron
 
Looking good there, Ron! Always nice to see somebody else's progress.

As to your question on distances between axles. On mine the distances between Crankpin centres are up to 0.5mm different left to right. Don't know if this will stop it running... I'm making the rods to fit, so will find out when I get the rods finished!

Will post some more pictures tonight, hopefully.

Gordo


Thanks Gordo. Someone on another site told me as long as you make the rods to fit in wasn't a big problem.

I was beginning to wonder if maybe people just over looked the question after looking at the pics.

Ron
 
Ron

Just skimming through my Rob Roy thread and realized I hadn't done you the courtesy of taking a look at your thread. What's this "long term project"? You seem to be going well and making a good job of this. You must be felling good.

I don't know if I'm off the mark with the answer to your question but I recall a story from my dad. He used to go the local model engineering night school to get tips etc. In discussion the guys on axle length and clearance he asked how many thou he should allow between the axles and the axle boxes. The response was along the lines "Thou? You'll need a bit more than thou, how the F*3K do you expect it to go round corners?" He went home to make 3 more longer axles.

Good luck on the build.

Pete


Hi Pete, thanks for looking in. I was asking about the distance between the leading axle and the driving axle and the trailing axle., nogt the sideways play of the axles. But your info is good to know about the side play too. I didn't even think about that. I just made em to plan.

Again thanks for looking in and I'm enjoying you "Rob Roy" thread also.


Ron


Hi Matt. Been reading your posts about the A3.


No. Nothing to post yet. I' m milling out the wheels and taking some pics so when I'm done I can post them. Although I'm retired I have part time job driving a Headstart school bus 3 times a day and that gets in the way too.

After the milling there will be a lot of file work to do on the wheels too.

Ron
 
Sounds good. Will be waiting to see the progress. I noticed that your using steel instead of brass for your running gear. I going to do the same thing with the A3.

Matt
 

Been awhile since I posted and have done quite bit on the wheels.

I bought a cheapie 3 in rotary table at Horrible Fright and used it to mount the wheel blanks for milling. I also drew up full size wheels in Turbocad and glued them to the wheel blanks and basically milled to the lines.

DSC02838.jpg


I used a 3/16 Ball end mill to mill around the inside of the rim and the outside of the axle boss. Then I switched to regular end mill and milled out the spokes and such. Did this times 6.

DSC02843.jpg


DSC02846.jpg


I didn't fancy trying to round over all the spokes by filing so after a few days of pondering I settled on trying a HSS dremel round over router bit and it workrd but the finish was not very good. It doesn't take much filing to make them presentable though.

DSC02850.jpg


DSC02851.jpg


I then broke out my new riffer files and went work on the wheels. I have 2 done as far as the profiling goes to try to make them look like cast wheels. 4 more to go.

DSC02852.jpg


I've never seen cast wheels before other than pics on the computer so I hope they look sort of right.


Still along way to go before these wheels are done but the really hard part is done. I hope!!

As always comments,tips are welcome.


Ron


Latest posts

Back
Top