RUBY KOUHOUPT MARINE ENGINE

Home Model Engine Machinist Forum

Help Support Home Model Engine Machinist Forum:

This site may earn a commission from merchant affiliate links, including eBay, Amazon, and others.
Hi Don

Have just finished your thread and am very impressed. Like Dave, I just love brass and you have certainly made good use of it on this lovely engine I think your work on that lamp is pure artistry, it is something I have never tried myself. One day maybe.

Cheers Les :bow:
 
That is inspiring Don. I used to do a lot of work with gravers and a watch maker's lathe back when I was doing antique clock restoration on a regular basis. It never occurred to me to set up a bar in the tool post to act as a tool rest for gravers on the big lathe. thanks for opening my eyes :)
 
Hello Don,

The lamp pole, base and shade are fantastic! I love to see gravers being used for complex profiles like your lamp project. George Thomas advocated their use quite often for model engineering in his written work. Keep practicing and develop the skill set, it sure is faster than grinding form tools. And as you just showed, spectacular results are possible.

Very well done! Oh BTW, your engine is pretty nice too. Thm: I am looking forward to seeing you complete it. All of your engines are finished so beautifully.

Regards,
Mike
 
Thanks Dave, Ron, Idahoan, Les and Brian I too love working with brass. Thanks for all you kind works it keeps my focus and glad you guys are watching over me.

Don
 
Thanks Mike for the encouraging words. I did start out model engineering graving. A good friend of mind had a watchmakers lathe and he introduced me to graving. Thanks again for the kind words.

Don
 
Very nice work - so nice, in fact, that I am prompted to suggest that you do something to alter that green color on the dynamo. To me, it's a designer color that just doesn't go with the rest of the plant. Matt black would do. Some of them were very dark green, or dark brown.
 
Wow, Don, both engine and lamp post are looking great. You made that lamp post look really easy!

Simon
 
Beautiful work Don. As you have asked, I would paint the generator black.

Vince
 
Black as well Don. Black (Matt?) gets my vote along with Marv and Vince!

Really sweet looking engine and such a good thread. Thanks for sharing.
I agree with Steamer in that brass looks so good. Especially on a good build such as your's.
:bow:

Ron.
 
My vote is for mat black to go with your beautifull brass engine. :bow:

Ian (seagar)
 
First thanks guys for all you kind words and input, so Matt Black it will be for the dynamo.
Simon graving the parts was easier then you think. 360 brass machines real easy and graves just as easy.
Marv I check you built on the motor generator setup real nice.

Ok BTW.
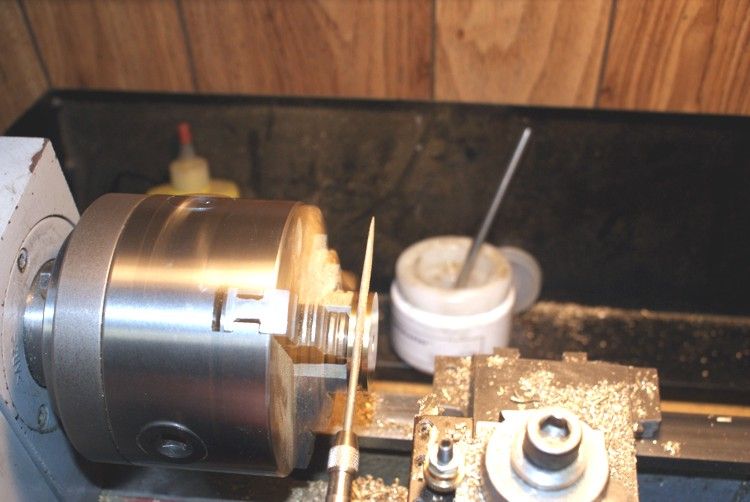
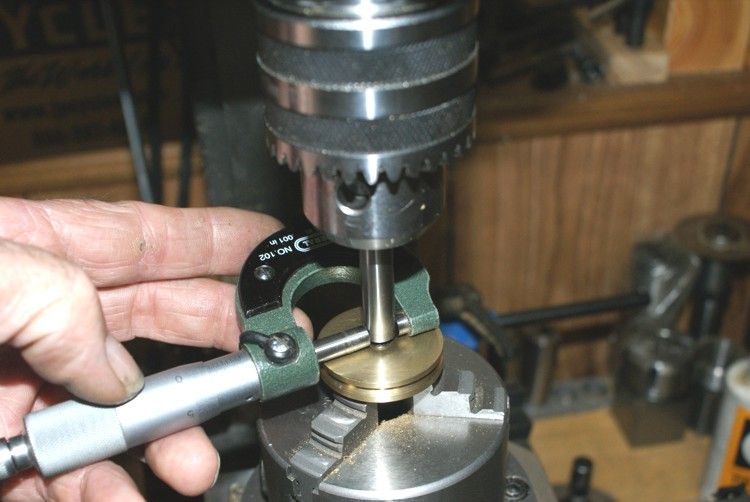
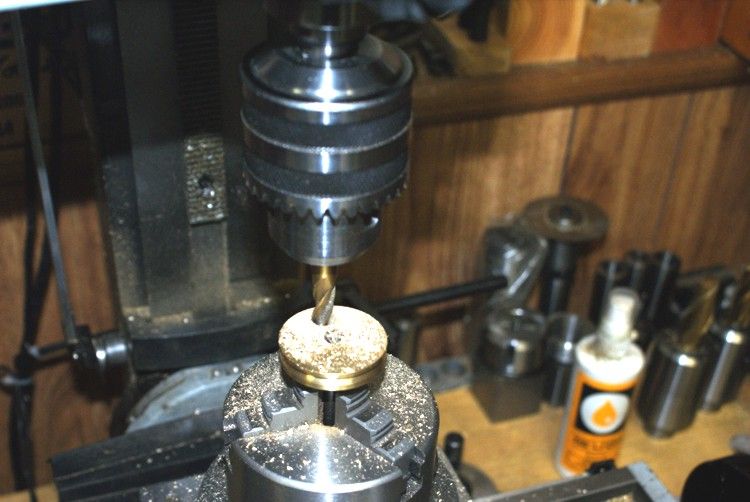
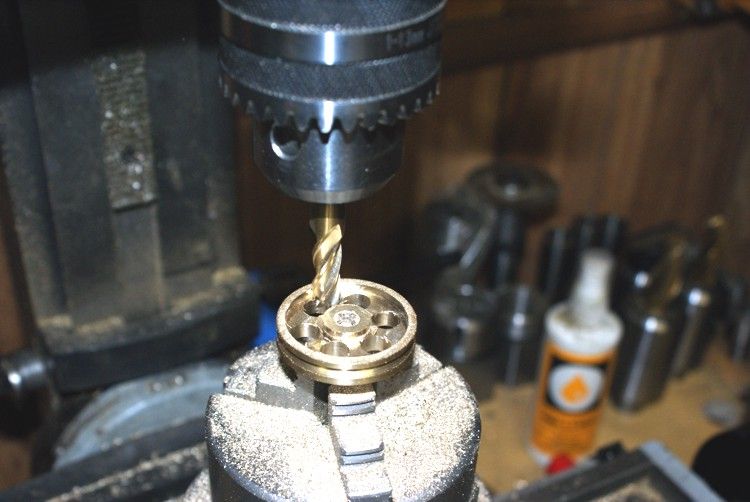
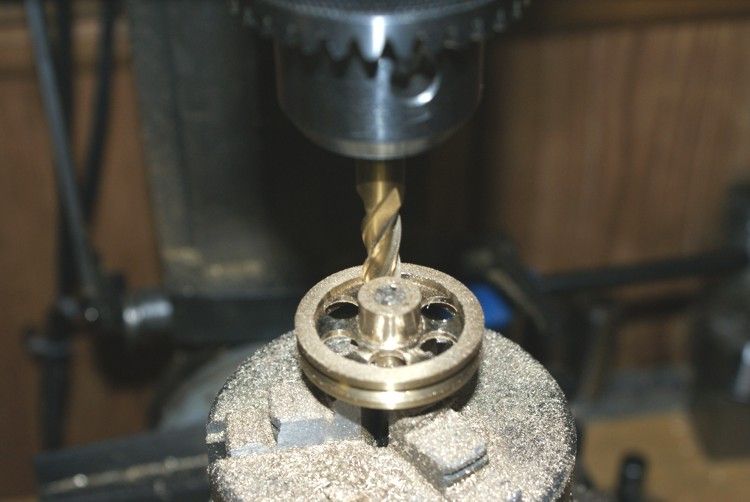
I had some time in the shop today and did not do a whole lot, but managed to make the pull for the engine to drive the Dynamo with. I start out with 360 rd brass 1 1/2" chuck it in the lathe to cut the slot for the belt and the hub. I then mounted my rotary table on the mill to do a little practice at doing something I had neve done on it. This was cutting the inside ridge of the pulley and holes for spokes. One mistake I made which could of cost me to redo the pulley was to leave the chuck on the mill. I first left the chuck to cut the holes throught the pulley. When I did this I had not put the tommy bar in to secure the chuck. All went well drilling the holes, but when I decided to cut the ridge inside the pulley guess what. :wall: Yea the chuck fell down into the pulley. Make a note do not mill with the chuck. :fan: I managed to salvage the pulley just cut the ridge a little deeper. The photos below I will detail the progression.
First I turned the hub and using a round nose tool to cut the pulley belt slot and used a rat tail file to finish it with.
NO90.jpg

Seeting it up on the rotary table on the mill and adjust it for zero position with the taper part of the edge finder. Note using the micrometer to check movement of the edge finder.
NO91.jpg

Cutting the hole pattern
NO92.jpg

Cutting the ridge aound the wheel
NO93.jpg

NO94.jpg

NO95.jpg

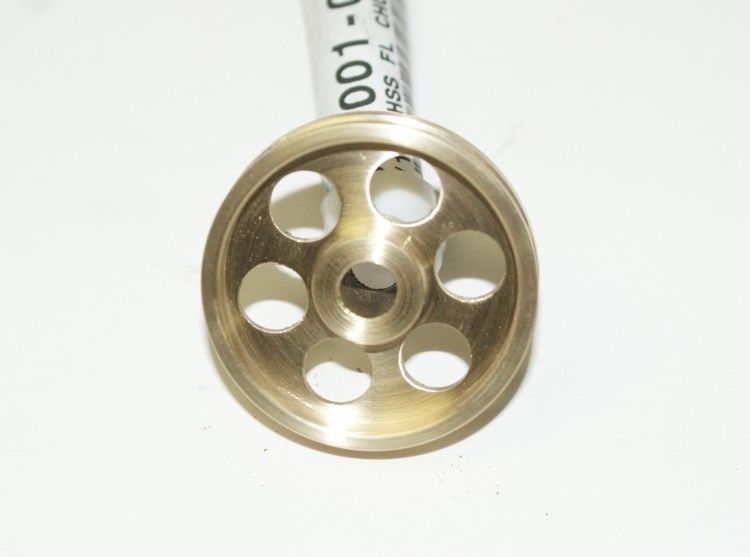
The pulley all completed
NO96.jpg

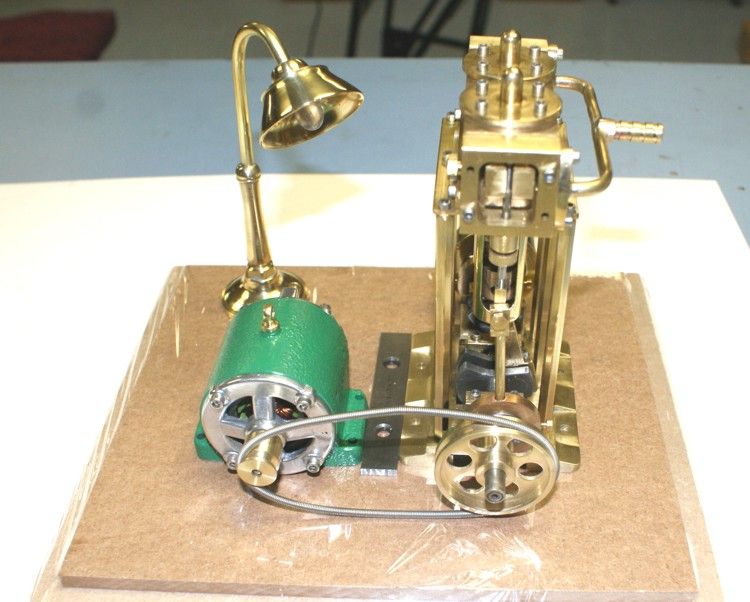
Just a shot of the setup with the pulley and belt.
NO97.jpg


My taps still have not arrived so today I ordered some more just to make sure.

Don

 
Today I had a little time in the shop and my taps finally came in. I have a short video of the engine running. Although I had a mishap with the engine I managed to get it running again but it is still tight. When I set it up to video it I turn the air on and the engine started and vibrated of the counter before I could pick up the camera and make the video. It bent the shaft some and the eccentric strap, but all in all it was OK. I will have to run the DTI on it tomorrow and try to finish straighting the shaft. The engine would run on 2 PSI with no problem now it take 10. So here is a short video.


Now I have to disassembly it and clean it all up to mount it with the dynamo.
 
Sorry to hear about your mishap Don! It seems you got it repaired very well! :bow:

A suggestion if I might. Its bad practice to use a drill chuck to hold an endmill. The shank on a drill is soft and the drill chuck will grip that very well, on the other hand a endmill shank is extremely hard and the chuck will fail to grip it.

The result will at best be the end mill will pull out of the chuck in use.

Additionally, most chucks don't have a draw bar. The cutting forces on an endmill tend to be in the down direction. Trying to pull the endmill out of the spindle. The result can be disasterous! I think you suffered this failure.

Definitly get a collet set or even better a set of endmill holders with a proper drawbar. That's the right way to do it.

Warm Regards,

Dave
 
Thanks Tin and Dave for your comments. Dave I do have collets and collet chucks. It was one of those dumb things I do sometimes. Today I will try to sraighten my shaft to better tolerance. Then disassembling to pretty it up. I was rather proud of it till it fell, but it could of been worse.

Don
 
You should still be proud!

I was in the shop pushing the cross slide back and forth and I slide it forward only to realize that the gibs on the saddle....when the whole thing fell!.....lucky for me I caught it but it made me say a lot of bad words at myself!

Excrement Occurs!

Dave
 
What Tin & Dave said Don - A nice engine you can be proud of :bow:

The "stuff" will happen; the first engine I built got knocked over accidentally and now has a wonky flywheel :( - unfortunately one can not do much about accidents happening. If an engine is damaged, it's sad, but that's better than getting injured.

Kind regards, Arnold
 
Thanks Arnold for the boost, I will manage to get the shaft straight. I use to straighten shaft on electric motors year ago, when I was in the motor shop. I seen your finished engine and I will try to document the finishing process of my engine with a few photos to show how much time and effort goes into finishing an engine. I have not read any threads on it. So I will do my best to show it.

Don
 
It's looking great Don. I hope to build one of these some day. Yours will be a build to strive for.
 

Latest posts

Back
Top