Re: TB5 proposal

Home Model Engine Machinist Forum

Help Support Home Model Engine Machinist Forum:

This site may earn a commission from merchant affiliate links, including eBay, Amazon, and others.
Pat,
no prob, will be a while before I am worried about those holes

Randel
 
Fly Wheels Take 2!

003-28.jpg


004-23.jpg


007-12.jpg


Still working on the video.

What you guys think of the revision?

Matt
 
Pat,

Who has the crank? Maybe we should leave that a little longer, cause I'm not machining the center of the fly wheel down as far now on the revision. That, and the discs I got really vary in width, so it might be better to cut the final length of the crank per mating fly wheel, as they will very from one to the other a bit.

Matt
 
Pat J said:
Below is a photo of one of the bases Ken has made, that we are shifting over into TB No. 5.

Thanks Ken for the nod to my Dad, Bob Jorgensen, who designed Engine No. 21 and built the first one. I know Bob would be very thrilled to see such work. Bob J. absolutely loved to build model steam engines and would appreciate this very much.
Bob was also in the hardwood lumber business and would love the variety of wood.

Per Ken:
"The main base is quartersawn white oak sitting on ebony feet and the engine bearer is curly black walnut."

Nice work Ken.

Team No.5, I think we are on a roll.

Pat J

That base is awesome!!! Way to go Ken! th_wav
 
Pat J said:
Matt-

I have material for the crank.
No problem there.

I can also ream the holes in the flywheel for the crank all the same size if they are not already the same size.

Pat J

I will be reaming them all to 7/16" so that should be fine, just want to make sure the the crank will be long enough to make up for the extra width of the fly wheel.

Matt
 
aermotor8 said:
i would like to do the crankshafts (should i make the shafts 1/2" longer then you can trim to fit the flywheels???)and


chuck

Chuck that would be great!

You ok with this Flywheel?
003-28.jpg


Matt
 
Pat J said:
Matt-

I vote go on the flywheel.
What does everyone else think?

I started making a cylinder lagging tonight.
It is a thin brass tube, and I power wire-brushed it off, and put it in the lathe (about a 12" piece) and began to part it off.
I wrapped the piece in the chuck jaws with some heavy paper to prevent maring.

About 3/4 of the way through the parting, the part snagged, and tube collapsed in the jaws. I was afraid of that, and have had some trouble with thin tube before, especially brass, grabbing when parting off.

I will post disaster photos tomorrow. I think I can salvage all but about 2" of the piece.

I toyed with the idea of mounting the dremel in the tool post and using it for cutting off thin brass tube, but I thought I would stick with the traditional methods.

I made a bracket a while back for the dremel, but did not finish it, so I will either finish it or use the slitter saw in the mill with the rotary table.

I will get it right tomorrow.

Pat J

how about turning a piece of something to put inside the tubing to keep it collapsing
 
Woodguy said:
Matt,

Could you post a video of the engraving process?

Ken

My video is floating in Cyber space I think. I will make a different one, when I get to the next flywheel.

My Wisconsin Badgers are playing in the Rose Bowl today!!! Shop is Closed, due to the intoxicants I'll be ingesting today. :big:

Matt
 
Here is the beginning of the cylinder lagging, made from 2" brass tube.

I initially tried to part off a piece of this, and ended up snagging it in the lathe, and bending a piece.

I ended up making a mandrel to hold it, which is just a piece of steel sized for the inside diameter of the tube, and slit in the cutoff saw. The inside was drilled out and a 3/4" pipe thread was a added. The mandrel expands on the end when the pipe is screwed in. Not a pretty piece of tooling work, but I did not want to waste a lot of time on something I was not sure would work.

This setup does work, but I would probably make the inside diameter of the mandrel larger and cut it more times. It takes a little more effort to tighten than I would like, but holds the tube well without deformation.

I set the carriage stop for the correct length of the lagging.
The tubing was cut slightly long, faced on one end, de-burred, rotated, and then faced up to the carriage stop position.

Finish is with fine emory cloth, maybe 600 grit.

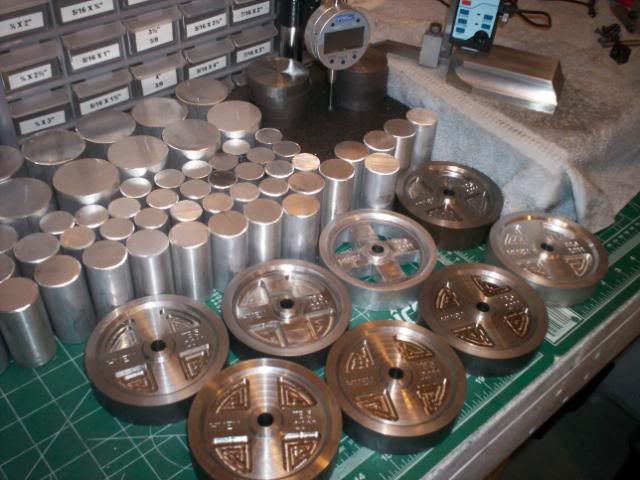
You can see the rough mill finish on the tubes on the right.
The lagging piece on the left has a ding in it from the first crash, but since a slot will be cut out of each, then the defect can be omitted.

These can be buffed to a mirror finish if desired.


rIMG_3166.jpg


rIMG_3168.jpg
 
Looks good Pat! glad the mandrel worked out for ya.

I finished up Fly wheel #3 tonight, and all three are different! I thought #3 was going to be like #2, but something got balled up in the gcode. When I started the program everything was going as planned, so up stairs I went for supper. When I returned, What a surprise! The outside of the spoke design stayed the same, but the center stepped down another .100". So now there is 2 designs in 1. I think its the best looking mistake yet to date!

Well, tomorrow night we see what #4 looks like....... after supper! :big:

Matt
 
Computers. Gotta love 'em.
 
Woodguy said:
Computers. Gotta love 'em.

LOL..... I'm sure it was all operator error. I must of layered it different this time.

Matt
 
I shipped the base components to Pat this afternoon and he should have them in 4-7 days. Bases are in White Oak, Red Oak, Mahogany, and there is one in Walnut with its long edges bound in ebony because the walnut offcut was too narrow. There are engine bearers in Walnut, white oak and cherry. There are extra bases and bearers.

Do we have a final list of who is doing what parts?

 
002-29.jpg


Getting closer! Just need to turn the outer and bevel the edges.

Matt
 
Now that's a great group photo!
 
Matt, your letters look great.

I have done several items with letters and I find a common center drill works well as a cutter. they are much stronger than a 1/16" end mill and the V end makes a neat looking carved like letter.

The only tricky part is the depth of cut- because you are using a V cutter the line width changes a lot with just a little depth change.

For software get DeskEngrave- its free and does good job of letters, both on a line and around a circle. http://www.deskam.com/deskengrave.html
 
Thanks Ron. I kept breaking 1/16" end mills, do to my lack of experience. While waiting for more end mills to show up, I did like you said and tried a 5/16" V pointed end mill, and worked well. I will try the center drill next time. I do like the looks of the V shaped groove verses the standard slot an end mill makes.


Thanks
Matt
 

Latest posts

Back
Top