Sixtysixdeuce
Member
- Joined
- Jun 4, 2014
- Messages
- 18
- Reaction score
- 25
So, although I have a fair amount of experience in manufacturing, I'm still very new to the world of model engine building. As such, this is not going to be a runner, but just something fun to put together that offers proof of concept, machining experience and an opportunity to learn what works and what doesn't for when I begin my build on an actual working engine.
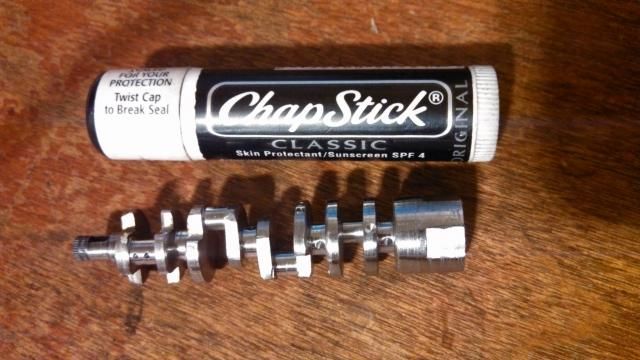
Anywho, it started with me merely trying to see how well I could machine a miniature crankshaft. It began life as the smooth shank of a 1/2" grade 8 bolt, but after about 9 hours, became a decent little loose copy of a SB Chrysler crank.
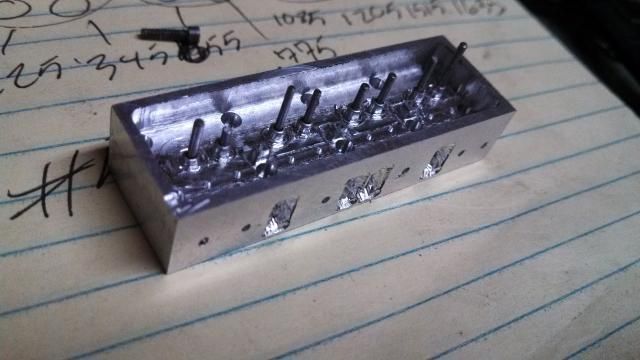
Well, I fondled it for a few days, then decided it needed a home. After about 8 hours, I had the block. Unfortunately, this was where I learned of one of my tooling shortfalls; the bit I was using to bore the cam tunnel walked significantly as it went in, nearly coming out at the #7 tappet holes. Oh well, like I said, not a runner.
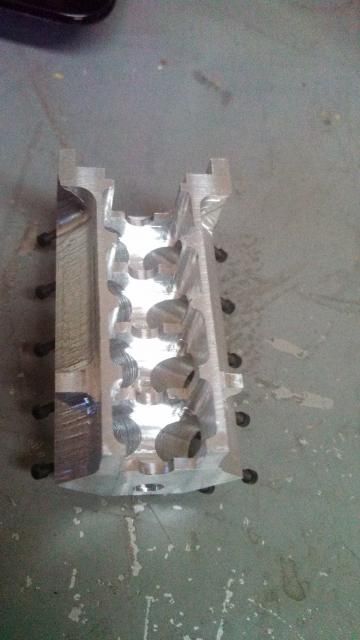
Today's projects were the cam and bed plate/pan. Copied a BB Chrysler cam I had lying around, since it has basically the same profile as the SB cam, save for the distributor/oil pump drive being at the front. Cam is machined from a piece of 3/16 mild steel, the lobes are hand filed.
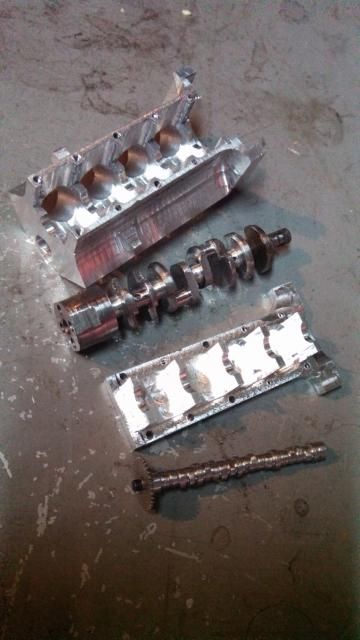
On the bed plate, the reason I decided to go this route was simply a matter of practicality; the main journals are so thin, there is barely enough room for a 00-90 screw, and I have not had good luck with 00-90 taps in the past.
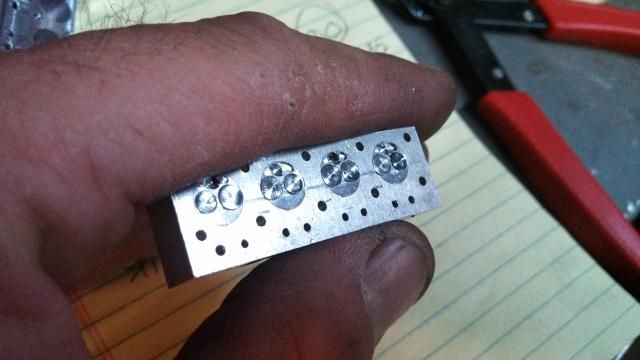
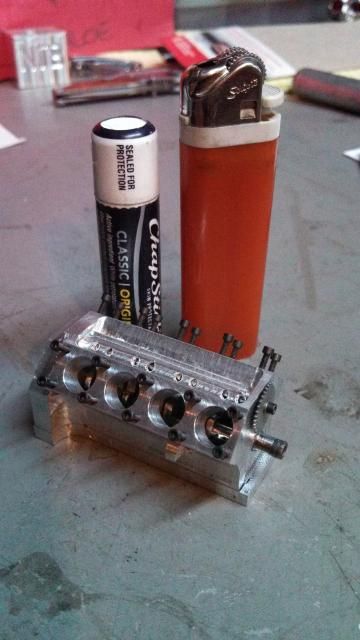
Here's one for perspective:
All the head and pan screws are 0-80 socket heads. The block and bed plate are, as will all other aluminum parts be, 7075-T6. I do not like working with 6061.
So, that's it for now. I'll hammer out the heads next, I think. Rods are gonna be tricky, haven't quite worked out how I'll do them yet. They're also going to be cylinder specific, as this entire build so far has been nothing more than scratch paper for "plans"; no actual drawings, really just wingin' it. As such, there is some slight variation in journal width and distances between each.
And I apologize for the crappy pics. Can't find the camera battery charger, so having to use my phone for everything right now.
Anywho, it started with me merely trying to see how well I could machine a miniature crankshaft. It began life as the smooth shank of a 1/2" grade 8 bolt, but after about 9 hours, became a decent little loose copy of a SB Chrysler crank.
Well, I fondled it for a few days, then decided it needed a home. After about 8 hours, I had the block. Unfortunately, this was where I learned of one of my tooling shortfalls; the bit I was using to bore the cam tunnel walked significantly as it went in, nearly coming out at the #7 tappet holes. Oh well, like I said, not a runner.
Today's projects were the cam and bed plate/pan. Copied a BB Chrysler cam I had lying around, since it has basically the same profile as the SB cam, save for the distributor/oil pump drive being at the front. Cam is machined from a piece of 3/16 mild steel, the lobes are hand filed.
On the bed plate, the reason I decided to go this route was simply a matter of practicality; the main journals are so thin, there is barely enough room for a 00-90 screw, and I have not had good luck with 00-90 taps in the past.
Here's one for perspective:
All the head and pan screws are 0-80 socket heads. The block and bed plate are, as will all other aluminum parts be, 7075-T6. I do not like working with 6061.
So, that's it for now. I'll hammer out the heads next, I think. Rods are gonna be tricky, haven't quite worked out how I'll do them yet. They're also going to be cylinder specific, as this entire build so far has been nothing more than scratch paper for "plans"; no actual drawings, really just wingin' it. As such, there is some slight variation in journal width and distances between each.
And I apologize for the crappy pics. Can't find the camera battery charger, so having to use my phone for everything right now.