Parting off problems... advice needed...

Home Model Engine Machinist Forum

Help Support Home Model Engine Machinist Forum:

This site may earn a commission from merchant affiliate links, including eBay, Amazon, and others.
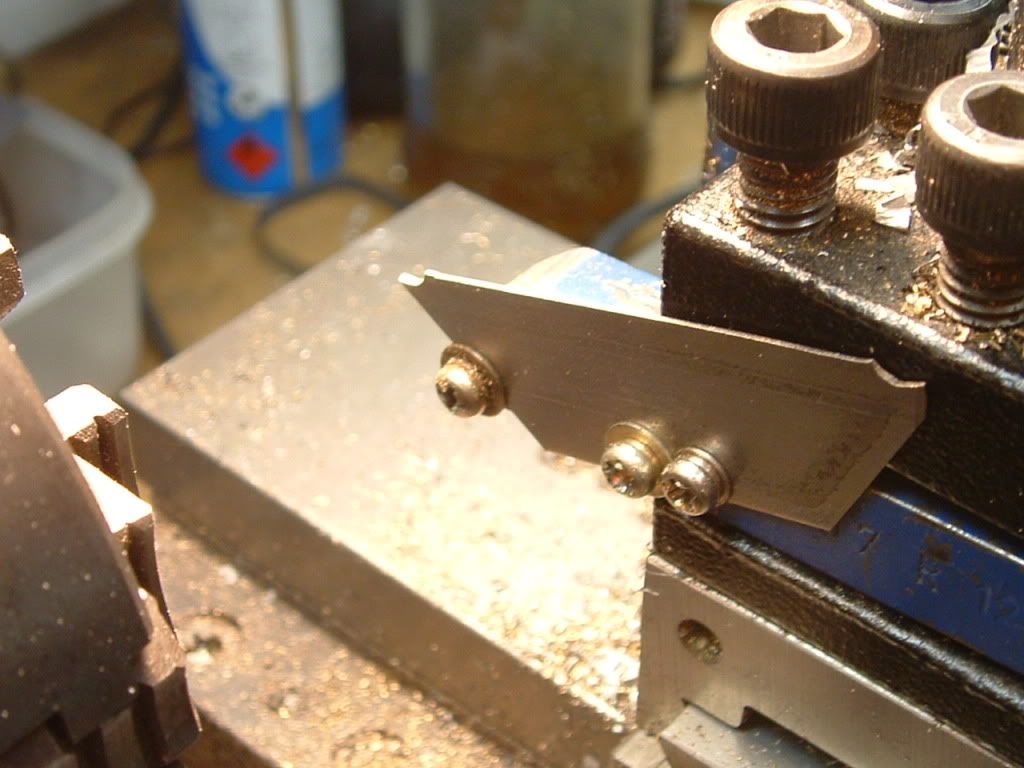
I find with my Sherline lathe that everything must be perfectly straight. For example, I use a machinist square to align the tool post. The work must be mounted solidly. Use plenty of lubricant. But, I also noticed that speed and feed are kind of finicky. At first I had a hard time cutting off anything larger than .75", but as I aquired a better feel for it, I find that 1.25" aluminum isn't too hard if you are carefull. I keep the speed down to about 200 rpm and the feed rate by "feel" I begin the cut and adjust the feed to where it is smoothest. I know that doesn't tell you much, after a while it becomes obvious as you cut. I know that if I feed into the work too slowly, it will chatter, and if I feed to quickly, it will "bite" forcing the part out of alignment in the chuck and lock up the machine. Like most things I have tried, it takes practice.

Cuttoff.jpg


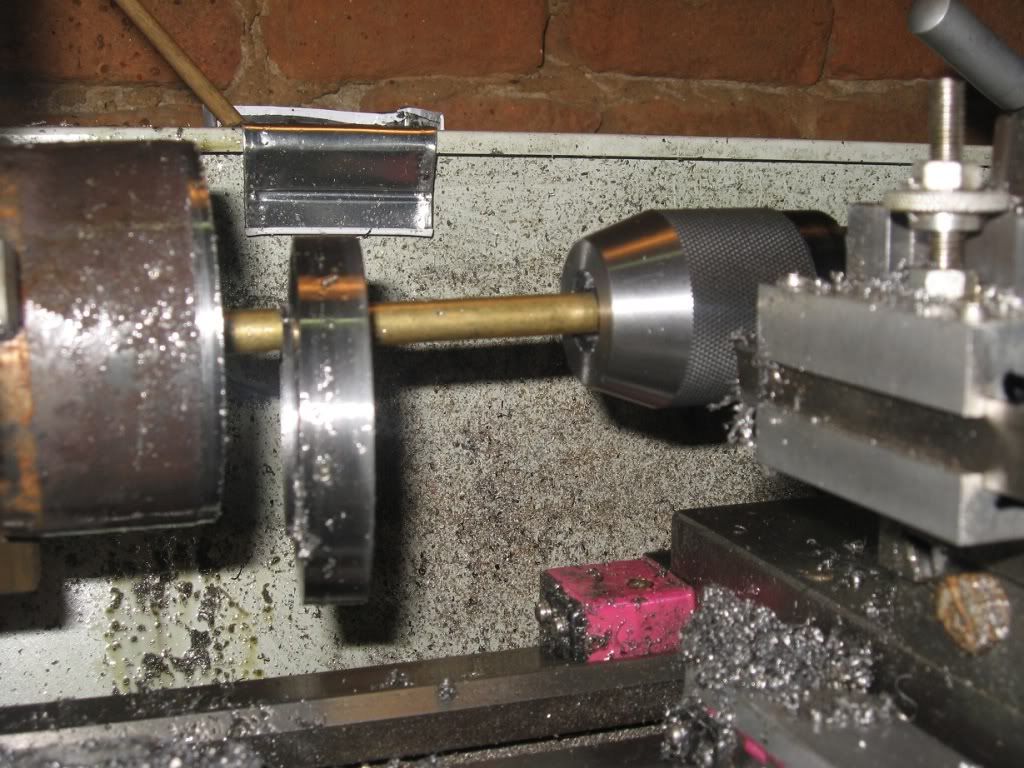
Edit to add another photo:
Cutoffprep.jpg
 
Russell,

is this the Sherline parting tool you show there?

tom
 
Yes, it is a standard Sherline parting tool in the photograph. It has served me well so far.
 
Has anyone used the double cut method. That is what I call it anyway. Start the cut and keep going untill it starts to chatter or has a mild digin, then start another cut to widen the grove, usually the full width of the tool as it will drift in towards the existing grove. Take this cut down till it starts to give a bit of bother and go back and work on the first cut. Work like this untill it is done. I have parted 75mm like this admitadly on a bigger machine.
I think that when you can part off without any problems and cut a thread with a singlepoint tool that you have ground yourself you can call yourself a competant machinest. I have a good suply of broken parting blades that I have not added to for years. Partly because of experiance and partly becouse I have a bandsaw :)

Dave
 
Yeah - I use the "double cut" fairly regularly.

In most cases once the chatter has put a pattern on the cut its difficult to resume without chatter - by offsetting the tool by about half its width you only encounter half of the chatter when you next reach it.

It also helps with the chip clearance.

Sometimes it works sometimes it doesn't.

Wasted effort and material - goes without saying.

The problem of chatter with all tools stems from a fundamental rule of physics :-

The rules of physics are out to get you !

Cutting metals requires an almost constant unit of power for the amount removed - a good rule of thumb for mild steel is 3H.P. per cubic inch per minute. (The "K" factor)

If the cutting speed is increaced, the force required to perform the cut diminishes - force x velocity = power - more velocity = less force and of course vice versa. This seems counter intuative but I assure you it is true - in fact if the force increaced with velocity, chatter would not occur at all.

So if a tool (or any other part of the machine for that matter) deflects then the force increaces (in reponse to the diminished cutting speed caused by the deflection) - and the deflection worsens - until the cutter gains the upper hand and the process reverses.

If the natural resonant frequency of any part of your set up falls into line with this the problem goes from bad to worse.

What to do - obviously the more rigid the tool and support structure, the less the problem is going to be and of course changing speeds and feeds might move you out of resonance.


Ken
 
On my South Bend 10K and cheap Chinese 7X lathe I always put a small flat on the top of the 'T' shaped blade. My holders hold my HSS 1/2" blades at an incline. I always grind a little flat on the top of the blade approximately 1/8 to 3/16 in length. Never had any problems. I use 0.040, 0.062, 0.093 and 0.125 parting blades. I find the rake of the tool in the holder to be too much.
 
Pat J said:
...When you part on the back side of the carriage, you are creating a moment about point "B", and any flex in the tool post or carriage moves the tool bit away from the work, and places the tool post and carriage in tension.
The difference is that the power from the turning part reduces the cutting when the tool post springs out, and thus automatically reduces the energy that is being transmitted from the rotating work piece to the tool post.
Since the bit moves away from the work in the process, it will not dig in and keep trying to transmit energy into the tool post and carriage.

Pat J

Excellent explanation, and as always made easier to understand by the picture (worth thousand words).
The only comment I would add - it's nothing do do with rear or front tool post ;D
I can do exactly the same using front post, as easily shown on (your) modified picture:

It will be (I hope) clear from this picture, that it is all to do with work rotating away from lathe bed and away from tool - this stops digging in, which is such a common problem when using "normal" turning/parting configuration, which actually encourages tool digging in.
The only (historical) reason for using rear toolpost to solve this problem, is that the chucks tended to be screwed on the spindle and using spindle in reverse you ran the risk of chuck unscrewing - so the only way to achieve this tool/work with spindle rotating as normal was by using rear toolpost.
With modern lathe and chuck secured positively on short taper spindle I can run it rotating back or forward without any concern and I can use upside down tool easily by simply changing rotation of the spindle :)

Chris
ps this I hope will also answer question being asked by tom in MA
vedoula said:
... Still I do not understand the front vs rear debate...
The answer ;) - it's nothing to do with front ve rear
 
Yes Pat its amazing how many lathes have threaded spindle noses these days.
Could do some mischief to the bed as well if it landed there, then there are the stubborn ones that won't unscrew for love nor money when you want them to! ::)
 
Yes Pat, you only make this mistake once :) and I bet you have learned your lesson ;)
So for the sake of those who are reading fast and not very carefully, let me repeat again:
To avoid parting tool digging into work it's best to have it rotating away from the lathe bed.
The only SAFE way to do it on a lathe with chuck screwed on is by using rear toolpost.
On a modern lathe, with any of the positive, secure fittings you can use front toolpost and simply rotate spindle backwards.

Chris
 
In reply 4, GWRdriver mentioned parting off with a hacksaw blade. I filed this at the back of my mind with a view to perhaps trying it sometime in the future. Well, having a lot of small components to make, I thought I would have ago at making one for my peatol. just for a quick trial, I used a piece of 1" sq mild steel for the body and just welded a piece of 1/8" by 1 1/4" high MS plate on the front (gives the correct hight for rear parting on a tiag), ground the teeth of a piece of an old blade clamped it to the body and welded a top piece on, then drilled and hacksawed the clamping slit. I just ground about 2 degrees front clearance, no top rake or side clearance. As you can see from the photo, i've brought a new low to the meaning 'utility engineering' :-[. but all I can say is it works like a dream. so good it's unlikely i'll bother making a 'posh' version. for 3/8" Dia and below ,I use it exclusively. For 1/4 Dia, I turn and part off at the highest speed with just a dab of cutting oil. Next to it is one of the small comercial blades you can buy with it's dedicated holder and correctly ground angles. almost impossible to clamp up properly in on of the tiags tool blocks, and the blade would often slide backwards in the holder. it is going in the bin.
XZXZX062.jpg
 
I have had many of the same kind of problems as described in these posts with my HF 7X10 as well. I recently purchased both 1/8 and 1/16 cutoff blades from an ebay source, as I remember in Ohio, that really make my cutoff task much better. Less chatter, easy to set parallel, and no side cutting necessary of the tool.

The difference is that the blades have a "T" shaped top edge which gives a nice side clearance to the tool. Looking at the top of the blade, at the cutting edge, it has a "U" shape which seems to cut on an angle from both sides when you crank it into the work.

The only problem that I ran into was that I could not clamp them into my AXA tool holder. The "T" top on the blade made the blade sit at a slight angle. I carefully milled across the tool holder at just slightly wider than the height of the "T" part of the blade. I then had problems tightening the screws that hold the blade, and keeping the blade flat in the holder. The answer to the problem was two fold, first the milling of the tool holder and then clamping a second blade, upside down in the tool holder against the first. Hope that makes sense.
I can post a pictures of the assembled AXA holder with blades if that would make more sense.
George
 
T-blades work like charm; they can be purchased from LittleMachineShop, too.
I made a special toolholder for them, with a kind of T slot, narrower on the bottom part.
Marcello

TBlade-IMG_1749.jpg
 
Nothing dumb about that idea Ken, I quite like it.
may even have a go at making one as well, although i,m thinking now along the lines of perhaps fiting a washer with an off-set hole under the front edge to help set the centre hight (no adjustable quick change posts). that way I can grind some top rake on it. as you say, for the right application they're great.
 
Peatlouser, good idea - obviously mine's a complete lash up - I must get round to doing a better job of it - but what the hell - it works.

Thanks,
Ken
 
The t shaped ones are great the tared are not bad either but beware . I purchased a set of HSS cutters from harbor freight a while back . It supposedly had a parting tool in the set. Not really I guess one could grind it into submition but the whole point of buying one is not have to grind the whole tool just the tip once in a while . I think it will make a fine scraper blade just need to make a holder for it.
Tin
 
Having been a full time machinist for about 30 years now I got two words that will make a world of difference in your success with parting and grooving tools. TOOL CLEARANCE ! Straight tools won't get it. Try grinding a back taper on your blade and you'll be amazed at what you can do. I just made an aluminum heat sink on my 7 x 10 with grooves .850" deep x .125" wide. Roughed them with an .060"wide high speed tool in one pass. Positive rake and .010" back clearance on each side.
Just sayin'...
 
Just sharing. I found that parting 12L14 steel is much easier than aluminium. Just part off the 3/4" flywheel to make my first engine - The Millie (the simplest I can find with the least parts). I always had phobia with parting off aluminium rods. Gave me quite some problems till I found that I've to be firm in pushing in the blade.

The 12L14 steel is much easier. I can go rather deep before pulling the blade out to clear the chips. In fact, the chips just fell off while cutting.

Regards,
Wong

www.wongstersproduction.blogspot.com
 
Hi Tom

12 months on from your original question, I guess you've got it sorted by now.

But for the benefit of others

Here is a means of dealing with 'dig-in' - during parting off

The top bar is acting under gravity on top of the job, whenever it tries to climb onto the cutter of parting off tool the top bar stops it.

PT.jpg


Bez
 
If I may add my 2 cents worth, have you considered your jaws may be bell-mouthed at the ends causing the work to be held on a small portion of the jaw facet.
To try and see chuck a largeish piece of stock ,centre drill and support in the live centre and now cut as normal.
Is it any better or worse?

Brian.
 

Latest posts

Back
Top