Newest project--A Flyball Governor

Home Model Engine Machinist Forum

Help Support Home Model Engine Machinist Forum:

This site may earn a commission from merchant affiliate links, including eBay, Amazon, and others.
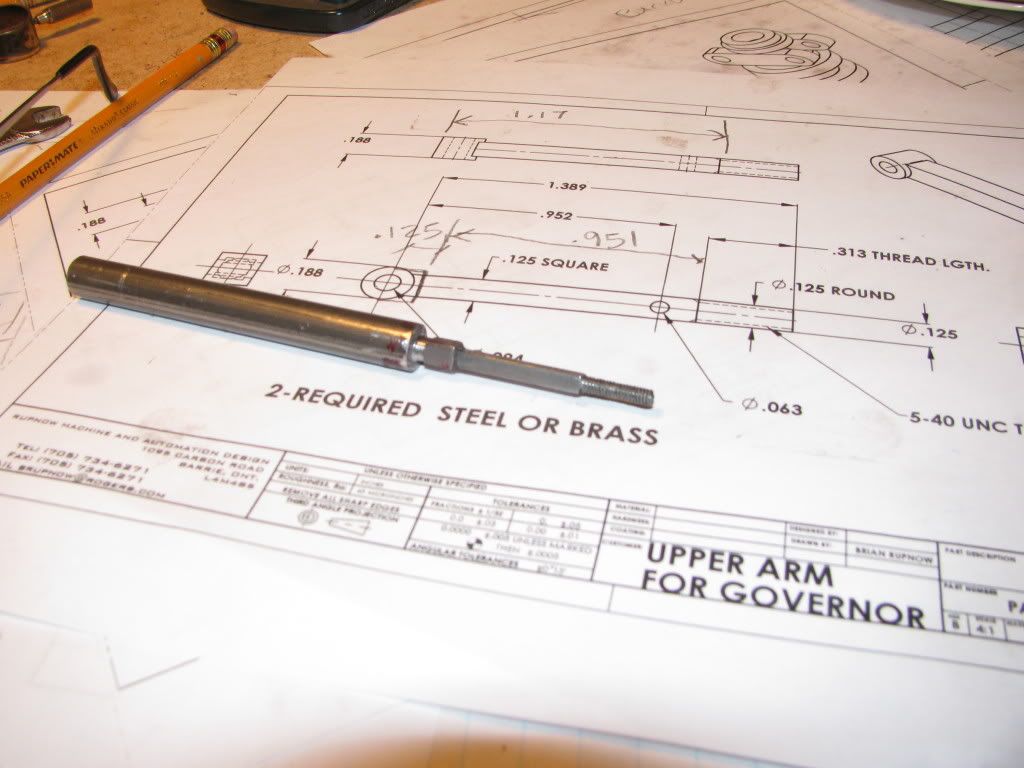
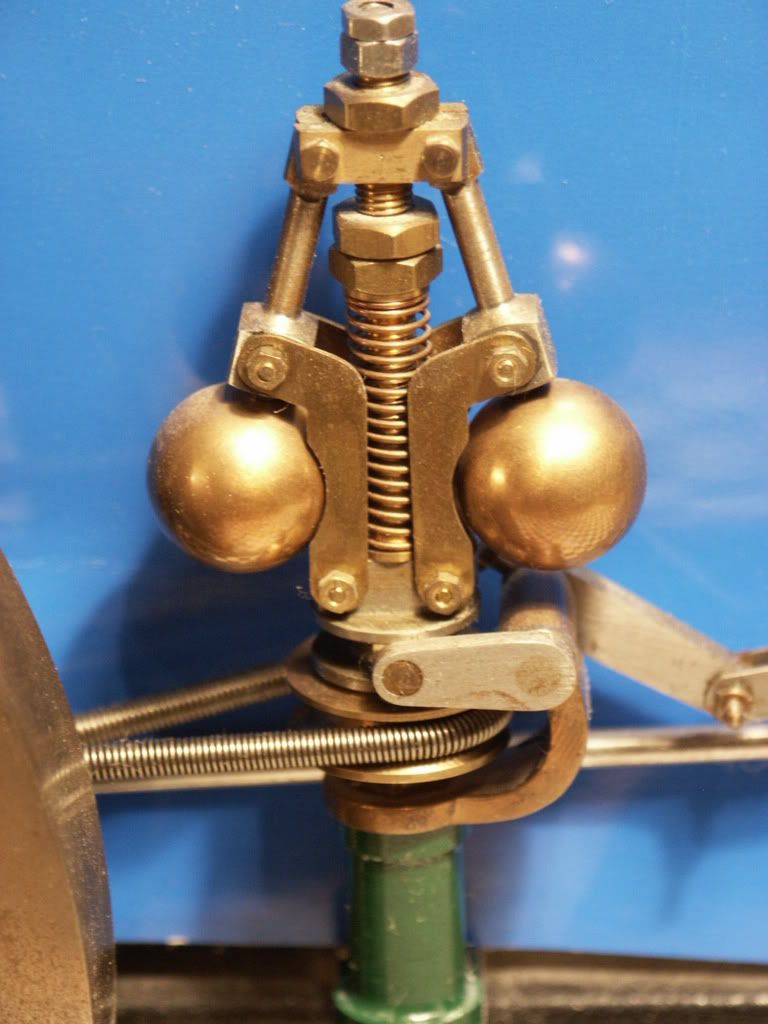
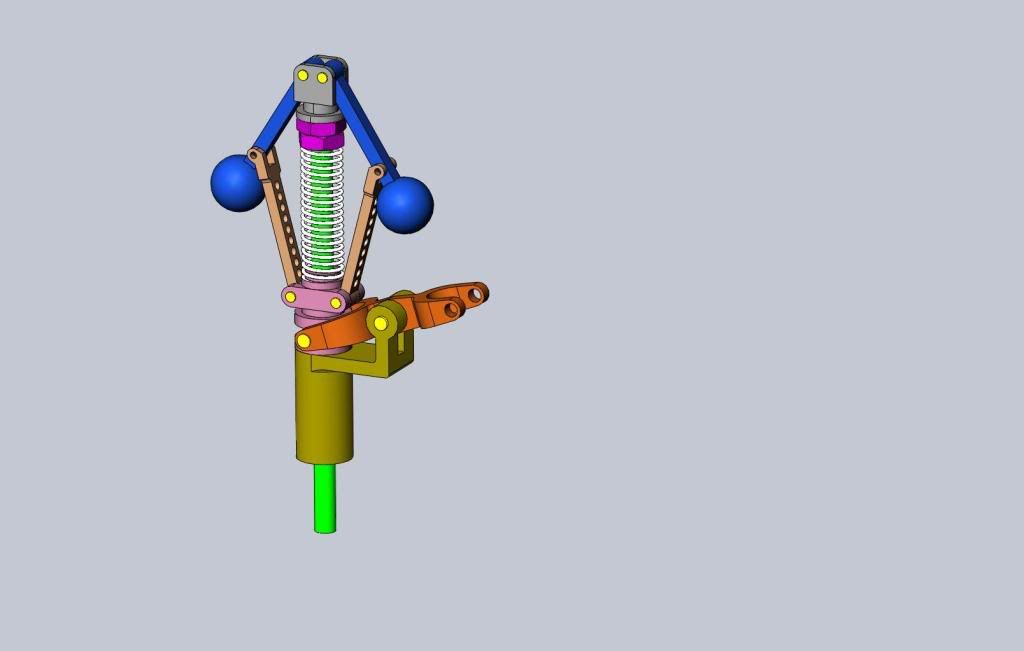
Although there is a lot of sophisticated math to calculate governors, (or anything else mechanical for that matter), they give a guideline to a theoretical "perfect frictionless scenario". This project is going to be based on "seat of the pants" experience and mechanical accuity gained over 50 years of messing with all things mechanical. Yes, the secret will be in the spring (The one I didn't show, Tel.) I plan on test driving this thing in my variable speed 3/8" drill.
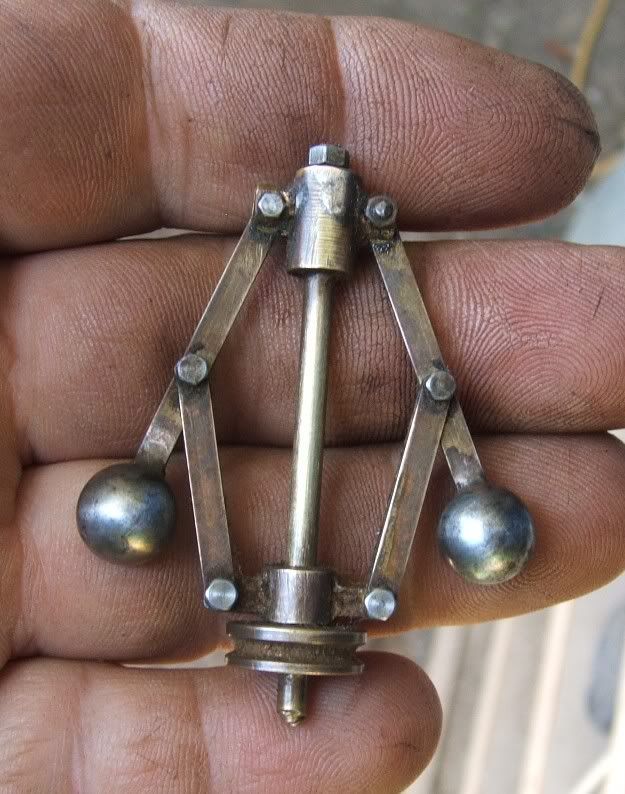
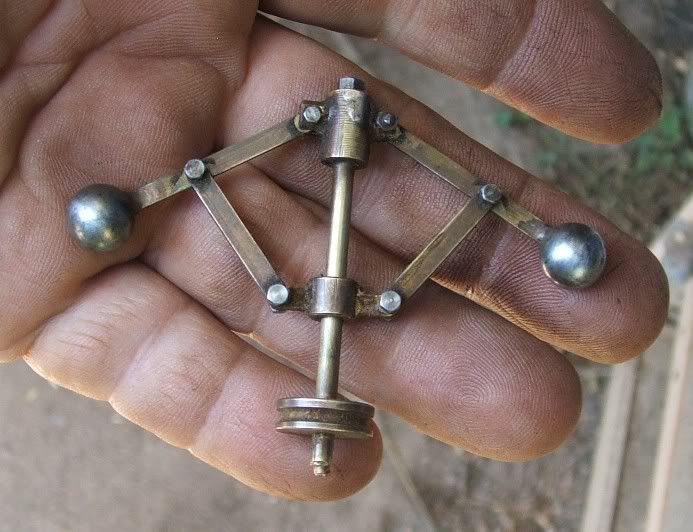
 
Interesting project Brian. This will go on my projects list. I noticed every time I read one of your WIP's, my project list gets longer. :'( :'(

Cheers,
Phil
 
kvom said:
You need the spring only if the mass of the balls is insufficient.
According to what I have read on the subject, the spring helps in a large way to dampen out the oscillations.
 
Tin Falcon said:
Don Sandler has working ones of that type on several of his engines the governor is only about the size of an American 1 cent piece.
Tin

Hey Tin, does he have a web site? Would like to see those.

Bernd
 
Bern: Do not think don has his own site. there are a few of his engines in the NEMES photo gallery. I do not see any photos of the tiny FB Governor but here is a photo of one of his engine with a working governor.
DSCF3895.jpg

Tin
 
If you thread the tube inside the spring and fit a nut it is possible to adjust the compression rate of the spring and therefore the tick over speed of the engine. That I what I understood the main reason for the spring was.

If you look at my stuart beam you can see the nut and locknut which are threaded 3/16x40tpi.

Jason
 
Jasonb said:
If you thread the tube inside the spring and fit a nut it is possible to adjust the compression rate of the spring and therefore the tick over speed of the engine. That I what I understood the main reason for the spring was.

If you look at my stuart beam you can see the nut and locknut which are threaded 3/16x40tpi.

Jason
Jason--Very interesting. Can you make the adjustment while the engine is running? Can you take a digital pic of the governor from closer up and post it please.---Brian
 
You need to do it with the engine stopped as you have to get two spanners for the nut & lock nut between the arms which would be whizzing round if the engine were running. Though you can grab hold of it a sthe spring steel drive belt tends to slip easily

Pics as requested, the balls are 5/8" dia to give some idea of size. The linkage works a butterfly valve in the inlet to the steam chest

Gov1-1.jpg


gov2-1.jpg


Jason
 
JasonB---Thank you very much---Brian---You will see that the drawing in the very first post has been changed to incorporate the spring and a couple of hex nuts. This is a definate improvement to the design, and the fact that the spring is shown will make Tel very happy. ;D ;D
muncaster-brianmodified-model.jpg
 
Onya Brian! ;D ;D ;D
 
Today I worked on the part of the governor that the lower set of arms attach to. One of the things I find with small stuff like this, is that it becomes a real problem to hold it in the milling vice without it turning or trying to run away from me. Yesterday when I made the top peice, I drilled and sawcut a peice of scrap aluminum and after sticking the round shank of the part in the hole in the scrap aluminum, I was able to mount it in the vice (with a good squeeze). Even so, when I was milling it, it turned from the pressure of the milling cutter. Not enough to ruin the part, just enough to annoy me. Today when I made this peice, I stuck the shank into the hole in the aluminum scrap peice, then cross dowelled it and put a 0.125" pin through it to keep it from turning when I machined it. This time it didn't turn on me, so I guess I was successfull. I am still learning a lot of this machine shop practice, as I only started last March. I guess that one of the most important things to learn is how to hold the friggin material still while machining it.---Brian
BOTTOMPARTOFGOVERNOR001.jpg
 
Hey Brian,

"I am still learning a lot of this machine shop practice, as I only started last March"

Coulda' fooled me ;D

Cheers,
Phil
 
Philjoe5 said:
Hey Brian,

"I am still learning a lot of this machine shop practice, as I only started last March"

Coulda' fooled me ;D

Cheers,
Phil

Yeah, you've come a long way in that time Brian!

Now here's a bit of history - the first governor I made, 25 odd years ago, was purely ornamental (non working), it looked the pert tho', spinning around on the mill engine.

Now do you see anything missing here? ;)

istgov1.jpg


istgov2.jpg


The next part I build will be the upper arms for the governor. Those of you with sharp eyes will see that I managed to make a mistake on the bottom part that I machined yesterday. The flat area which has the pivot holes in it for the two lower arms is supposed to be 0.188 high, as per the drawing. I never noticed untill I had the darn thing completely finished that it ended up as .31 high on the peice I machined. Since this will not impair the function of the governor, I will use it anyways, as it can not be fixed and I do not want to take the time required to machine a new bottom part.--I have 44 years experience at making this type of drawing, but only 10 months practice at reading them to create parts, I guess. ;D ;D ;D


View attachment PART-1-MODIFIED.PDF
 
As always, thanks for sharing these drawings :bow:

Cheers,
Phil
 
Lord, but I hate making these tiny little parts. Can't half see them, have difficulty holding them, grumble, grumble, grumble!!! :mad: :mad: ??? I have to stop now, because I have to go up town and try to buy a small chuck, which I can hold in my big chuck, on both the miling machine and on the lathe. I bought a 3/32" reamer and a 5/64" drill yesterday, but have nothing small enough to hold them. I bought one of those cheap Chinese pin chucks, and the drill wobbles so bad in the damn thing that I'm afraid to use it. A plague on the people who manufacture cheap stuff that never was any good right from their factory---no matter where their factory is!!!
toparminprocess001.jpg
 
Brian,

I think it's an accessory, but the drill chuck from a dremel may be the answer. I had a similar problem until I realised that my pin chuck was 4 jaw.
mgeye-popping.gif


Best Regards
Bob
 

Latest posts

Back
Top