
You are using an out of date browser. It may not display this or other websites correctly.
You should upgrade or use an alternative browser.
You should upgrade or use an alternative browser.
My Flame Gulper
- Thread starter NickG
- Start date


Help Support Home Model Engine Machinist Forum:
This site may earn a commission from merchant affiliate
links, including eBay, Amazon, and others.
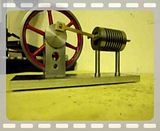
Here is last night's installment - I'm absolutely knackered, was in there until around 2am which is a bit silly but I just got into one of those moods thinking I am not leaving until I do what I intended!
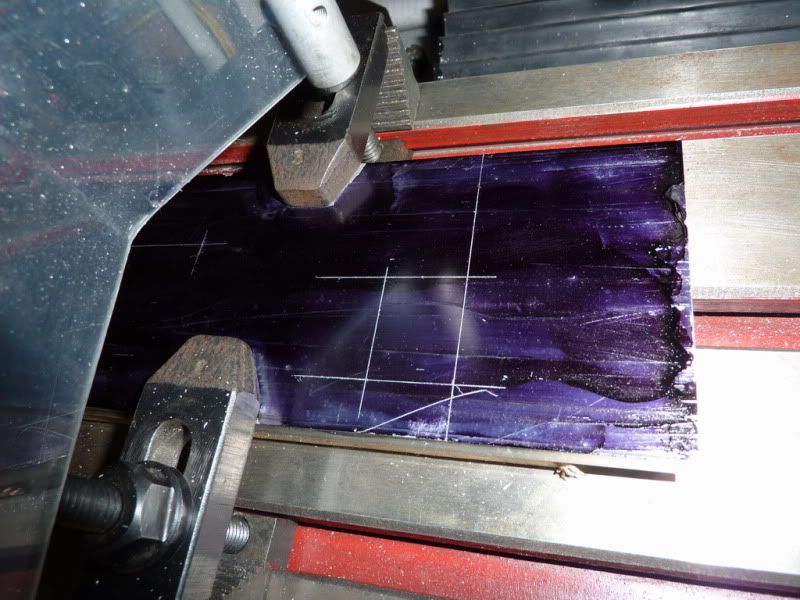
I started by sawing the base to rough length and milling the sides in the vice to give the correct width.
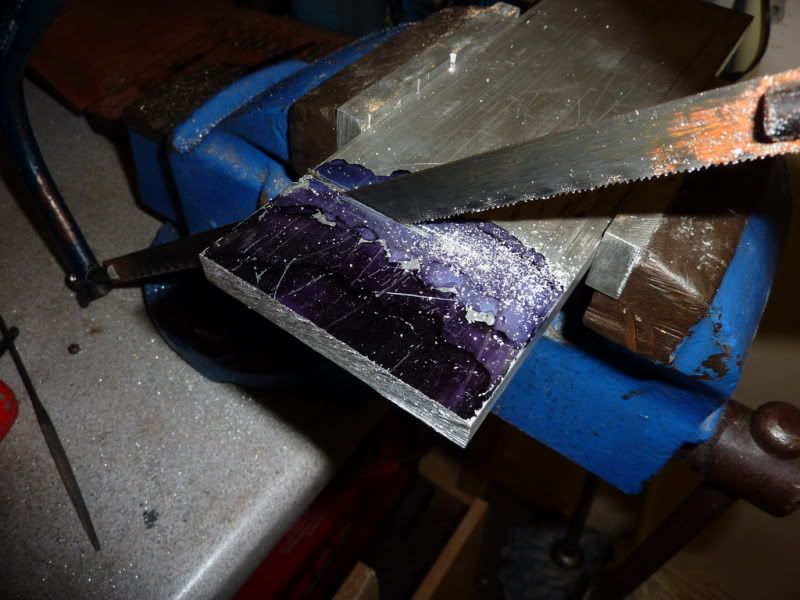
Unfortunately it wont fit in my vice so I had to remove the vice and clamp it on 2 blocks of wood with the edges overhanging. So I clocked it with my dti.
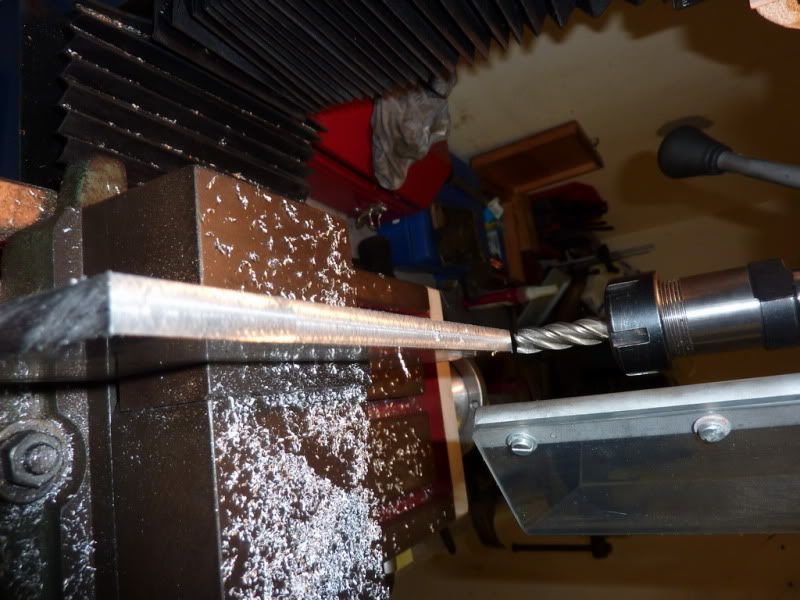
I milled the ends square:
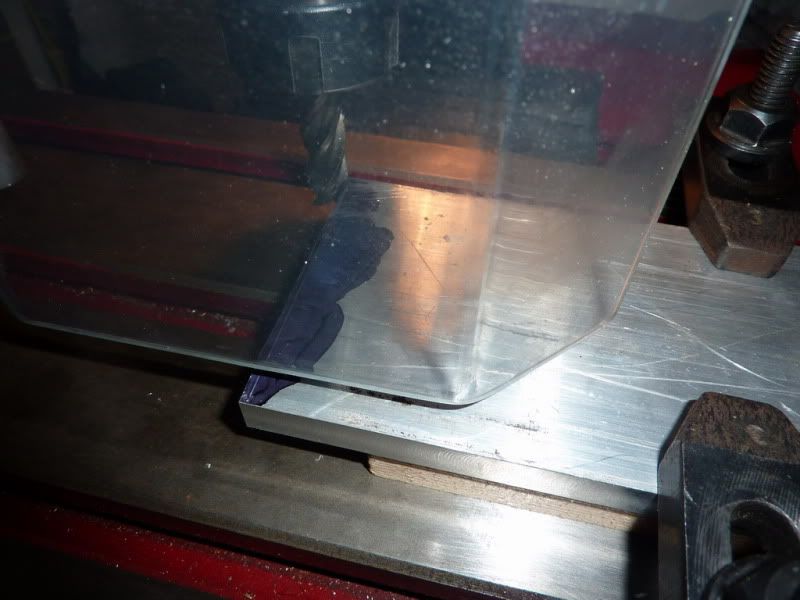
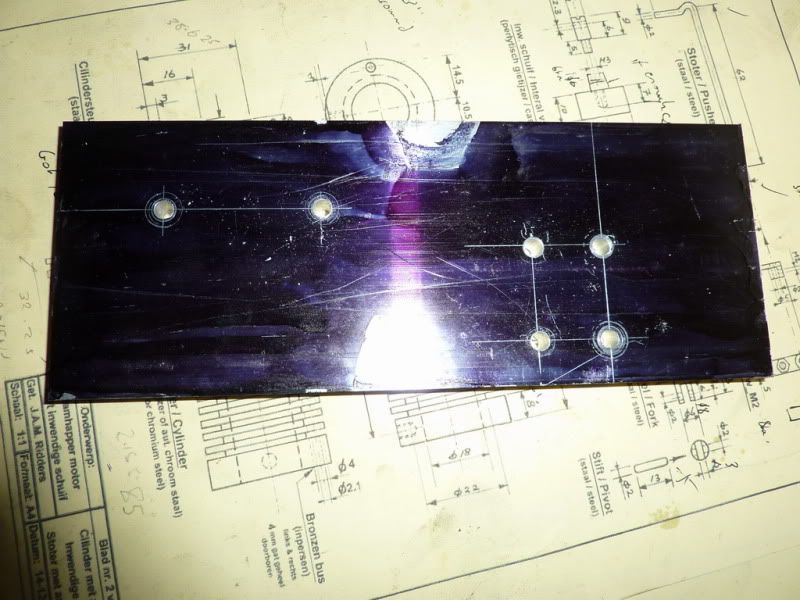
I then marked it up as a precaution.
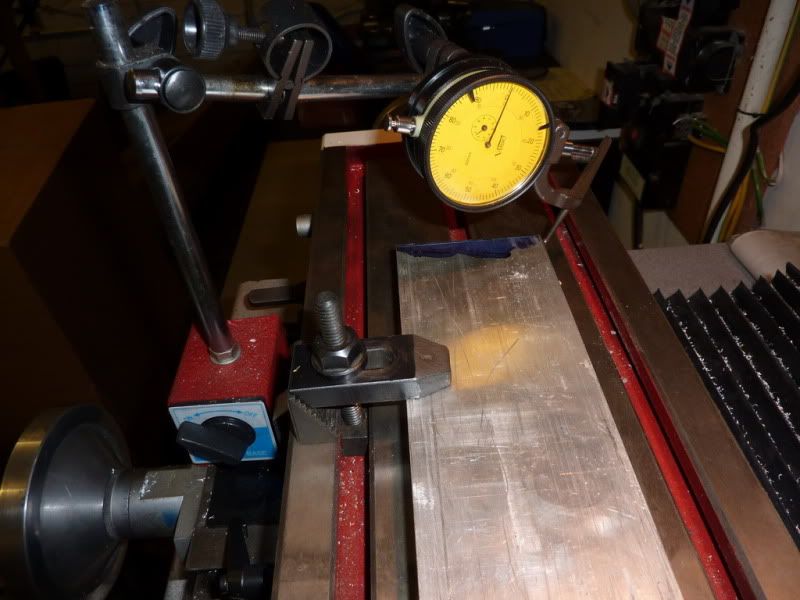
Drilled all the holes, centre drilling first.
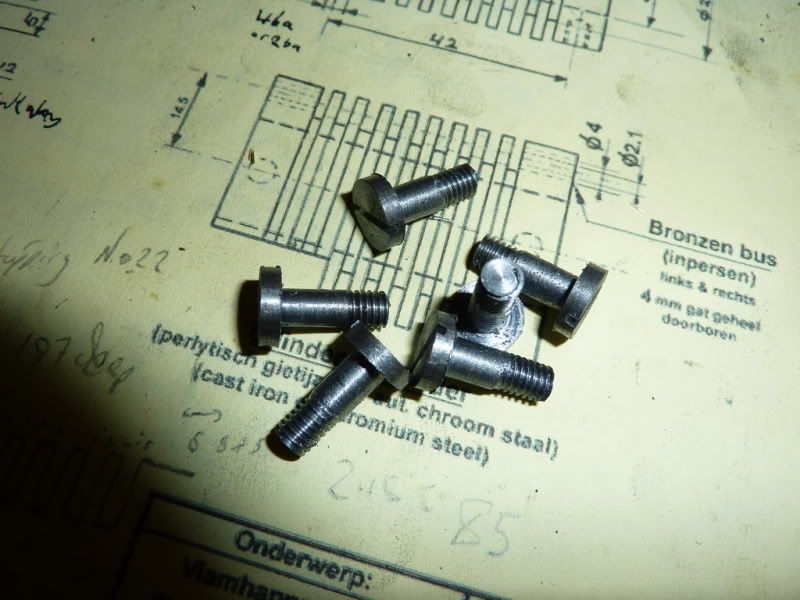
Then I realized I didnt have any 2ba bolts, screws or anything! Pretty pissed off, I set about making some screws in a mad frenzy! Unfortunately, because I was rushing the shank size is slightly bigger than 2ba clearance size so I had to open the holes in the base up a bit.
Everything bolted up quite nicely.
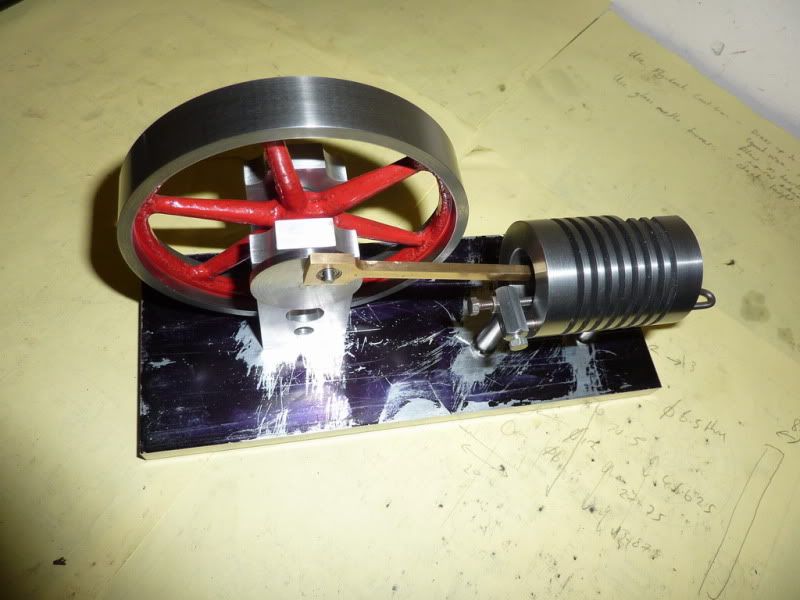
But I must have made a mistake somewhere in my calculations! The piston was not coming to the end of the bore, but at the other end it was sticking out by the same amount. This meant I had either drilled the holes too close together on the base I was annoyed and about to re-drill / slot the holes, then I thought why I can just shorten the conrod. So I did that and it means no damage to the base. It all looks how I intended so think I must have made the con rod wrong! Actually, come to think of it, when I wound the distance in using the milling machine dials I thought, thats miles out but put it down to the dials, I know them to be inaccurate over large distances probably the pitch error on the lead screws. So I thought nothing of it and used my markings instead. Maybe I calculated the marking wrongly oh well, no matter.
It spins over nice and freely so the only thing left to do was try it!
Unfortunately I couldnt get a peep out of it, I was just holding the burner in different positions whilst trying to spin the flywheel but it didnt show any signs of life. It makes a nice sucking noise and you could see it sucking the flame in and blowing it out if held in the wrong place. I need to have a proper look at flame positions, size of flame and timing of the valve now I didnt think timing would be an issue but maybe it is. I bit dis-heartened but I will keep trying, it cant be that far away. If it still doesnt show anything Ill go for a new piston and valve.
Nick
I started by sawing the base to rough length and milling the sides in the vice to give the correct width.
Unfortunately it wont fit in my vice so I had to remove the vice and clamp it on 2 blocks of wood with the edges overhanging. So I clocked it with my dti.
I milled the ends square:
I then marked it up as a precaution.
Drilled all the holes, centre drilling first.
Then I realized I didnt have any 2ba bolts, screws or anything! Pretty pissed off, I set about making some screws in a mad frenzy! Unfortunately, because I was rushing the shank size is slightly bigger than 2ba clearance size so I had to open the holes in the base up a bit.
Everything bolted up quite nicely.
But I must have made a mistake somewhere in my calculations! The piston was not coming to the end of the bore, but at the other end it was sticking out by the same amount. This meant I had either drilled the holes too close together on the base I was annoyed and about to re-drill / slot the holes, then I thought why I can just shorten the conrod. So I did that and it means no damage to the base. It all looks how I intended so think I must have made the con rod wrong! Actually, come to think of it, when I wound the distance in using the milling machine dials I thought, thats miles out but put it down to the dials, I know them to be inaccurate over large distances probably the pitch error on the lead screws. So I thought nothing of it and used my markings instead. Maybe I calculated the marking wrongly oh well, no matter.
It spins over nice and freely so the only thing left to do was try it!
Unfortunately I couldnt get a peep out of it, I was just holding the burner in different positions whilst trying to spin the flywheel but it didnt show any signs of life. It makes a nice sucking noise and you could see it sucking the flame in and blowing it out if held in the wrong place. I need to have a proper look at flame positions, size of flame and timing of the valve now I didnt think timing would be an issue but maybe it is. I bit dis-heartened but I will keep trying, it cant be that far away. If it still doesnt show anything Ill go for a new piston and valve.
Nick
Powder keg
Well-Known Member
- Joined
- Oct 10, 2007
- Messages
- 1,091
- Reaction score
- 3
The timing on my flame eater had to be way advanced to get it to run good. Just a suggestion. Remember that this type of engine is the most challenging to get to run good. Mine was really finicky to get running until I made a graphite piston. Yours looks really good!!!Can't wait to see it run.
Wes
Wes
vlmarshall
Well-Known Member
- Joined
- Dec 28, 2008
- Messages
- 1,138
- Reaction score
- 1
Well, it LOOKS great, and very interesting! I can feel flame-eater engines trying to pull me in... ;D
Thanks for the encouragement guys.
Wes, do you mean the valve closes earlier, i.e. before bottom dead centre? Was yours a conventional valve or this piston type? I still should be able to do that by altering the length of the striker.
Will give it a go, thanks.
I tried setting it up as per Jan's instructions but still no go. The characteristics are a bit different though, there is more of a whoosing sound but it now blows the flame out if given a decent push on the flywheel.
I am also using some very old methylated spirits which I've noticed leaves a sticky brown deposit quite quickly which dramatically effects friction, so I need to clean it down before I try again. Not sure where to get some better fuel.
Nick
But I must have made a mistake somewhere in my calculations! The piston was not coming to the end of the bore, but at the other end it was sticking out by the same amount. This meant I had either drilled the holes too close together on the base
I may have misunderstood your problem or your method of fixing it. I think the mounting holes were too far apart. When you shortened the con rod that stopped the piston from sticking out the end of the cylinder but it also means the piston is going to be even further from the head at the top of the stroke.
NickNickG said:... Actually, come to think of it, when I wound the distance in using the milling machine dials I thought, that’s miles out … but put it down to the dials, I know them to be inaccurate over large distances – probably the pitch error on the lead screws. So I thought nothing of it and used my markings instead.
Nick
I experienced a similar problem with my milling machine. However, it was not a pitch error but the resettable dials slipping with grease from the leadscrew getting where it shouldn't. Soon fixed that with a paper towel!
Dave
The Emerald Isle
Powder keg
Well-Known Member
- Joined
- Oct 10, 2007
- Messages
- 1,091
- Reaction score
- 3
Yes. The valve shuts about half way to bottom dead center. Mine has a slide valve and an adjustable cam.
Stan,
Sorry, I wasn't very clear. At bottom dead centre, the piston was not reaching the end of the bore, but at top dead centre it was protruding through the bore. So I shortened the rod by the corresponding amount.
Dave, I've often wondered whether it was that - will investigate. I really want some sort of DRO on it.
Wes,
I was having a think about this and although I can make the valve close earlier - it doesn't make any difference on this type of engine - this is because of the internal valve. When the valve moves enough to cover the port, fair enough, I can make that happen earlier in the cycle by making the striker longer, but all this means is the point between where the port becomes closed and where the piston reaches the end of it's stroke, the valve is moving the same amount. So the characteristics aren't changed by doing it, except the fact that you're not drawing in as much volume of hot gases.
On yours, once the valve is closed and the piston is travelling towards the end of it's stroke, you are effectively increasing the volume in the chamber creating a partical vacuum. That's what gives those engines the sort of kick back feel when you spin the flywheel. The internal valve one doesn't do that, all that is happening if you make it close earlier is it moves the pocket of air along the cylinder bore.
I made a little alteration last night and put an adjustable stop on the valve end of the valve rod. I had a sudden thought that the way I'd bent the rod, the travel of the valve could be more than necessary into the bore. I thought this would have the effect that when the underpressure was created, both the piston and the valve would get pushed towards each other by the atmosphere, which would stop it running. I still think that is right but my modification didn't seem to make any difference. The way Jan does that on his design is to have the rod bend properly, or on his first iteration he had a 90 degree soldered joint on the rod.
A little lost with this now. I know the friction is ok, the only thing I can think is the seal of my piston and valve aren't good enough. I did think they were a little sloppy when I first made them but the tests carried out seemed to work.
I'll keep going. I need to make a proper burner and base so it's more stable than holding a burner next to the port and the engine wobbling about when I'm trying to start it.
Nick
J
jimmyocharlie
Guest
i'm following this with real interest as i'm thinking about building one of these, not sure if its an ideal second build though!
Jimmy,
I started in the hobby when I was 13 (29 now) making small oscillating engines and some other bits and pieces. Pretty much self taught, never had any official training just shown the controls on the lathe.
I did have a long break where I didn't do a lot, but started with serious intentions again about 3 years ago. Since then I've only made 2 oscillating engines, a hot air engine (that was quite a challenge to get working but I did it and it runs nicely), a rocking engine and now this.
All the engines have been my own designs so far. This one is based on Jan Ridders obviously, I've tried to keep the critical dimensions the same but it is definitely the most challenging thing I have made. If I get it working it could be the most rewarding too as it is going to sound quite unique and the motion should look the part.
Jan recommends this for somebody with little experience and I think I see where he's coming from but I personally think it needs more experience. A lot more attention needs to be paid to limits and fits, even than the stirling it seems.
What was your first build Jimmy? I would recommend a stirling before this I think.
Nick
J
jimmyocharlie
Guest
Nick, my first build was the EZ engine, its the first thing i've ever made for pleasure. Most stuff at home is either fixing things or modifying things on my bikes, or on my little side line.
I'm a skilled engineer, served my time on capstan lathes 20 years ago. like most engineers left today, work is all CNC, the skill in my job now really comes down to setting up machines rather than producing parts.
the thing i need to learn on these engines is to stop rushing, get all my material before i even start and stop rushing!!
i still can't get over the satisfaction of making the EZ and seeing it run!
Jimmy,
In that case I'd say go for it, I think you have the skills, by the sound of it just need to kerb your patience like me!
When I did the stirling, the satisfaction was 10 fold that of the steam or air engines I'd built due to the extra complexity and difficulty in getting it to run properly.
I have a feeling if I get this one working the satisfaction will be another 10 x I'll go through the roof!
Nick
putputman
Senior Member
- Joined
- Nov 22, 2008
- Messages
- 600
- Reaction score
- 55
Nick, I have been following this thread with great interest and hoping you would come up with a quick fix. I built the same one last year and had a lot of the same problems. Spents many days trying but could not get it running.
The 1st pistons were cast iron. Could not get it to work. Made new pistons out of graphite. Still could not get it to run more than a couple stroke. Both materials had a very good fit and surface finish.
I noticed that I was getting some bounce at the end of each stroke. The piston would hit the end and bounce back just enough to partially close off the intake. It was like the piston and the linkage were so free that they could bounce. I put a light rubberband over the cylinder & the linkage to give the linkage a little drag. That stopped the bounce but did not solve the running problem.
Only once did I get it to run for about a minute and that was at a very slow rpm. Don't know to this day why it ran, but never got it to run again. It has been sitting on the shelf for the last year.
I hope you have better luck than I did. Looking forward to your solution.
Powder keg
Well-Known Member
- Joined
- Oct 10, 2007
- Messages
- 1,091
- Reaction score
- 3
When this type of engine is first started. Sometimes as they start to warm up, water will condense inside and cause enough drag to stop them from running. Warming up the engine with a flame will stop this. Also, Denatured alcohol will burn clean and not soot things up. The soot will also cause drag. I like the graphite for a piston because you can run it without oil. If you run oil in your cylinder, It will burn and soot up the walls making too much drag on the piston.
Keep at it, you'll getter running soon )
)
Keep at it, you'll getter running soon
)mklotz
Well-Known Member
I don't want to start an argument but let me interject a bit from my own experience.
Senft's "Poppin", which I built a number of years ago,

calls for an oil feeder cup on the top of the cylinder. I included it and use it.
There can be a considerable amount of oil in the cylinder and the engine runs flawlessly, though I do need to preheat the cylinder to get it to start quickly.
Poppin has a very fast-acting valve operated by a cam on the crankshaft. This allows it to, after some hot gas is ingested, get the cylinder closed very rapidly so that the gas doesn't have a chance to lose much of its energy to the cylinder walls. I have to think that Senft, no dummy he, chose that design because he understood the problem of rapid gas quenching that arises in these models. I have an unproven suspicion that many of the problems with these engines have to do with early gas quenching and not friction. This is somewhat substantiated by the sensitivity to flame placement.
Senft's "Poppin", which I built a number of years ago,
calls for an oil feeder cup on the top of the cylinder. I included it and use it.
There can be a considerable amount of oil in the cylinder and the engine runs flawlessly, though I do need to preheat the cylinder to get it to start quickly.
Poppin has a very fast-acting valve operated by a cam on the crankshaft. This allows it to, after some hot gas is ingested, get the cylinder closed very rapidly so that the gas doesn't have a chance to lose much of its energy to the cylinder walls. I have to think that Senft, no dummy he, chose that design because he understood the problem of rapid gas quenching that arises in these models. I have an unproven suspicion that many of the problems with these engines have to do with early gas quenching and not friction. This is somewhat substantiated by the sensitivity to flame placement.
Powder keg
Well-Known Member
- Joined
- Oct 10, 2007
- Messages
- 1,091
- Reaction score
- 3
Would that be why the timing has to be advanced so far? Because of the quenching? It kind of makes sense to me.
Wes
Wes
Similar threads
- Replies
- 12
- Views
- 992