Mini-Lathe Tailstock Quill Lock Washer

Home Model Engine Machinist Forum

Help Support Home Model Engine Machinist Forum:

This site may earn a commission from merchant affiliate links, including eBay, Amazon, and others.

rudydubya

Well-Known Member
Joined
Nov 26, 2008
Messages
337
Reaction score
7
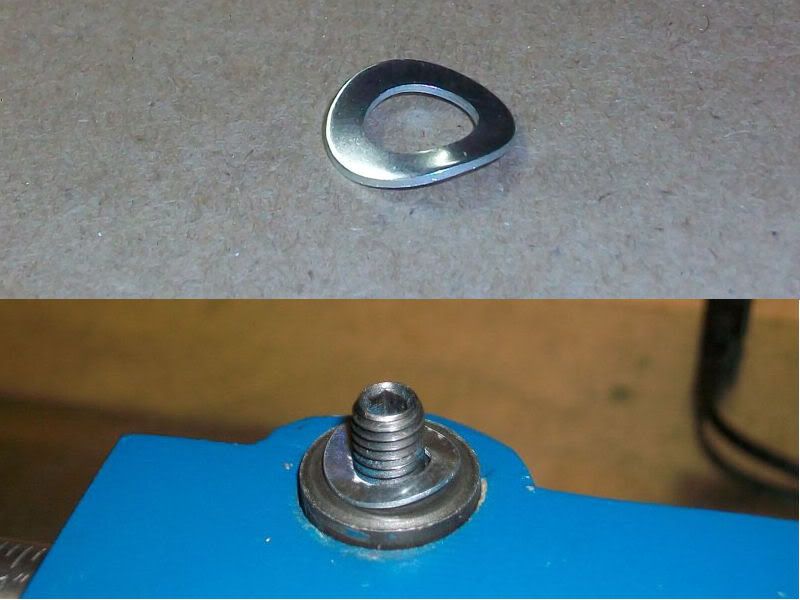
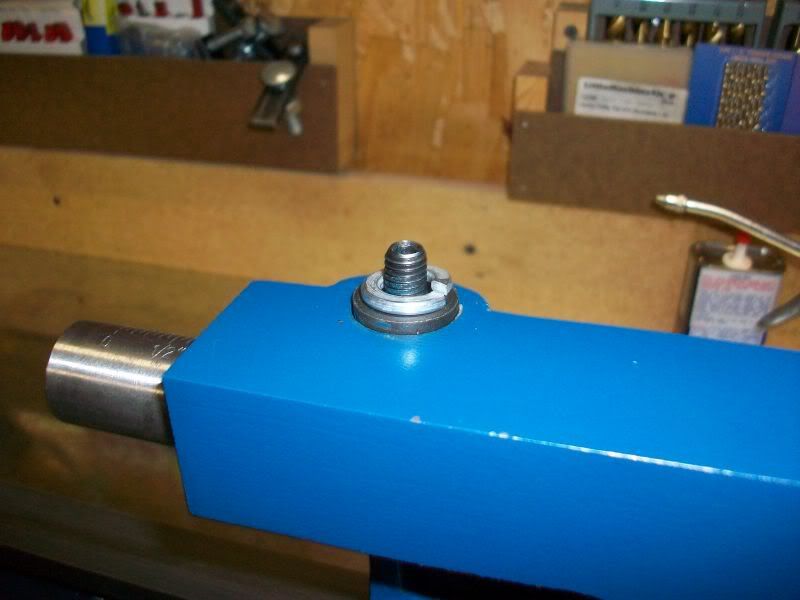
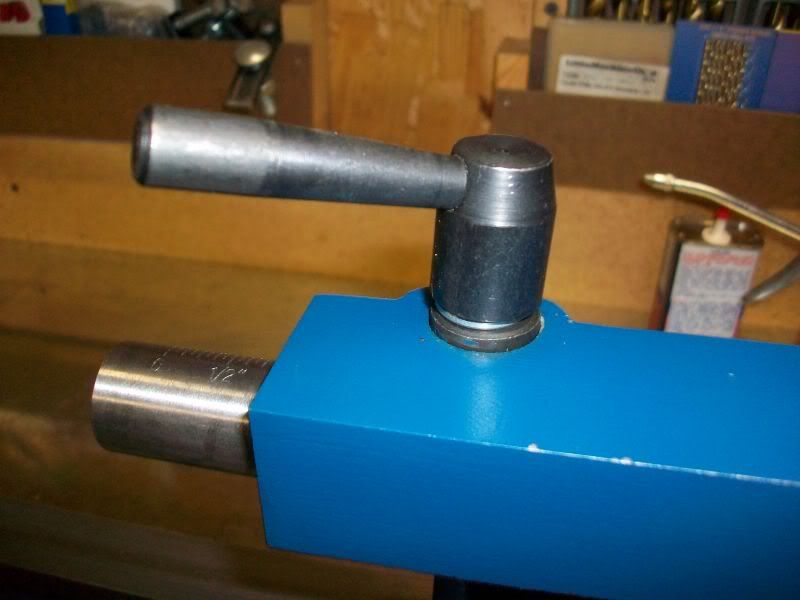
When I'm drilling a hole with my mini-lathe, I like to apply a little pressure on the tailstock quill lock to keep the quill more stable while I'm advancing or retracting the drill. But maintaining an even pressure on my machine was something of an art, because the friction on the quill changed depending on the position of the quill (some wear issues, I assume), requiring constant monitoring and adjustment, by feel, of the lock lever. I finally added a lock washer underneath the quill lock lever to introduce some variable spring pressure on the quill lock. I can now adjust the quill lock pressure on the quill from just a little to completely locked by adjusting the lock lever. I filed off the sharp edges of the washer ends a little so it wouldn't dig into the bottom of the lock lever when I was loosening the lock. Simple and cheap. Works pretty good for me.

QuillLockWasher.jpg


QuillLockWasherInstalled.jpg


Rudy
 
Great idea Rudy,
I have had similar problems so I intend to do the same trick as you have presented. Good work.

Cheers,
 
Very interesting idea Rudy

I'll try it on my lathe tomorrow

Thanks for posting
 
Hi Gary,
My first thought on reading the original post was these washers but I could not think of there name. Senior moment!! There are other types of washers which give even bearing like "circular corrugated iron", these would probably work but may be too weak for this task.
Great idea tho'
Cheers,
 
It would indeed be interesting to try one of those little Bellevilles under the lock lever. Good suggestion. Probably a lot smoother action than the lock washer too. Only Belleville I've got in my shop is that big one I took off the back of my mini-mill. I did find some "spring washers" at the local hardware store that I'm going to try, but they're so thin I don't have much hope for them.

Rudy
 
Hi Rudy,
Bit of thread but I hope I am forgiven. I'm interested why the big washer is know not on your mini mill?? I am currently troubled by the lack of the rigidity in the X2 mill and am designing fixes. Firstly I looked at an external frame to reinforce the rotating joint at the base of the column but am now looking at replacing this joint altogether with a much more manly joint. If you have thoughts or experience in this area I would love to hear your comments.
Cheers,
 
4wheels, greetings to you in New Zealand. I removed the Belleville from the back of my mini-mill when I replaced it with a piece of thick flat steel to make the column more rigid. I had read several opinions on different forums blaming the column flex on the Belleville, so I decided to replace it. After I replaced it with the steel, I added some bolts at the bottom to help align the Y-axis. You can see pictures and read about what I did to my mill in my thread "Reducing Mini-Mill Column Flex (and Column Y-Axis Alignment)" here:
http://www.homemodelenginemachinist.com/index.php?topic=6075.0

Adding the steel plate and some adjusting bolts eliminated most of the flex in my mini-mill. The remaining minor flexing I have left is probably due to bending of the pivot shaft or pivot plate, so I think you're right on about that joint. Hope this helps.

Rudy

 
Another thing that helps with the mini mill is fill the bottom with epoxy grouting.
It is the back wall of the column that flexes. Just stop it at the root cause.
 
Rudy,
Thanks for the comments and references to your previous thread etc. Today I cut some 4"w x 5/8" thick steel to about 11" long and the 1" x 5/8" bar ready for the mod your suggest it the previous thread.

Lykle,
I read the link about filling the base and lower column with granite/resin mix and I like the idea so will gather materials to do this mod as well.

Today I cut brass bar to make new gibs for the mill. Without the mill to cut the angled faces I had to resort to cutting the angle on a 1" sq block of wood - held the brass onto the block with screws and washers then cut the edges on the linisher. Seems to work fine. I will try and get a photo or two tomorrow. Tomorrow I will be shopping for as many grades of valve grinding paste that I can find to "lap" the ways on the mill. I read from you people and the other links people that each mod makes a noticable difference so I trust I will notice the difference too.
Thanks to all who filled in the many gaps in my knowledge on such matters.
Cheers,

P.S. My humble apologies for taking over this thread on Lathe tailstocks but for me at least the journey has be well worthwhile.
 
Tried an 8mm "spring washer" I found at the local hardware store and I like it ever better than the lock washer. More "spring" than I thought just looking at it. It's thinner than the lock washer and requires less turning on the lever to get the same pressure on the quill lock.

Rudy

SpringWasher.jpg
 

Latest posts

Back
Top