Line shaft

Home Model Engine Machinist Forum

Help Support Home Model Engine Machinist Forum:

This site may earn a commission from merchant affiliate links, including eBay, Amazon, and others.
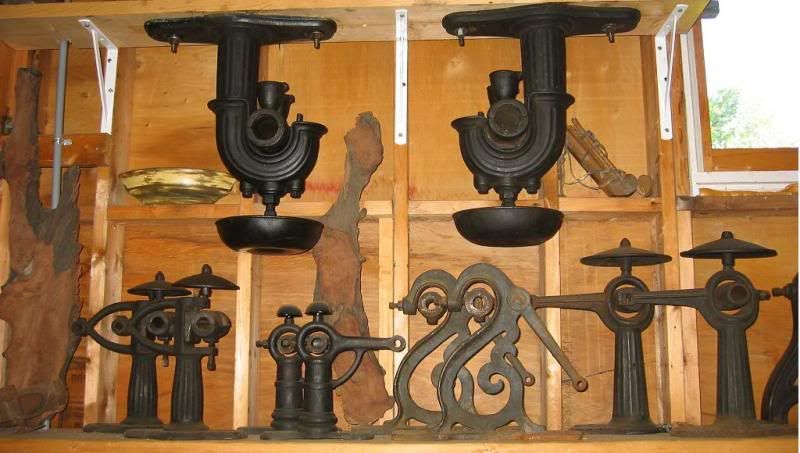
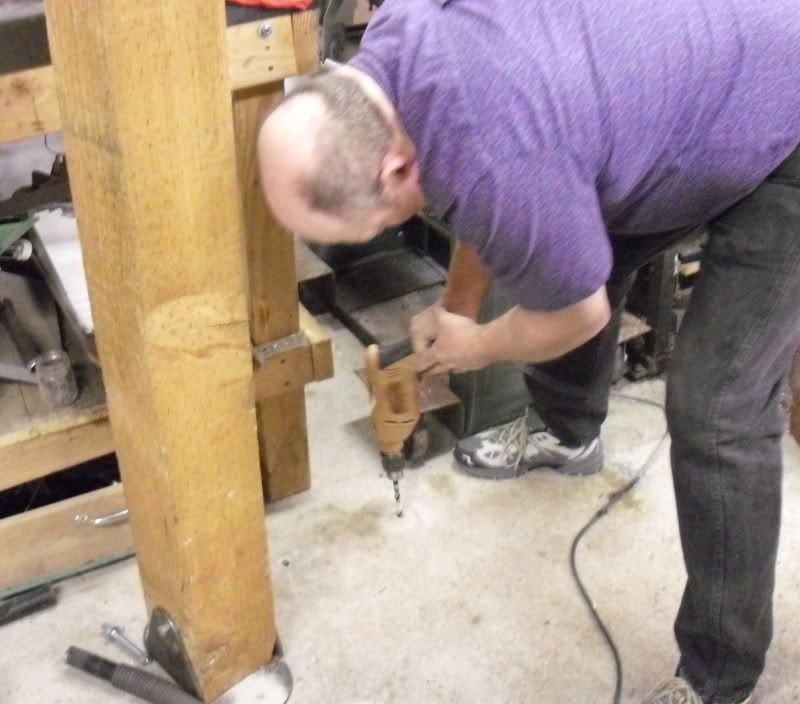
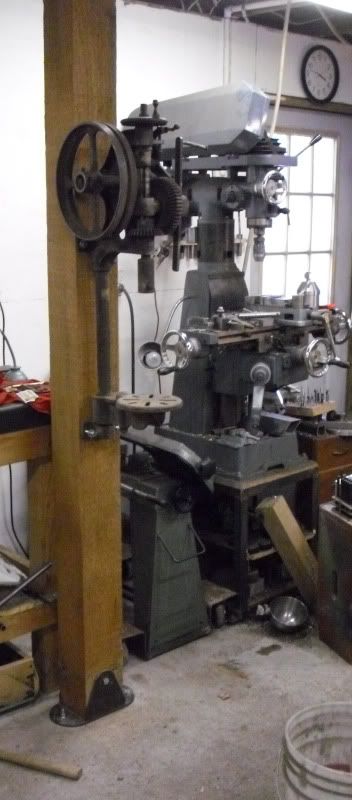
Thanks. I can't wait to see her ticking over under power. I have my wall painted and the bench back up against it. this week I'll try and get the post mounted. I need to order some belting and find out what to use for glue? And a few other things:eek:)
 
Well I see we have been shopping in the same type of supply "junk" pile. Here's my treasures from a few weeks ago. You just surprised me with a picture of a similar post drill. I have the little one cleaned up and waiting on an idea of where or what to so with it. The larger ones patina still has it stuck fast. Hum it has a hand wheel not a drive pulley.

IMG01670.jpg
 
My uncle has a lot of vintage machinery, (stationary engines, tractors, thrashing machines etc) he also has a couple of old line shafts kicking around, (he used to use one, running from a crossly 2 cylinder diesel engine, i am sure that had bronze bearings) the belts that was on the shafts are made from canvas and are joined by a metal connector which looks like a really fine finger joint you get in wooden boxes, this clamps into the canvas webbing and is joined via a pin going through like the pin in a watch strap.

Also, once up and running, the belt would stretch, we used to pour water on it to cool it and make it shrink again.
 
Here is a photograph I shot at an annual steam show. It is of one of the overhead line shaft hangers used to power the original Ford engine factory tooling. Although this may not be suitable for home shop use, I thought it would give a idea of the hangers overall construction.

BC1
Jim

DSCN0842.JPG
 
Thanks for the pictures. I found this earlier It has some Really nice looking hangers.

ShopDisplay.jpg


I like the way people cared about the way everything looked in the old days.
 
Those are some elegant hangers, I wonder if the more ornate units were from powering the early ceiling fans that were employed in mansions and civic buildings.

BC1
Jim
 
Thanks for the link Mutley.

I found an old book on the net that has some info on leather belts. It says the best joint is glued and pegged. After you glue it, you poke holes in the leather with an awl and insert wood pegs through the leather. Then you trim them off flush with the belt. Sounds like fun to me:eek:)

I think I'll give the 1/2 horse motor a shot before I get a bigger one. I'm planing on gearing it down pretty slow. I might run a jackshaft to speed the grinder back up.
 
Well, I started taking the grinder apart for a clean and paint. It looks like I'm going to have to make a couple more parts than I originally thought\0/ The ends of the shafts take a tapered flange that has an integral boss to center the wheel. One is missing. It had a flat pulley and a V pulley installed on the shaft. These originally had a loose and a tight pulley. The tight pulley is missing. I'll have to make one of those. That and two tool rests need to be made. The originals are long gone.

I found a tool catalog from 1920 that has this grinder for sale. It was pretty versatile. There were a couple of attachments that you could sharpen discs and sickles with it.

With this loose and tight pulley arrangement, Do you have to have loos and tight pulleys on the line shaft as well?

I'll post a couple of pictures tomorrow. My paws were too messy to touch the camera ;D
 
Keg, I have a SB manual that says if you want a glue joint use airplane dope or acetone cement.
You can still get airplane dope, but I'm not sure how to use it to splice a belt.
For the acetone cement, try Pliobond. I know this stuff will glue leather. On a three to four inch overlap for 1 1/2" wide belt, you won't be able to pull it apart.

Dean
 
I got here a little late and the topic seems to have moved on, but I thought I'd put in my two cents worth on bearings. Jabezkin mentioned lignum vitea. The 82-year-old fishing boat I work on still has the original lignum vitae propeller shaft bearing that has lasted though the boat has worn out three engines and is on it's forth which isn't exactly new. And both the prop and shaft are massive chunks of bronze, so there is a considerable amount of weight resting on the bearing.
 
Re: Lignum Vitae:

That's in a water-lubricated environment, unless I miss my guess. Lignum will run forever that way as long as there's liquid around it. Not sure how it will do in a dry or oil-lubricated environment, but it would be interesting.

Re: Maple:

Lots of different species of maple...not sure what one you're talking about when you're getting material that soft (ruined in sanding).

The one I am familiar with in bearing use is called rock maple - this stuff will dull high-speed-steel saw blades when it's being cut once seasoned. It's also commonly used in lab bench tops and other high impermeability/high durability applications.

Let me have a dig through my books when i get home over the next day or two and i'll bring some numbers to the discussion.

Re: Leather cement:

Get thee to the nearest Tandy leather or good hardware store - there is a cement that is highly recommended for leather goods and belting called Barge Cement (it's the brand name). This stuff works really nicely for scarf joints in belting - scarf back the belt ends , apply cement, align, clamp between wood blocks and then allow to cure. A bit of waxed paper between the blocks and the belt wouldn't be a bad idea, or you might be one of the many who has glued the clamp blocks to the belt with the squeeze-out... :)


ajr
 
Thanks for the story Jared. That is amazing that it is still running after 82 years!!!

Thanks for the tip on the leather cement!!! Also on the waxed paper:eek:)

I'll get some pictures tonight of the parts I need to make.
 
Been busy around here. Here is the top of the grinder. It shows the busted ear on the bearing cap. Someone had "fixed" it before and busted it again. I ground off the "fix" and cleaned up the casting.

LutherGrinder001.jpg


Yeah!!! The bolt holes still line up ;D A little file time and some paint. no one will know that it was busted.

LutherGrinder002.jpg


I've never seen or used a grease cup before. I must be a "young sprout" ;D If you look really close there are two in this picture. They still have a protective "coating" on them.

LutherGrinder003.jpg


This is the warsher with a tapered bore. It also pilots the grinding wheel. I need to make one of these and two of warsher's that go on the other side.

LutherGrinder004.jpg

LutherGrinder005.jpg


I have most of the metal for my flat pulleys. The big ones will be around 12.75. I'm going to build them up from bar stock and some tube.


I used to make high voltage cable a few years ago, and the machines used to have those grease caps on, they work really well, just fill up at the start of shift, then every hour or so, just give them a quarter turn.
 
Made some more progress today\o/ I managed to get the outer warshers made for my grinder. The originals were long gone.

LutherGrinder006.jpg


I had a chance to bend the spokes today for my flat belt pulleys that I need to make. Worked on these this morning. I turned the taper on the shaft and then heated and bent them on a cheesy jig that I made. But they turned out pretty good I think. I now need to make the hub and the rim's and weld the lot together.

Flatbeltpulley001.jpg


A buddy is coming over to help me install my post for my drill\o/

 
Here is the tapered pilot warsher that I made next to the original. I left the finish a little rough to match the original. A couple of interesting things that I noticed. The original was made from a casting. The roundy shapes on the outside were made with a form tool. They cut the whole end all at once. You can tell by the chatter lines that match up on the end. They probably then used some enery paper to clean it up a bit.

LutherGrinder007.jpg

LutherGrinder008.jpg

 
I welded up the pieces for my bracket today. A buddy cut them out for me:eek:)

Postdrill001.jpg


My Bald headed friend grabbed the hammer drill first:eek:)

Postdrill002.jpg


We got the post drill mounted for now. There are a couple of things that I want to fix. Then It will get painted.

Postdrill003.jpg


Now back to my grinder. I have some pulleys to make:eek:)


That's not me Brian. That's my buddy Lee. I'm about 20 years younger:eek:)
 

Latest posts

Back
Top