It is a fair while since this topic has been aired, so for all you new people or beginners, here is a reminder how to do it, one of my older posts from elsewhere.
How many times have you had to make a load of bits on the lathe all to the same length?
PITA isn't it?
What you need is to be able to push the job back into the chuck until it comes to a dead stop, then once tightened, you can use one setting to cut the face, and every one after that will be the same length, within a thou or so.
So this is how I went about making my chuck backstop.
This is about one of the cheapest but best bits of kit you can make for your lathe, and if used correctly can save you hours of machining time, and reduce recycling to zero.
First off, I got a soft end blank morse taper to fit my machine, theses are only a few squid each and I usually have a couple in stock of the two sizes my lathe uses, just in case a job like this comes along. If you want to go the cheapskate and difficult way, and make your own, that is up to you. To me, for the cost of them, they are just not worth making.
The normal sizes used for lathe spindles nowadays is either 2 or 3 morse taper.
A UK example of the type.
http://www.arceurotrade.co.uk/Catalogue/Blank-End-Arbors

If you want to make them yourself, then old large drills with a MT fitting can be utilised very well. The fitting is usually fairly soft anyway, just cut the drill part off. You are not worried about having a hardened MT fitting, or being very accurate, as it isn't doing any driving, just make sure it is cleaned up to a smooth finish.
Heating to red hot, hold it there for a minute or so, and then letting it cool down slowly should soften it down a lot, allowing you to drill and tap to a good depth.
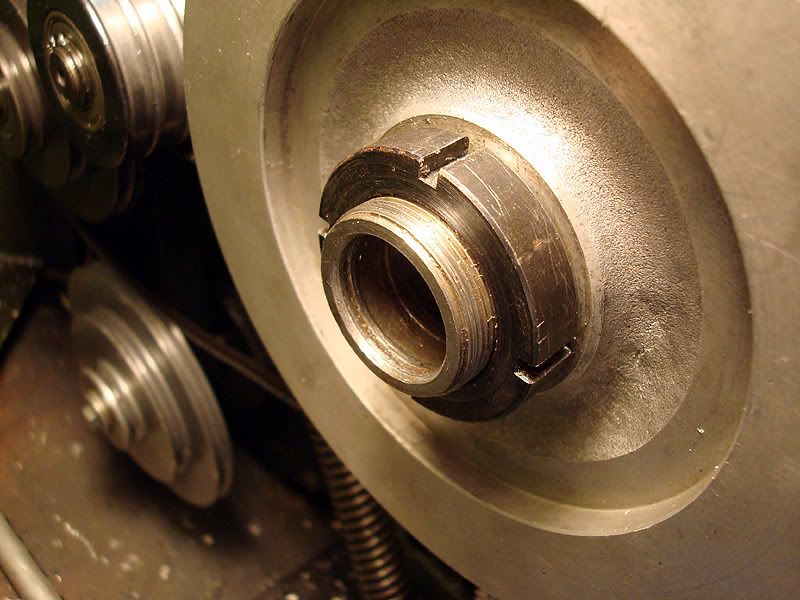
The soft end needs to be reduced so that it will fit thru the smallest centre of your chuck range into the spindle without having to remove the chuck. The easy way is just to reduce it down to where it meets the taper.
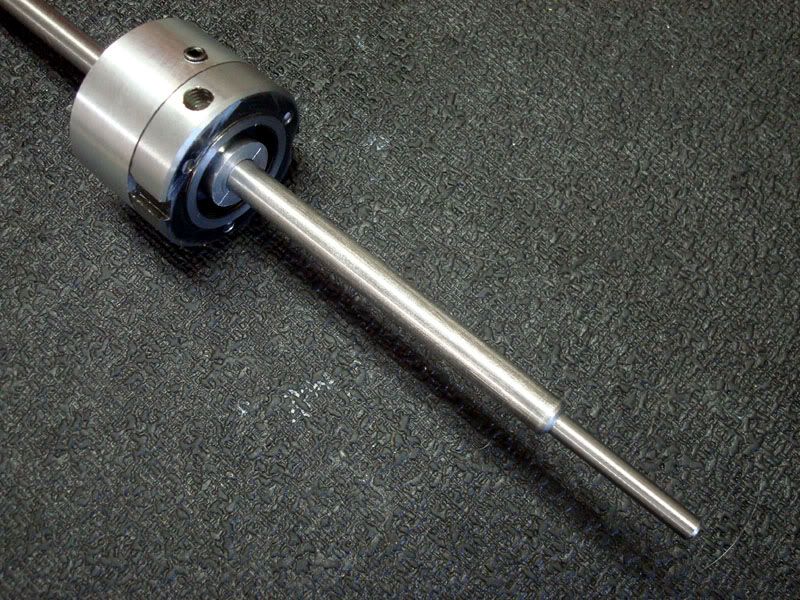
This is a shot of the back end of a 5C collet and a blank arbor.

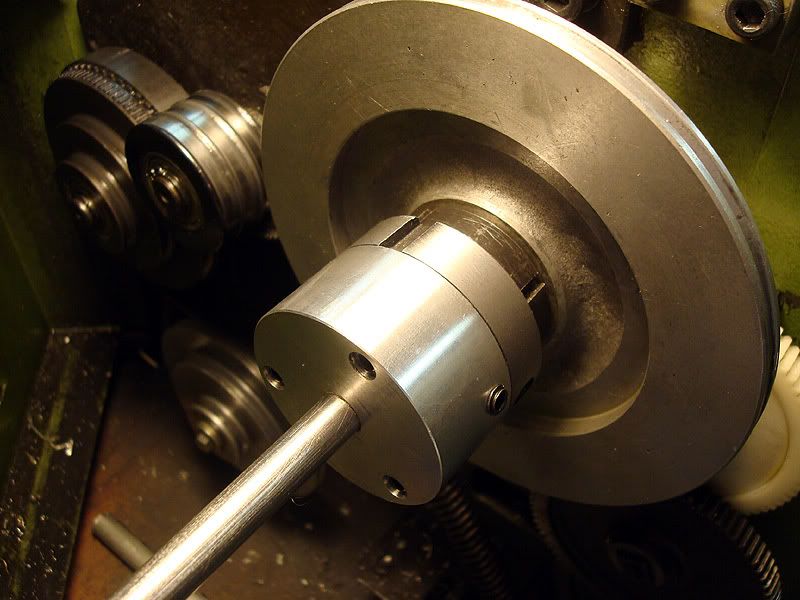
With the chuck off the machine, mount it into the spindle nose.

Turn down the soft end until it is the same size as the largest part of the taper. As you can see, it will now easily go into the smallest part of my chuck, the centre hole in a 5C collet.

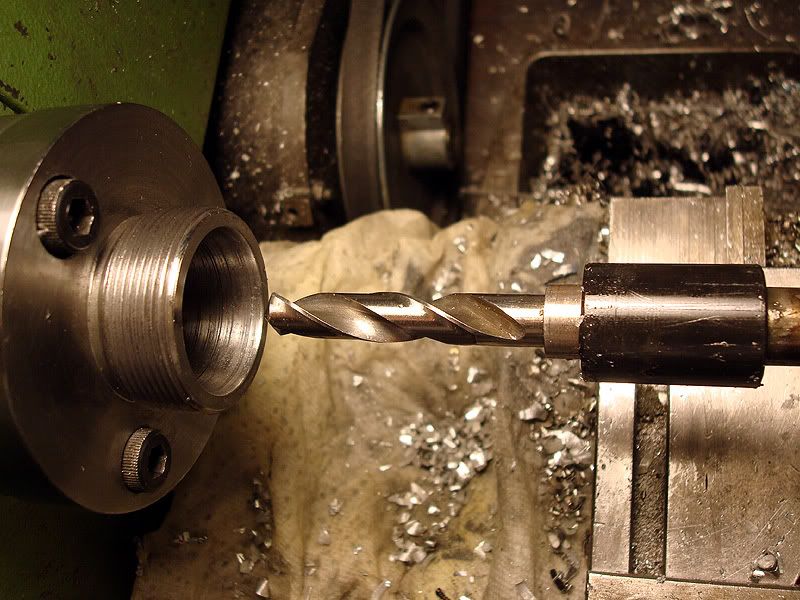
Drill down the centre as far as you can go with a tapping drill of your choice. I am using an 8mm thread, for a 2MT I would suggest 6mm or 1/4" thread.
You will most probably find you can only drill down the length of the softened end, which will give you about 3/4" adjustment on the stop length.

Then tap down as far as you can go.

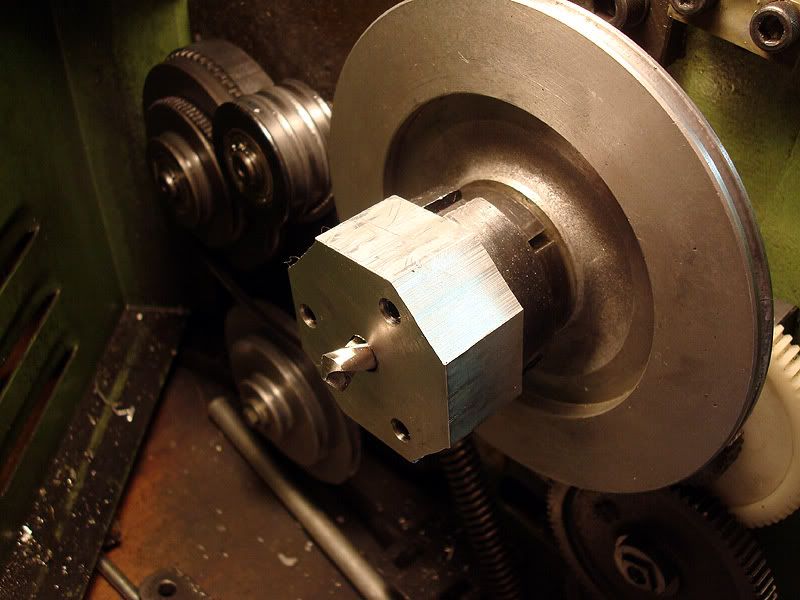
I used an 8mm coach bolt, but you could use almost anything, even threaded rod if you have it. Screw it as far in as it will go, and tighten up the locknut.

I have removed the chuck jaws to show you what is going on.
All power off the machine, stick a rag into the spindle end and push it all the way thru the spindle with a stick. You do this every time you fit anything into the morse taper in the nose, just to get rid of debris in there that will stop the MT seating properly.
Feed the backstop thru the chuck and get it seated in the spindle.

This is bit of a hoptical dillusion. You need to mark up the screw length just before it would hit the back of the jaws. So if the jaws are tightened up, they won't touch the backstop screw.

Cut the screw to marked length, and face it off.

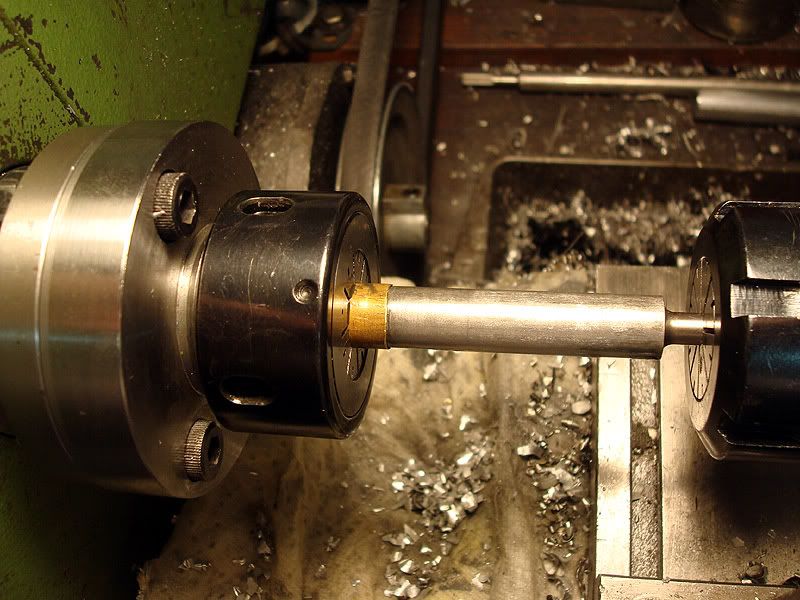
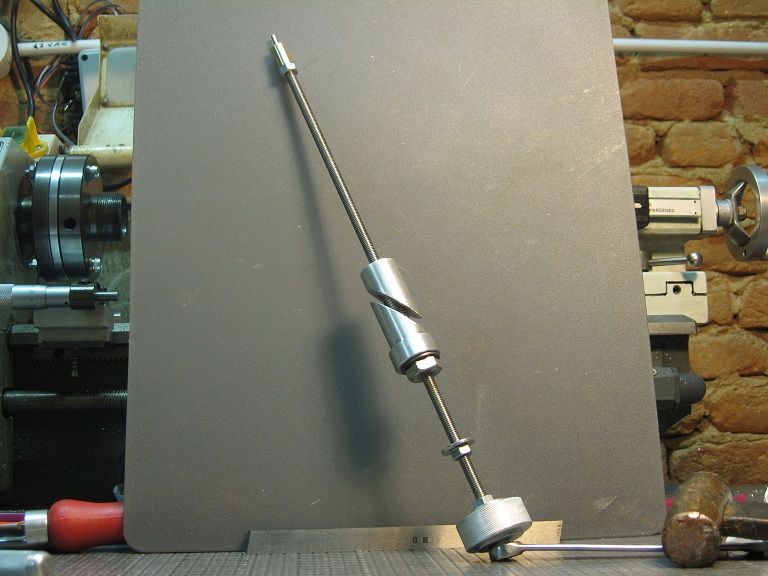
This shows how the screw fits, it isn't screwed all the way in just so I could get this angled shot. Normally you would take the stop out when not in use, and when you fit it, you adjust it to length to push your part back to, ensuring the locknut has been tightened before mounting it into the spindle..

As mine is, it can only be used with parts that are larger than 8mm and longer than about 25mm (1"), that is because it isn't completely finished.
I will put say a 4mm (5/32") thread in the very end of the 8mm adjusting screw, and make up little adapter noses for smaller material sizes. Just as I have done for the 5C collet backstop in the top of the picture. You soon end up with all sorts of ends that you keep in a little box for almost any occasion.
The bolt at the bottom could be faced off and used for a backstop for material having a hole thru it, say a bored cylinder. You just have to use your imagination a bit.

I will just explain one thing about the commercial stops that fit into the back of 5C collets.
I use a commercial screw in backstop in my 5C collets all the time, because they are so convenient, but they are not super accurate, because the position can be altered by how much you tighten up the collet into the chuck, the tighter you go, the further back the collet sits, and so does the stop in relation to your cutting tool.
This type is spot on, because once it is locked into the spindle, it is going nowhere, and once your saddle is locked, you can just face up to the same length time and again.
If you don't understand anything, just ask.
I can't give any machine specific answers, because unless it is the same as mine, I just won't know. But ask away anyway, because someone on here will know what you are talking about.
John
How many times have you had to make a load of bits on the lathe all to the same length?
PITA isn't it?
What you need is to be able to push the job back into the chuck until it comes to a dead stop, then once tightened, you can use one setting to cut the face, and every one after that will be the same length, within a thou or so.
So this is how I went about making my chuck backstop.
This is about one of the cheapest but best bits of kit you can make for your lathe, and if used correctly can save you hours of machining time, and reduce recycling to zero.
First off, I got a soft end blank morse taper to fit my machine, theses are only a few squid each and I usually have a couple in stock of the two sizes my lathe uses, just in case a job like this comes along. If you want to go the cheapskate and difficult way, and make your own, that is up to you. To me, for the cost of them, they are just not worth making.
The normal sizes used for lathe spindles nowadays is either 2 or 3 morse taper.
A UK example of the type.
http://www.arceurotrade.co.uk/Catalogue/Blank-End-Arbors
If you want to make them yourself, then old large drills with a MT fitting can be utilised very well. The fitting is usually fairly soft anyway, just cut the drill part off. You are not worried about having a hardened MT fitting, or being very accurate, as it isn't doing any driving, just make sure it is cleaned up to a smooth finish.
Heating to red hot, hold it there for a minute or so, and then letting it cool down slowly should soften it down a lot, allowing you to drill and tap to a good depth.
The soft end needs to be reduced so that it will fit thru the smallest centre of your chuck range into the spindle without having to remove the chuck. The easy way is just to reduce it down to where it meets the taper.
This is a shot of the back end of a 5C collet and a blank arbor.
With the chuck off the machine, mount it into the spindle nose.
Turn down the soft end until it is the same size as the largest part of the taper. As you can see, it will now easily go into the smallest part of my chuck, the centre hole in a 5C collet.
Drill down the centre as far as you can go with a tapping drill of your choice. I am using an 8mm thread, for a 2MT I would suggest 6mm or 1/4" thread.
You will most probably find you can only drill down the length of the softened end, which will give you about 3/4" adjustment on the stop length.
Then tap down as far as you can go.
I used an 8mm coach bolt, but you could use almost anything, even threaded rod if you have it. Screw it as far in as it will go, and tighten up the locknut.
I have removed the chuck jaws to show you what is going on.
All power off the machine, stick a rag into the spindle end and push it all the way thru the spindle with a stick. You do this every time you fit anything into the morse taper in the nose, just to get rid of debris in there that will stop the MT seating properly.
Feed the backstop thru the chuck and get it seated in the spindle.
This is bit of a hoptical dillusion. You need to mark up the screw length just before it would hit the back of the jaws. So if the jaws are tightened up, they won't touch the backstop screw.
Cut the screw to marked length, and face it off.
This shows how the screw fits, it isn't screwed all the way in just so I could get this angled shot. Normally you would take the stop out when not in use, and when you fit it, you adjust it to length to push your part back to, ensuring the locknut has been tightened before mounting it into the spindle..
As mine is, it can only be used with parts that are larger than 8mm and longer than about 25mm (1"), that is because it isn't completely finished.
I will put say a 4mm (5/32") thread in the very end of the 8mm adjusting screw, and make up little adapter noses for smaller material sizes. Just as I have done for the 5C collet backstop in the top of the picture. You soon end up with all sorts of ends that you keep in a little box for almost any occasion.
The bolt at the bottom could be faced off and used for a backstop for material having a hole thru it, say a bored cylinder. You just have to use your imagination a bit.
I will just explain one thing about the commercial stops that fit into the back of 5C collets.
I use a commercial screw in backstop in my 5C collets all the time, because they are so convenient, but they are not super accurate, because the position can be altered by how much you tighten up the collet into the chuck, the tighter you go, the further back the collet sits, and so does the stop in relation to your cutting tool.
This type is spot on, because once it is locked into the spindle, it is going nowhere, and once your saddle is locked, you can just face up to the same length time and again.
If you don't understand anything, just ask.
I can't give any machine specific answers, because unless it is the same as mine, I just won't know. But ask away anyway, because someone on here will know what you are talking about.
John
") ..... 'Cept I'm only half way there ...
..... 'Cept I'm only half way there ...