Kel Builds Bill's V-Twin Steamer

Home Model Engine Machinist Forum

Help Support Home Model Engine Machinist Forum:

This site may earn a commission from merchant affiliate links, including eBay, Amazon, and others.
Thanks Bob, Kevin, and Dean.

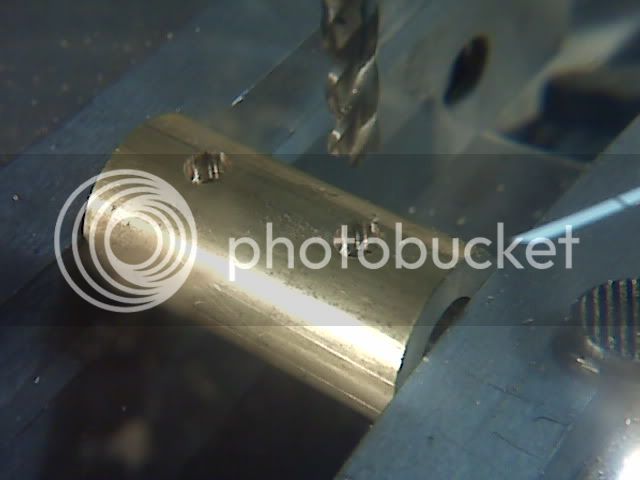
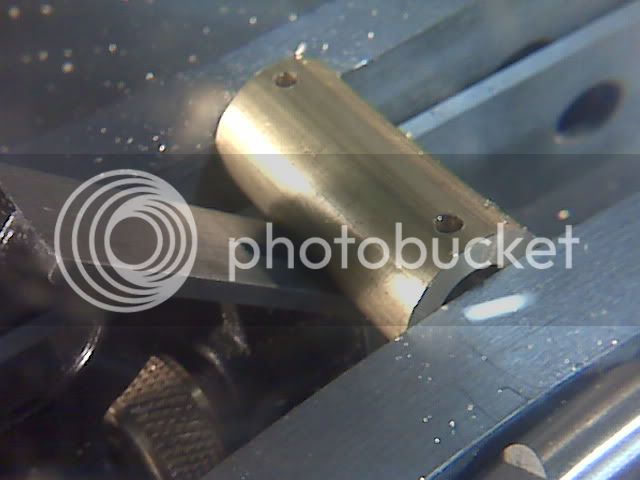
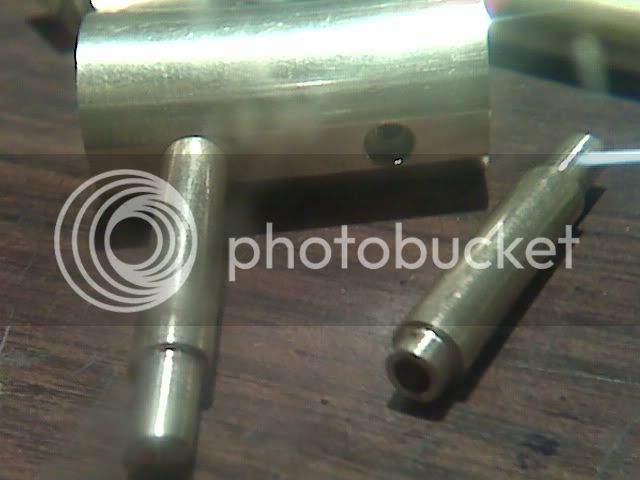
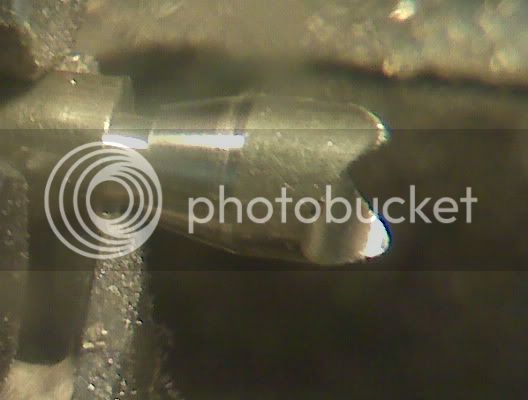
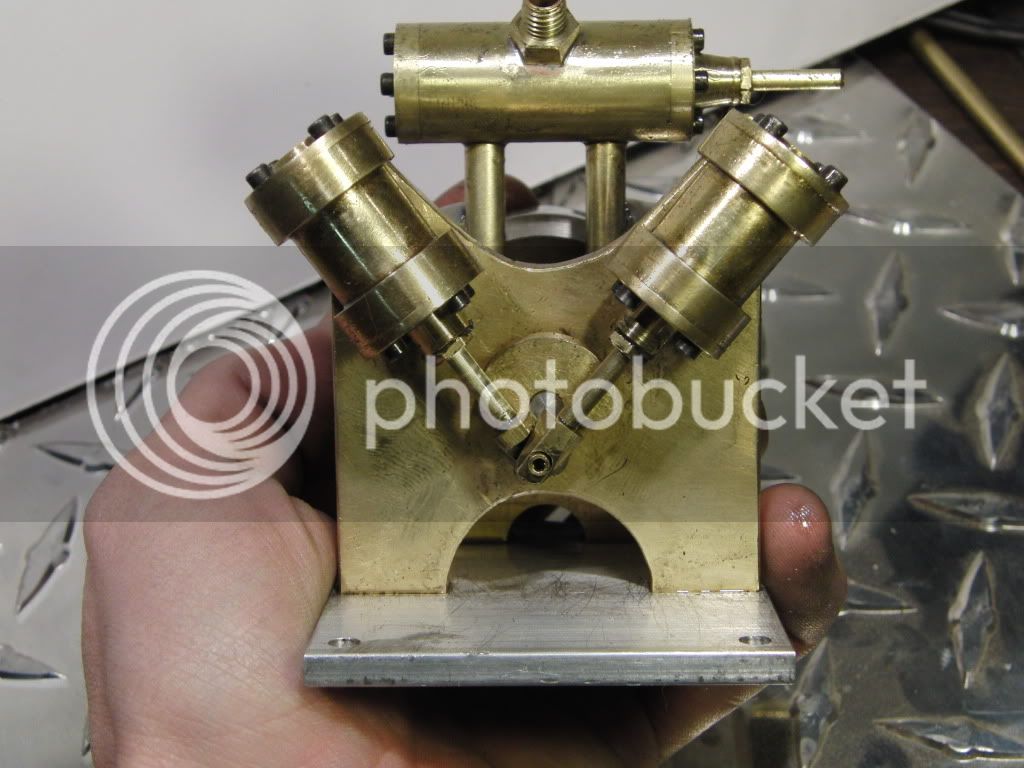
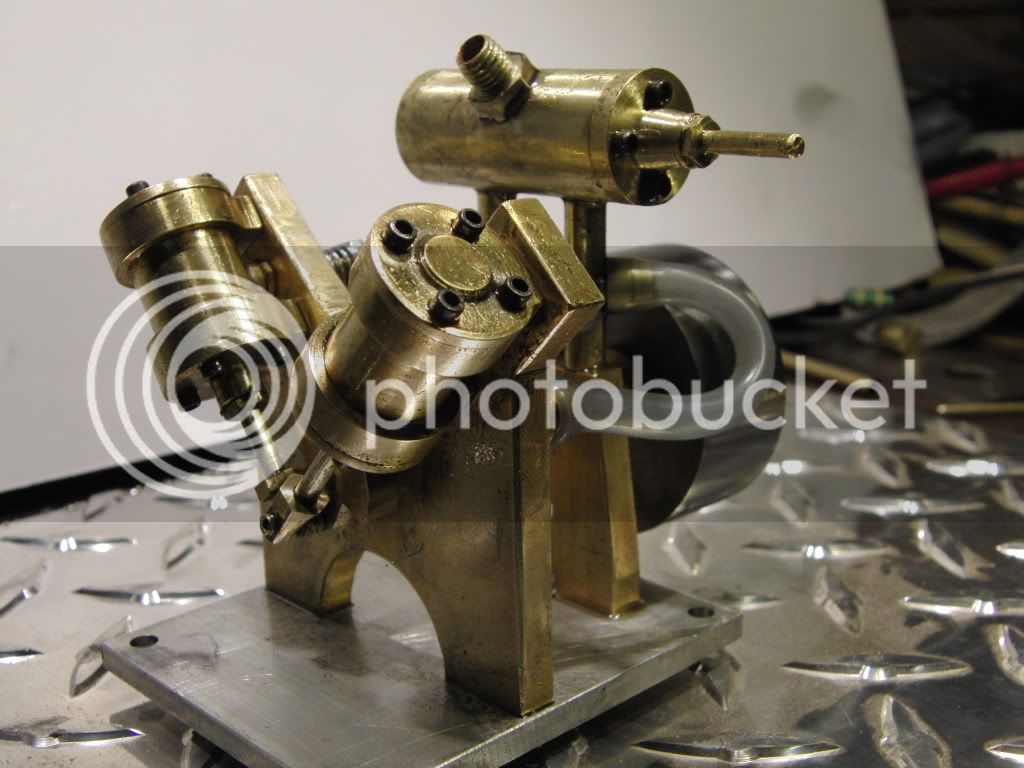
I was very happy when she turned over for the first time without any major fiddling. It has actually been about 5 years in the making, more or less. This was my Third attempt at this engine. 1 complete failure and 1 quasi-failure. The phrase "We learn from our Mistakes" could not be any more true. When it came time to build the parts I already knew what didn't work, so it was just a matter of properly making the little guy.

I guess you could say my rivalry with this engine has finally come to an end............for know.


I am planning on making a boiler for this just like the plans. It is a water tube boiler and pretty straight forward construction. Just a matter of getting all the materials needed for the job. Who knows, the whole boat maybe.


Thanks for lookin


Kel
 
Kel,

Your engine sure runs smoothly.

I'll be following your boiler build with interest.

SAM
 
SAM in LA said:
Kel,

Your engine sure runs smoothly.

I'll be following your boiler build with interest.

SAM

Thanks Sam, yes it does run very smooth, and is very quite too. One design change I made that might help this out is that I put ball bearings for the crankshaft. It turns over very nicely. Also I used alot of oil to "break" it in.

Kel
 
Got some more progress done today. This engine will require a forward/stop/reverse valve for R/C control.

I decided not to go with the design given in the plans, a little over complicated construction for a simple valve.

So I decided to go with a piston type valve, most typically used in double acting steam engines instead of sliding valve.

I started with a 3/4 inch brass bar 1.5" long with a 3/8 hole drilled and reamed and honed. Then started to drill the 5 port holes.

here are the two on the bottom that go to either side of the engine.
36-2.jpg


Now for the exhaust holes, these need to be at 45 deg off center of the bottom holes to make clearance for the end cap screws. This is not critical so I just used a small square with a 45 on one side.
37-1.jpg


Next up was the valve itself. I made this from brass also.
38.jpg


To connect the valve with the ports on the engine is posing to be a problem. But I think I got it figures out now.
There will be two upright posts on top of the rear bearing block. These will double as steam passages from the valve to a 1/8" piece of copper tube which will connect it to the engine.
39.jpg


To connect the uprights to the copper line I need some protrusions at 90 deg
cant think of what these would be called?

To meet up with the 1/4 inch uprights I used a 1/4 inch end mill to make a saddle for it to sit on.
40.jpg


Then I brought it to the lathe and turned it down and cut it off.
41.jpg


Then all that's left is to solder it to the uprights, and drill the hole through.
42.jpg


That's all for now.

I get my new camera tomorrow, the Casio EX-FH20, so my pictures and video will be much improved. A really cool feature of this camera is that it can shoot video at 30, 210, 420, or 1000 frames per second. (Surprisingly good quality too) That will make for some super slow motion video, a tool I have always wished for but never thought I could afford. It is currently on sale at BestBuy.com Very affordable, even compared to point and shoots.

Kel
 

Nice progress Kel!

I look forward to the high quality pictures to go with the top quality work!

 
Kel,

Your engine has an "Industrial" look to it.

I'm looking forward to seeing it run, especially since your camera can do tricks.

SAM
 
So that's what it looks like!
; )

Just pullin' yer leg, Kel. Looks good. New camera sure helps us guys on the forum, too.

Dean
 
Here is a good vid of this engine. I have the forward/stop/reverse valve operating now.


Thanks for watchin.

Kel
 
Really does run great, Kel. The reversing valve is slick!

Dean
 
Kel,

Quick change from forward to reverse and it doesn't look like the clutch suffers one bit. :eek: What other tricks do you have up your sleeve. :big: Keep up the good work.

SAM
 

Latest posts

Back
Top