Fabing a curved spoke flywheel

Home Model Engine Machinist Forum

Help Support Home Model Engine Machinist Forum:

This site may earn a commission from merchant affiliate links, including eBay, Amazon, and others.

ghart3

Well-Known Member
Joined
Feb 12, 2008
Messages
154
Reaction score
1
Making curved spoked flywheel.
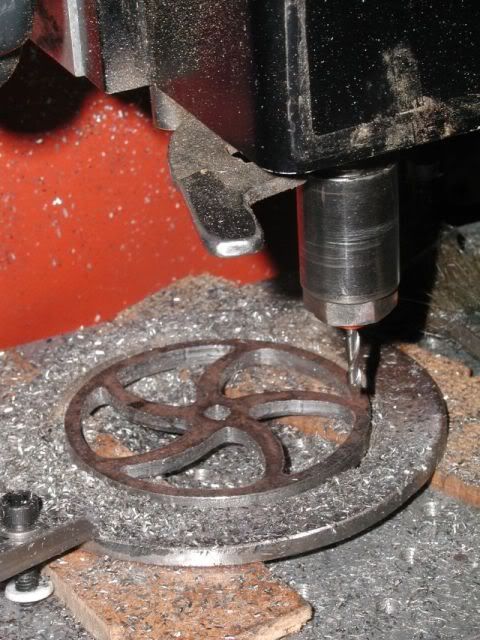
Spokes cut out of 3/16" thick steel using 1/8" carbide end mill on little cnc mill.
Riderflywheelspokesmilledout.jpg


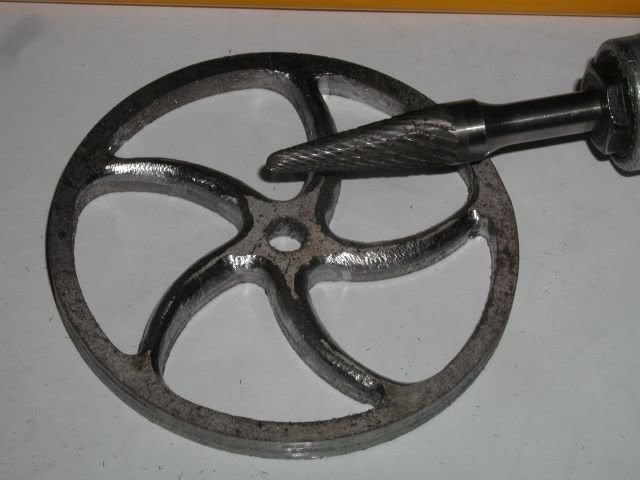
Roughing out radius on spokes with carbide burr on a flex-shaft tool.
Roughingradiusonspokes.jpg


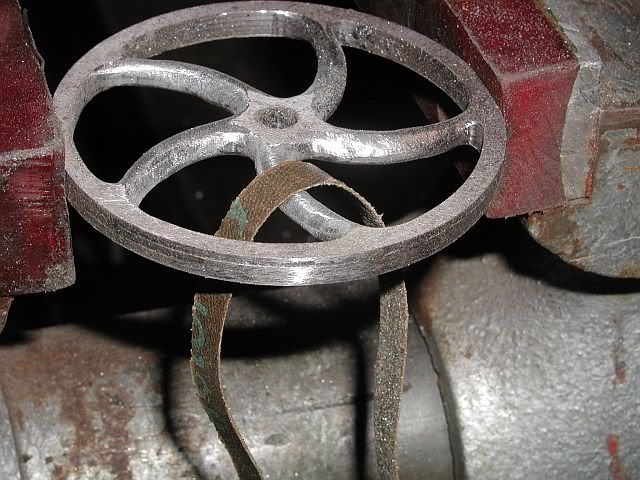
Sanding the spokes. Shoe polish style sanding.
Sandingspokes.jpg


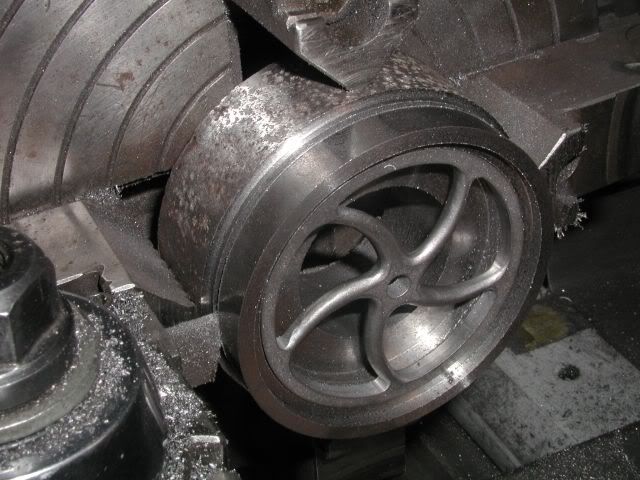
Turning and boring rim for the spokes. OD of flywheel will be 3.300 inches.
Mainpartofrim.jpg


Spokes and the two parts of the rim.
Spokesrimrimring.jpg


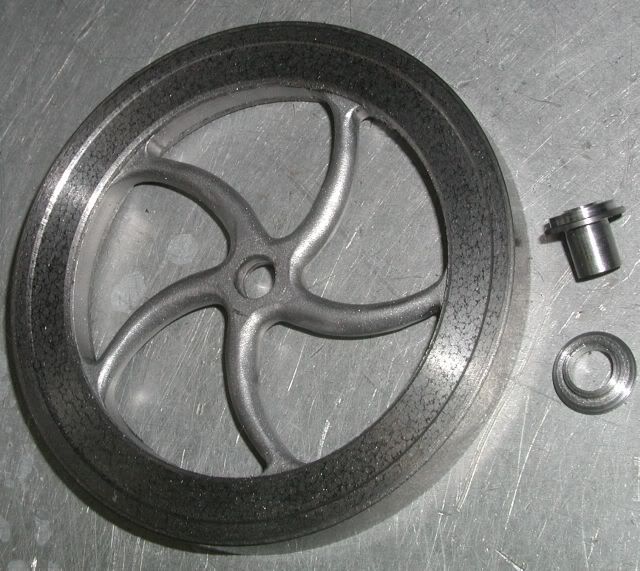
Rim and spokes held by Loctite and the two part hub insert ready to be held also by Loctite.
SpokeandwasherwithLoctite.jpg


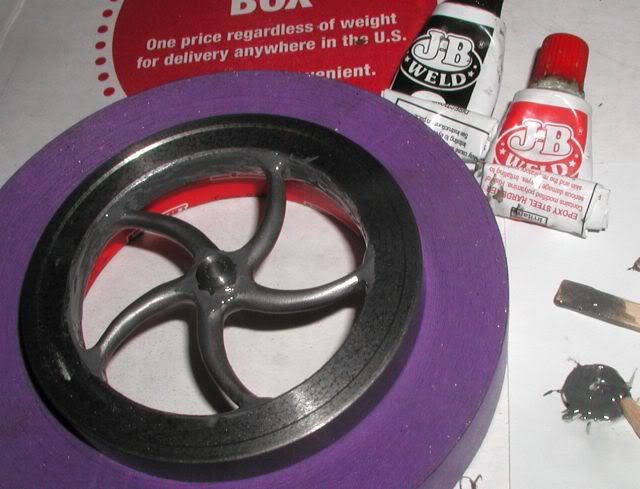
Adding some metal filled epoxy (J-B Weld) to finish fillets on outside edge of spokes at the rim.
J-Bweld.jpg


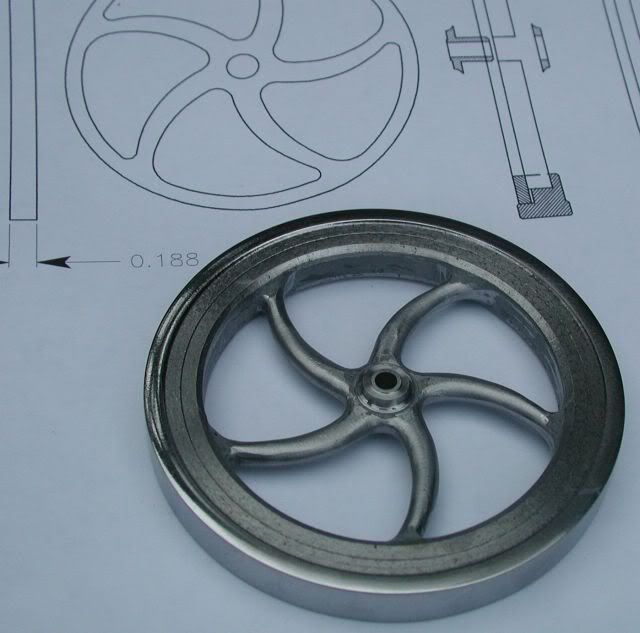
Hub insert has been Loctited in placed and bored to size. Rim sanded and buffed.
Rimpolished.jpg
 
Nice! A very impressive bit of work.
 
Very nice, cast iron look without needing to do the casting.
 
*discussion* Thank you for sharing both pictures and methods.
This will be my next flywheel project.
rog/TN
 
Very nice work! How much time do you think it took you start to finish?

Flywheels are always a thorn in any project. A nice flywheel really makes the project but they can be very difficult and time consuming to make.

Chuck
 
One further note. I don't have CNC but I do have a plasma cutter that will cut through steel up to 3/8" thick. I've thought about fabing a flywheel like yours by first roughing out the spokes with the plasma cutter and a jig, then smoothing them up with the mill. Has anyone ever considered or tried that? I just wonder if the plasma cutter would harden the steel so it would be difficult to finish off with the mill.

Chuck
 
At work we use a plasma cutter every day. Items that come into the machine shop are sometimes too hard to machine. To solve this we anneal them. I'll take them to a cherry red with a tourch then cover them quickly with "floor dry" and let them cool slowly. The floor dry really holds in the heat. Sometimes they will be too hot to touch the next day. But I take them out at that point and let them finish cooling. Works nearly every time.

Nice job on the flywheel!!!
 
Chuck, Think plasma cutter would work ok with the right pattern.
Things went fairly smooth making the flywheel. Started on day and finished the next day.
 
Used to build CNC plasma cutting machines -

If you cut the parts on a water table out of steel with over .2% carbon you would probably get some hardening of the surface, but if you cut in air on a part as thin as this it would probably come pretty close to anealed off the table. You might want to bead blast it or wire brush it to get all the cutting slag off the surface. Since you would not be welding any more surface prep would be unnecesary.

I would actually be more concerned about warping because of the small cross sections of a part like this.
 
Wow... I miss so many cool threads, like this one. Great flywheel.

That mill spindle looks awfully familiar, but I'd like to see more of the spindle lock. Also, is that an ER collet adapter you're using?
 
Ghart3,
Beautiful work!

Thanks for the step by step. It really helps me visualize the steps and the ways to finish the part I hadn't thought of before.

Please continue if possible, your work is very educational!

Regards,
Sean
 
Vernon That mill spindle looks awfully familiar said:
It is a Sherline head. A Erickson DA 200 series collet extension was worked over to replace the Sherline spindle and new pulleys made for higher speed. Borrowed the idea used on wood router for holding spindle so only one wrench needed to loosen collet.

EricksonDA200seriescollets.jpg


It is a home brew machine. The Z axis screw is mounted to the head mount so it can not turn. In the over head frame is a pair of ball screws that turn. This get the screw closer to the balance point.


framebare.jpg


Zheadmount-1.jpg


Have 5 different heads that can use and they easily change in way under a minute.
One Sherline head with the collet spindle and higher speed.
Standard Sherline head borrowed from the Sherline lathe.
A drag engraver that holds a spring loaded diamond tip.
Precise high speed head
Engraving head that used to be on a pantograph.


5heads.jpg
 
Very nice... I thought that might be a homebuilt machine behind the Sherline spindle. Quite a stout-looking beastie, too.
 
Very nice looking flywheel, and a fascinating mill too. I don't know if you have some build photos from that mill, but that would be a great thread too!

Best,

BW
 
Back
Top