exp. design for a dbl. acting mini. hydraulic cylinder

Home Model Engine Machinist Forum

Help Support Home Model Engine Machinist Forum:

This site may earn a commission from merchant affiliate links, including eBay, Amazon, and others.

hobby

Project of the Month Winner!!!
Project of the Month Winner
Joined
Dec 5, 2009
Messages
510
Reaction score
47
Hello everyone,

I have a few mechanical model projects I would, like to design and build,
using hydraulics, so this is going to be a experimental project in designing tooling and such, to be able to fabricate micro-miniature double acting hydraulic systems.

Building a single acting cylinder in hydraulics, is easy because there is no need to have a seal at the top of the cylinder, to contain the fluids, as long as the piston to cylinder fitting, is properly done with good compression, and very minute leakage, at the top.

But designing and building a double acting cylinder is more of a challenge, as I need to cap off both the bottom and top, of the cylinder for fluid pressure to push the piston in both directions.

I have decided I want to make a hydraulic system with a 3/8" dia. steel rod, with an internal bore dia. 1/4", so a piston with a dia. 0.249", and a length of 1/4" can be used and the piston rod to be made of 1/8" drill rod.

I looked at the idea of using my follower rest on my lathe, and makeing the piston and rod one piece, however I want the rod to be over 3", and to get a precise turning cut that way for that long of length could run into bending problems, somewhere if not some inconsistant rod diameter.

So I decide it would be best to use 1/8" precision rod, (drill rod) that ensures perfect dia. along the length of the rod. This means now I need to make the piston and rod 2 seperate pieces.
I thought about threading the piston and rod, than assembling together and then machining the piston down to final diameter. Or to press fit a aluminum piston, already to finished diameter, onto the rod.

I decided to go with the press fit method. This means to keep the 1/8" dia. rod from bending, I would need to fabricate a dedicated pressing jig, that I could utilize on my manual press.

I look at a project as being not only the finished work itself, but all the tooling and setups needed to be made in order to build and complete the project.
So building tooling is all part of building the final project itself.
-----------------------------------------------------------------------------------------------------

So here is a run down of what I have done so far, in fabricating a pressing jig:
Since this is a work in progress thread, I will give a lot of detail as possible.

The idea of this design is to press the 1/8" dia. 4" long rod onto a piston, 1/4" dia. x 1'4" long, for
a depth of 1/8".

This jig must support the rod along its entire length, as best as possible, so my design uses a solid rod, and a top plunger, spring loaded.

1.jpg


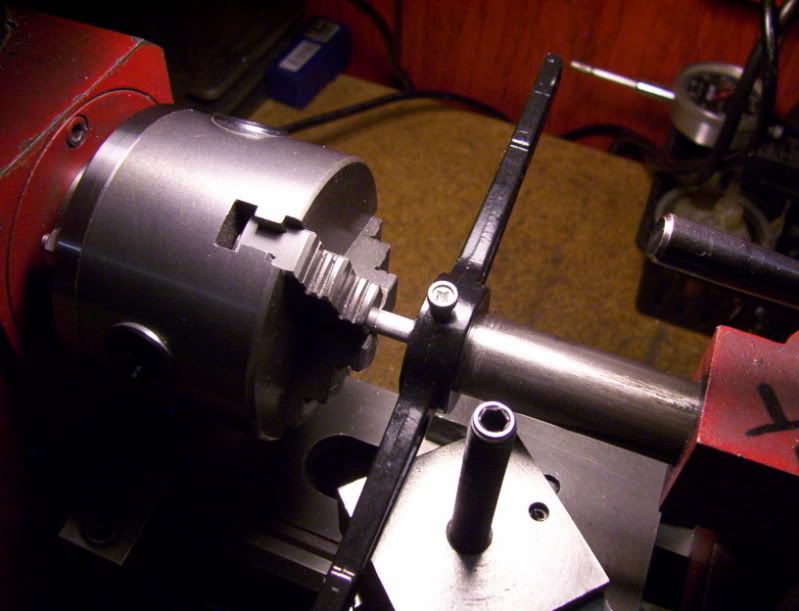
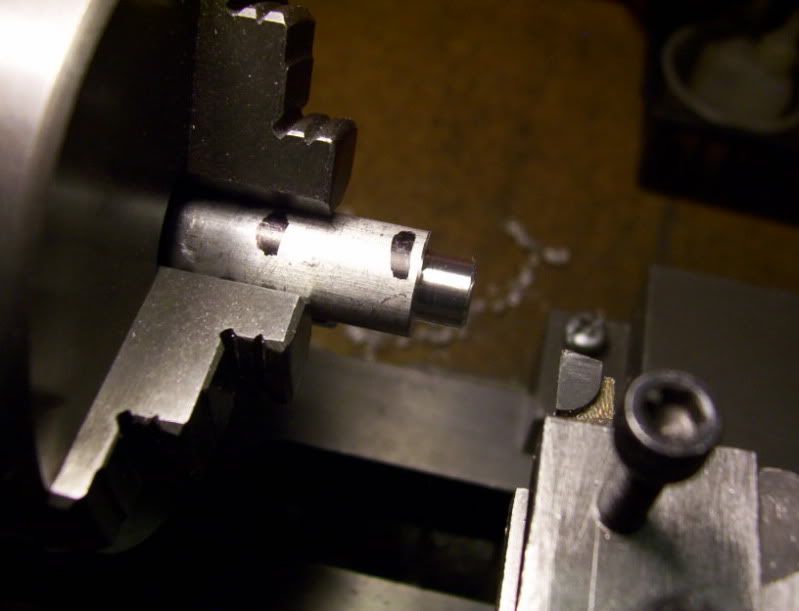
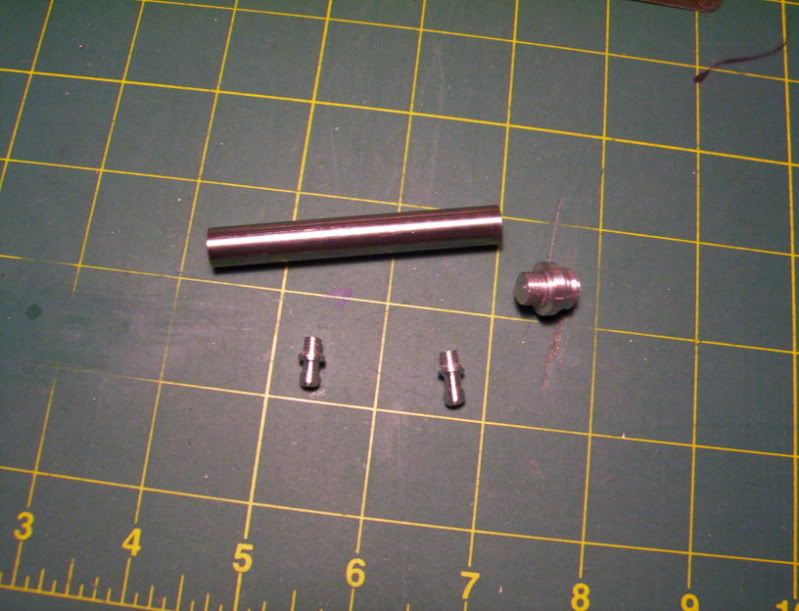
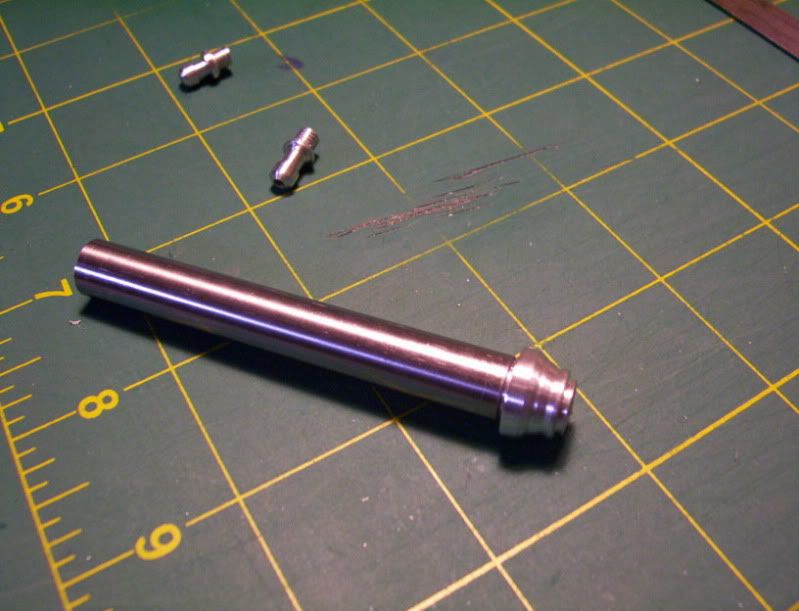
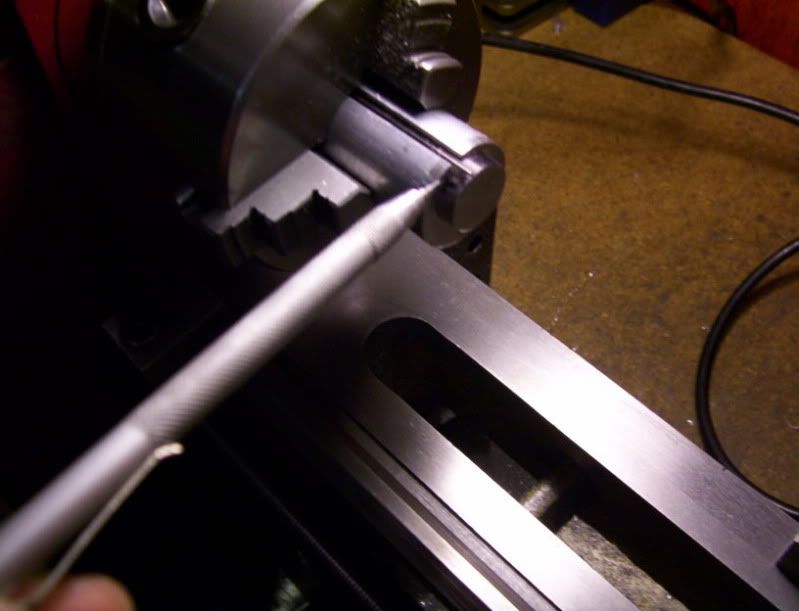
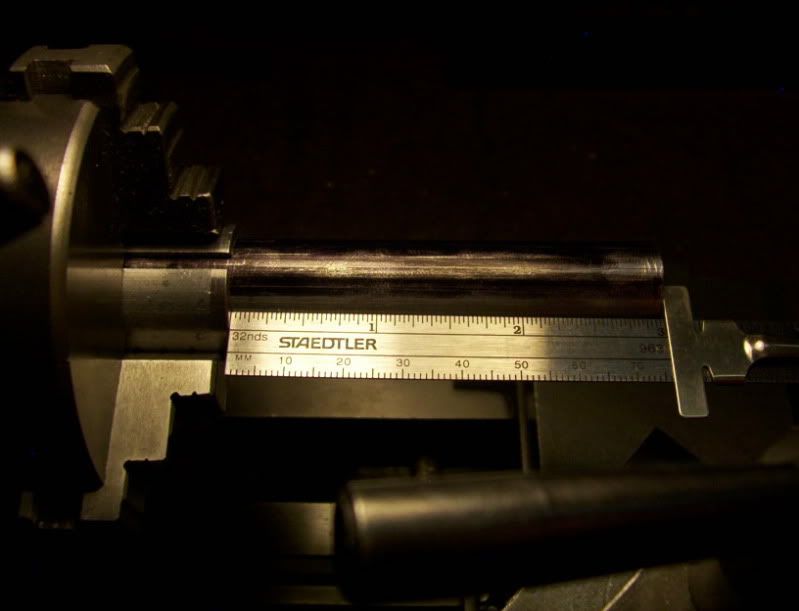
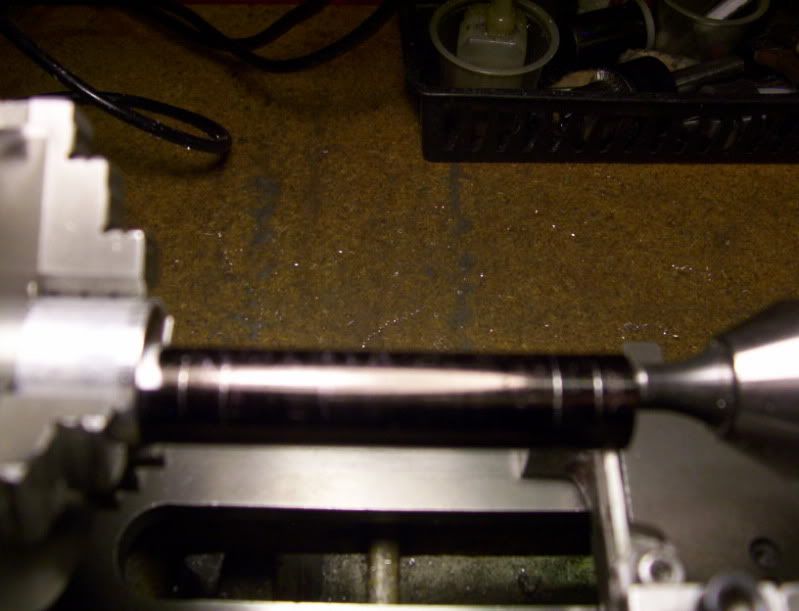
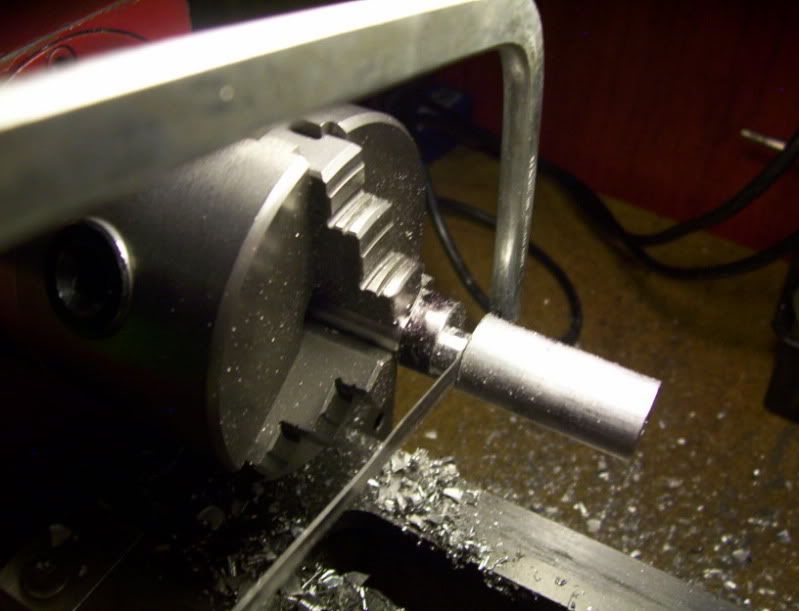
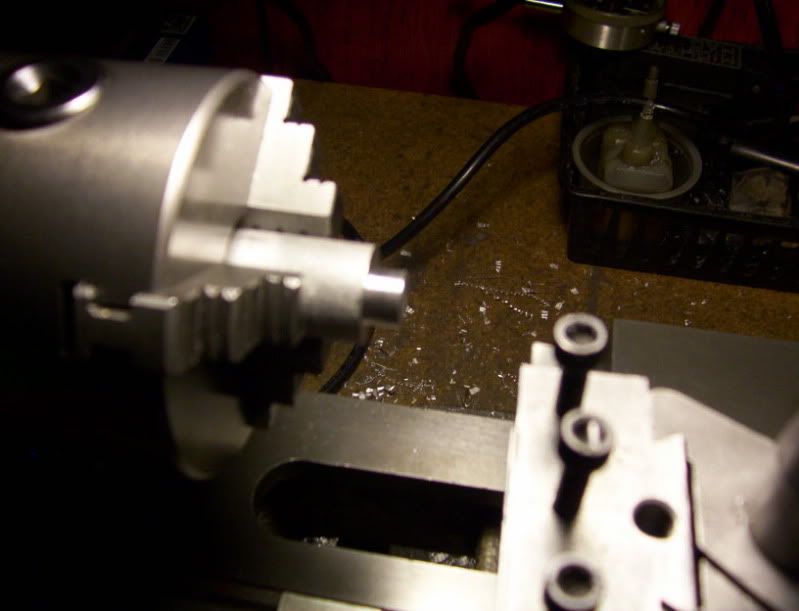
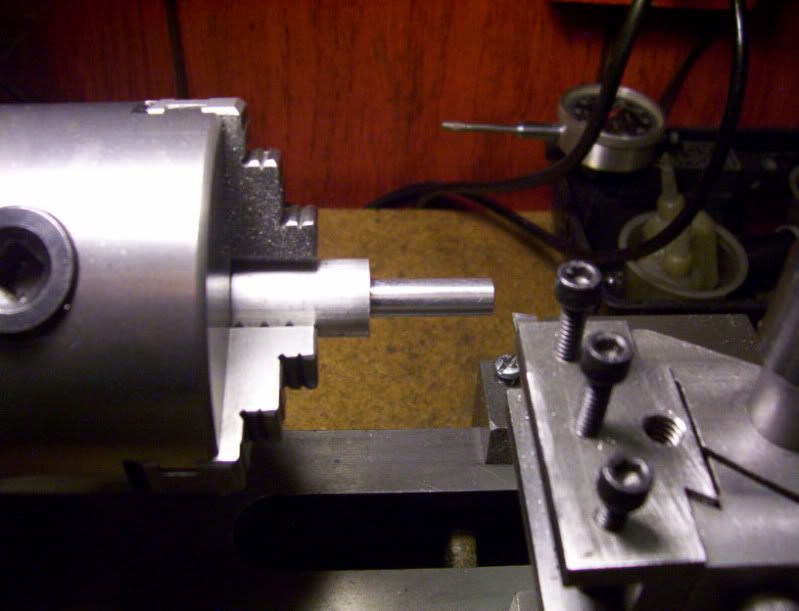
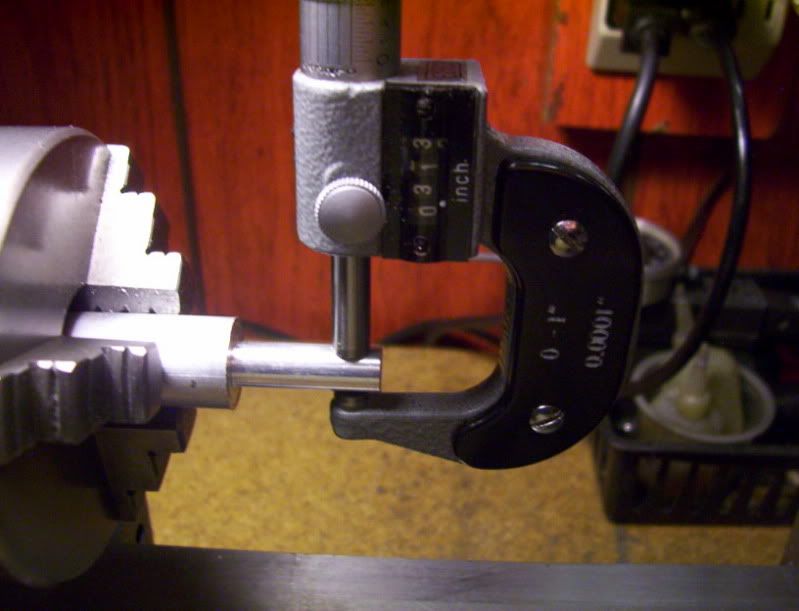
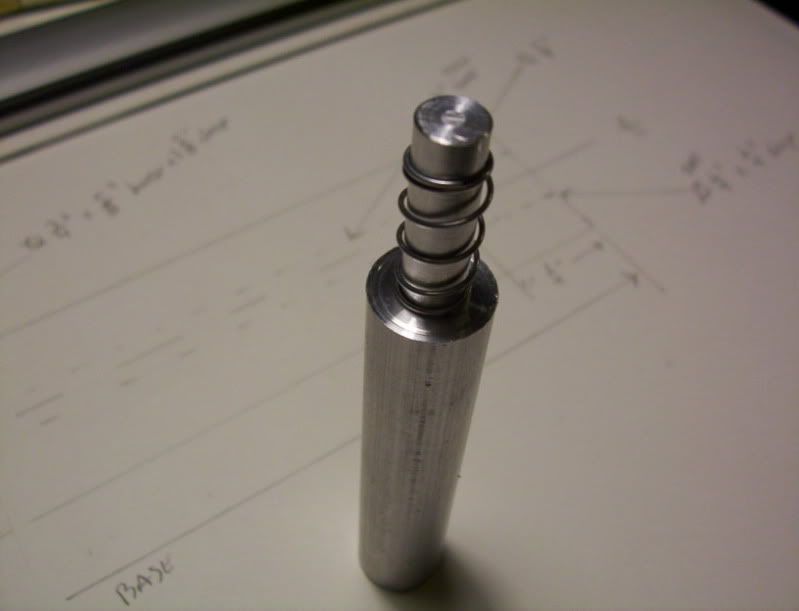
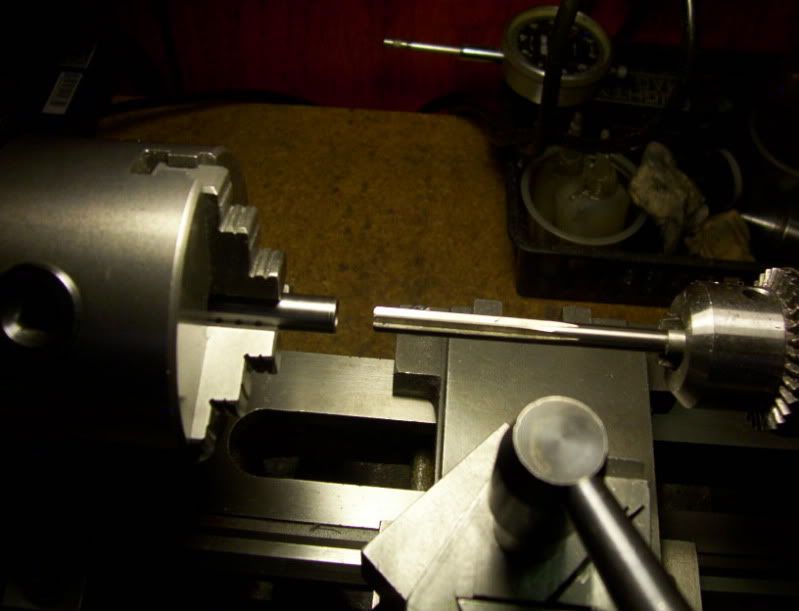
I start out by machining a 5/8"dia. rod to 4" overall length, measuring the length of the spring and its inner dia. shows I need to maching a stem on the end of this rod 5/16" in diameter, for a 1" length.

2.jpg


.
3.jpg


4.jpg


5.jpg


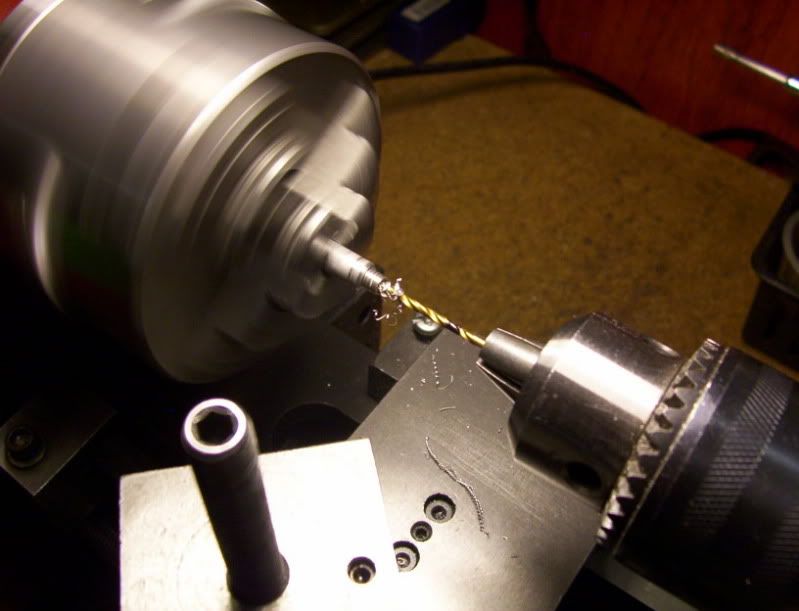
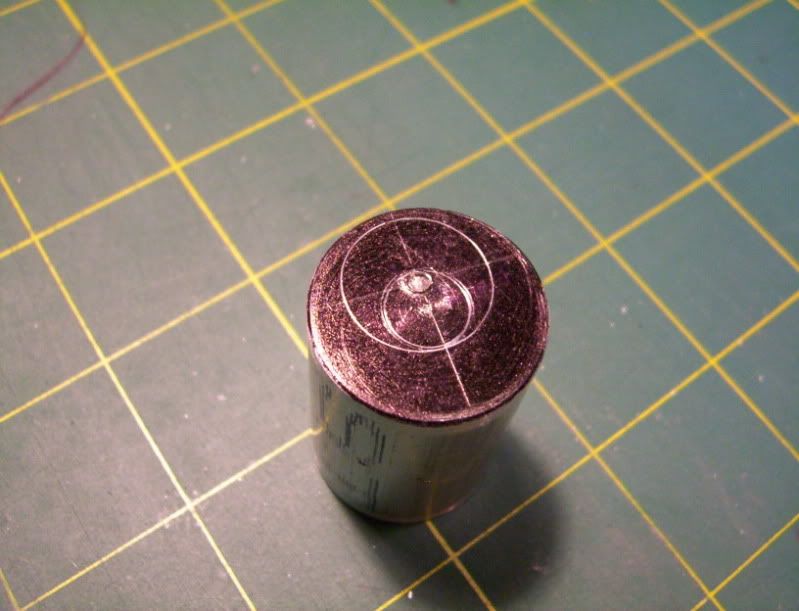
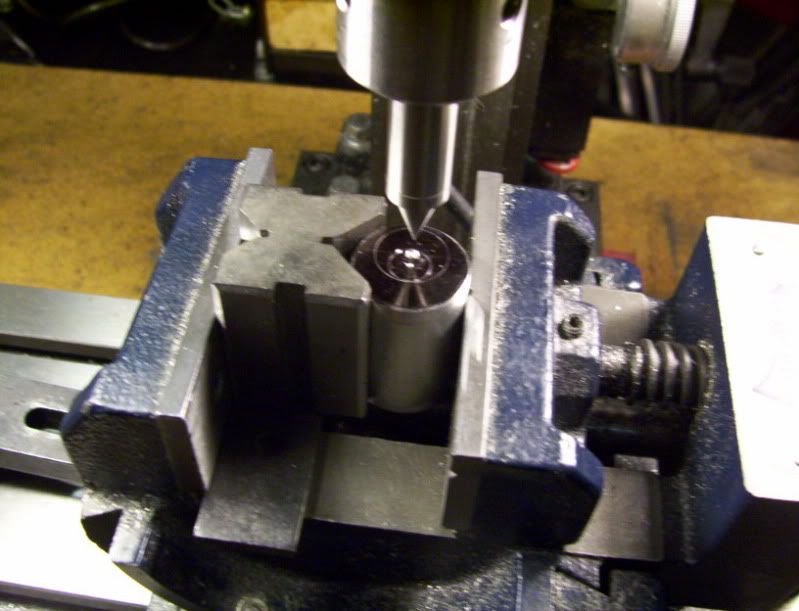
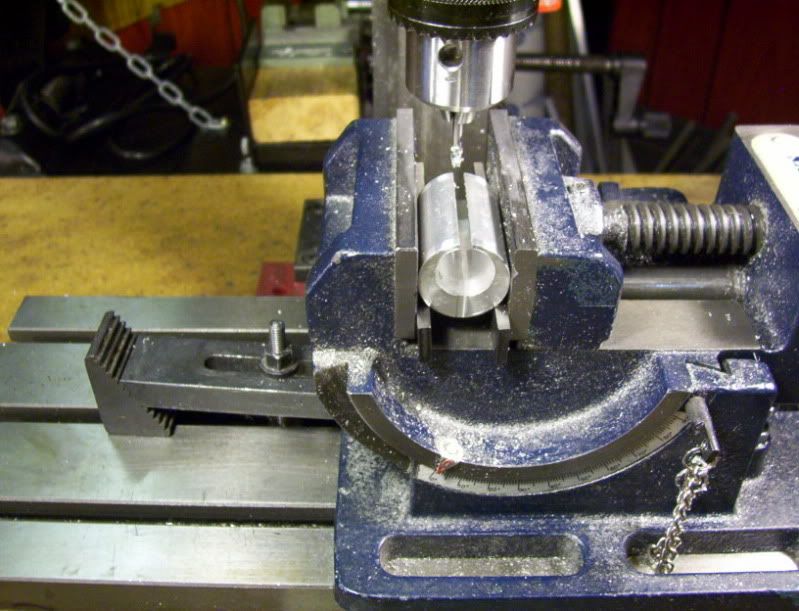
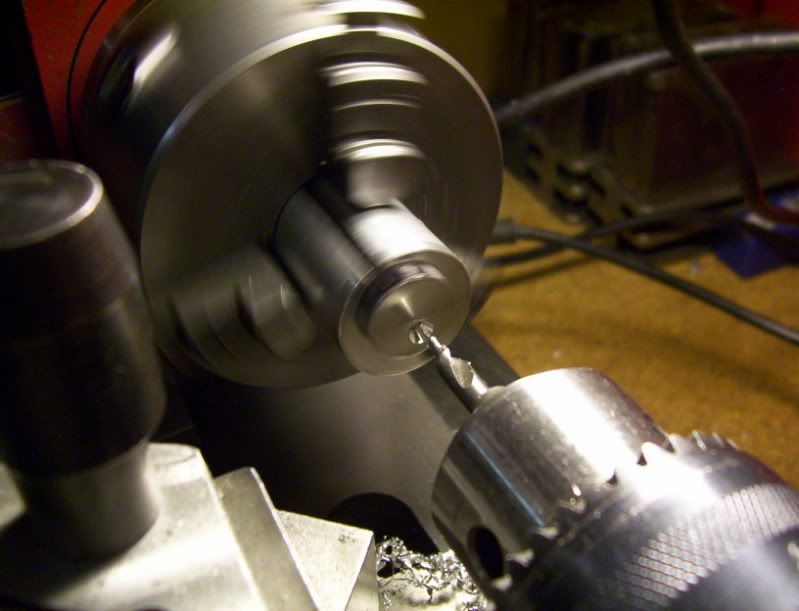
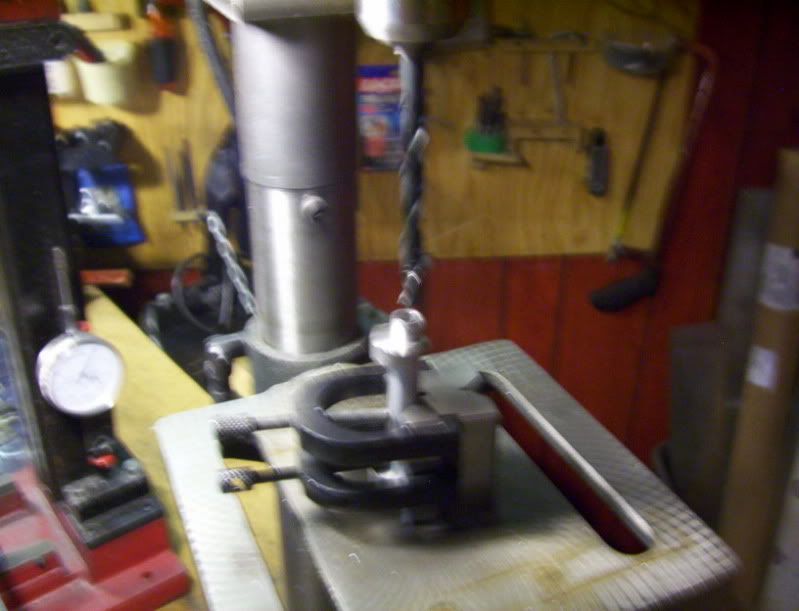
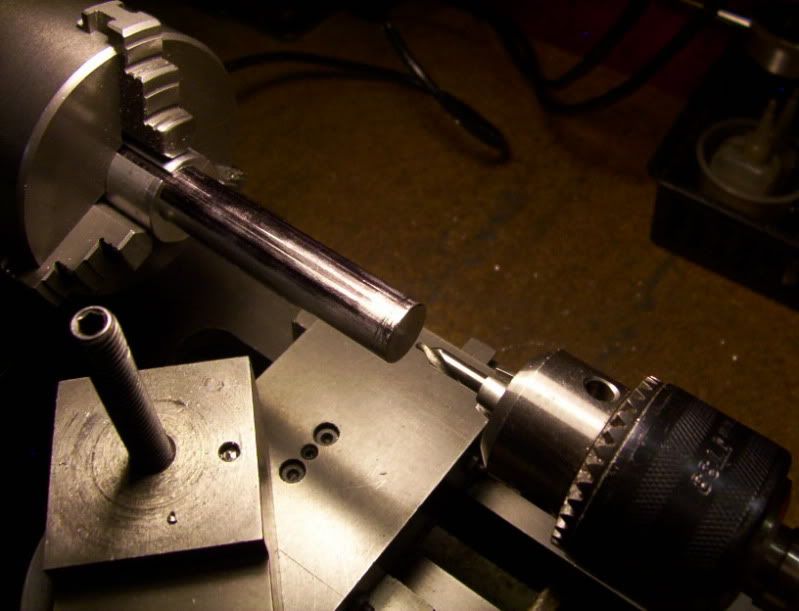
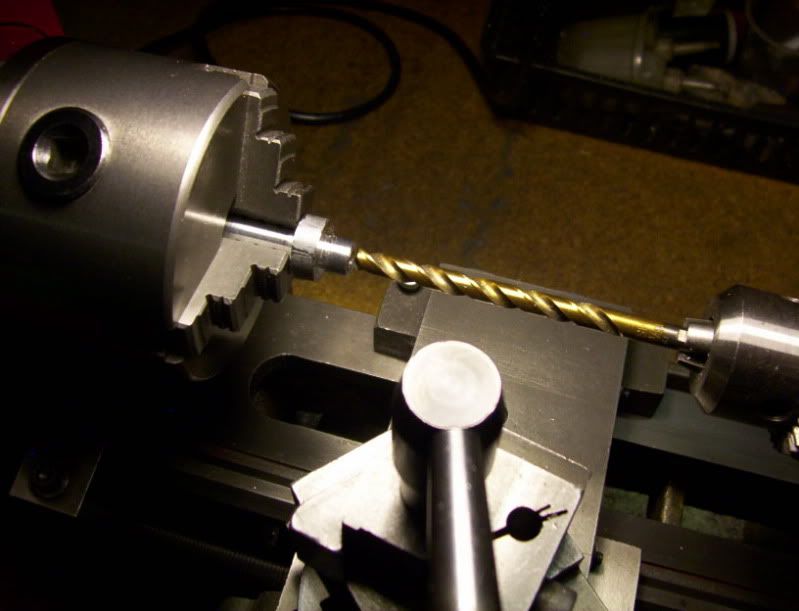
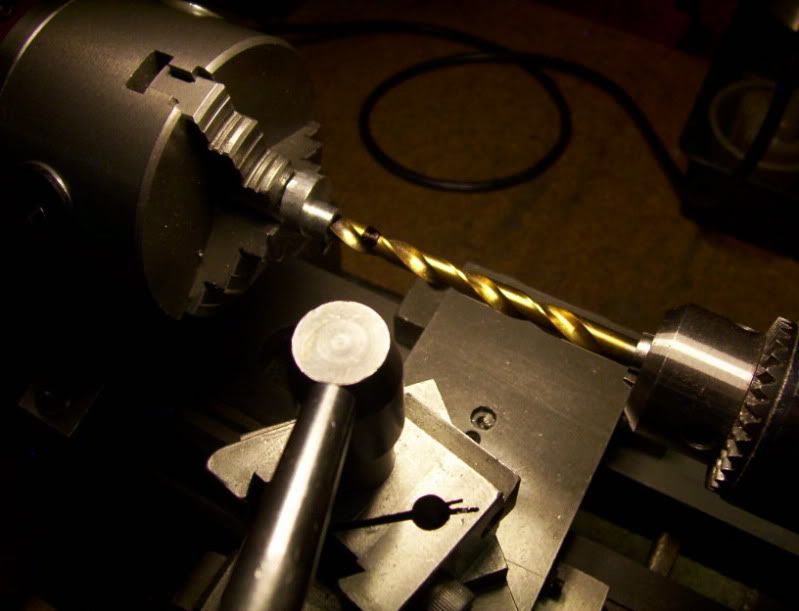
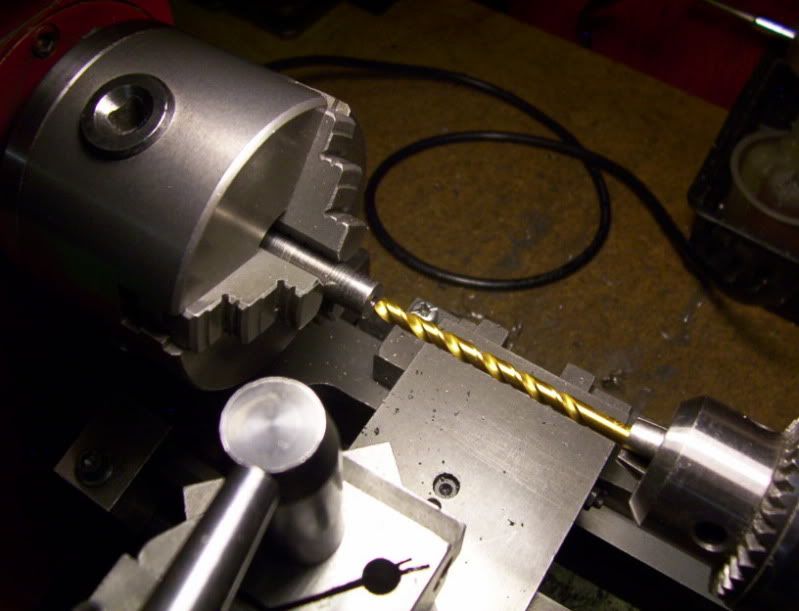
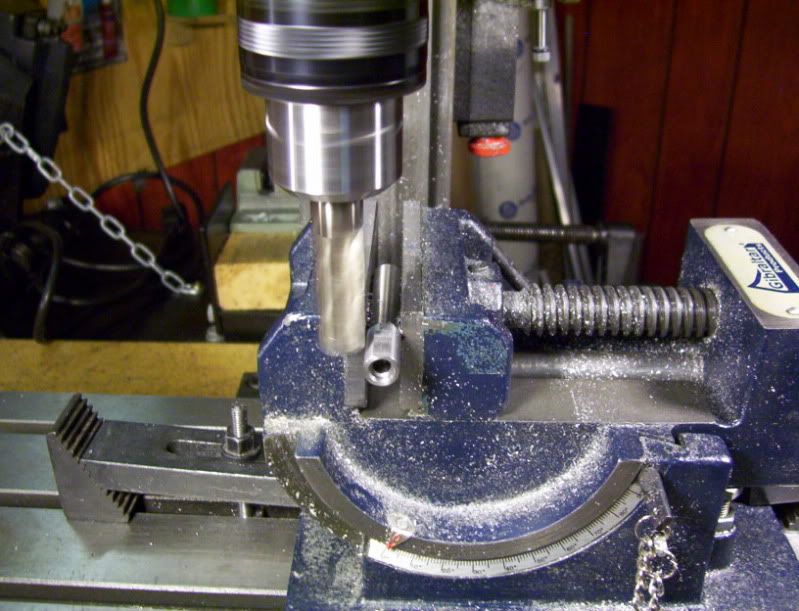
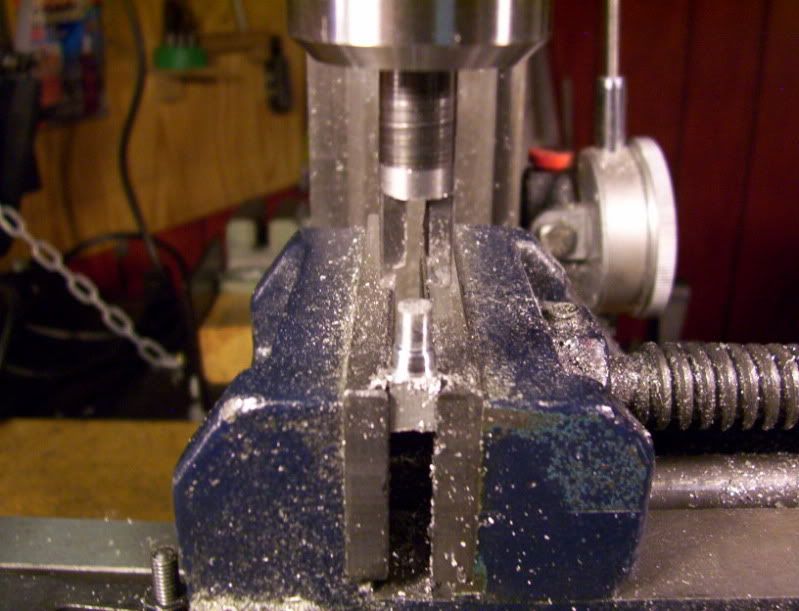
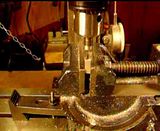
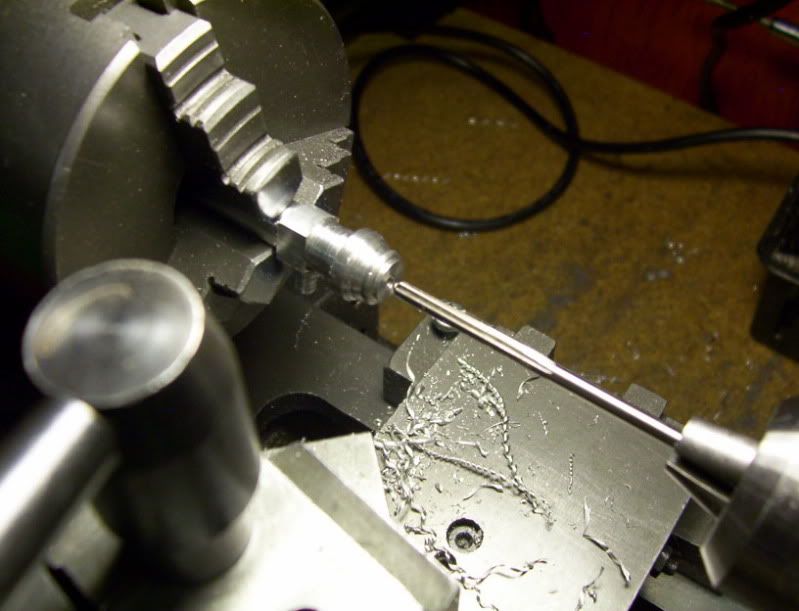
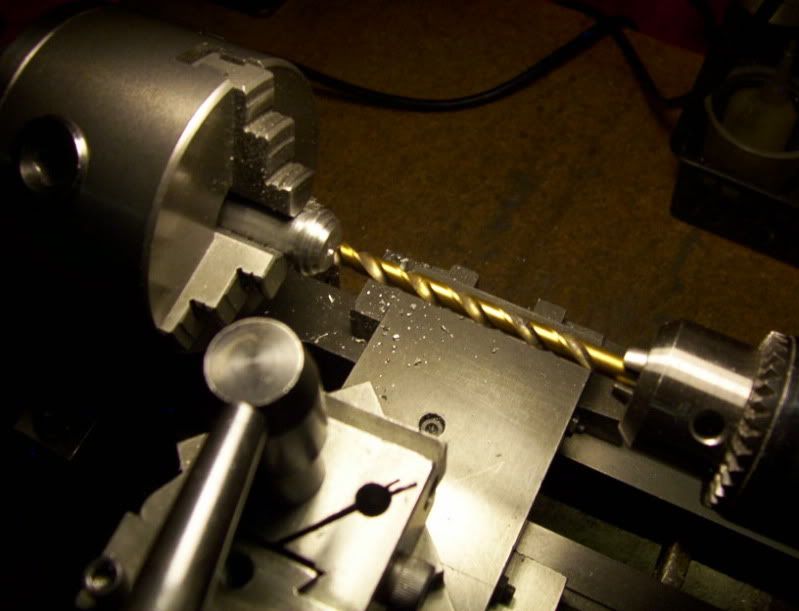
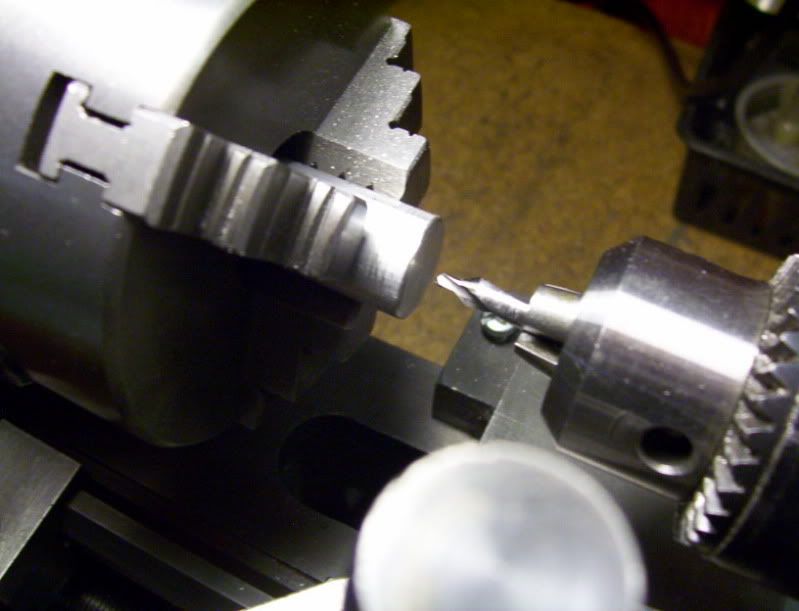
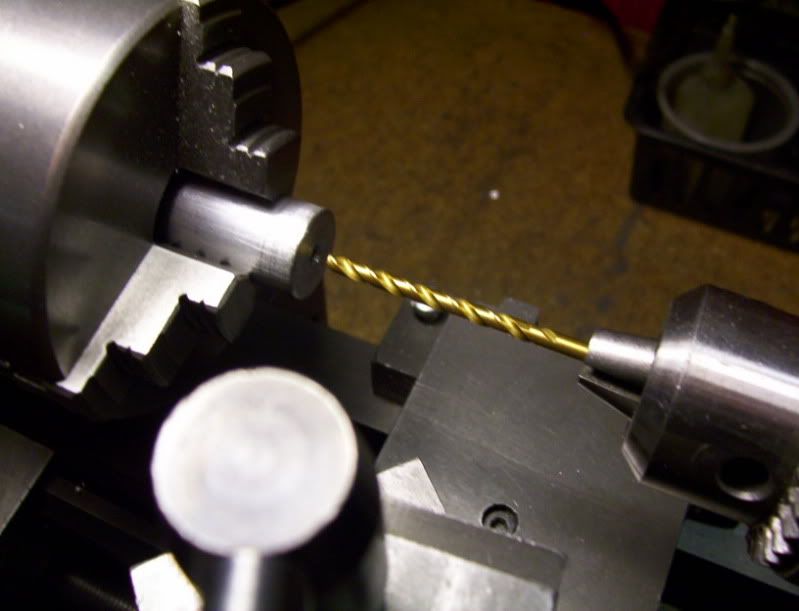
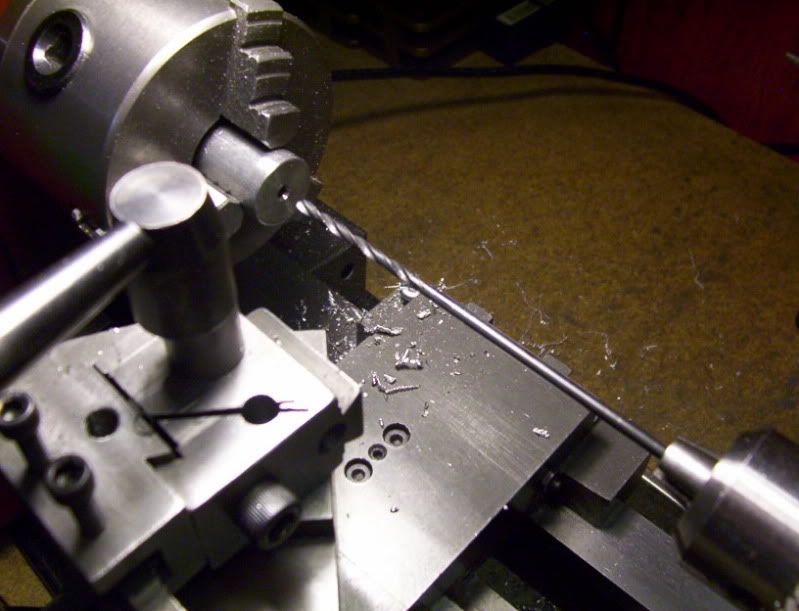
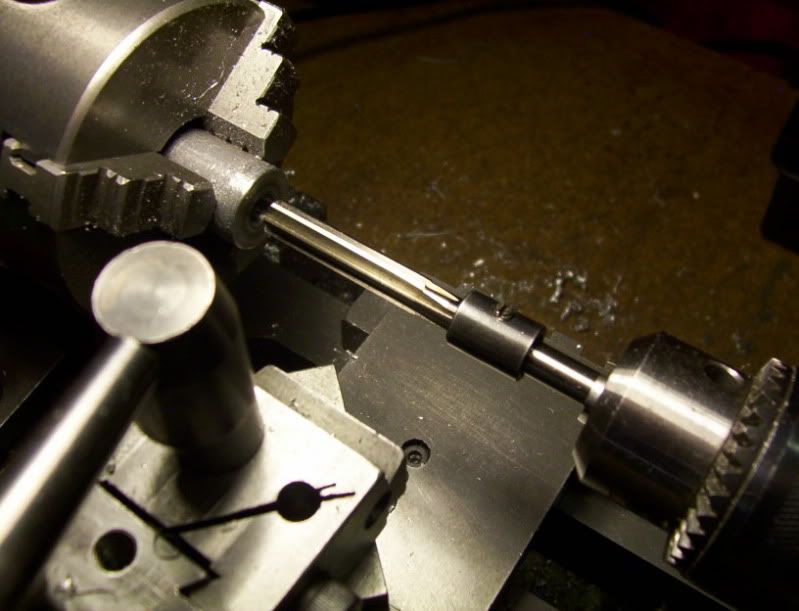
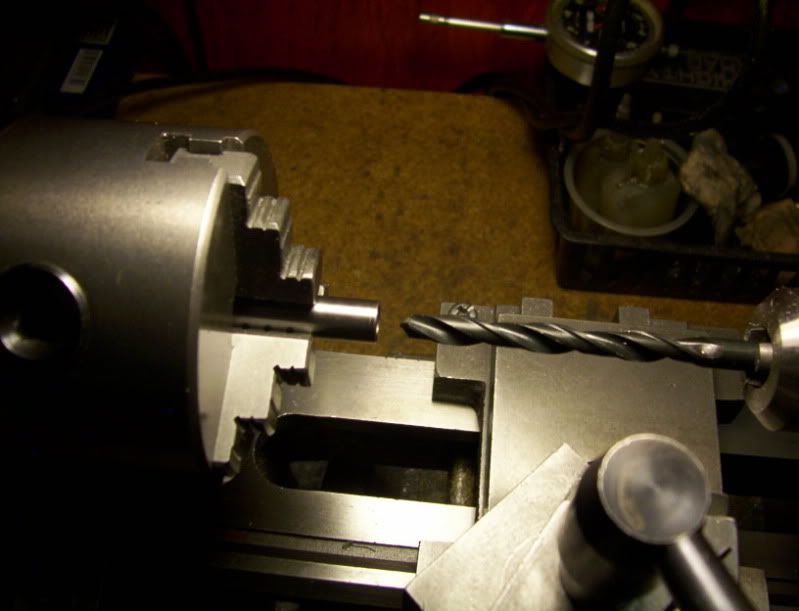
Now to support the 1/8" dia. drill rod its entire length I need to take my time and precisely drill the work piece with a thru hole of 1/8" dia., then finish it with a 0.126" reamer.

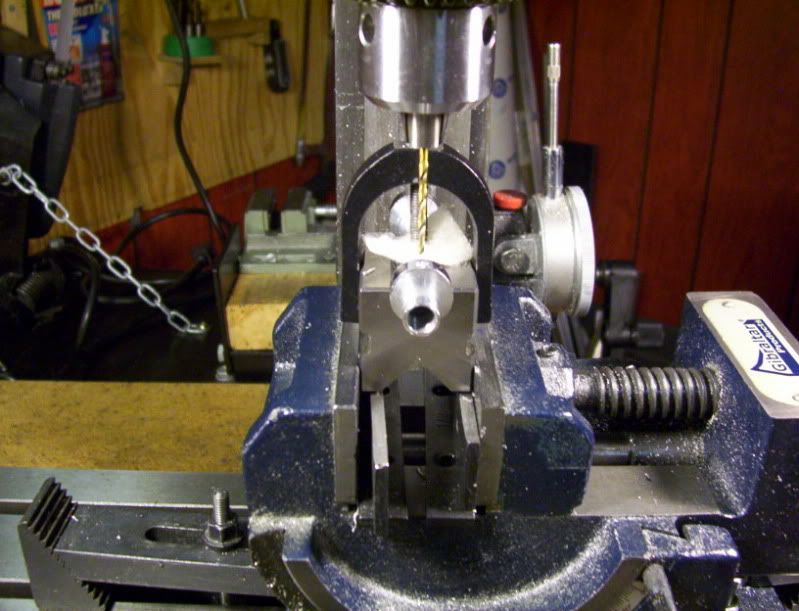
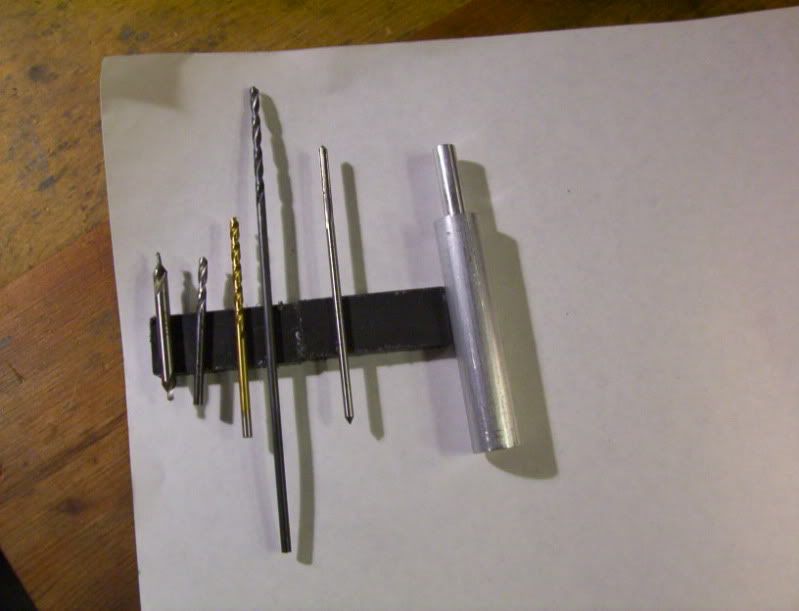
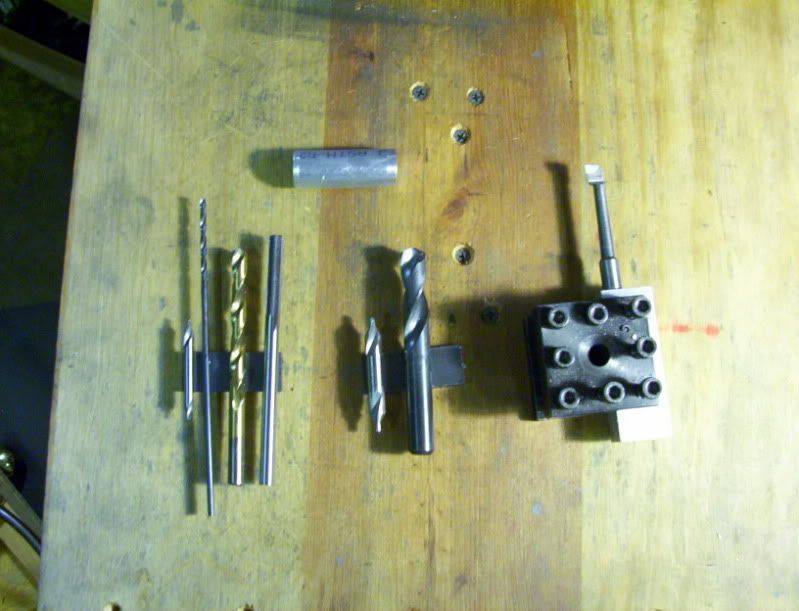
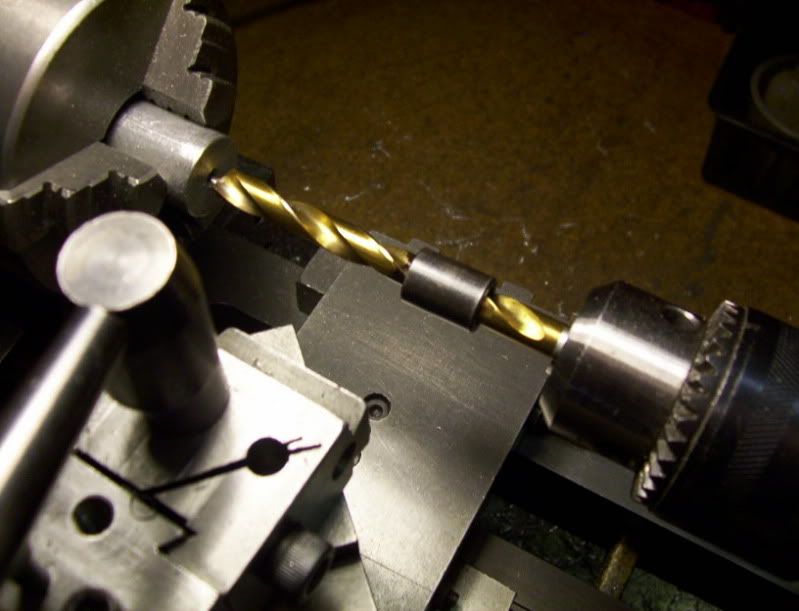
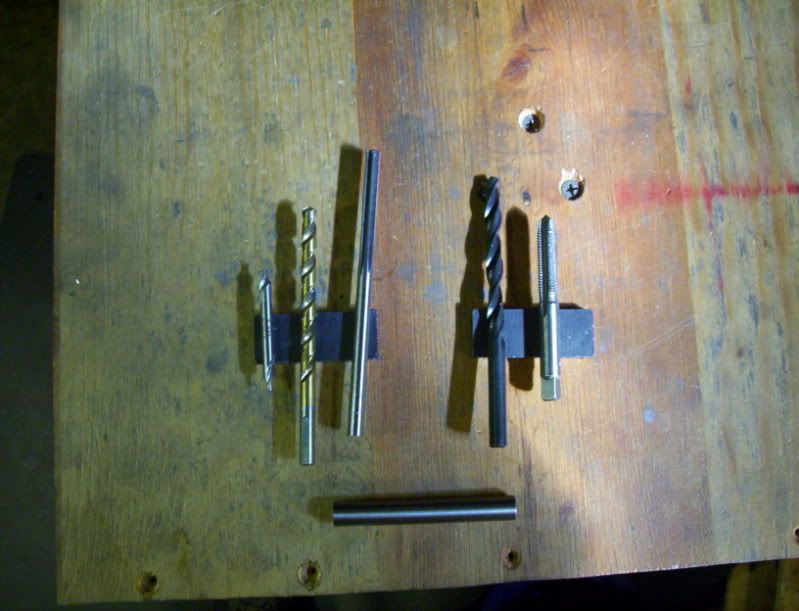
So I need to use my smallest 1/8" screwmachine size drill bit, followed by a 1/8" jobber size, finally following that with my 1/8" aircraft size bit.

6.jpg


7.jpg


8.jpg


9.jpg


10.jpg


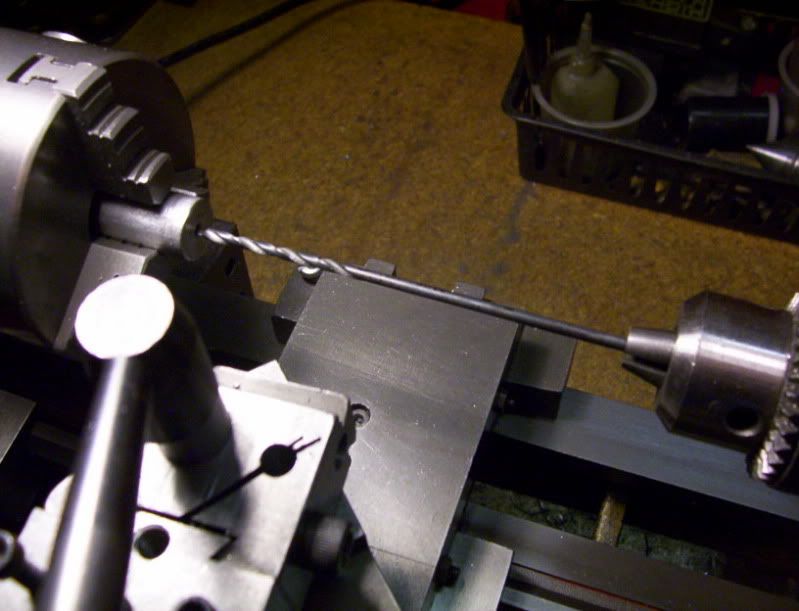
Now I'll ream it with the 0.126" reamer as far as it can go.

11.jpg


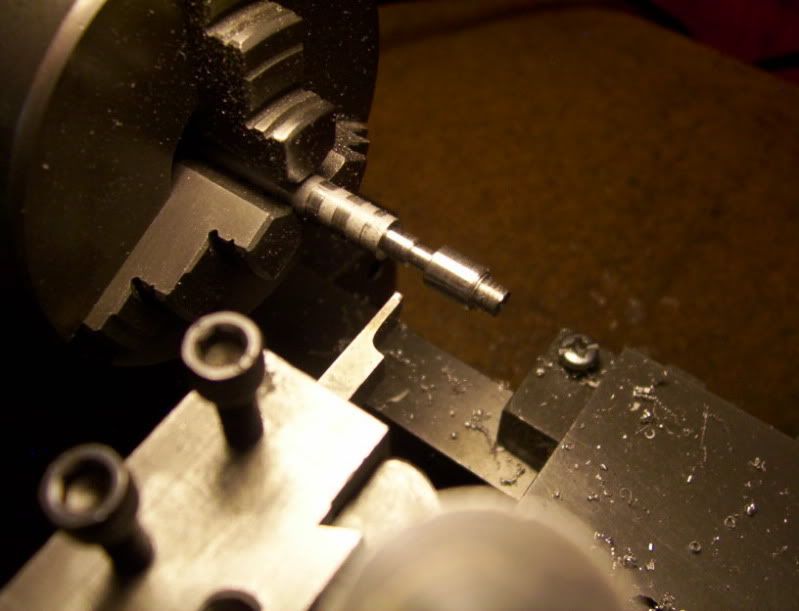
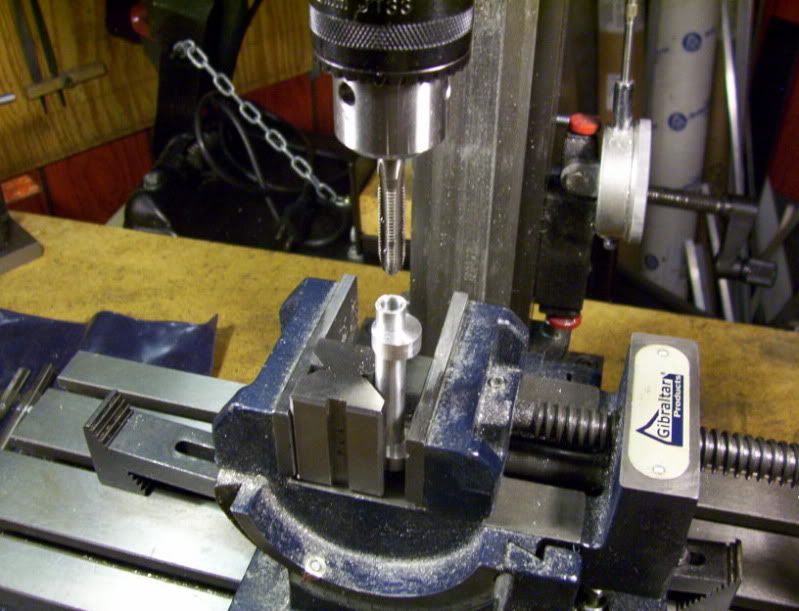
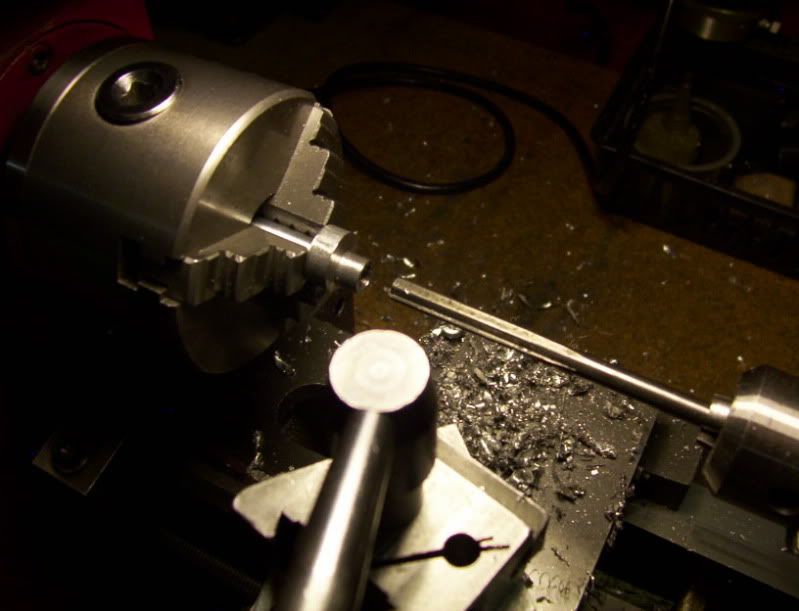
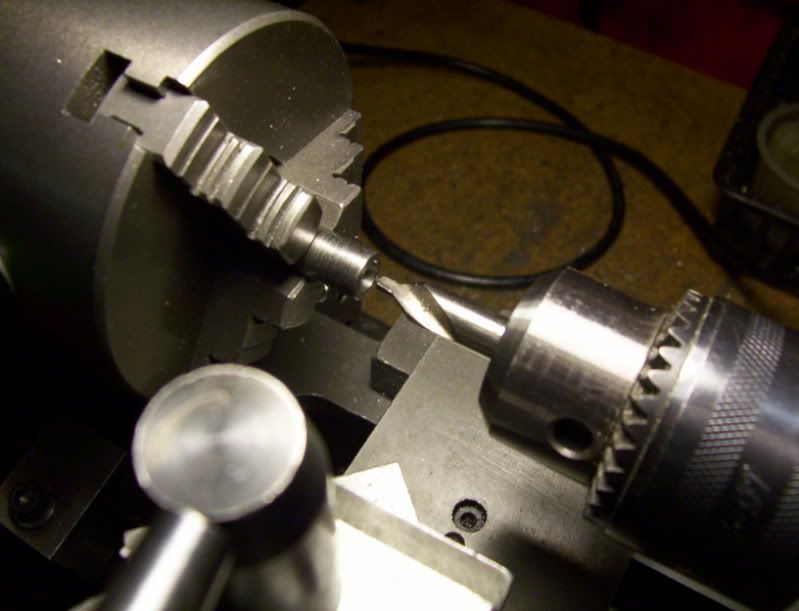
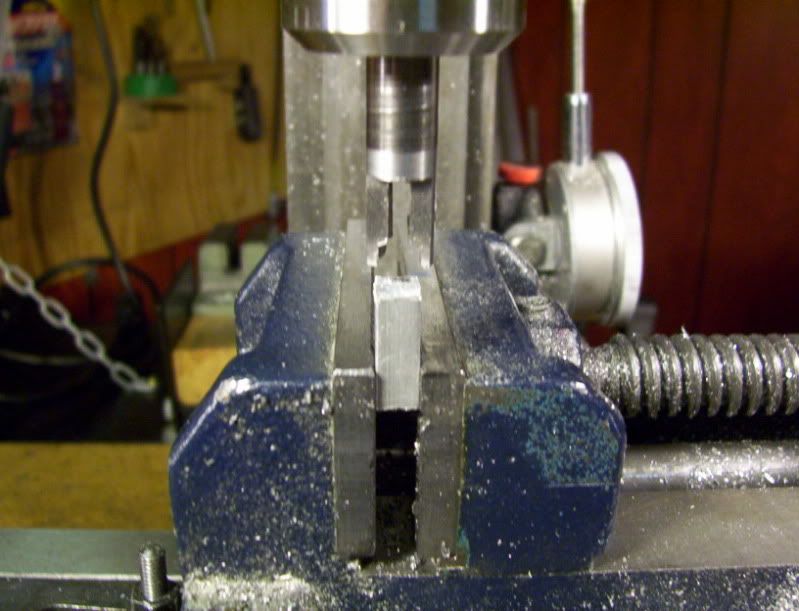
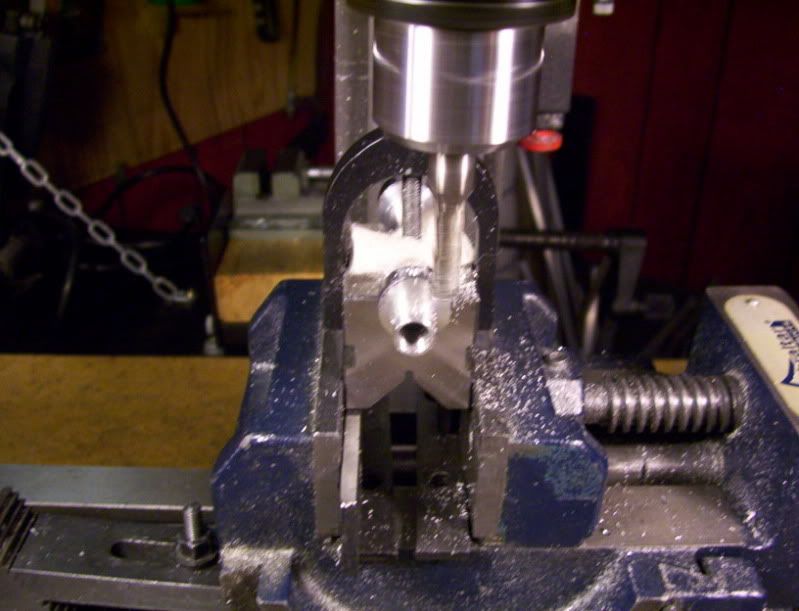
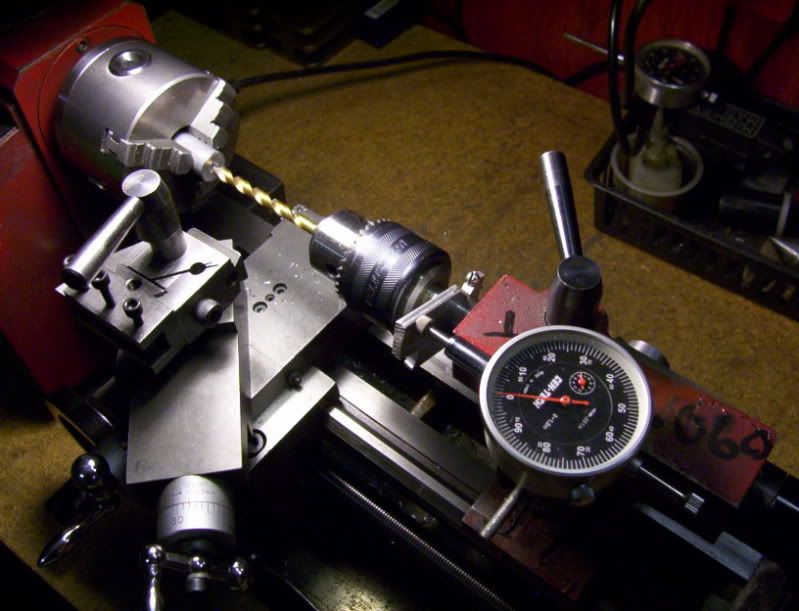
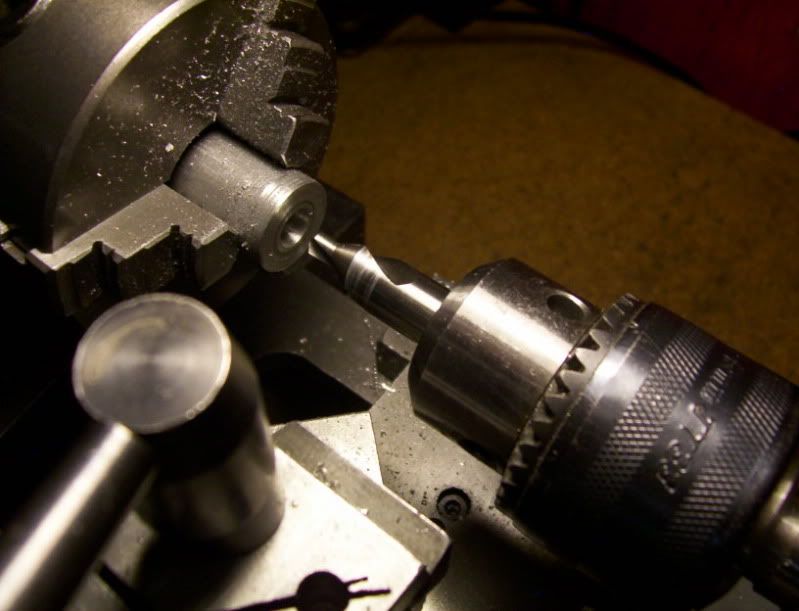
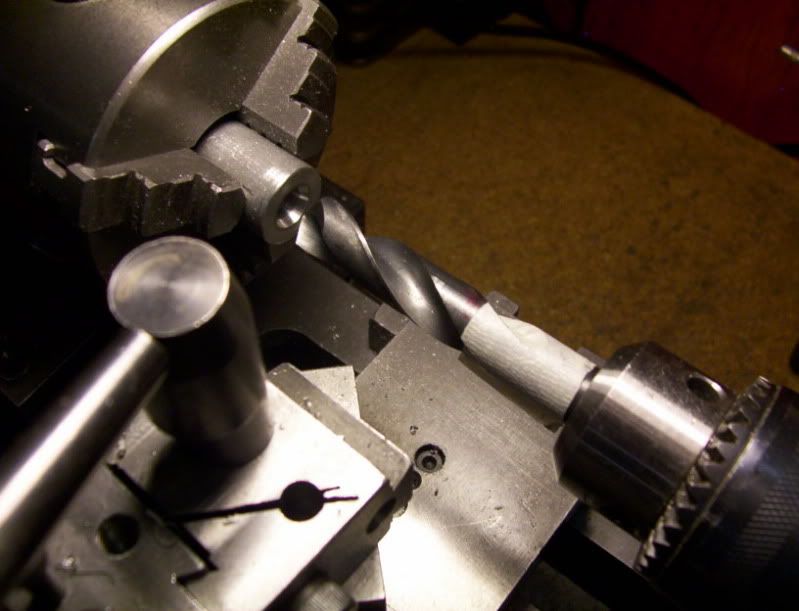
Before I take the workpiece out of the chuick to turn it around to finish thru with the reamer from the other side, I need to drill and ream for a 0.249" hole 1/4" deep at the bottom of the workpiece.

12.jpg


13.jpg


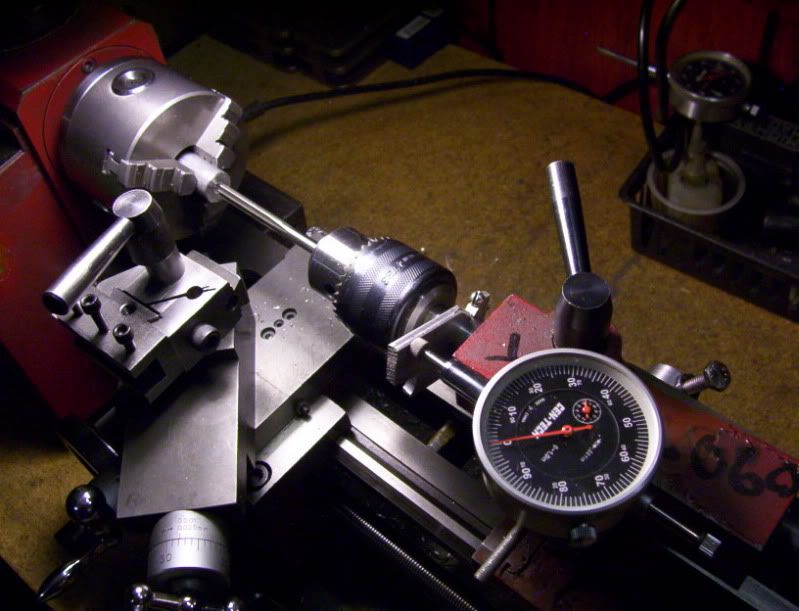
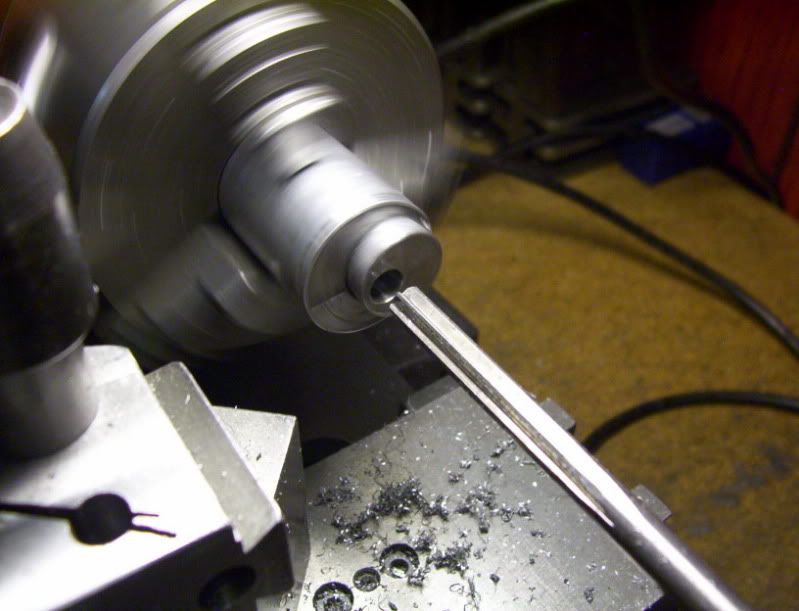
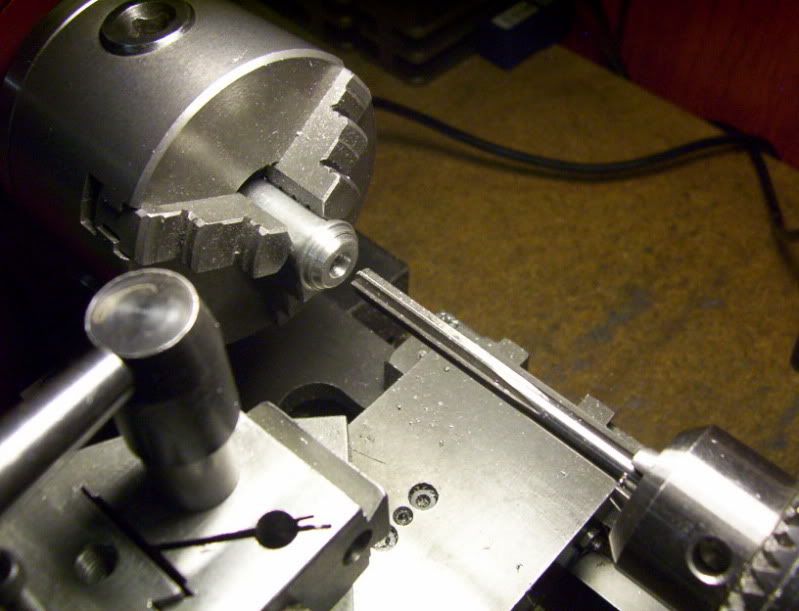
Now I can turn the workpiece end for end to finish the reaming thru the workpiece.

14.jpg


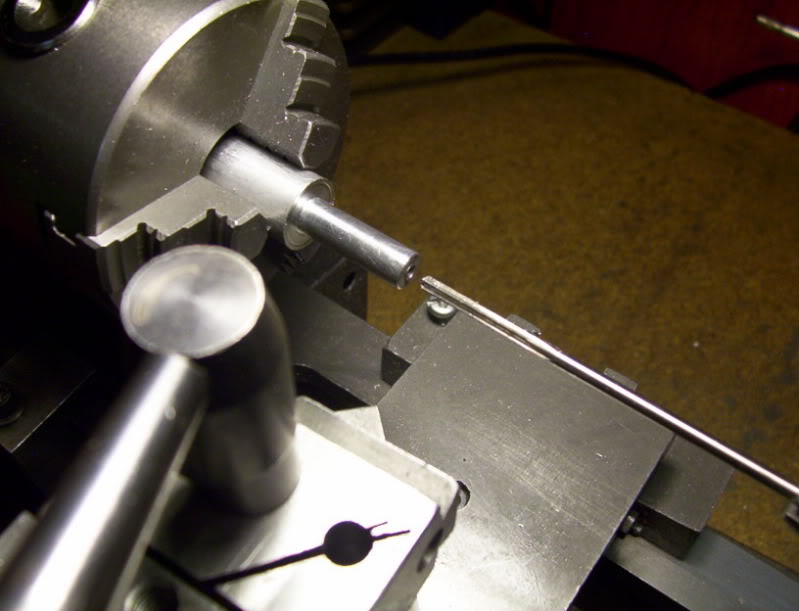
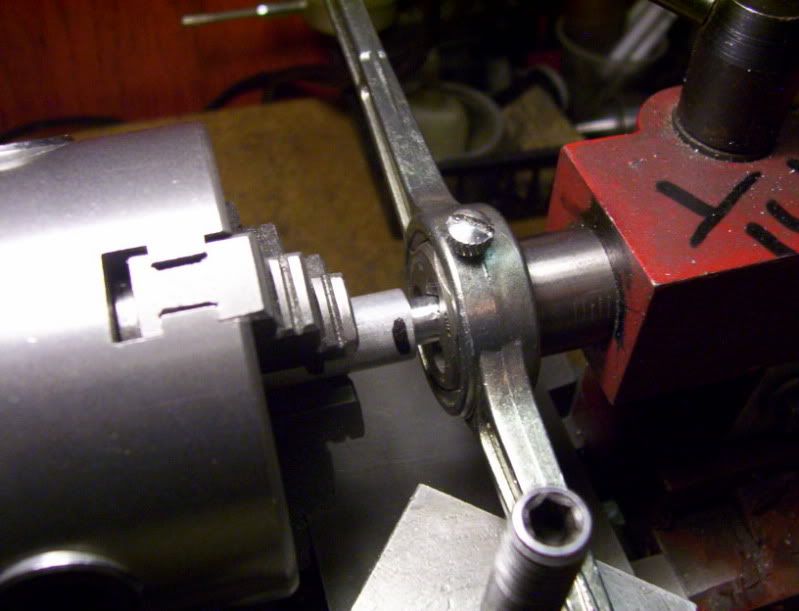
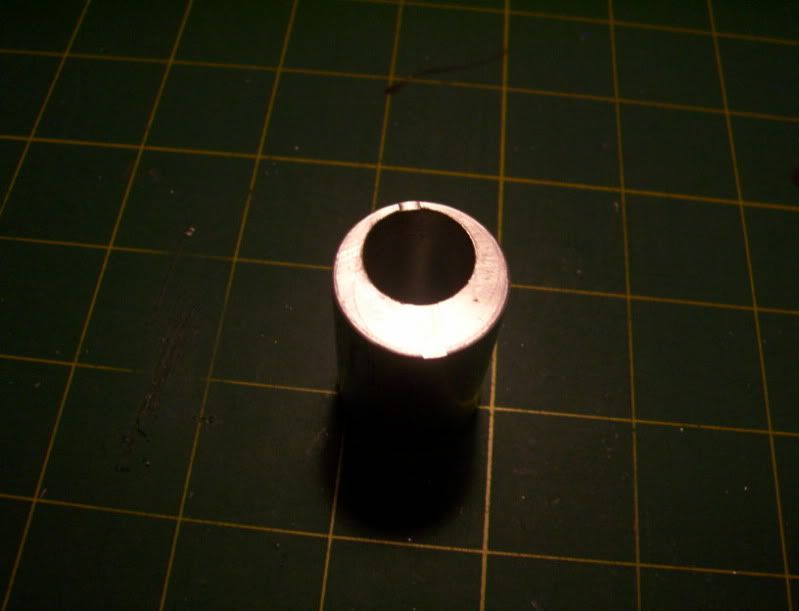
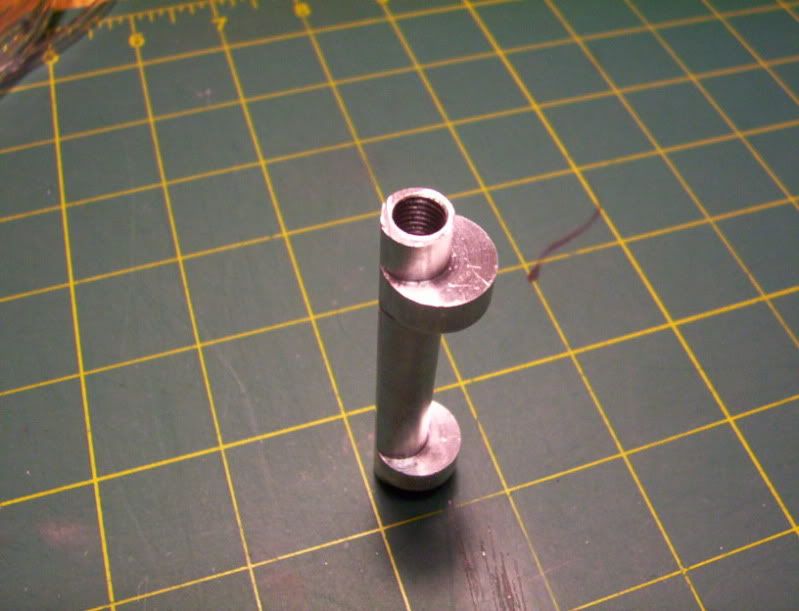
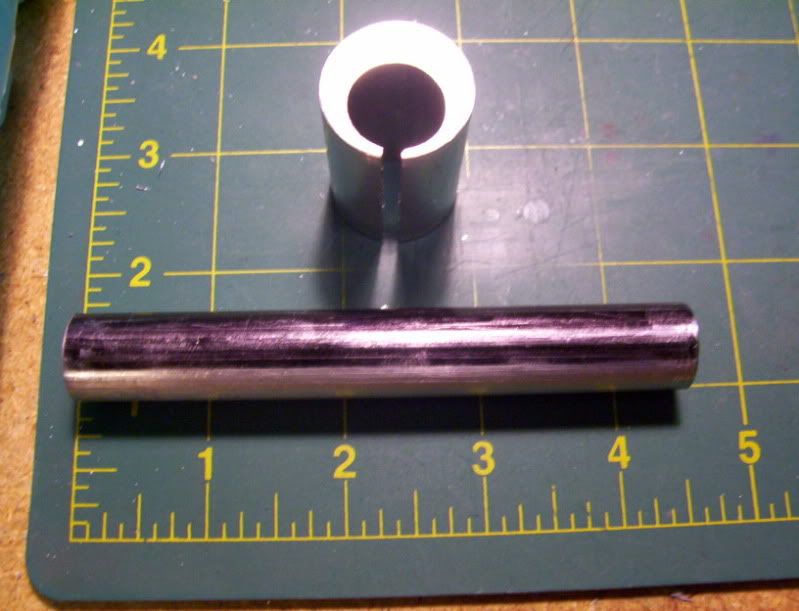
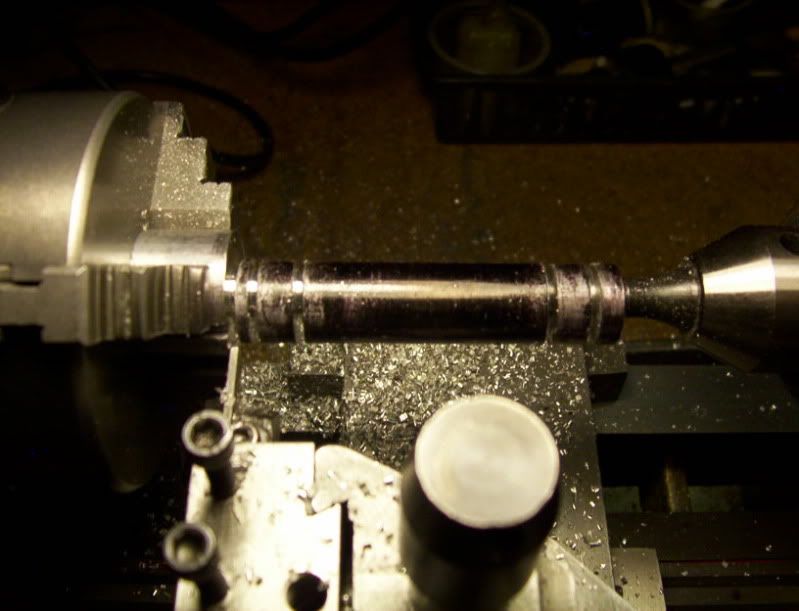
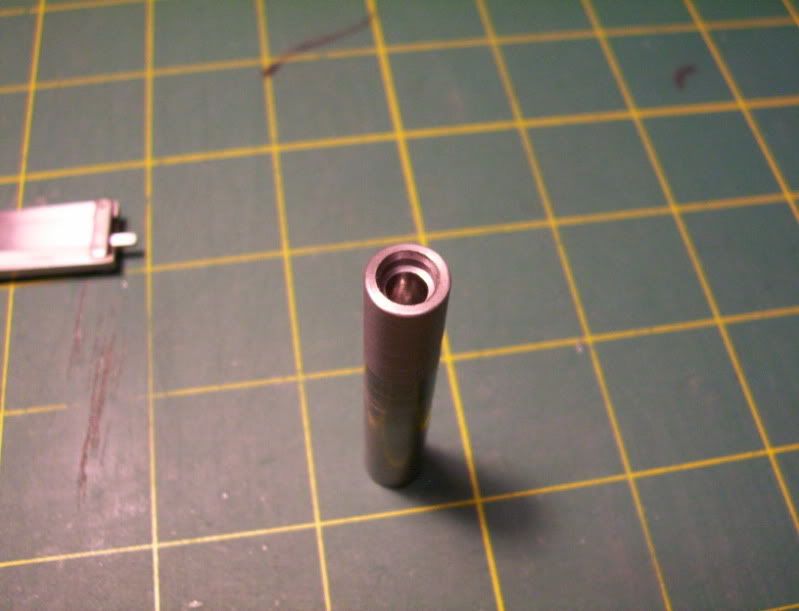
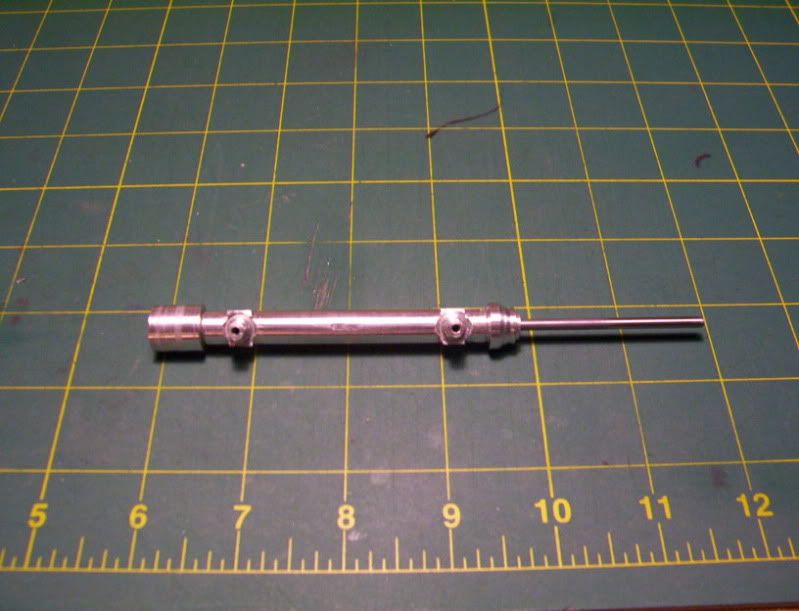
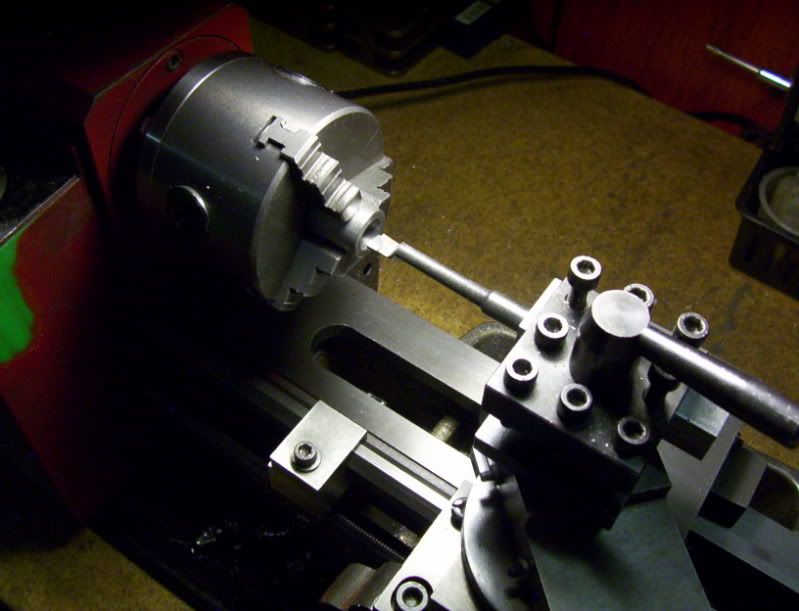
Now here it is with the thru hole as precisely as possible drilled and reamed through, and the spring that will slide on top of it.

15.jpg


16.jpg


17.jpg


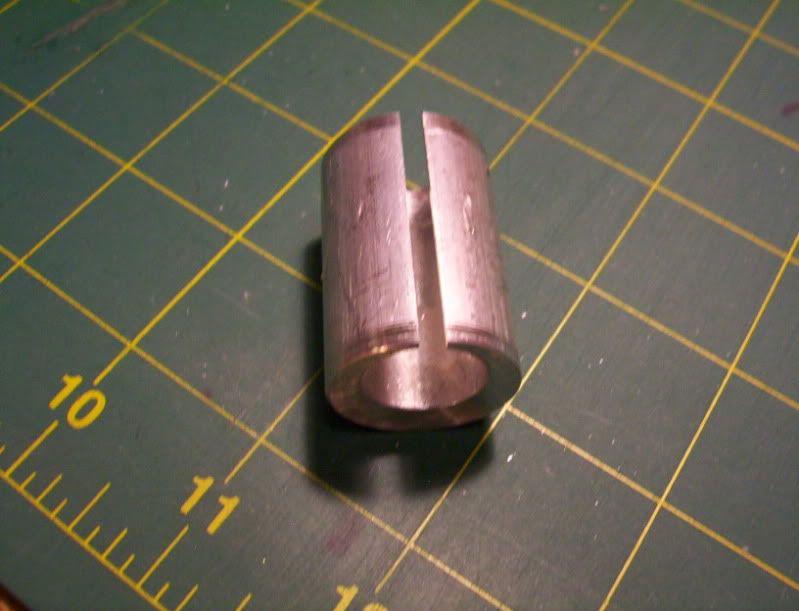
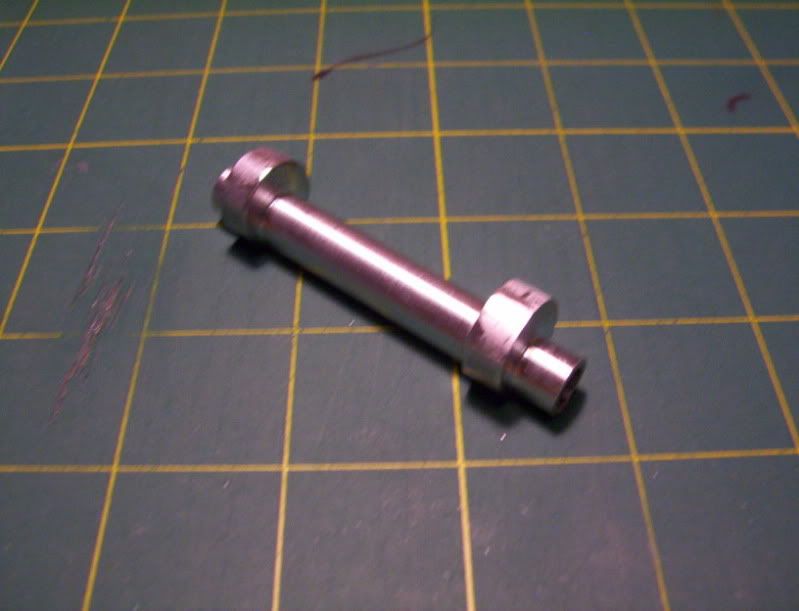
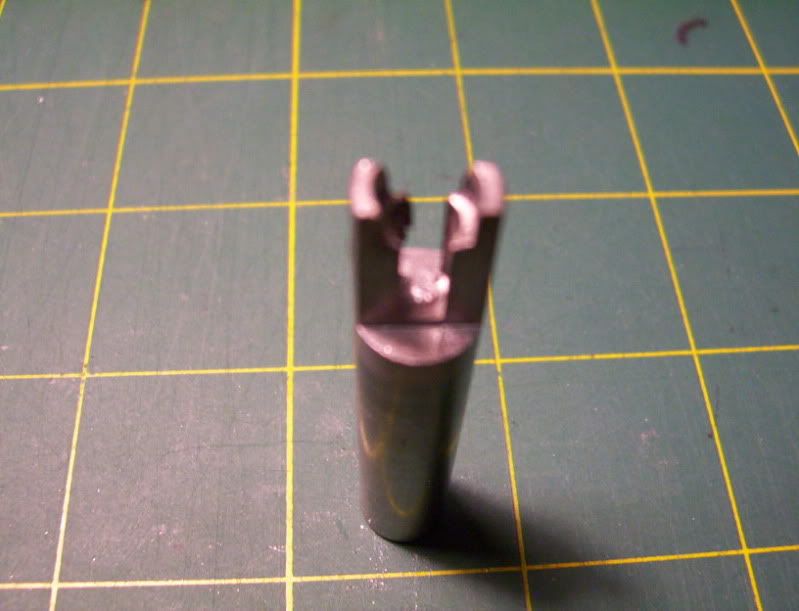
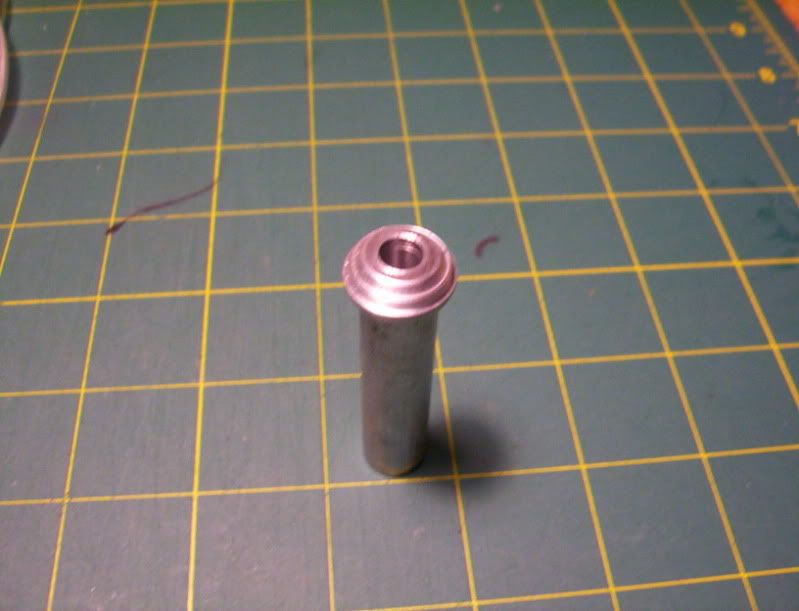
Now its time to make the top plunger, that will rest on the spring and glide over the base and have a stop after it traveles for 1/8". This plunger will be 2" in length.

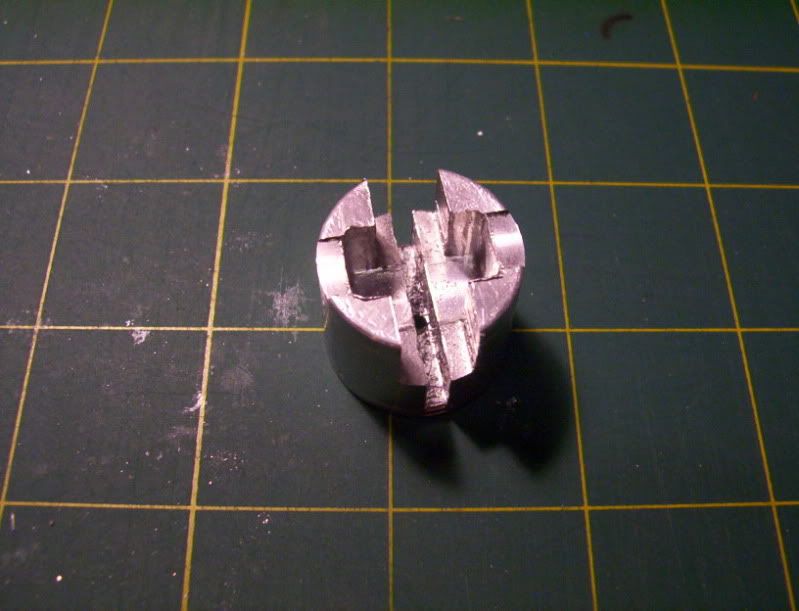
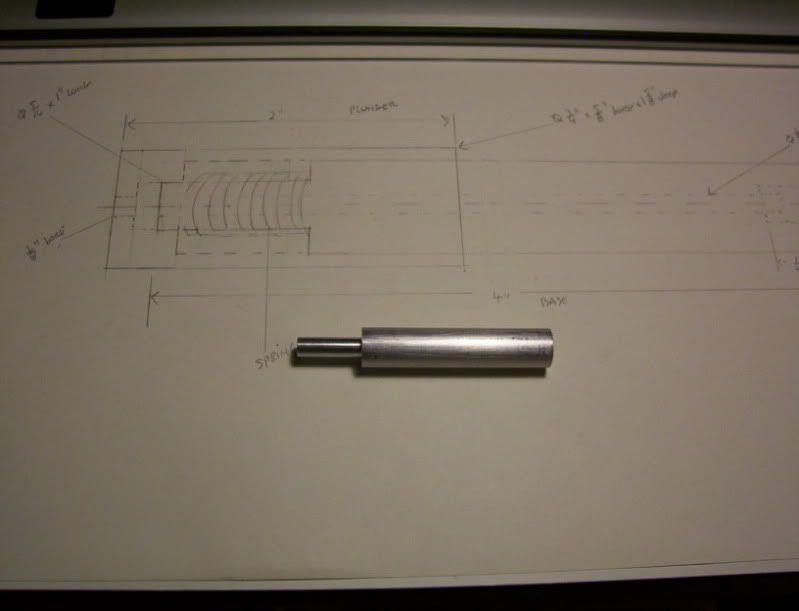
Here is the plunger blank machined to final length of 2"

18.jpg


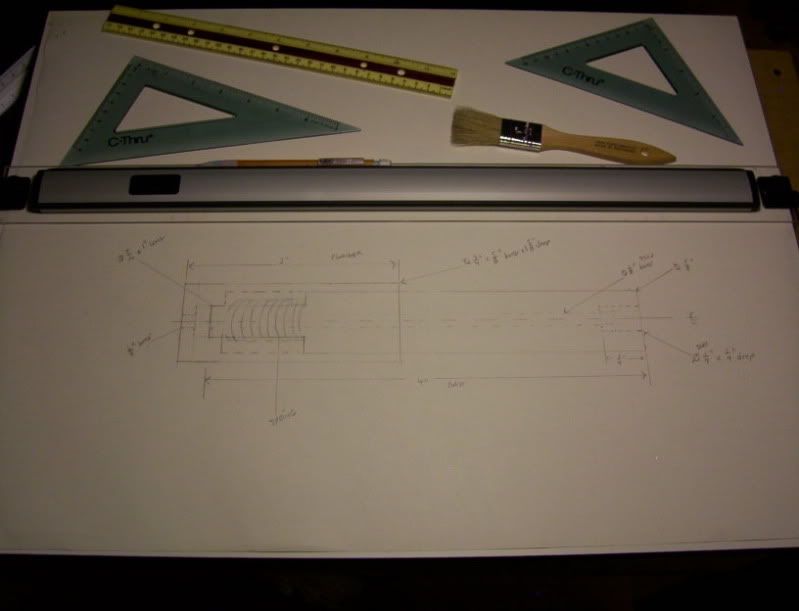
And the drawings for the dimensions.

19.jpg


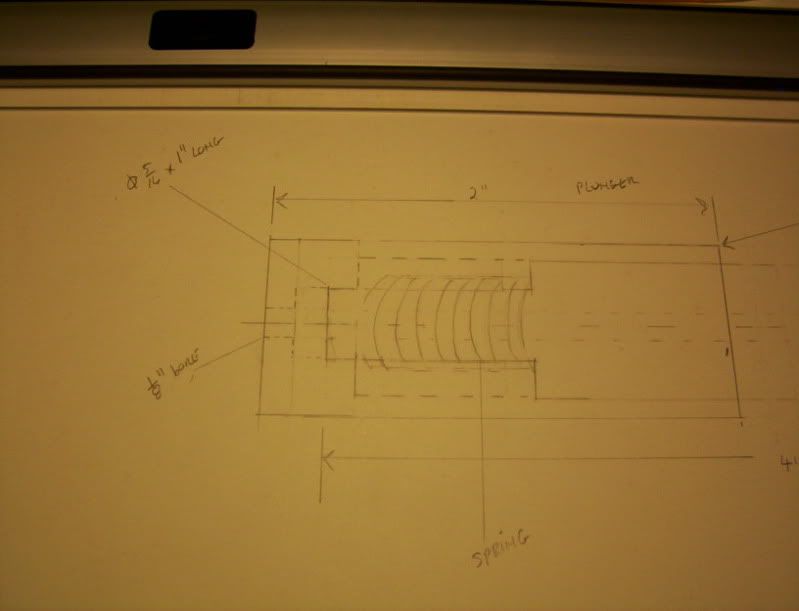
this will be done in 3 phases.

20.jpg


The first will be a thru hole 1/8" dia.
after that I will drill a 19/64" hole 1-7/8" deep, followed by a 5/16" reamer.

21.jpg


22.jpg


23.jpg


phase 2, I need to drill a 1/2" dia. hole 1-5/8" deep.

24.jpg


25.jpg


Phase 3. now bore this hole to a final insde dia. of 5/8" - 0.626" by 1-5/8" deep to make a sliding fit with the 5/8" base previously made.

26.jpg


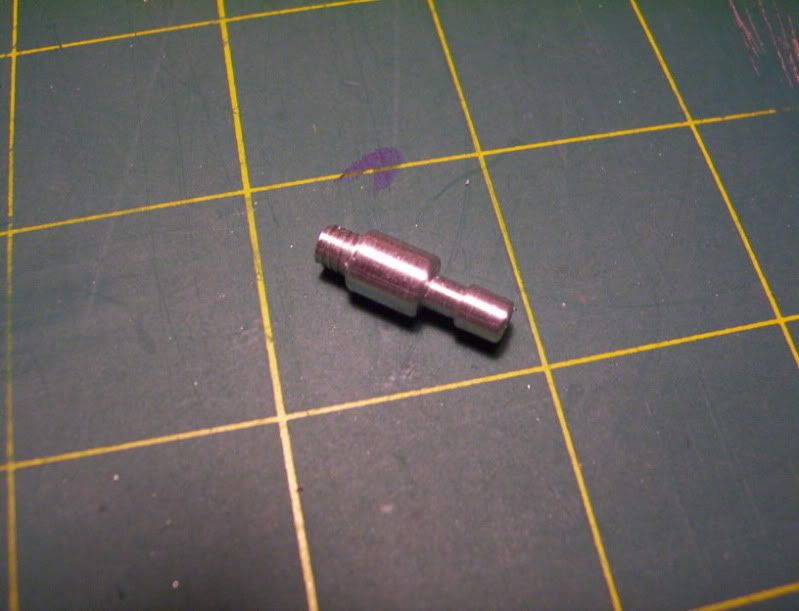
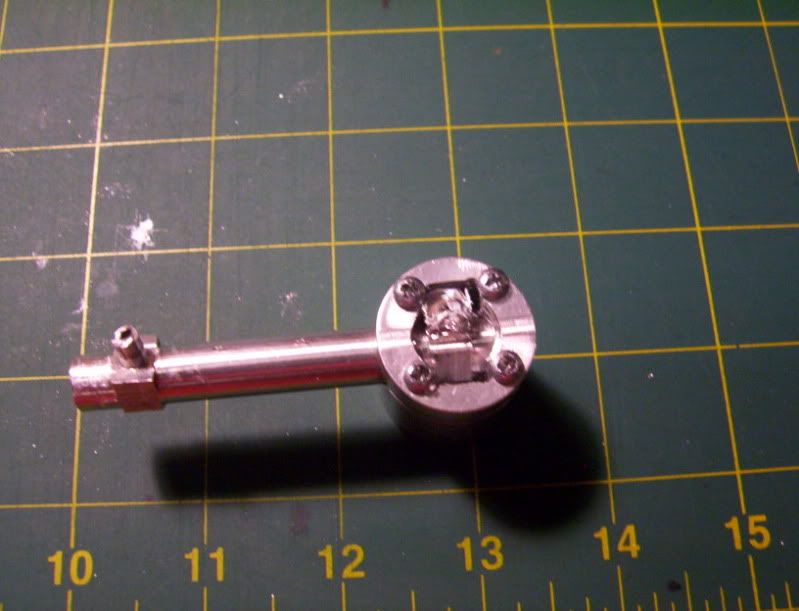
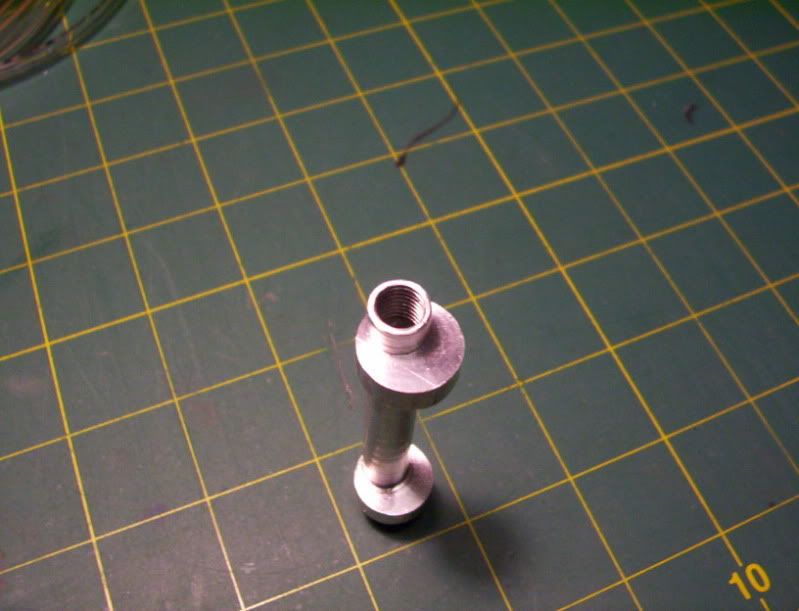
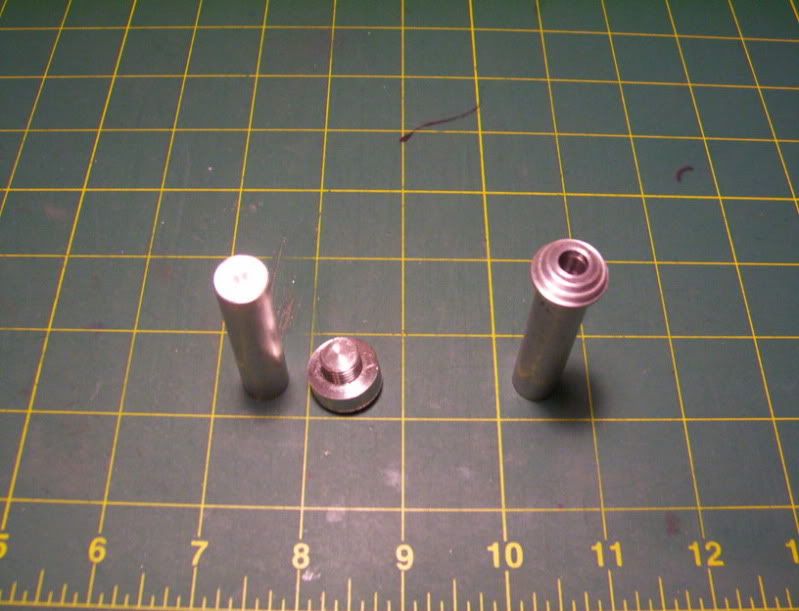
Now the parts before assembly

27.jpg


And the jig in it's final assembled stage.

28.jpg


29.jpg


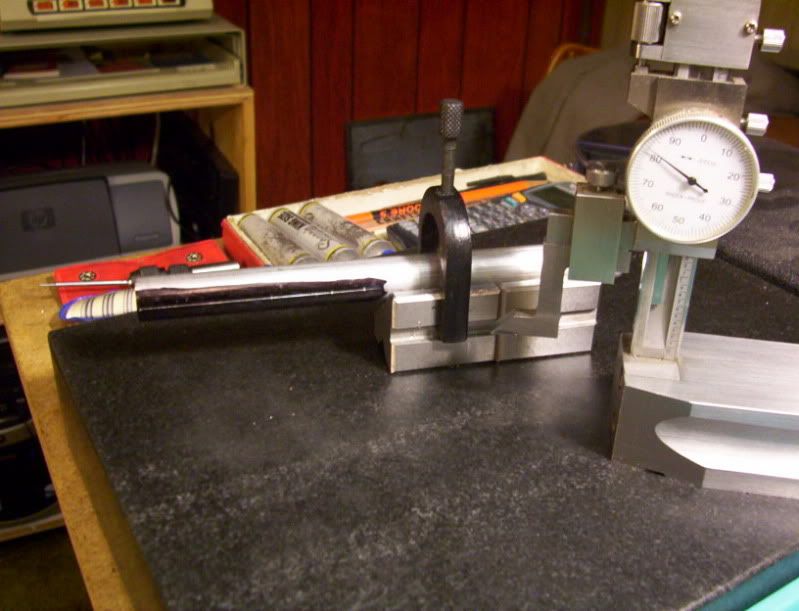
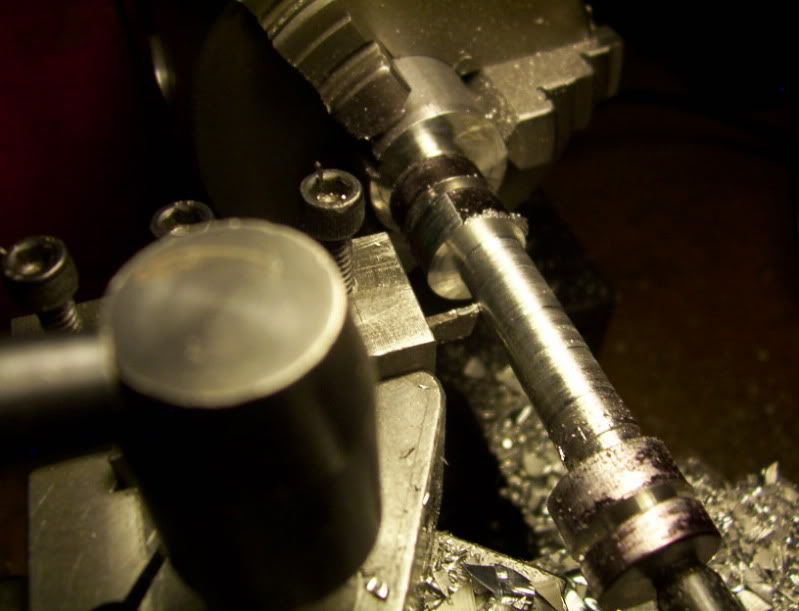
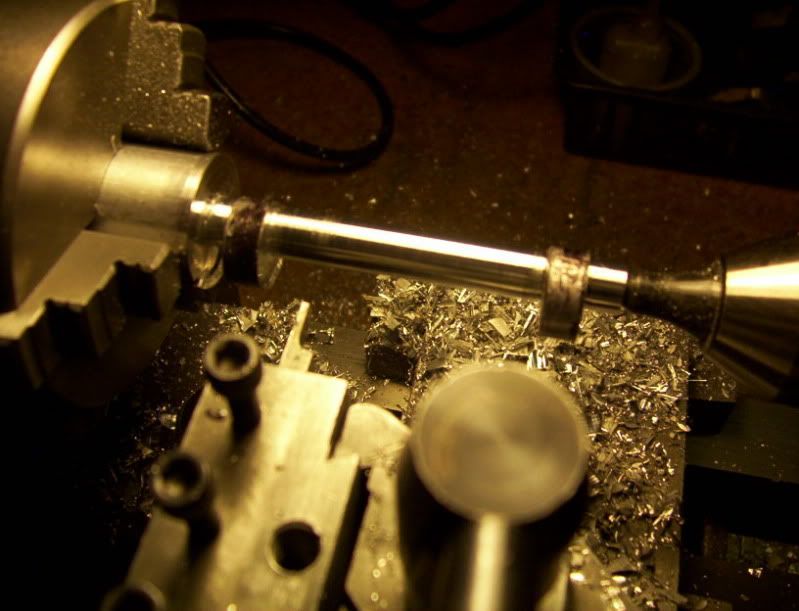
Now a 36" drill rod 1/8" dia. is slid through this jig, to test the accuracy of the assembly.
it slides with no excessive play along the entire length of the drill rod, very presisely done, so this may work in supporting the rod from bending during a press operatiopn.

31.jpg


The way this should work would be, the machined piston will be loaded at the bottom of this jig, then a 1/8" dia. drill rod machined to exact length, will be loaded at the top of the jig, the top of the rod should be just about flush with the top of the plunger cap, that is resting on the spring, now placing the jig under my small manual press, I should be able to press the rod into the piston, for an depth of 1/8" before the plunger hits its stop thereby keeping consistancy with every pressed rod. The spring does nothing more than keeps the cap plunger around 1/8" floating above the base stop. Thereby preventing any bending to occur imediately at the top of the rod where it will be pressed against.

This completes the first part of this project,

----------------------------------------------------------------------------------------------------------

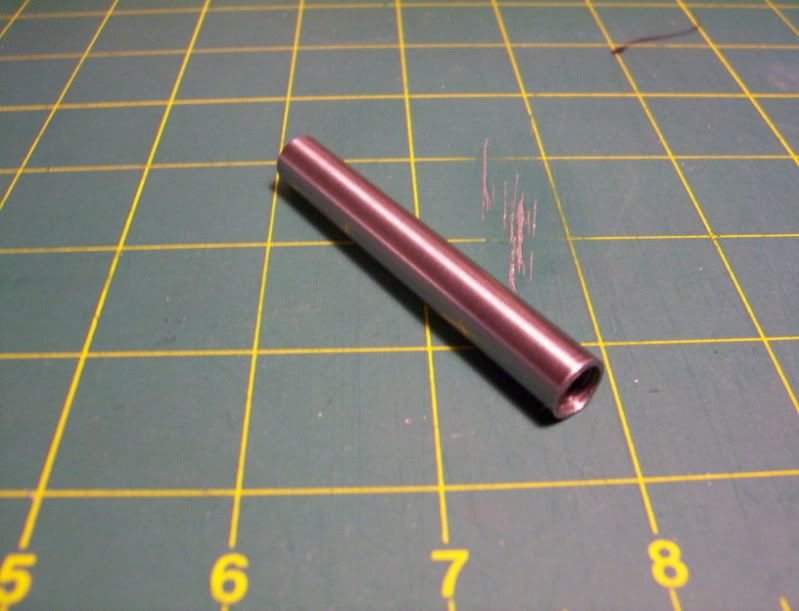
Now time to build a miniature cylinder:

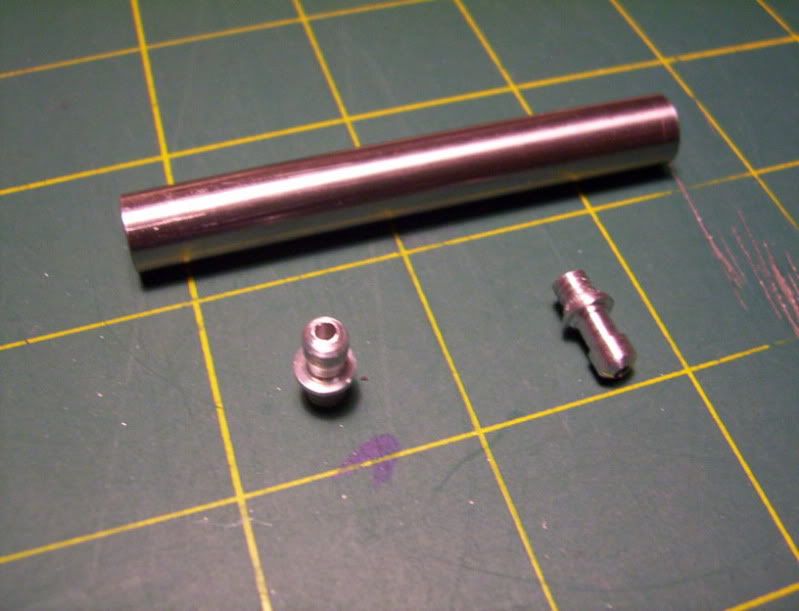
I will use a 3/8" dia. steel rod for the cylinder.
In order to get an accurate inner bore 1/4" dia. it needs to be a thru hole drilled and reamed,
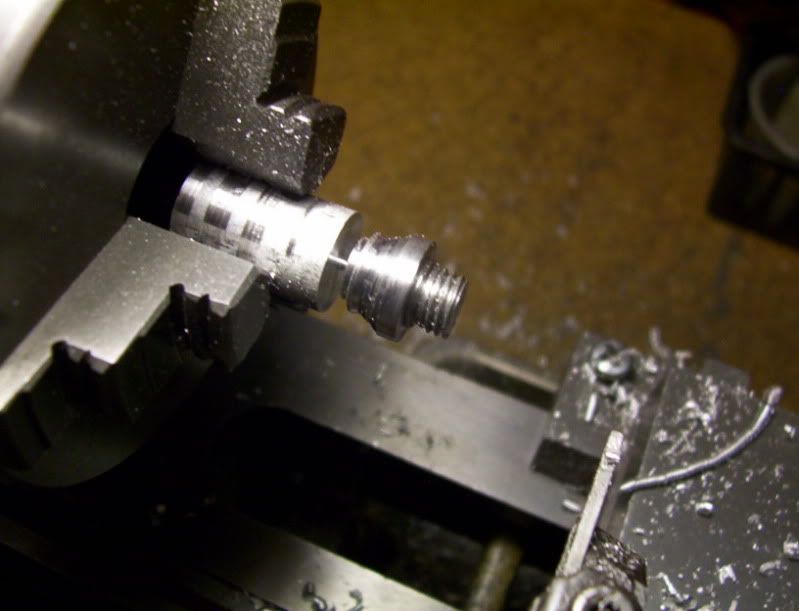
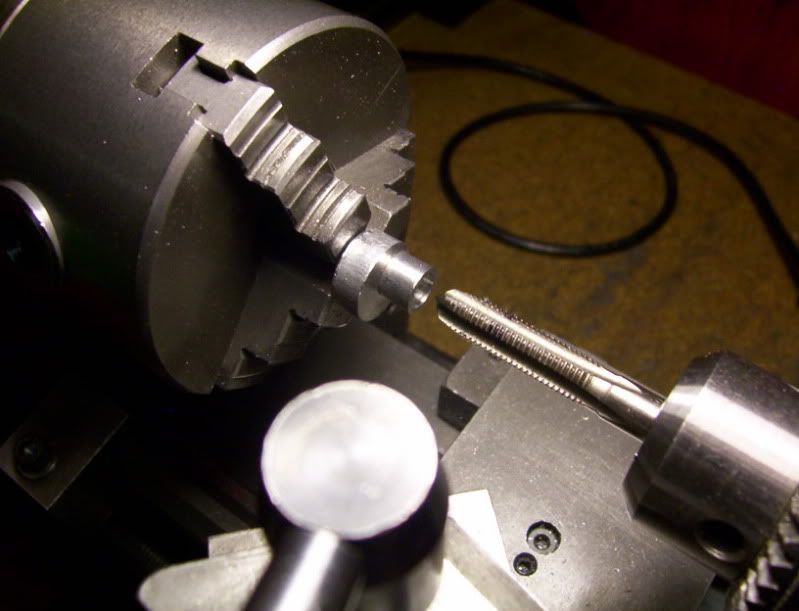
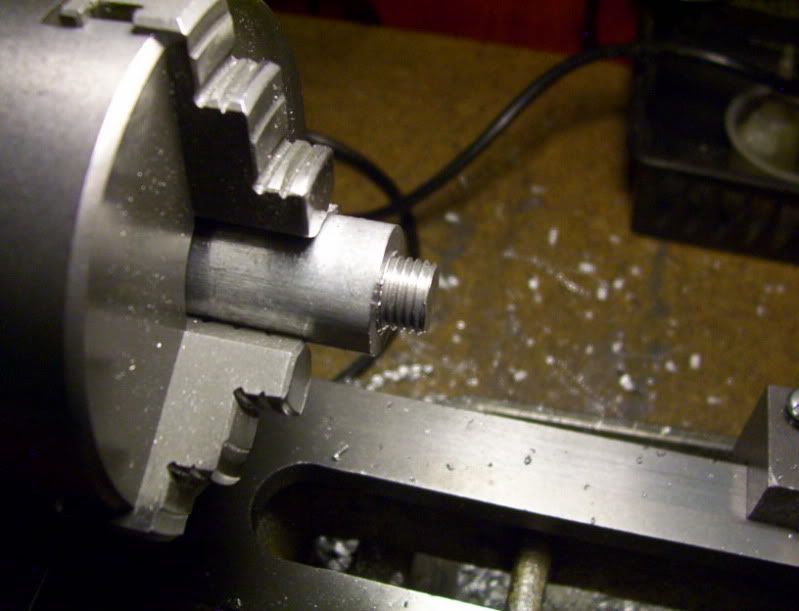
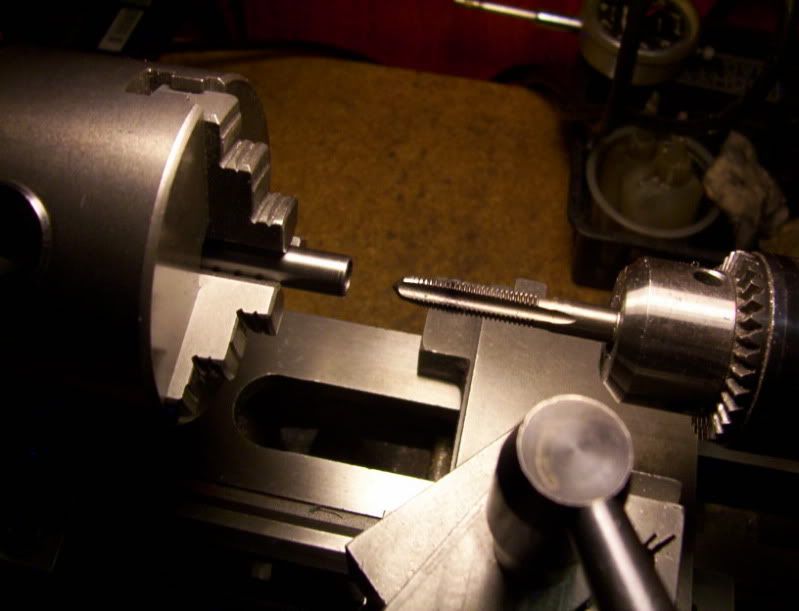
than to cap off both ends with appropriate fittings, I need to drill and tap for 5/16-24 threads on each end for a depth of 1/4"

32.jpg


33.jpg


34.jpg


35.jpg


36.jpg


---------------------------------------------------------------------------------------------------------------------

That's all for now, next the piston rod:


very interested!
:bow:

something I am also interested in making :D


Very nice work.

Just a thought, unless you really want to use a press fit, why not use permanent
locktite? I've not used it yet myself but John Bogstandard and others more knowledgeable than I have used it say its great.

Anyway I thought I'd throw that out for what ever it's worth.

Keep up the good work.

I'll be following along.

Ron
 
Hi Hobby, why not ''freeze fit'' the piston shaft to rhe piston...make the hole for piston shaft a couple thou under, gently heat piston, spray end of shaft with liquid nitrogen, fit shaft into hole and it wont be moving from there any time soon.
All the best for now,
John.
 
Michael, Ron and John,

They are all great suggestions, you guys gave me, thankyou,
I definately will keep them all in mind, if my jig doesn't work properly.


Today I started working on the hose bibs, for the cylinder, the tubing I have available is 1/8" inner dia. so I made the bibs, from 1/4" alu. rod, and formed a spigot to put a 10-32 thread at one end.
then drilled a 5/64" thru hole for the fluid inlets.

37.jpg


38.jpg


39.jpg


40.jpg


41.jpg


Then I began working on the top end cap, the cylinder is threaded at the top and bottom with a 5/16-24 tap. So I measured the tap I used and got around 0.320" for the outside dia. then the spigot on the cap is turned to that dia. for around 1/4" length, later it will be reduced to around 3/16".


42.jpg


43.jpg


44.jpg


45.jpg


46.jpg


Next I will work on the bottom end cap, then drill and tap for the 2 hose bibs,
I looking at 2 options, for the tube connectors (hose bibs),
I have aprox. 1/16" thickness on the cyl. walls to tap into, that's plenty in steel.

The first option is to tap for the tube con. straight into the cylinder, or to tap at an angle
by tapping at an angle into the cylinder facing away from the end caps, would direct the pressure onto the piston.
By placing the conn. 90 deg. would direct pressure and fluids more towards the end caps.

So this is something I will be thinking about. As I proceed with this build.


The idea of tapping into the thin cylinder wall at an angle did not work, there are heavy leaks as well as too much tube connector inside the cylinder that could interfere with the piston rod, on the top of the cylinder.

47.jpg


I need to redo the cylinder, connectors and end caps over again, and this time, make the end caps to be able to acomodate the tube connectors, I think I will be able to get a good seal doing it that way because I can make the connectors as large as needed without interfering with the piston rod, by using larger dia. endcaps, to accomodate the connectors.

 
Hello,

In order to eliminate any fluid leakages involved in making seperate cylinder and tube connectors to thread into it, I decided it would be best to make the cylinder and connectors as one piece.

I want at least 3/16" tube connector to stand above the cylinder side, so I opted, to usiing a 5/8" dia. aluminum round bar, that would be offset 1/8" offcenter, and then turned down to 3/8" outside dia, leaving 2 places on both ends for the entire diameter of the rod to be machined later on, for the tube connectors.

To machine the cylinder in this fashion, requires a homemade split collet to be able to hold a 5/8" round bar offcenter by 1/8", and have it be used in a 3 jaw, self centering chuck, on the lathe.

48.jpg


49.jpg


50.jpg


51.jpg


52.jpg


The 5/8" dia. cylinder stock, I'm scribing a centerline, for locating in the collet.

53.jpg


54.jpg


Now I am beginning the process of drilling and reaming the inner bore to 0.249".

55.jpg


56.jpg


No that the cylinder bore is done, I need to loosing the collet and slide the work piece out so it can be machined, this is why the centerline was scribed earlier, so as to have a locating reference for the collet.

57.jpg


The finished workpiece, after the eccentric turning in the lathe.

58.jpg


Now I clamped the workpiece to a V block, and drilled 1/4" deep hole for a 5/15-24 tap, on both ends on my drill press.

59.jpg


And then put it in my micromill-drill to line up and tapped the hole 5/16-24 both ends,
these threads will be needed to be able to put endcaps on both ends, of the cylinder.

60.jpg


And the final work piece (cylinder) before the machining of the tube connectors.

61.jpg


Next I will fabricate a fixture for holding the cylinder blank, either in my lathe or on my rotary table, so I can machine the tube connectors onto the cylinder, where the eccentrics are seen at, in the above photo.


Hi Hobby, I'm very new to machining. That's an interesting way to make an eccentric part, I'm enjoying your thread and soaking up your ideas.

Thanks

Nick
 
Hi, this is very interesting, how will you power the hydraulic cylinder will you make a pump? Also what will you use it for out of interest
 
Nick,
I'm glad your enjoying this thread, as you can see from this, jigs and fixtures are a big part of any build, but that's what make s this hobby so fun and challenging, is figuring ways to machine parts, that from the outset look simple to make, but the preparation for making that part can be longer than making the part itself, I just finished making another fixture for holding the workpiece iin my lathe for machining the tube conectors, but when I went to try it out, it didn't work properly, and I know why, and what I need to do to make this fixture work, you soon discover that machining parts is a lot of trial and error, but through that, is how you learn better ways of approaching the same task.

I went through about a dozen designs and prototype builds for my lathe tapering jig, every fail;ure brought temporary discouragement, but then I would learn from that failure and kept at it until I got what I think is the perfect design (for me) for that bguild, had no problems with it's performance whatsoever, but it took a lot of redoing over and over again.

So this thread may be like that, I may go so far and hit a snag, and have to use a whole new approach, but once I get this working properly, I will then get it down to a science, and post step by step procedure to get the same results everytime.


Speedhound,
The actuation will be with another piston cylinder arrangement, i will have 2 one each to push the piston, in each direction.

If I get it working properly, I will display this one as a mechanical model, with some extra fancy stuff with it working some sort of linkage or something.

If it works excellently, and I have the procedures down to a science, in buildiong these, then I was thinking of designing and building a miniature mechanical type flight simulator, where the airplane would move different directions via the pistons pushing and pulling it, with the mechincs modeled a little like the full size versions you see on TV, and the innernet, for training pilots.

But that is just way on the back burner for now, right now it is just a challenging project in itself to build one cylinder arrangement that works satisfactorily.

Thanks guys for your replies.

Have a great day...
 
These are the 2 failures in making a fixture for holding the cylinder for machining the tube connectors in my lathe.

The first one failed because of a poor design to start with, it was made to act like a split collet to hold the cylinder stock sideways for machining, the failure with it is that this collet will not cinch properly, due to the square walls, milled into the collet.

100_1896.jpg


This second one is a succesful design concept, it works perfectly for holding the cylinder stock in position for machining, the failure is with the size of stock I used to make it, the clamping screws are to close to the area that needs machinied therefor not enough room to bring the lathe tool in from the side to take nice cuts.
The cylinder workpiece got ruined when the screws hit the lathe tool and twisted the workpiece out of center.

However this is the design concept for this fixture I am making, I will use larger stock material, so as to have plenty of room to get proper lathe tool clearance nessary for machining the cylinder blank.

100_1897.jpg


I will now do over the cylinder as well as fabricate a fixture like the one above, only make it larger.
 
I had to redo the cylinder because I ruined the other one.
Which was good, cause now I was able to fine tune the procedures and get this part down to a science.

First I rough the length of a 5/8" dia. round bar to 4-1/2",

62-1.jpg


When I drilled and reamed the last time I had to drill and ream a blind hole, because I had the parent stock in the collet, which went further in length than my reamer could handle.

This time I set the workpiece out to around 3" overall working length,

63-1.jpg


And only drill a center hole for my tailstock center,

64-1.jpg


That way there is no need to loosen the collet and pull the workpiece out and realigning it as I did the first time.

The workpiece is placed in the collet for all outside machining first, so I mark off the areas needed to be machined,

65-1.jpg


Then starting out with my cutoff tool I begin to cut these marked out areas to the specific depth,

66-1.jpg


Then change to a heftier tool, and take almost the entire depth of cut, that way it eleiminates most of the interupted cutting ,due to the offsetting of the center of the workpiece, then after that I take the final finishing cut.

67-1.jpg


68-1.jpg


Now I can remove the work piece from the collet, and grip it in my chuck by the 3/8" turned down diameter (center of cylinder workpiece blank), and using a hack saw cutoff the parent stock, which was being held by the collet.

69-1.jpg


By doing it in those steps, I am now able to drill and ream the workpiece all the way thru the cylinder blank, eliminating any heavy build up of chips when reaming the blank.

So now I drill and ream, the blank to it's proper inside dia., with a thru hole.

70-1.jpg


71-1.jpg


Afterwards I can now drill and tap each end, of the cylinder blank.

72-1.jpg


73-1.jpg


And again the finished cylinder blank, ready for the next operation. Notice that the hole is more concentric with the rest of the workpiec dia. because of drilling it in my lathe, instead of holding it and drilling in my drill press like I done before.

74-1.jpg


Next up is to fabricate the fixture for the final machining of this cylinder blank..


......................


Hello Steamboatmodel,

Yeh, my original idea was to put the connectors on the endcaps, but I chose not too, because it would increase the overall length of the whole assembly, I'm trying to scale down my builds to much smaller as possible for me to build, so I have room to display my projects.

However if my present build concept fails, then I will definately look back into accomodating the connectors on the endcaps.

Thanks for your input, greatly appreciated. I like that picture, of how these work, that you posted, looks interesting to study, and maybe try to build a model of it in another experimental project.

 
Ok todays progress, I decided that to make a fixture for holding the cylinder in the lathe, may not be nessary, because that would mean more steps involved to get an acurate setup, so I opted. to build a tooling instead, so all the work in drilling the connector holes and machining the connector itself, can be done all in one setting, in my mill vise on my milling machine.

The tooling I made is sort of like a plug former, rather than a cutter, because it forms a cylinder shape from an already squared shape.

Here is how I made it.

Took a piece of tool steel, 3/8" dia. and after the usual lathe work of getting it prepared (facing both ends), then I drilled a 3/16" hole, about an 1' deep. (this forms the spigot which the tube connects to)
Than followed that with a 1/4" bit for a depth of around 0.1" deep, (this forms the base of the tube connector form),

75-1.jpg


Lastly in the lathe, I made a taper using a center drill, (to give a gradual entrance of the tooling into the workpiece.


77.jpg


78.jpg


Then over at my mill I milled a flat on both sides to a depth to expose the slots that are formed by the internal drilling. (this gives a lot of chip clearance.

79.jpg


83.jpg


Now a piece of scrap, aluminum square stock 1/4" is in the vise and a cut is made with this tool to see how well it performs in cutting a cylindrical stud.

84.jpg


85.jpg


My camera only takes 30 seconds of video, so the finished workpiece could not be televised, but here it is starting to cut a stud from the 1/4" square piece.


Next I will work on the cylinder and use this tool hopefully, to machine the tube connectors on it.


I drill the inlet holes first, this alsop allows me to use these as references if need.

86.jpg


Then I mill away the material on the sides to make a 1/4" square nub, ontop of the cylinder.

87.jpg


Now I use my former tool to machine the spigot on the cylinder.

88.jpg


Once both sides are done, I then return it to my lathe to do a clean up pass with the reamer, to clean up the fragments left by the drilling operation.

89.jpg


Here is the cylinder at this stage, with both tube connectors machined onto it.

90.jpg


91.jpg


92.jpg


Probably next step would be to start working on the piston and rod assembly or the end caps.

 
Its now starting to look like a welded cylinder.
Regards,
Gerald.
PS The largest one I worked on was 22" Dia and 7' long, the end caps were threaded on. We had to use a Welding torch to loosen the Loctite
 
steamboatmodel said:
Its now starting to look like a welded cylinder.
Regards,
Gerald.
PS The largest one I worked on was 22" Dia and 7' long, the end caps were threaded on. We had to use a Welding torch to loosen the Loctite

It does give it that kind of industrial look to it.

22" dia. 7' long, sounds more like a canon, than a hydraulic cylinder, ;D.


Now that I have a technique, to machine a inlet port nozzle onto a workpiece, without making them seperate pieces, your mention of putting the hose ports on the end caps, is begining to look more promising, since it's not threaded in seperate, it won't take up as much room, so I can shorten the cylinder to accomodate putting the inlet ports on the endcaps.

Right now the way I'm thinking I could do this, would be to turn down a spigot on a piece of 3/4" round bar, then thread it to the required 5/16-24, that would then leave around 1/4" left of the remaining dia. above the spigot, that can be machined to the required 1/4" square, followed by the former tool, directly on the endcaps.

That way there would be no need to machine the cylinder from 5/8" stock, but now I could use the 3/8" dia. stock.

That would make production a whole lot easier as well as faster, shoiuld I want to build a model requiring several of these cylinders.

I now have the piston and rod assembles, as well as temporary endcaps installed, and tested it out with blowing through the tubes on both ports, and the piston works fine with good compression.

I know I have a good seal on the top endcap, because when I put my finger over the top inlet port, and blow air into the bottom port, the piston moves very slowly, but if I rem,ove the blocking of the top port, the piston snaps out very quickly with little air pressure. That tells me that there is a good seal at the top, because the piston is having a hard time exhausting air as it is moving. So succesful design as far as air preasure working the piston back and forth, smoothly.

Now that I know this design will work, I will look at rebuilding the whole system, by machining the intake ports, as one piece on the endcaps, that will be the next experiment in this build.

 
Time to assemble the piston to the rod using the press jig I made earlier in the build.

93.jpg


94.jpg


95.jpg


This is the cylinder and piston assembly, with temporary endcaps,
here I put the top endcap on tight and then drill and ream the 1/8" hole for the rod to pass through.

97.jpg


98.jpg


I decided it's time to run this a test, that's why the endcaps are temporery, to get out any bugs before I do any final machining on the caps.

Therefor to put this through a hydraulic test, I need to make 2 piston cylinder assemblies to act as manual pumps for the hydrauics.

I'm using 1/2" dia.alu.round, and reaming a 3/8" hole, with a 1/4" hole through the top endcap, for the piston rod. This piston rod assembly will be one piece from a 1/2" stock turned to proper diameters.

For anyone NEW to this hobby, here is a quick procedure if you need to make a cylinder with a cap on it and the cylinder bore needs to line up concentric with the hole in the cap, for a piston rod to pass thru, without binding.

First I machined the endcap and threaded it to mate with the cylinder.

Turned down nub for threading.

100.jpg


threading the nub.

101.jpg


then after cutting it off, I wrap plumbers tape around the threads.

102.jpg


103.jpg


Then set it aside and begin machining the inner bore of the cylinder with a thru hole,
drilled and reamed to proper inside diameter.
Keeping the cylinder still in the lathe I tap the mating thread into the one end of the cylinder.

Now with the cylinder completed on that end, keeping the cylinder still in the lathe, I screw on and tighten the previous ly made endcap.

104.jpg


Then I do all finish machining to the endcap, such as facing it to length, and any decorative turnings to it. In this machining process the endcap continues to tighten more and more, as the cutter makes contact with it. Also if the 2 pieces weren't threaded straight, when put together like this they can have any iregularities machined out, so it all ends up concentric.

105.jpg


Now after all the machining the profile is done to it, the endcap is as tight as it will get hopefully giving a good seal, now its time to drill and ream the hole through it the proper dia. for the piston rod to pass through.

106.jpg


107.jpg


If done properly the rod hole should be very concentric with the cylinder bore so as to have smooth piston movement, with a fairly good seal with the rod and cap.

108.jpg


The before and after of the top cap and cylinder assembly.

109.jpg


After both these cylinders are to this stage, I can then put the cylinder back in the lathe, with the bottom sticking out to tap the threads for the bottom caps.


Hobby, I love the project, and your thread is great, very informative.

In the past I dabbled with hydraulic cylinders for some R/C applications, and my biggest pitfall was the hoses I tried would have some expansion and take away movement from the cylinders. I guess a rigid line would work best.

My question is what are you going to use a hydraulic line? DO you know of any high strength hydraulic line down to 1/8 inch inside diameter?

Kel
 

Latest posts

Back
Top