


digiex-chris
Well-Known Member
- Joined
- Dec 6, 2010
- Messages
- 263
- Reaction score
- 58
Just a cautionary tale. Turned out well enough, but it was nearly a disaster.
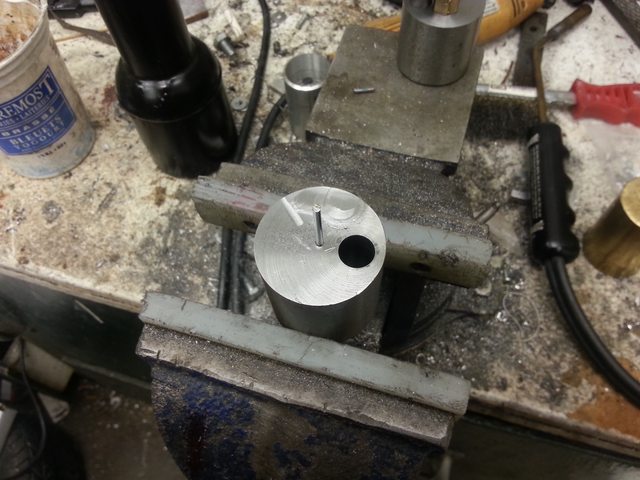
I was milling the light end of a crankshaft off, to form the crankshaft weight. The crankshaft was setup in a fixture used to turn the crank pin, so the crank bearing journal was in a reamed hole in the face of a round chunk of bar.
Here's the fixture.
Here's the setup in the mill
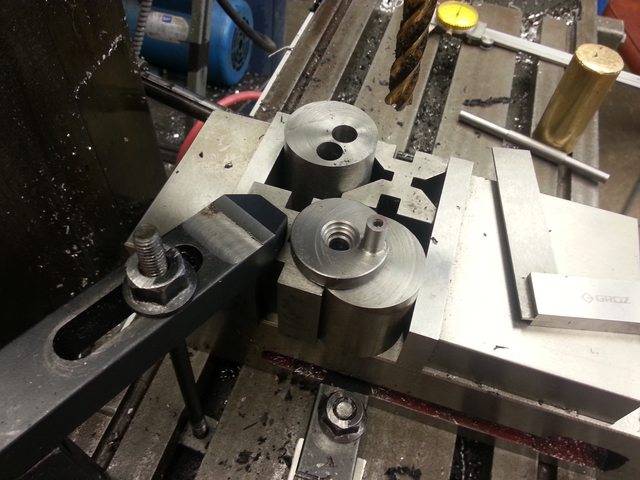
With the endmill on the left of the line drawn between the center of the crankshaft and the crank pin, I quickly realized moving the endmill into the work using the Y axis would be climb milling, so I changed plan and came in from the left instead (moving the table to the left), with the X axis.
What didn't become obvious till later, is that if the endmill were to grab for any reason and anti-rotation pin were to shear, the crankshaft would rotate counter-clockwise, self-feeding into the endmill.
And that's exactly what happened!

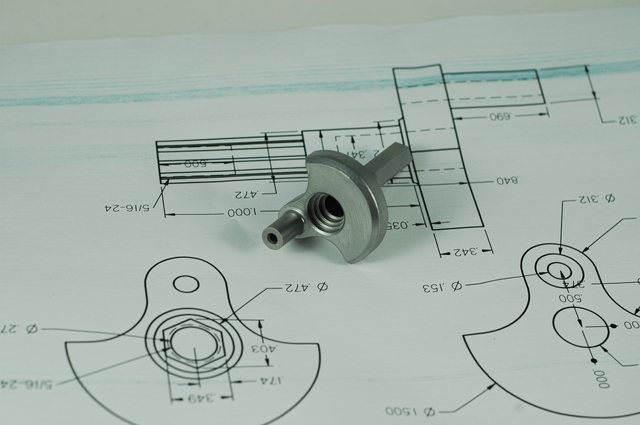
It turned out ok, but I learned my lesson. The endmill is actively working to rotate something like that. I'll back up the crank pin with a clamp or a stop or something next time. I suppose roughing it out with a smaller endmill would have allowed a more even cut, slotting more of it. Thankfully, I was able to save the part. It knocked a corner off my endmill though.
Any other ideas on how to better secure that?
I was milling the light end of a crankshaft off, to form the crankshaft weight. The crankshaft was setup in a fixture used to turn the crank pin, so the crank bearing journal was in a reamed hole in the face of a round chunk of bar.
Here's the fixture.
Here's the setup in the mill
With the endmill on the left of the line drawn between the center of the crankshaft and the crank pin, I quickly realized moving the endmill into the work using the Y axis would be climb milling, so I changed plan and came in from the left instead (moving the table to the left), with the X axis.
What didn't become obvious till later, is that if the endmill were to grab for any reason and anti-rotation pin were to shear, the crankshaft would rotate counter-clockwise, self-feeding into the endmill.
And that's exactly what happened!
It turned out ok, but I learned my lesson. The endmill is actively working to rotate something like that. I'll back up the crank pin with a clamp or a stop or something next time. I suppose roughing it out with a smaller endmill would have allowed a more even cut, slotting more of it. Thankfully, I was able to save the part. It knocked a corner off my endmill though.
Any other ideas on how to better secure that?
Last edited: