Building a Bigger Benson Engine

Home Model Engine Machinist Forum

Help Support Home Model Engine Machinist Forum:

This site may earn a commission from merchant affiliate links, including eBay, Amazon, and others.
i don't know how i missed this build ??? but i will be following along as there is a wealth of info to read and great pictures to see :eek:

excellent workmanship jason :bow:

chuck
 
Jason,
A more than very clever way of properly locating those bores in the support bracket. :bow:

Pete
 
Hi Jason, I've just caught up with your progress - brilliant - lovely work, all of it inspiring but especially the conrod build. It's going to be a real picture once finished and a great model to watch running. Keep it going Thm: Thm:

Ramon
 
Another excellent job on a very nice looking engine Jason. Was nice to see you used the radius function on the DRO, I keep meaning to try it when I get a spare minute, but it looks like it makes a fine job of it.

MartinH
 
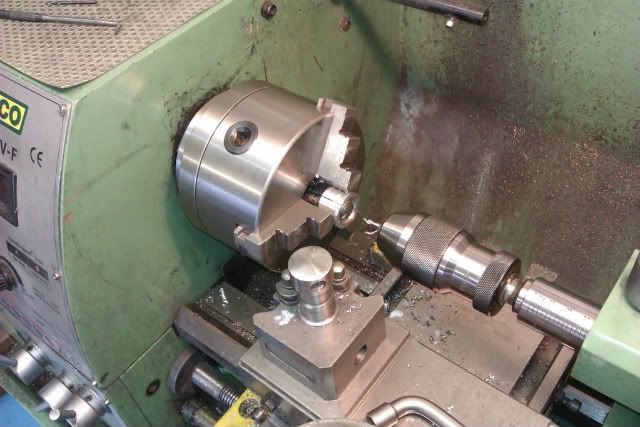
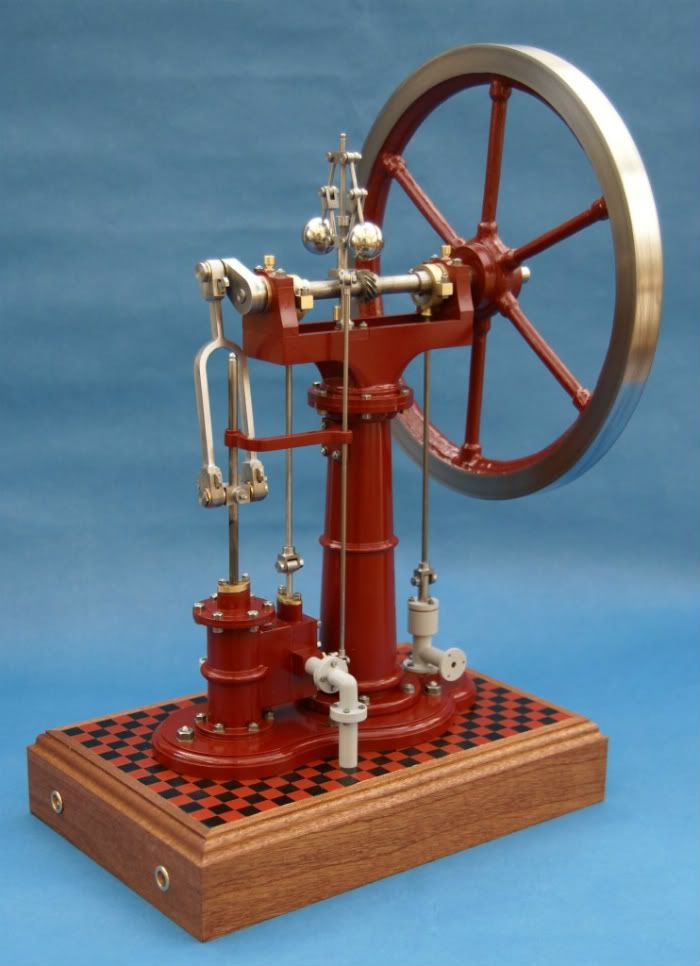
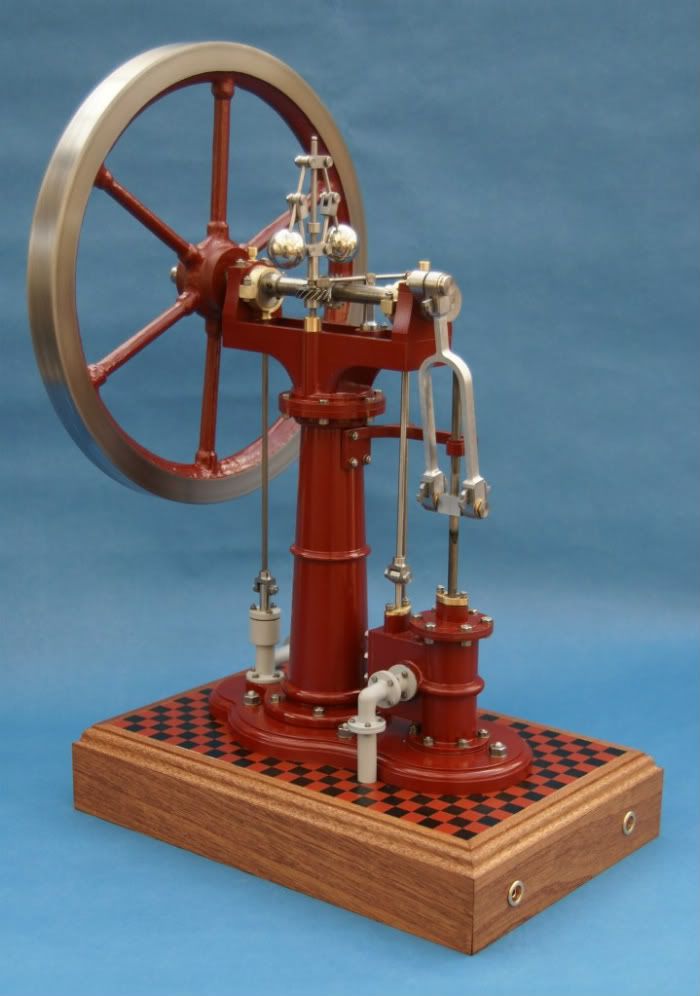
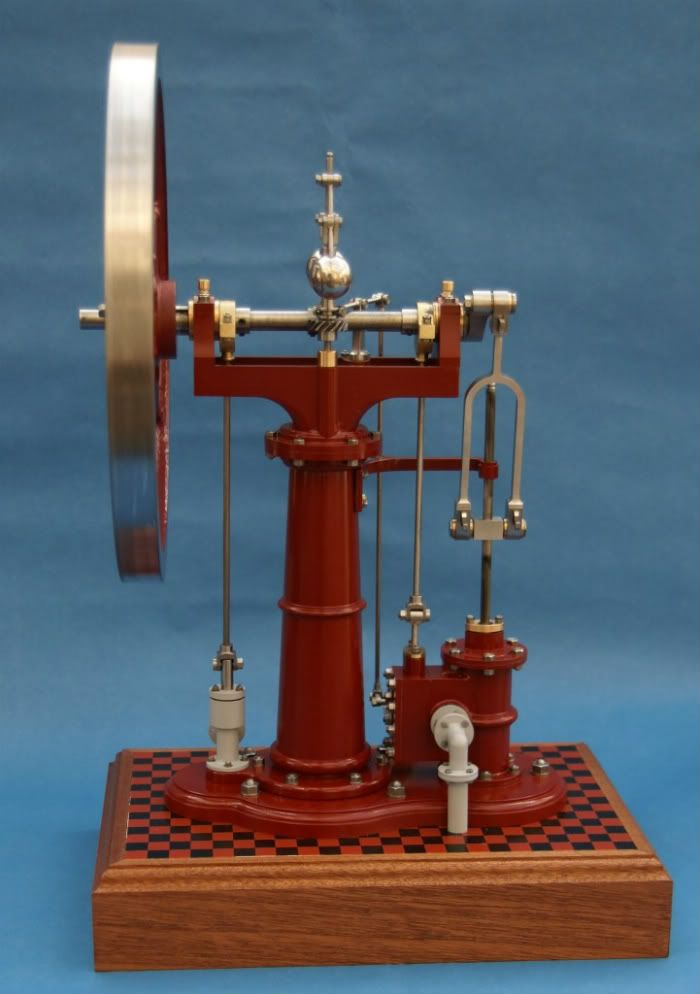
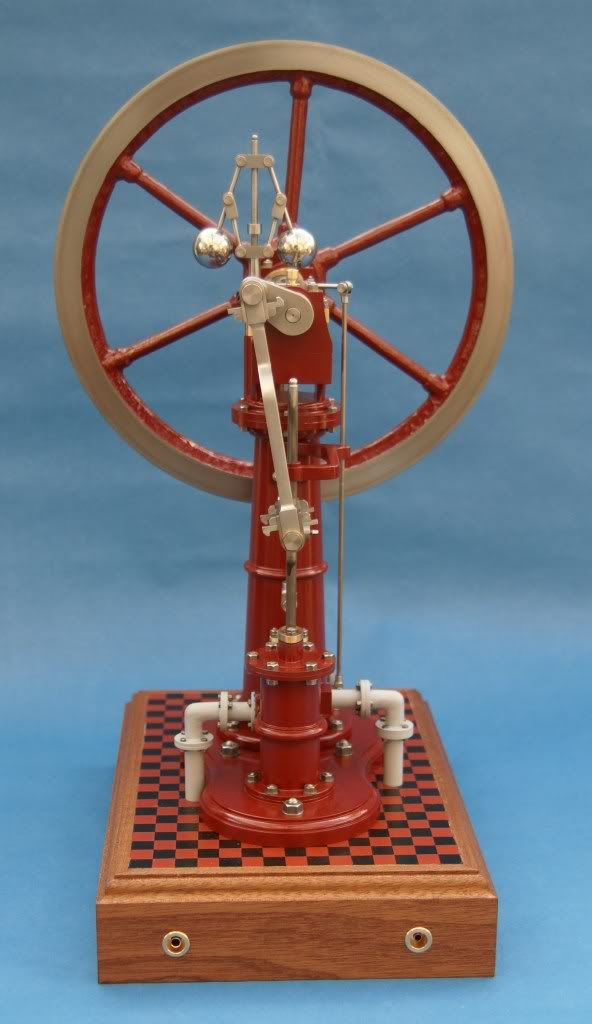
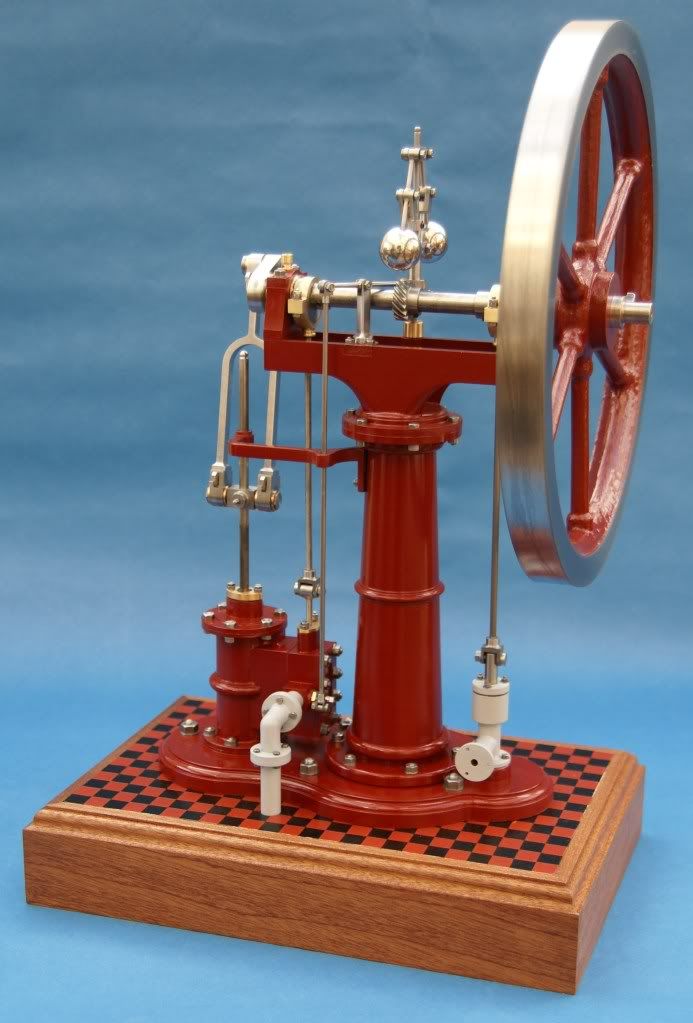
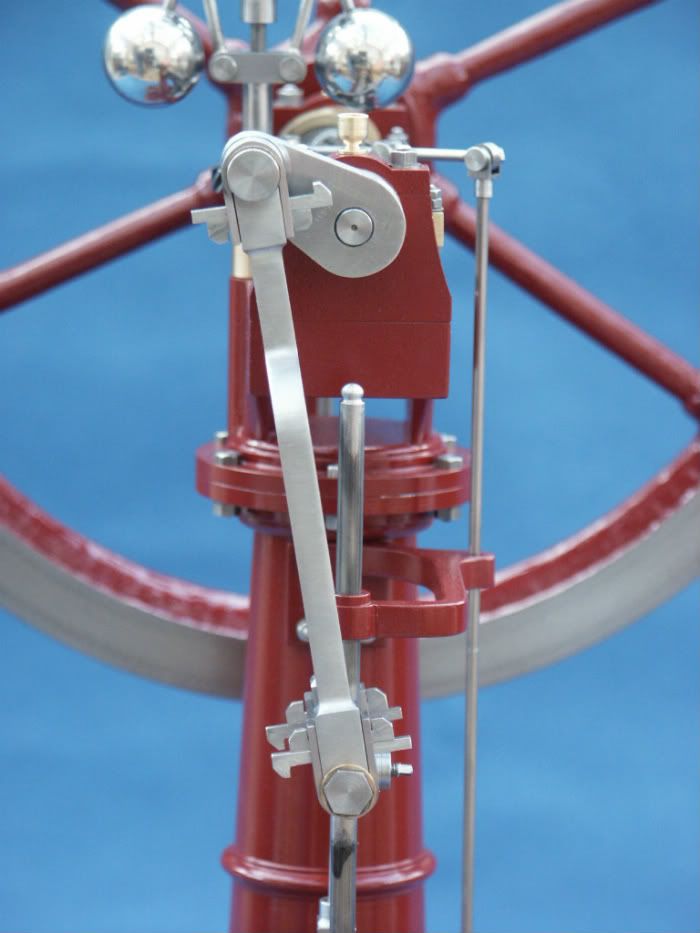
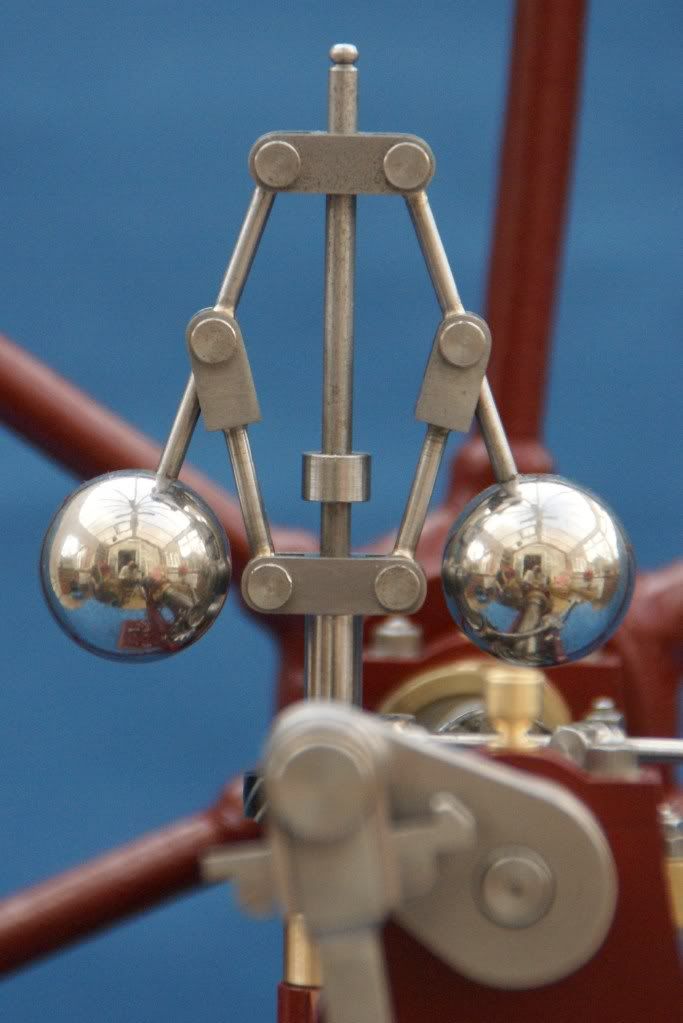
Next up I tackled the governor which is driven off the crank shaft by a set of skew gears, I took the easy option and bought a standard pair which just needed a little work to make them fit.

Ramon had a thread going about how best to drill steel balls for use on governors and ended up annealing his steel ones. I took a slightly different approach and bought stainless steel balls which although still reasonably hardwearing can be drilled without any prep. A simple top hat bush was made to hold the balls while drilling.

IMAG0244.jpg


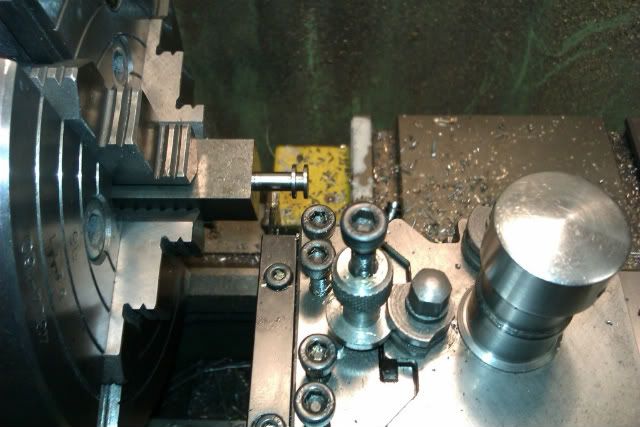
I only got one other pic of the governor under construction and this shows the groove and undercut being done on the bottom pivot with a parting tool.

IMAG0261.jpg


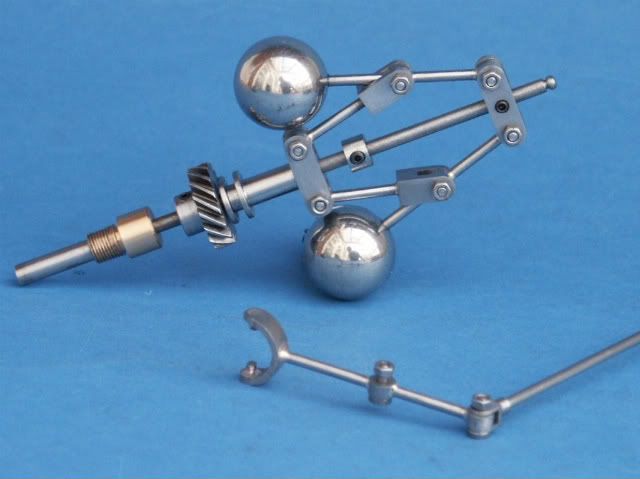
And here it is all complete with the associated follower arm and rod.

PICT0343-1.jpg


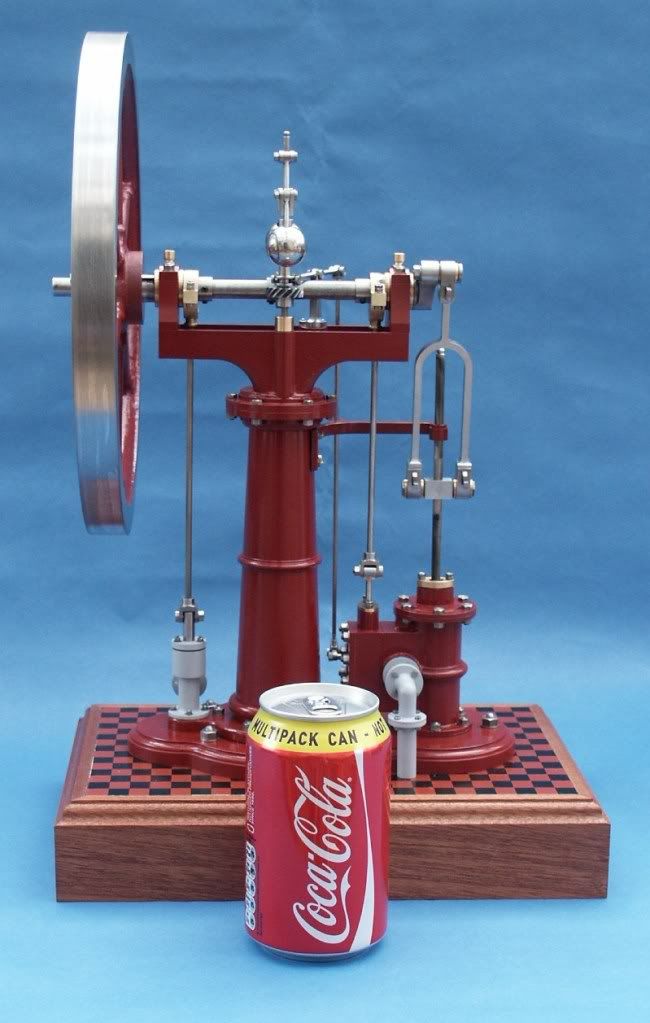
The second eccentric drives a small pump that could be used as a boiler feed pump is so desired, it was basically a fabrication from two bits of brass and a couple of balls and seatings to make sure the water only gets pumped one way!! Plus a simple stainless ram and stuffing gland

IMAG0221.jpg


PICT0346.jpg


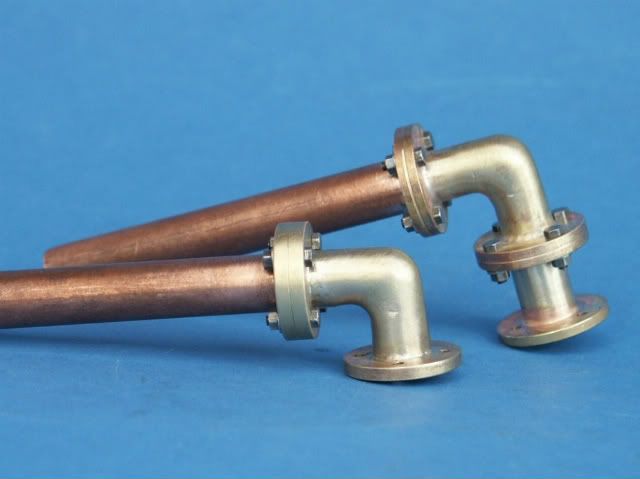
I like to use flanged pipework on stationary engines as nutted unions are really out of scale. The bends were made by modifying compression plumbing fittings and then the pipe and flanges silver soldered on and all held together with 10BA nuts and bolts.

PICT0335.jpg

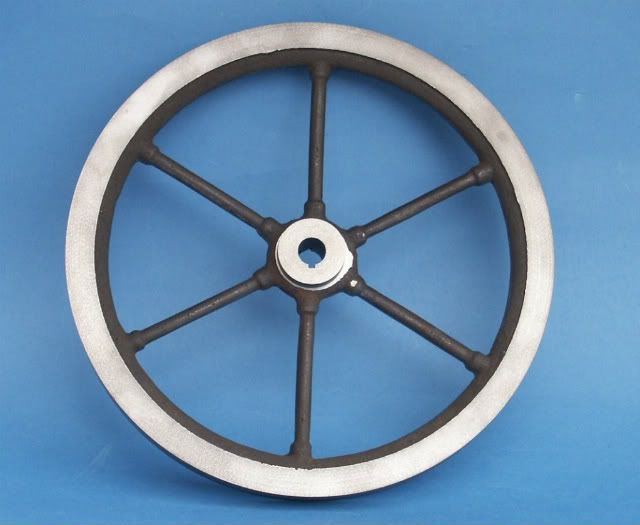
Last and not least is the flywheel this was purchased from one of the large UK tool dealers – RDG who also have a few flywheels in their range. This is the 10” one and was very good for the money, just a small blow hole near the hub but soon filled.
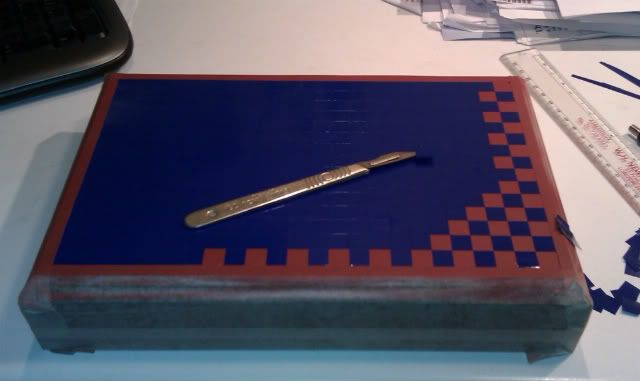
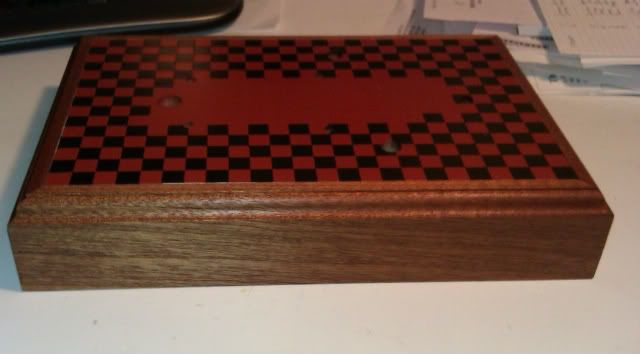
PICT0345.jpg


Well it’s all stripped down for painting now so hopefully the next post will be the finished item and maybe I’ll show how to get a tiled floor effect on the display base.

J
 
That is beautiful machine work Jason. I love the Benson engine, does anyone sell the plans for this? I have a long way to go to build this engine, but I would like to get plans for future built that is till I get better. Can you tell me where to get plans?

Regards Don
 
There are a few options on plans.

Bruce engineering will sell just plans or plans and castings.

Track down the back Issues of Model Engineer or Engineering in Miniature that the build was originally published in.

Or do as I did and buy one of Anthony Mounts books which are basically reprints of teh magazine articles and each covers 5 or 6 engines. The Benson is in book II.

J
 
I mentioned in the last post that I would show a simple way to get the effect of a tiled engine room floor on a display base, so this is how I did it for the Benson.

First make your baseboard and drill any holes for fixings, pipes etc. I used 18mm white melamine faced chipboard for the flat area and edged it in an off cut of Sapele that I had which was just mitred and glued than the moulding done with a router once the glue was dry.

IMAG0304-1.jpg


I decided on a terracotta and black tile but if you want to go black & white this step can be left out. Mask off the wood and then spray the terracotta, I used red oxide primer from a spray can as its quick and simple.

IMAG0305-1.jpg


When the paint has had a good chance to dry cover the whole area with either masking film or as I could not find mine I used a bit of sign writers adhesive vinyl. Next mark out a grid to suit the scale of your tiles, mine worked out at 10mm. Cut the mask along each grid line with a sharp scalpel and then remove alternate squares taking care not to scratch the paint below.

IMAG0306-1.jpg


Its then just a case of spraying on the second colour before peeling off the remaining masking film once the paint is dry. For good measure add a coat or two of matt or satin clear Acrylic to protect the surface before peeling the masking tape off the wood.

IMAG0311-1.jpg


J
 
That's a nice masking job Jason and very effective Thm:. Rather fortunate it's a couple of days' too late as you would have given me ideas ;)

Several years ago at an exhibition I saw an engine - an Otto I think - mounted on genuine brown linoleum that had been scribed for tile effect then oiled. It looked absolutely realistic but where oh where would you find linoleum these days.

Looking forward to seeing the finished model.

Regards - Ramon
 
Its still available I was involved in a large reffurb job a few years back and they had a proper linolium floor with all the borders done in contrasting colours and an enblem in the middle that was water jet cut, not cheap though.

http://www.forbo-flooring.co.uk/

If you just want a small sheet then check out your local art shop, they should have A5, A4 and A3 size pieces as its use dfor lino prints.

Jason

I've also sent you a PM.
 
That's a superb job Jason, thanks for the how to photos.
Don
 
The last thing to do was the painting, I don’t have any photos of this and I’m sure you can find more interesting things to do than watch paint dry. I will say that the parts were cleaned down with cellulose thinner, masked and then primed with car aerosol as I find this gives a slightly more textured effect which suits the “cast” look of the parts. Once dry they were airbrushed with “Fowler Showman’s Red” which is one of the Cherry paints traction engine range.
It was all put back together with liquid gasket where needed and graphite yarn for piston and gland packing.

DSC04338.jpg


DSC04340.jpg


DSC04341.jpg


DSC04339.jpg


DSC04337.jpg


DSC04343.jpg


PICT0357.jpg


DSC04345.jpg


And this one should give you an idea of the actual size

PICT0360.jpg


Well I suppose you also want to see it running so here it is, I’ve set the governor to a very low speed as I don’t like fast reving models and was surprised that the governor actually works as on a lot of models the force of the balls does not overcome the friction in the linkages etc.

I have to chase down what sounds like a small squeak but I think it’s actually a whistle as the air is exhausted on the downstroke, I have a feeling I got some liquid gasket into the passage end when fitting the cylinder to the end cover.

http://www.youtube.com/watch?v=jNeaWlhRw7E&feature=youtu.be

Jason
 
Hi Jason, I know I've had a sneak preview but let me say what a super job you've made of this very characterful engine. It's an absolute picture from the base to the top and and I expect you are well pleased with the result. :bow:

How far are you from Norfolk - it would be lovely to see it at this years Forncett ME day.

Congratulations on a truly lovely model - now - what's next? ;D

Regards - Ramon
 
When folks use the phrase "museum quality" this is what they're talking about. Beautiful work, Jason. Be proud of yourself.
 
Anthony Mount would be more than impressed and probably jealous. Fantastic job.

Pete
 
Beautiful job Jason, congratulations and thanks for sharing.

Jim
 
+1 for museum quality! ;D

Amazing quality from top to bottom.
Perfect!!! :bow:

Congratulations on an excellent engine!!

Andrew
 
:bow: Jason you are by far a master craftsman that is one awesome engine. I love the base and the color, I can only dream of doing that quality of work. Like they are saying museum quality. You have truly inspired me. Thank you for you excellent thread and teaching. again :bow:

Best regards Don
 
Jason

I don't know if it is correct to describe that engine as "gobsmacking" but it is appropriate. I'm gobsmacked!

Jerry
 

Latest posts

Back
Top