British 0-4-0 Toy Locomotive: he said

Home Model Engine Machinist Forum

Help Support Home Model Engine Machinist Forum:

This site may earn a commission from merchant affiliate links, including eBay, Amazon, and others.
Hi Frazer. I got the plans with the kit of materials from LittleMachineShop. You have to buy the drain pipe separately. I don't know if the plans are available elsewhere...I suspect they are since a couple of members posted the engine in this thread (near the beginning).

The nice thing about the kit is you get nearly all the material you need which can be a chore especially the sheet stock. But if you're a newbie like me...you'll end up getting more material anyway. ;D Best to find the plans and buy the material separately.

Anyone who knows more about this is welcome to post here.
 
Cool. Two piston rod assemblies complete. Very cool.
Well...it will be very cool if they fit the cylinders.

I hope the old hands remember...getting a press fit is (for me) a sign of budding skill.

Now to drill the holes for the crank pins.
Severe bumness if I screw this up.

But I know bumness...and have made it a friend.

It's easy. Bumness likes vodka.

Slow going but going. Two piston rods in two weeks! But I'm going to have a loco!!!

P.S. Bumness has no taste. Any vodka will do. I keep the good stuff for me.

Man I enjoy this forum. Or the vodka does. Can you tell I'm celebrating?
 
Well, celebrate away, Zee. Every part is a project completed in itself.
You know...

There will be no bumness, by the way. You will do well!

Dean
 
Zee,
We who are watching have no doubt that you will arrive at your intended destination. But, by golly, we sure do not always know what route you will take to get there :big: I myself have toasted many a shiny metal part at the end of the day. I'm doing that right now ;D

Cheers,
Phil
 
It might have been easier to drill the holes for the crank pins before they were removed from their parent stock, nicht wahr?
 
I drilled two holes! I drilled two holes!

Thanks Dean, Phil, and Marv.

mklotz said:
It might have been easier to drill the holes for the crank pins before they were removed from their parent stock, nicht wahr?

Marv...that's what I was wondering too even though the instructions show the end rod being pressed on the piston rod before drilling. In part I wondered about it because I couldn't see how the orientation made any difference.

However, I'm thinking now it might be to avoid crushing the rod end when it's pressed. When drilled, there's not much material left on the sides.

Anyway...I managed it. I had some .125 thick aluminum and milled it down to just under .1 and then squared it. This would be a miniature parallel to hold the piston rod horizontal. Then I cut two more pieces to act as a vise within a vise. The width of the aluminum was just right to fit between the rod end and the piston.

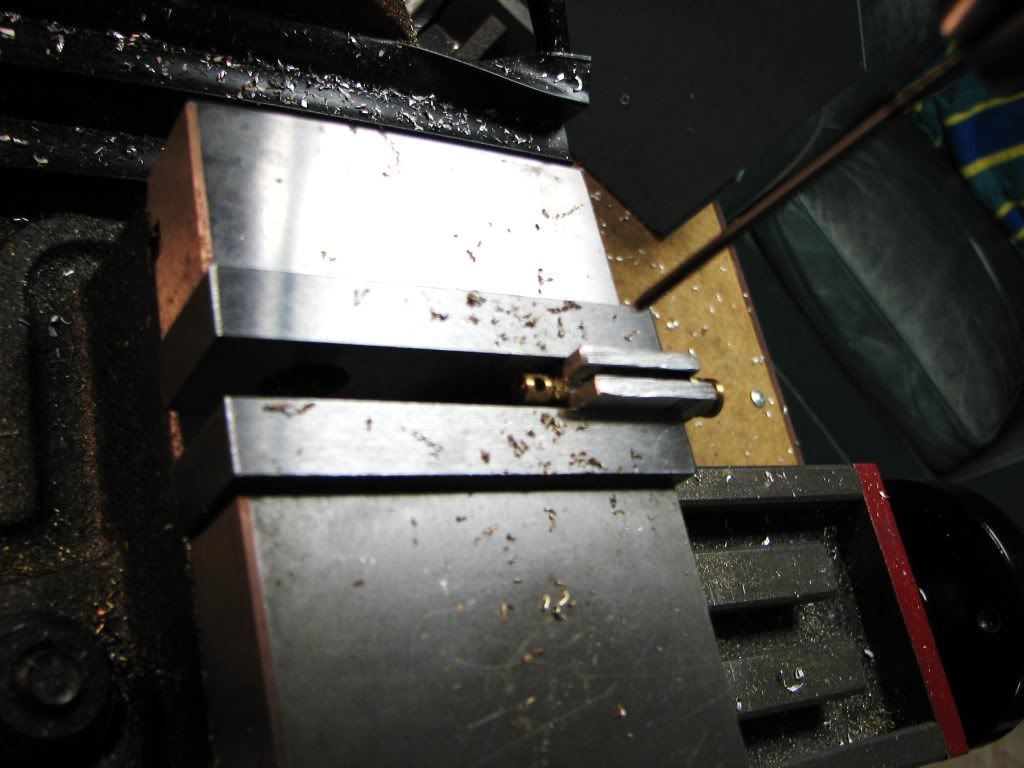
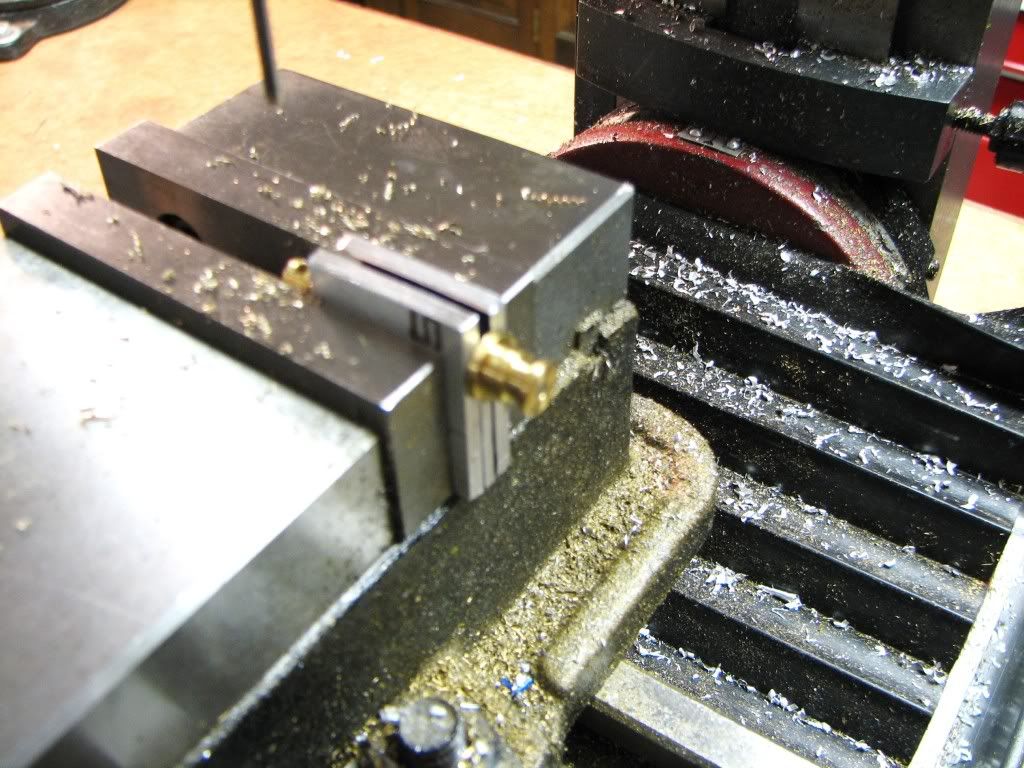
Here's one end. I used the edge finder to find the center and move to the needed spot.

393e6d7c.jpg


Here's the other end. You can see the mini-parallel underneath. Sorry it's so out of focus.

8aa6d311.jpg


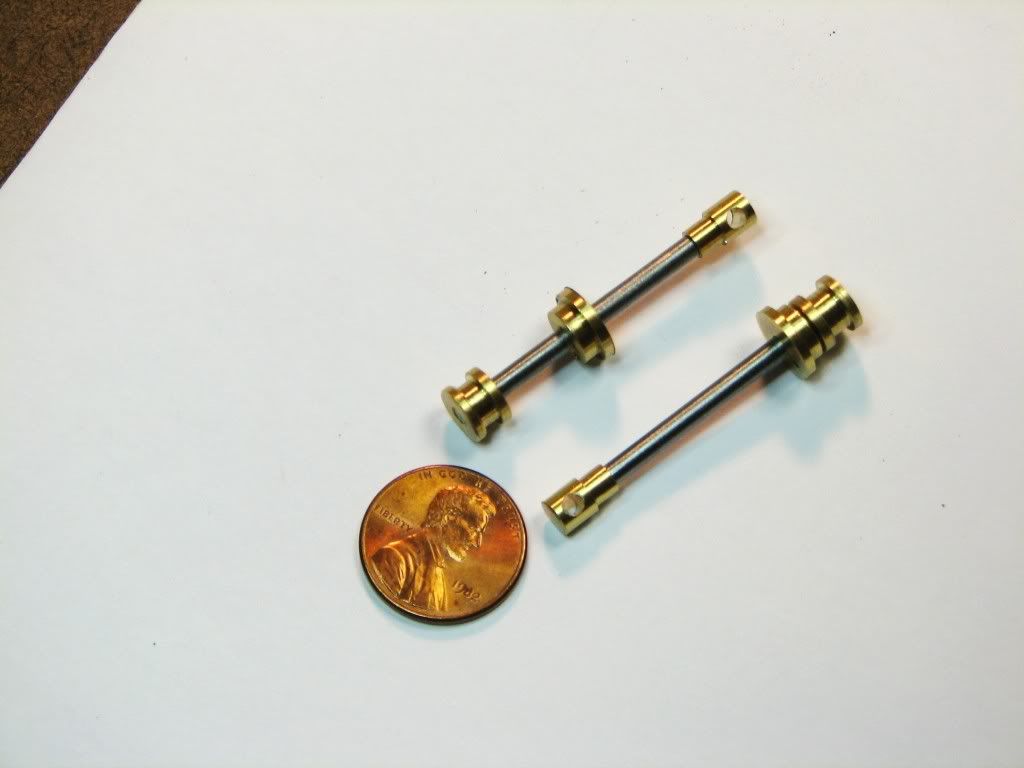
And here's the end result. You can see what I mean about the amount of material on each side of the hole. I don't know if it would be enough to support the end while pressing it.

8bcb4465.jpg


Ganz gut. Nicht whar? Ja. ;D

Ich könnte Mini-zeepster nicht finden. :(

(I couldn't find mini-zeepster.)
 
Those look really good, Zee. I'm likin' it.

I see your point about the press job there. Maybe would have been okay, maybe not, depending on interference. You did fine, in the end. Good results.

Eh, wot? Can't cipher the garble at the end. Speek Inglesh, dood!

Dean
 
Good Work Zee, and the forward thinking of drilling the holes after pressing the parts was a good one indeed. No sense in risking it if you don't have to.

Kel
 
zeeprogrammer said:
Cool. Two piston rod assemblies complete. Very cool.
Well...it will be very cool if they fit the cylinders.

I hope the old hands remember...getting a press fit is (for me) a sign of budding skill.

Now to drill the holes for the crank pins.
Severe bumness if I screw this up.

But I know bumness...and have made it a friend.

It's easy. Bumness likes vodka.

Slow going but going. Two piston rods in two weeks! But I'm going to have a loco!!!

P.S. Bumness has no taste. Any vodka will do. I keep the good stuff for me.

Man I enjoy this forum. Or the vodka does. Can you tell I'm celebrating?

Sometimes, just sometimes. You guys make me miss my drinking days. :D


You're on fire Zee. Don't slow down now!
Kermit
 
If vodka will enable me to make nice little parts like those, I'm switching over from my Captain Morgan Parrot Coconut Rum. They're like little models all by themselves...

-T
 
mklotz said:
Stimmt, ja sicher. Ich bin erfreut.

Sei ruhig, Dean.

Doesn't matter how many letters you jumble together, it's still jibberish. Like a foreign language, or sumthin'.

Dean
 
Ganz gut. Nicht whar? Ja.
Sehr Gut Zee :bow:

Dean, to quote Obelix: "Roman ? Latin ? Its all Greek to me!" ;D

Kind regards, Arnold
 
Thanks very much Dean, Kel, Kermit, Marv, Trout and Arnold.

Kermit...I was lucky to get some time in the shop last night. It'll probably be a week and half before I can get back again.

Trout...Vodka doesn't ever help me make good parts. But I'll celebrate them. ;D It doesn't help to make bad parts either as I avoid drinking and machining.

Dean...From Merriam-Webster, jibberish...A language that is confusing or hard to understand. That's what I experienced when I first started this hobby and joined this forum. :big:
 
Well done Z'. Those parts are beauties and I do admire your tenacity to begin anew and succeed.

BC1
Jim
 
Nice work on the small parts Zee. :bow: Progress is being made, keep it up

Cheers,
Phil
 
Thanks Jim. Thanks Phil. Very much appreciated.

No pic. Stop here if you're looking for one.

Gee, everyone sure is busy. I didn't realize my thread was headed for 'old news'.

Unfortunately, I cannot offer 'new news'...I must begin this post with my oft mentioned...

Rats.

Stupid one thousands.

Crank pins. Simple. Turn it down to .09 for .4" so they'll slip into the piston rod ends and then .094 for another .12" so they'll press fit into the drive wheels.

He said.

Piston rod end slips on...nice. Or is it a hair too loose? Should be okay.
Now for the press fit.
Zip zip.
And the drive wheel...slips on.

It's the usual lesson. Don't rush.

Bright side...I kept it on the parent stock. :big:


Well, at least they're not big boo boos, Zee. Easy to make again, right?
(We all do it.) I know you want it correct, but, Loctite is not a sin. I read the Bible
regularly, and I can promise that much.

Oh, and it's 42
And on my list; Greer Garson.

People will have to read both our threads if they want to know what we're talking about.
Maybe that will keep you out of the archives.
; )

Dean
 
42 is the "Answer to the Ultimate Question of Life the Universe and Everything".
Not that anyone ever stated what the 'Ultimate Question' is. ;D

Greer Garson...very understandable...but your answer is incomplete. I look forward to seeing it in your thread. :big:

I wasn't happy saying 'rats' just once tonight. I needed a second opportunity.
So I had another go.

This time the slip fit was beautiful. Just right. No wobble.

But darn it. I totally forgot to turn for only .4".
When I trial fitted the drive wheel for a press fit...my opportunity was fulfilled.

I think I'm a day machinist (if I may be so bold to use that term). :big:


Back
Top