Benchtop Mill Depth Stop

Home Model Engine Machinist Forum

Help Support Home Model Engine Machinist Forum:

This site may earn a commission from merchant affiliate links, including eBay, Amazon, and others.

Brian Rupnow

Design Engineer
Project of the Month Winner
Joined
May 23, 2008
Messages
14,997
Reaction score
8,295
Location
Barrie, Ontario, Canada
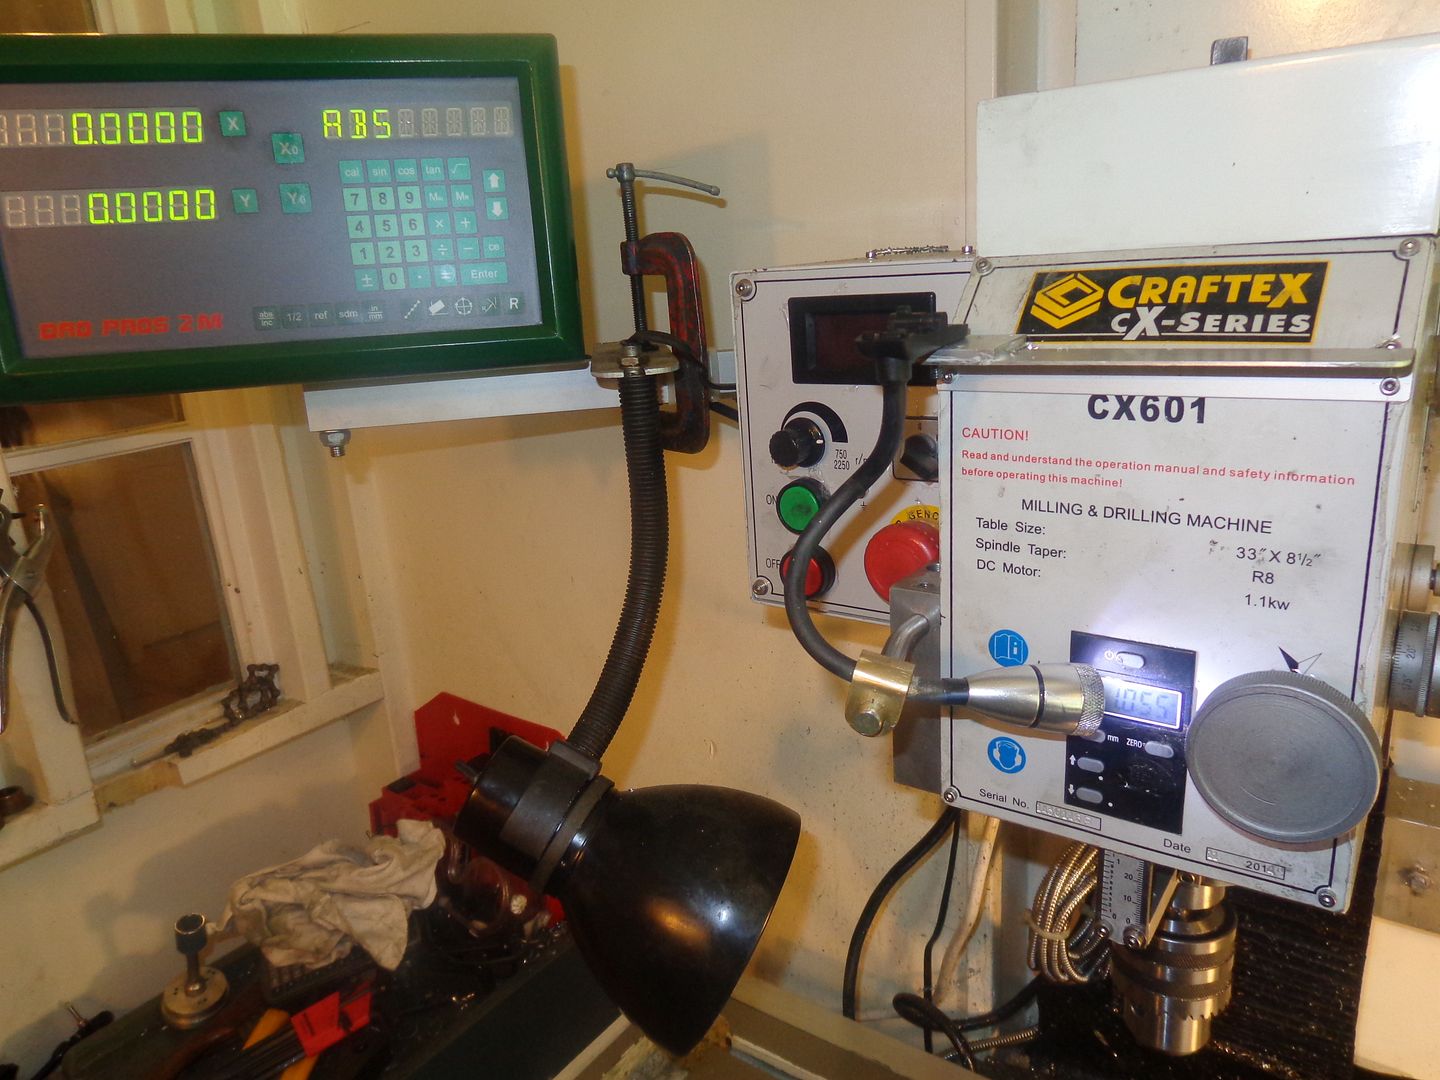
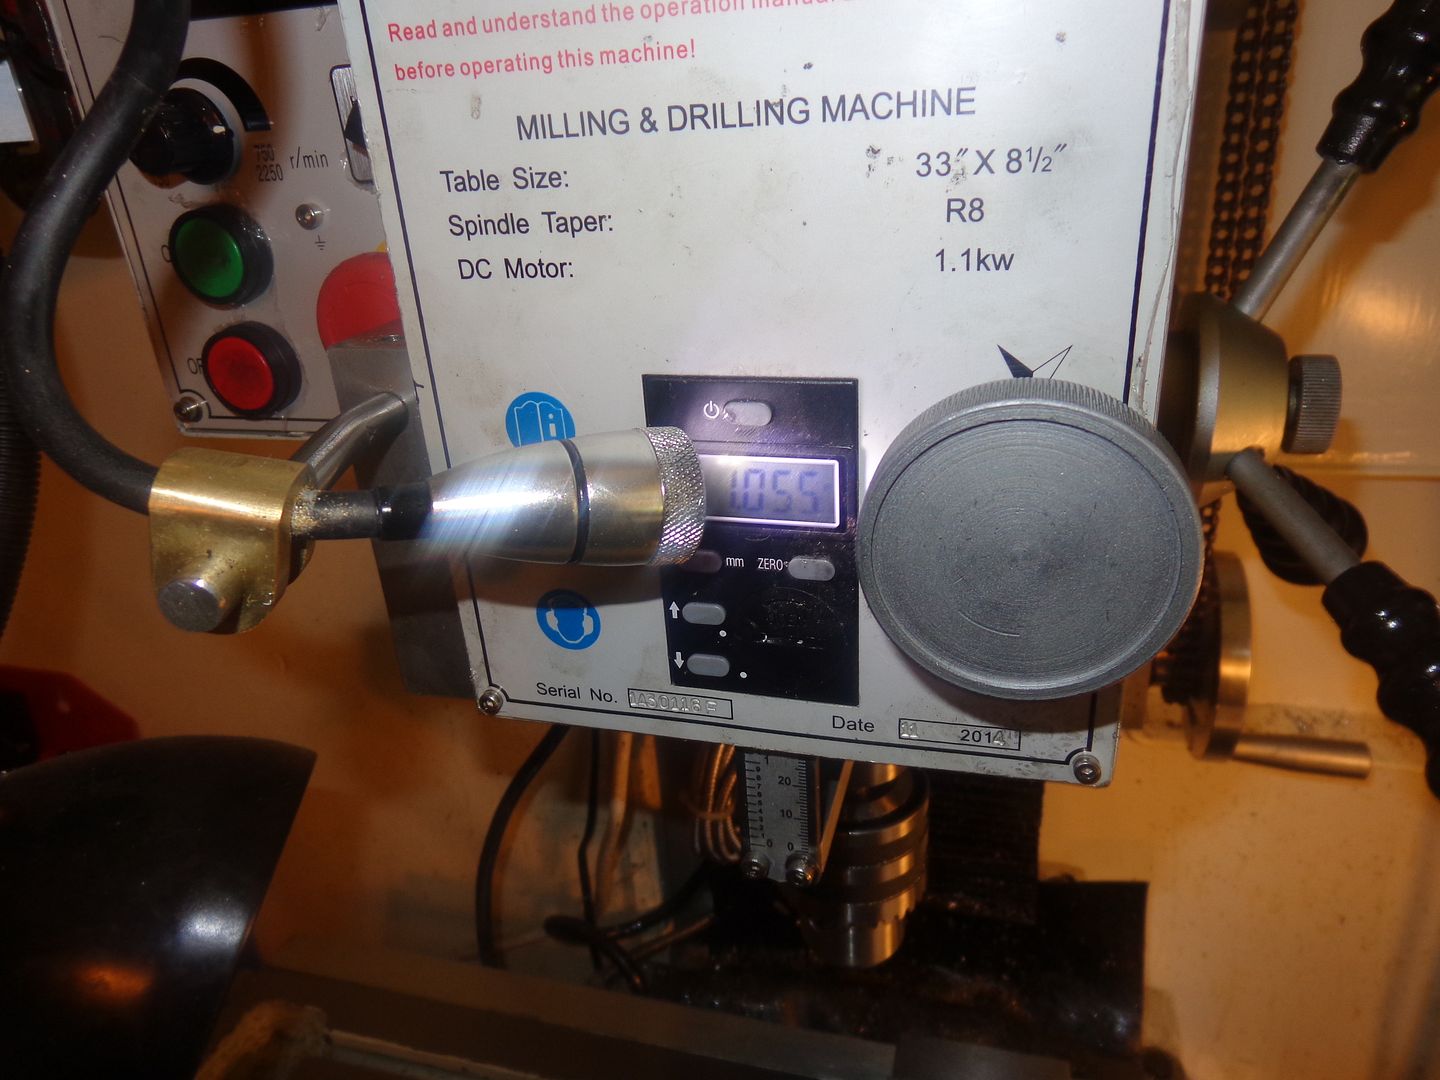
I am pleased with my new CX601 mill from BusyBee, in spite of a few initial "teething" problems. (Which were solved by removing the pin inside the spindle that mates with an R8 shank.) I purchased a set of 2 axis DRO's from DroPro in California, and almost immediately regretted not buying one for the Z or vertical axis. The mill comes equipped with a digital readout on the Z axis, but it is small and very difficult to see. I had some idle time this week, so I set out to solve the lighting issue with an $8 LED light with a semi-flexible "neck". While deciding how to mount it, I made the decision to get rid of the clear lexan chip guard on the front of the machine, and make a bracket for the light which would pick up the holes that had originally held the guard support in place. While I was at it, I decided to add a vertical depth stop similar to the one I had built on my previous bench top mill. I find this a very worthwhile addition to this type of mill. I will take you step by step through what I am doing in case you have a similar mill and wish to add an adjustable depth stop.

 
Last edited:
These views are from the underside of my mill head, showing it fully retracted in the first picture and extended about 1" in the second. The large diameter ring which has the horizontal bracket attached to the digital readout will serve as the mounting point for my depth stop bracket. This ring is part of the outer spindle body, and does not rotate, but does go up and down with the spindle advance handle.

 
I measured the outer diameter of this ring, added 2", and that was the diameter that I roughed out of two pieces of 3/4" plate which were bolted together. One half is tapped 5/16"-18 and the other half is drilled and counterbored for a 5/16" socket head cap screw. The ring on the spindle nose is .70" thick, so that will be the finished thickness of the 3/4" plates when I clean them up on the lathe.
 
Last edited:
Using first the 4 jaw chuck to grip the outside of the bolted together plates, I faced the exposed side and bored the center hole to a finished bore of slightly less than the 3.540" spindle ring diameter. The largest drill I have is 1", so a goodly portion of my afternoon was spent hogging out that center hole with a brazed carbide boring tool in the lathe. I then put the 3 jaw chuck on and gripped the internal hole, flipped the plates over to expose the other side for facing, and turned the outer diameter to finished size.
 
And here we have the machined split ring, mounted on the large diameter ring on the end of the spindle. Remember--I turned the inner diameter to about .003 to .005" less than the outer diameter of the spindle ring, so the bolts which hold the two halves of the split ring together clamp it in place on the nose of the spindle.---more to follow.
 
And here we are with an extension bolted to one side of the ring, a piece of threaded 3/8" rod screwed into a thread in the extension, and a couple of knurled and threaded brass finger nuts. The threaded rod passes thru a clearance hole in the aluminum bracket bolted to the side of the mill where the lexan shield support used to go. Now I can set the nuts for a certain depth and have repeatability on the stroke of the spindle. Not something you use a lot, but it sure is great for those jobs where you need it. Now all I have to do is reconnect (possibly make a new) bracket which runs from the spindle ring out to the digital downfeed readout.
 
So, there we have it. All done up and ready to Rock and Roll!!! I was able to shorten and re-use the original bracket which ties the spindle to the digital readout. This has been a nice little job that will pay for itself time and time again, and it helped me put in eight hours that was otherwise "downtime".----Brian
 
Bazmac--I probably could. I find that if you have a mill, a lathe, and 50 years of machine design experience, you can fit almost anything to anything.:p:p
 
I have a G0704. I bought one of the rolls of LEDs about 15 ft long for about $10. I cut two strips the length of the mill head and stuck them to some aluminum angle and screwed that to the bottom edge of the mill head. That give two strips of light right under the head. It provides great work light with no shadow.
 

Latest posts

Back
Top