A Small Vertical Steam Engine

Home Model Engine Machinist Forum

Help Support Home Model Engine Machinist Forum:

This site may earn a commission from merchant affiliate links, including eBay, Amazon, and others.
Jan you have done great work on your crank and bearings. Looking good and I am interested to seeing how unique the engine will look when complete.

Don
 
Jan, interested in the crank journals. They appear black in the last photograph is that anodise or some similar form of treatment?
Brian
 
Thanks for the comments, nice to have some company:)

Brian, the black on the crank is just a trick with the light, the crank is all polished steel. With a single lamp you can move it around so that some parts of the crank reflect no light to the camera and so appear black. My idea here was to get a bit more contrast to better define the shape of the parts.
 
My plans for tool making have been delayed by lack of material. It was my intention to finish the bottom end of the engine first and work up but I started on the cylinder anyway!

A piece was cut from a 25mm plate and squared up using a flycutter. Holes where drilled for the bolt on bits followed by work on the ports. It's all pretty straightforward stuff, just drilling and some light milling. The inlet ports where drilled before milling to give the 1/16" cutter an easy time.

Ports.jpg


With the ports done it was off to the lathe to bore the bore! The picture shows the setup for centring the block, the runout was just a little vibration on the needle.

Cylinder4Jaw.jpg


With the bore done the passages for the inlet where drilled followed by rounding the cylider end.

RoundingCylinder.jpg


Final pic shows work to date; the holes need tapping, the rounding needs filing and I need to finaly decide where to put the inlet and exhaust.

CylinderSemi.jpg


Tomorrow is a new day and I don't know what I will make yet:)
 
Now Vince that would be an honour!!!! I love making small parts and parts with small features. The Sherline mill excels at this sort of work and does exactly as it is told. Buying best quality drill bits and end mills also makes a huge difference.
 
Hi Jan, glad to see you back at again. The cylinder looks great.

Don
 
I was waiting for some leaded steel to start on the nuts but it's not coming so I got on with the job with steel on hand. Steam engines tend to use a lot of nuts so it seemed wise to develop some kind of method to get the job done a little quicker; this is my effort.

Start off by turning a piece of bar, part 6mm to fit a collet and the rest the diameter across the corners of the nut. In this case 5mm for M2.5 nuts. Each of these blanks will produce 5 nuts. The blank is mounted in a collet block and the hex milled. The overhang of the part is a bit much but it works fine with gentle cuts.

Nut1Mill.jpg


The blank is returned to the lathe and the flats polished first. It is a devil of a job trying to polish an individual nut;) The hole is drilled, the washer face turned and the nut parted off. Repeat a further four times.

Nut2DrillTurnPoff.jpg


Tapping is carried out using the mill vice. The nuts are packed up using a parallel and a guide used for tapping.

Nut3Tap.jpg


Nut4Tapped.jpg


If this seems like a lot of work it is! Having a method speeds the work and with practice I hope it will be less of a pain. No finished nut pic yet, they all need deburring and I have had enough for now:D
 
Hi Jan,

I don't think you will have any trouble with the use of Loctite and pins for the manufacture of the crankshaft if you make the tolerances just enough to allow the Loctite to penetrate, which from the photograph you obviously have. The pins I would Loctite in as well, the reason being when I made a similar crankshaft although the pins were as I thought a tight fit, one came out of the journal due to the centrifugal forces when spinning it in it's bearings at high speed. I noticed it before it did any damage.

Brian

My I add on.
Do ensure the Hi Strength Loctite is not made in China. It cost US$20 for a 50ml bottle in Singapore and !0 Rmb(US$1.5) for a made in China bottle.

I have use Loctite to hold crankpins with good results.
 
A little more progress with the engine, lots of things part done and a few finished:) 
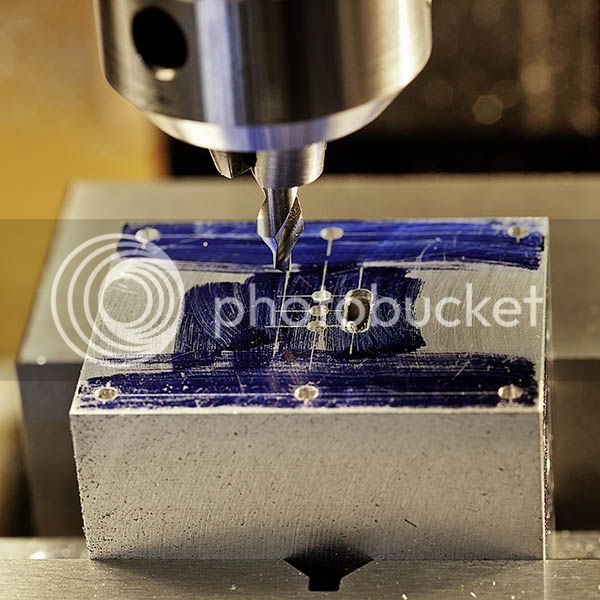
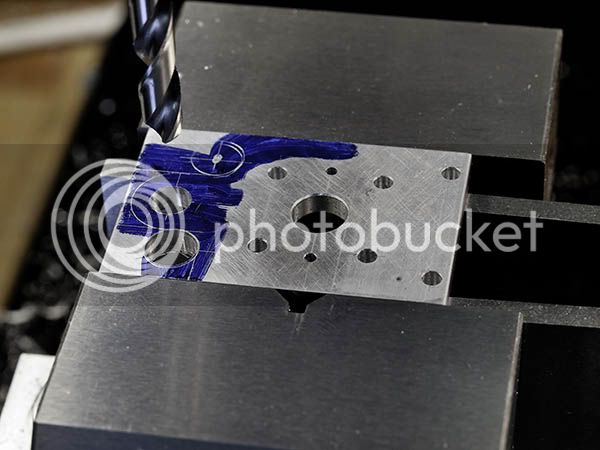
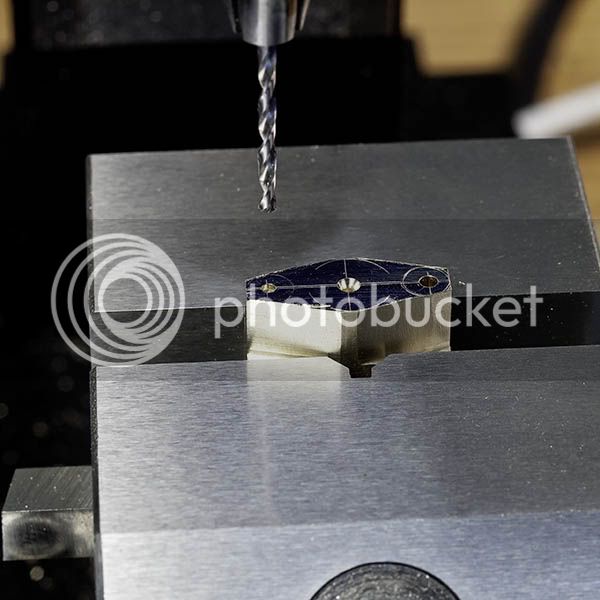
The cylinder base is a straightforward piece of milling and drilling followed by the usual filing/sanding. The geometry is marked out first but machining is carried out using coordinates from one corner.

DrillCylinderBase.jpg


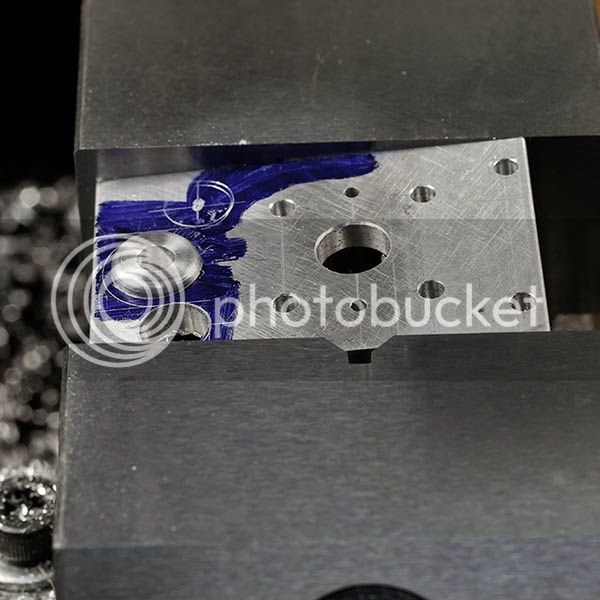
The hole for the stay bar needs to go in at six degrees so the base is twisted in the vise and the hole bored with a slot drill.

DrillCylinderBase2.jpg


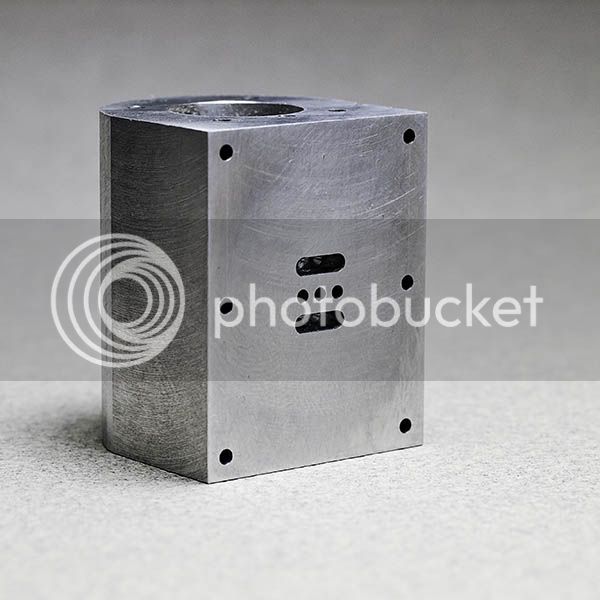
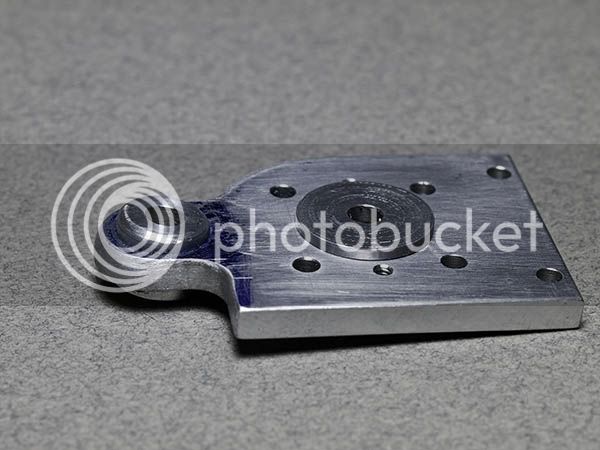
The bush in the centre of the base aligns the cylinder to the rod and provides a home for the gland.

CylinderBaseAssy.jpg


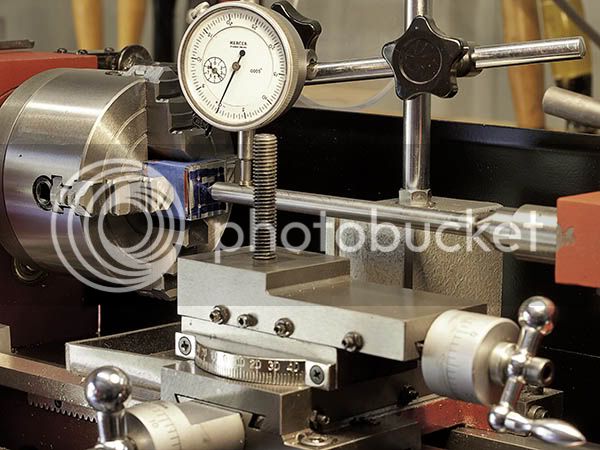
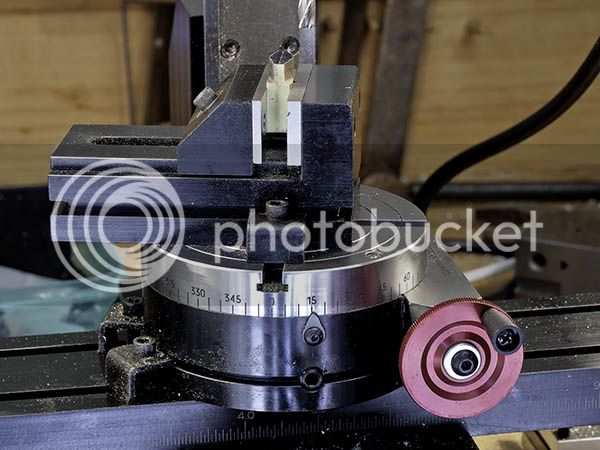
The gland was next up and gave me a chance to use my rotary table for the first time. The angle is set so that the sides can be milled.

MillCylGland.jpg


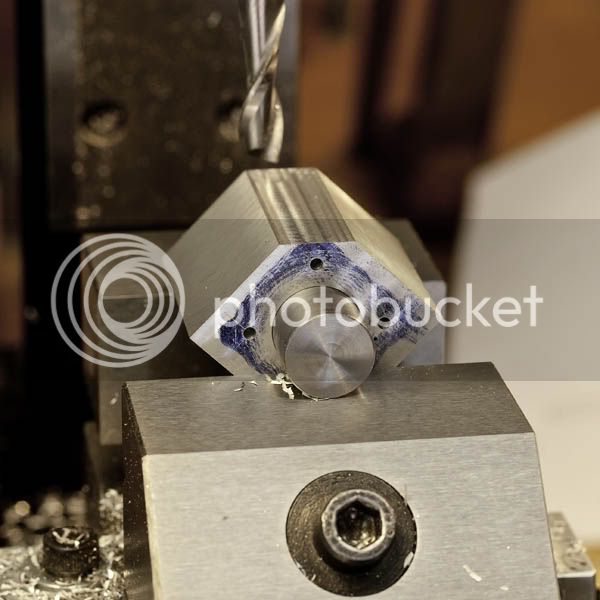
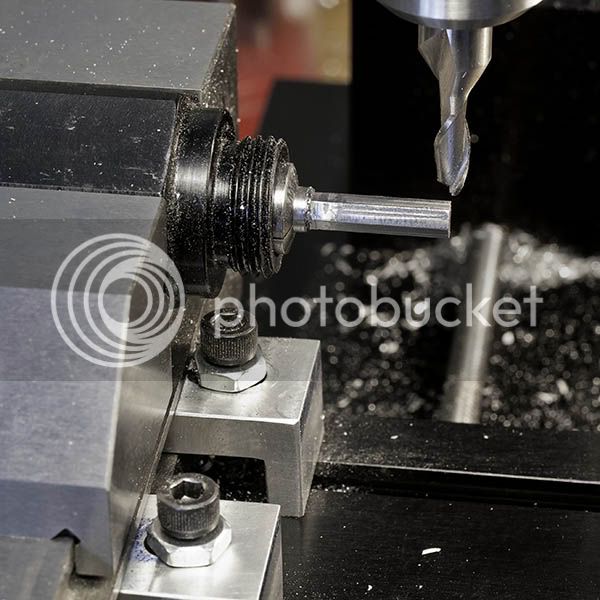
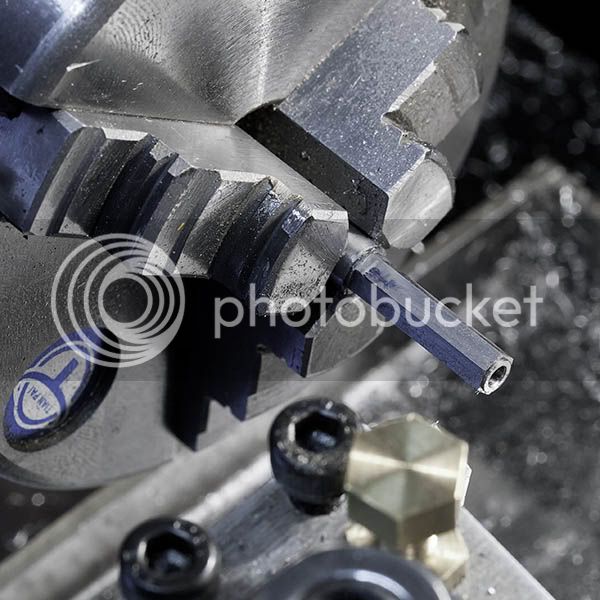
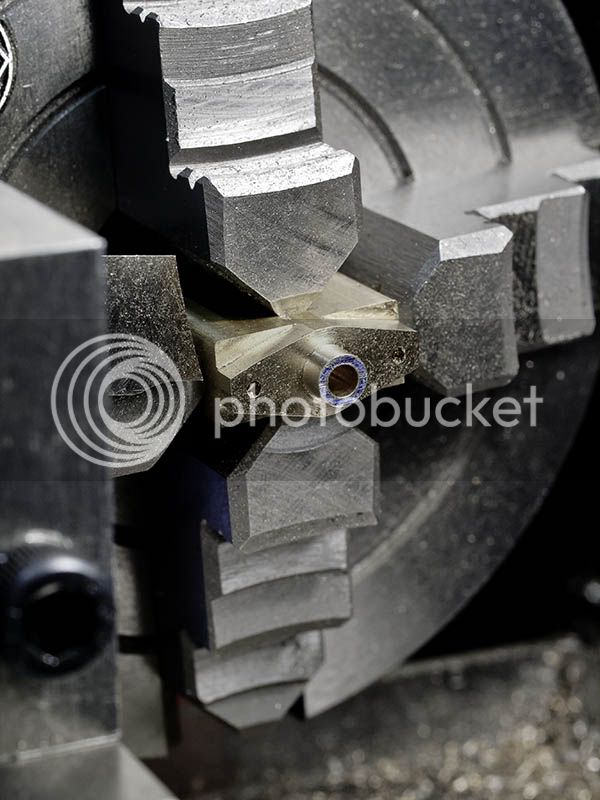
Next step is to drill the mounting holes and centre drill for the piston rod. The hole for the piston rod is best drilled on the lathe when the boss is turned down to ensure concentricity.

GlandDrilling.jpg


The boss was turned and the gland parted off. I then remembered I had intended to cut off the gland with a slitting saw, what a memory? Parting with an interupted cut is not a relaxing passtime.

GlandParting.jpg


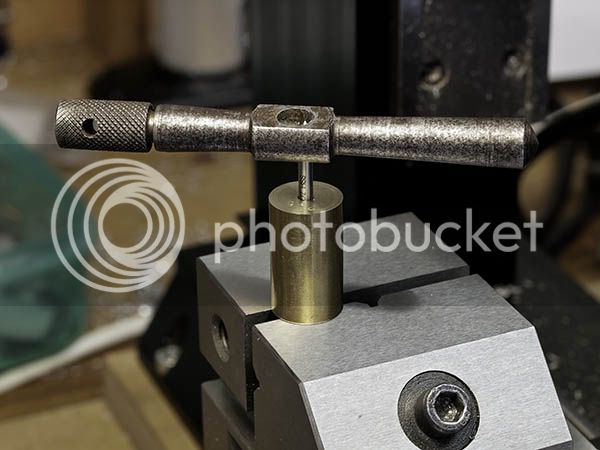
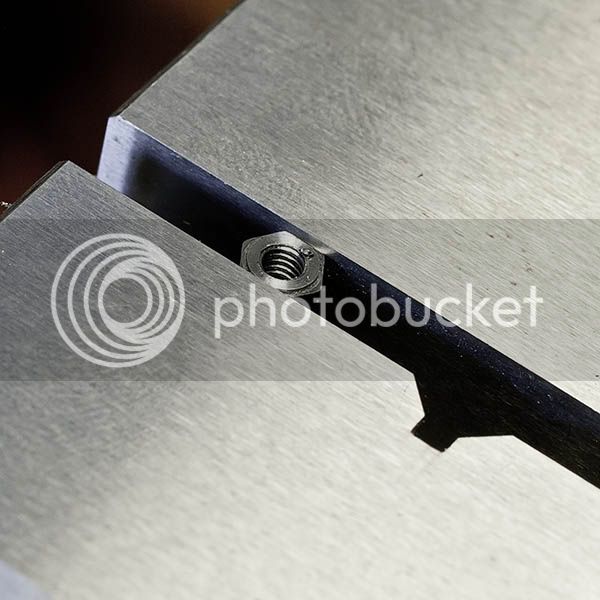
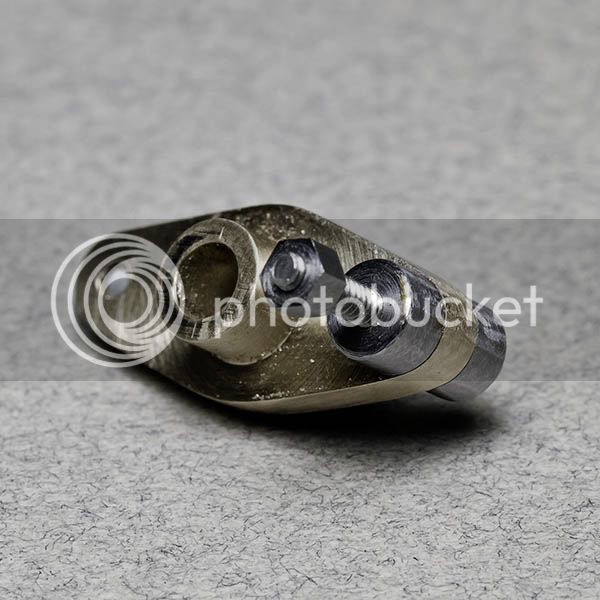
All that was left was some filing and sanding to blend the profiles. I made some buttons up to do the ends, 4mm diameter with M1.6 screw. The nut is only there because I have just made the first of many and it needed a home.

CylinderGland.jpg


That's all for now, I have the week off this week so hope to make more progress. Need to make lots of nuts so not too exciting but quite relaxing.
 
Nice progress Jan. How did you set the six degree angle on the stay bar? Was that done with angle blocks?

Todd
 
Looking good Jan, keep the photos coming, I love the details you give.

Don
 
Speaking as a hope-to-have-a-mill-some-day newbie, I would like to thank you for taking the time to post your pictures and explanations. It has been very educational to me to see how you approach a task. sequence of cuts, set ups, and so on.

Looks like the engine is coming along wel; I look forward to seeing the finished product. Thanks again.
 
Todd, the angle was set using a cheap digital protractor that I bought on ebay. The protractor works better than I expected and is a useful tool.

Don, the pictures have become part of my machining method and help with planning and remebering how things where done. I recently went through the whole set of pictures and was surprised how much was forgotten in such a short space of time. For items that will be made repeatedly I now write a set of process instructions, no sense in reinventing the wheel each time:)

Each weekend sees a bit of progress Vince, but nothing during the week. I work four 9 1/2 hour days along with 2 hours traveling so am pretty dead in the evenings. Still I do get a three day weekend!!!
 
Todd, the angle was set using a cheap digital protractor that I bought on ebay. The protractor works better than I expected and is a useful tool.

Thanks for the info. I have one of those too. I'll have to start practicing with it. :)

Todd
 
  • Like
Reactions: gus
Hi Gus,

I bought my digital protractor on ebay for around $30. You don't even need to level your machine, it has a feature to zero at any angle and then move relative to that point.
 
Hi Gus,

I bought my digital protractor on ebay for around $30. You don't even need to level your machine, it has a feature to zero at any angle and then move relative to that point.

Thanks ,Jan

After years of erecting Ingersoll-Rand heavy compressors in the field ,I am still stuck with levelling from ground up.
You cannot teach old dog new tricks but Old Gus has to learn new stuffs.

In the 50s,if you owned a micrometer,every machineshop in area gets to know of it.Mikes were very expensive and most use Old fashion calipers which I still have.My uncles swear by their insides and outsides.

In the 80s Digital Vernier Calipers cost " an arm and a leg". Today it is must have. Oh!!! Stay away from the cheapies but Japanese or Taiwanese.

Will go into LMS site to look for Digital Protractor.
 

Latest posts

Back
Top