A Small Vertical Steam Engine

Home Model Engine Machinist Forum

Help Support Home Model Engine Machinist Forum:

This site may earn a commission from merchant affiliate links, including eBay, Amazon, and others.

ProdEng

Well-Known Member
Joined
Apr 22, 2012
Messages
249
Reaction score
74
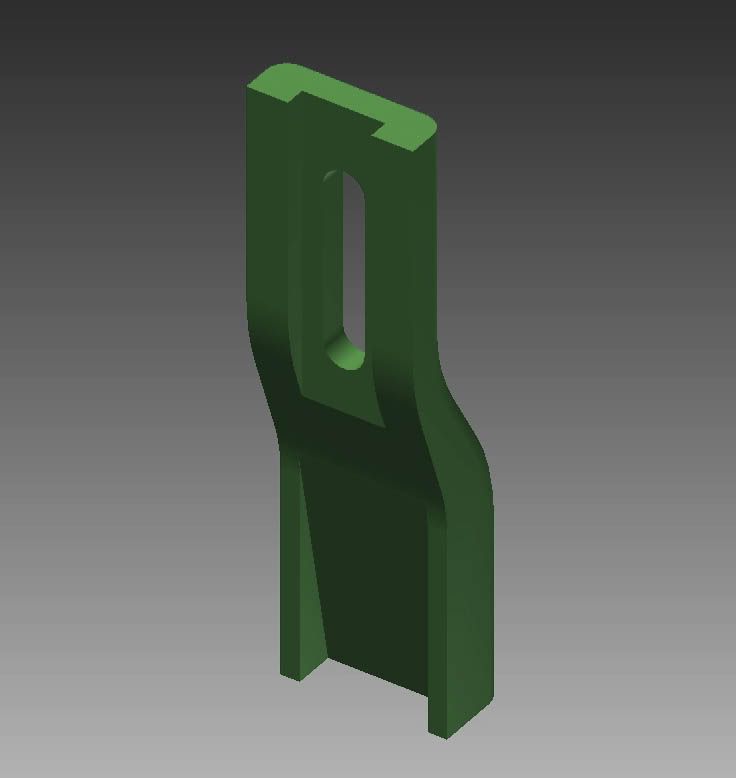
After many hours of modeling I have finaly started on my next project. The design is not set in stone but it should look a bit like the following. I am trying out inline pictures for the first time so hope it works!

7424843296_29103a5425.jpg


7424843170_fb693a4ac0.jpg


http://www.flickr.com/photos/69203564@N05/7424843170/

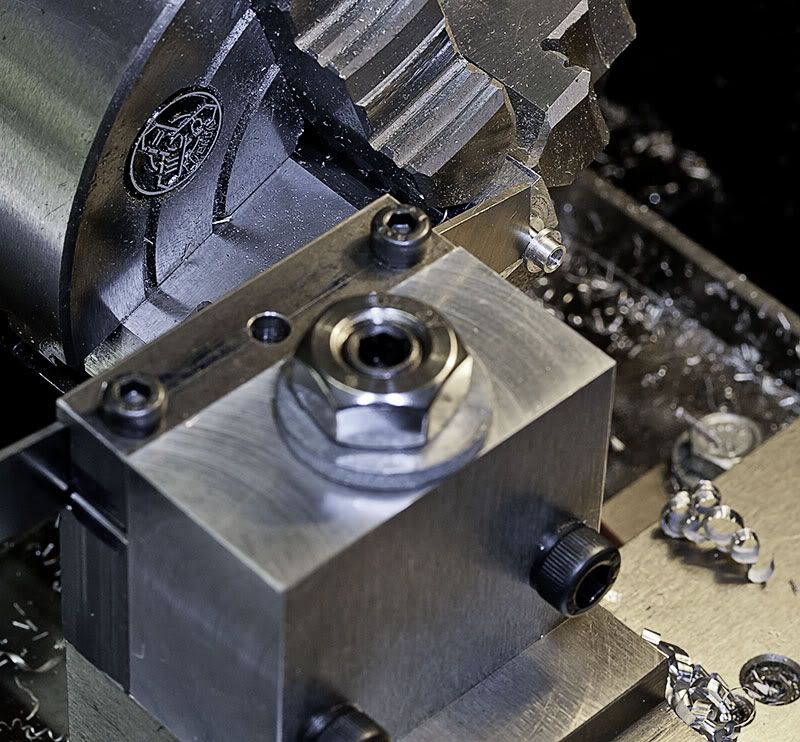
The design consists of bits and pieces from many sources and a lot of changes made on the fly. Every change added more machining, this one will take a while to build.

Jan

OK, so the link doesn't work, all suggestions welcome.

Small Vertical Front.jpg


Small Vertical Rear.jpg
 
Hi Jan

Sorry I can't see the picture.....maybe a missing character in the flicker link?

I'd try attaching the link again....

Dave


Getting there! nice looking engine!

 
Dave,

I have tried every which way and given up, resorting to just uploading the pics. It would be nice to link the pictures as some members have expressed a preference for this method allowing meaningful comments between the images. Does any body else use Flickr and if so how do they do it ???
 
I got the link to work....

The placement of the I think is off I think....where's Arnold! ;D

Dave
 
The idea behind this particular design is to develop some skill in making engines that look closer to the prototype and that can be made with the smallest of machines. The engine stands about 6" tall with a 3 1/2" flywheel. Small machines lack rigidity and power so every effort will be made to use free machining materials as a result of which aluminium will be used for most of the major parts. Despite the fact that me and paint don't get along, this one will be painted.

Machining has started with the feet of the main "casting", and if they are anything to go by, this is going to be a long build. Just a bit of filing to do on these so will start posting pics tomorrow.

What did you do to make the link work?

Jan
 
ProdEng said:
Dave,

I have tried every which way and given up, resorting to just uploading the pics. It would be nice to link the pictures as some members have expressed a preference for this method allowing meaningful comments between the images. Does any body else use Flickr and if so how do they do it ???

I have fixed up the links for you. It was the (IMG) (/IMG) tags that was causing it as Steamer mentioned. Note that the IMG tags must have the Square brackets not the round ones.

Cheers :)

Don


Nice looking engine . i too tried briefly to fix the links. thanks don .
tin
 
Good start Jan; I'm looking forward to your build :)

Don't worry too much about the paint; if you can, get a hold of "How (Not) to Paint a Locomotive by Christopher Vine" - I can really recommend the book.

"...where's Arnold!" - I was in the shop Dave ;D - don't have a computer in there yet... Thanks Don & Tin Thm:

Kind regards, Arnold
 
Thanks for all the help with the pictures, I was keen to get that working before I start posting the build. Don, I will try the square bracket just as soon as I have done a bit of filing on the foot.

I always have money for books Arnold so will place an order. I have an airbrush and a small spray booth from the bit of plastic modelling I have done so it's just a question of improving technique.

More pictures soon :)

Jan
 
Just finished filing up one of the feet , not completed yet still needs the bush glued in and the seam filled before a final sand.

The machining sequence starts with a 16mm square block into which a 12mm hole is bored. The block is parted to 7mm long lenghts ater which the section is cut into two parts. The faces are milled and a spotface machined for the bush. I turned up an arbor to hold the bush to put the radius on.

Jan

Foot Finished.jpg


Feet Boring.jpg


Feet Separated.jpg


Feet Milling Face.jpg
 
Still trying to sort out the inline photos, trying Photo Buket :)

This pic, if it appears, is of my parting holder with upside down blade cutting off the bush.

FeetBushParting.jpg


Jan

Sorted ;D
 
Hi Jan,
Very nice drawings :) which software package did you use?
It looks to be a really promising design and I look forward to following along with the build.
Clive
 
Jan

Congratulations, It looks like you have got it figured out now. It can be very frustrating till you get it working. It only takes 1 character to be wrong to mess up the works. I'll be watching your progress from the sidelines.

Cheers :)

Don

 
Clive,

I use Inventor for most of my drawing, modifications are simple to make and it produces working drawings with ease. As for the design, I can't claim too much credit, I have just assembled bits and pieces from other peoples work, most notably Stan Bray and Elmer. The engine should be fun to make with lots of detail work to complete.

Don,

Thanks ;D It is frustrating but worth the effort when it finally works. The PC is a marvelous tool that I have had the "pleasure" of using since 1986 and could not imagine life without it. However nothing drives me crazy quicker than a misbehaving application :big:
 
Nice start to the project Jan; I'll definitely be along for the ride :)

Thm: Good to see you've got the Photobucket thing sorted.

Kind regards, Arnold
 
Thanks for looking in Arnold.

The next part to make is what I have called the Main Body though I do think it has a proper name. In order to make it look like a casting it has curves and radii and will most likely have more before it is finished.

MainBodyipt.jpg


Generating a working drawing from the model takes a few minutes and produces the following.

MainBodydwg.jpg


The seemingly complex shape can be broken down into two categories of feature, those that are functional and those that are cosmetic. The functional ones are the top and bottom faces along with the bearing face for the cross head. The functional need to be machined first and then the rest is just sculpture ;D Hopefully machining will commence on Friday.

Jan
 
Will be watching this one ;D
Pete
 
Thanks Pete, when the workshop is less than 10C I need all the encouragement I can get! Does warm up a bit by lunch time though ;)

Jan
 
Hi Jan,
This part would be called the column or standard.
gbritnell
 
Jan I will be joining you on your journey.

Vince
 

Latest posts

Back
Top