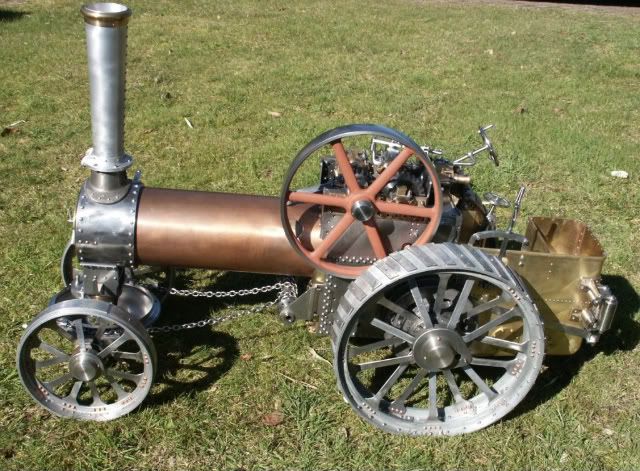
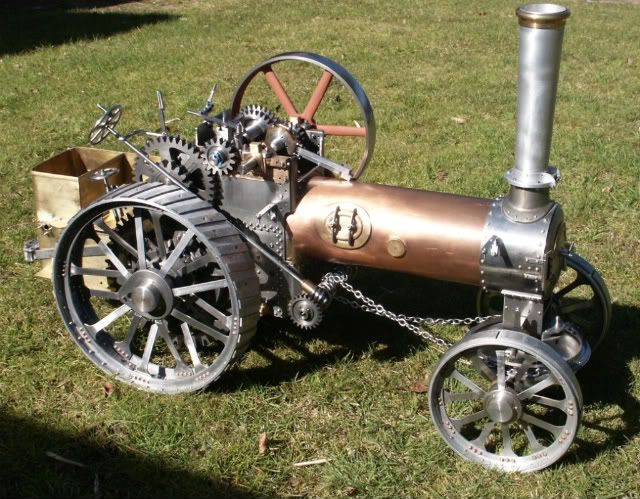
Its been a while since I last posted some photos of progress on the Fowler so here is what I've been upto
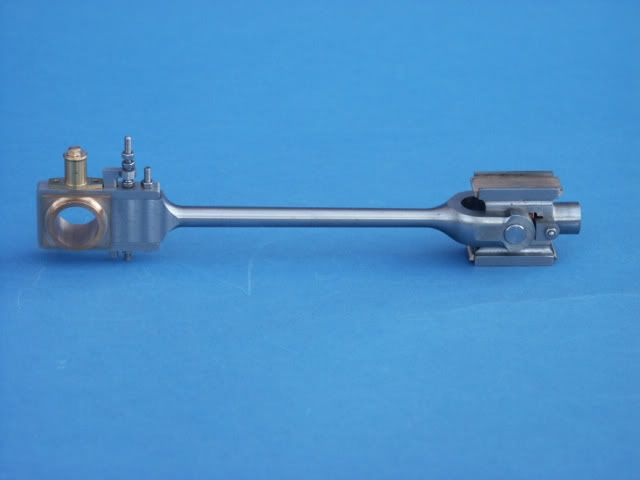
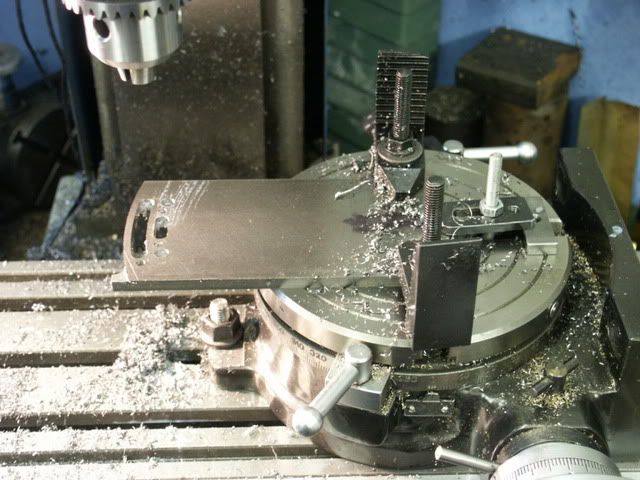
First job was to make a ball turner to do the curves on the conrod. I then used my new rotary table to complete the conrod and crosshead.
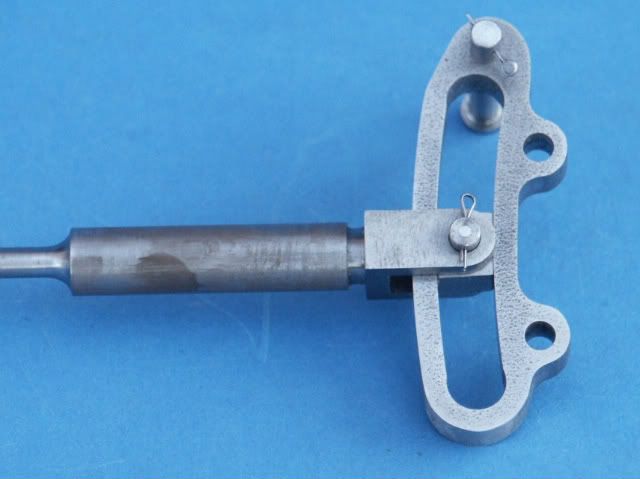
With this done I then moved onto the weightshaft bracket which is cast virtually to finished size so no room for error on the bore for the weight shaft. Lifting link, arm and rod were then tackled
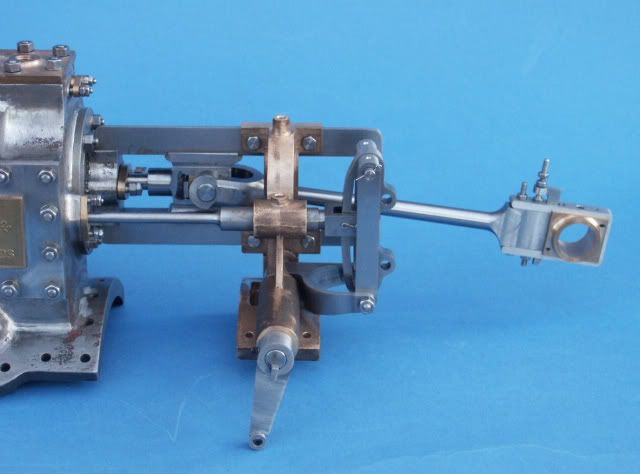
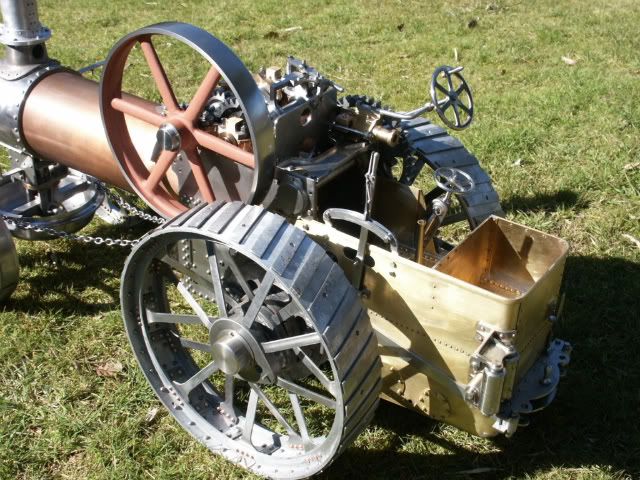
The expansion link radius was small enough to do by hanging a bit of 1/4" flat off the side of the rotary table
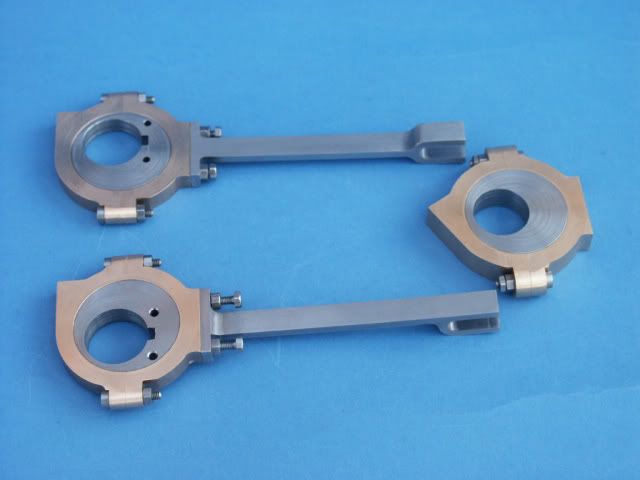
Next on the list were the eccentrics, I did the pump one at the same time as its basically the same just a bit wider. The rods were milled from solid after sorting out an error on the drawings. Still have to drill the forked ends but will wait until the cylinder & weightshaft are mounted to get exact length.
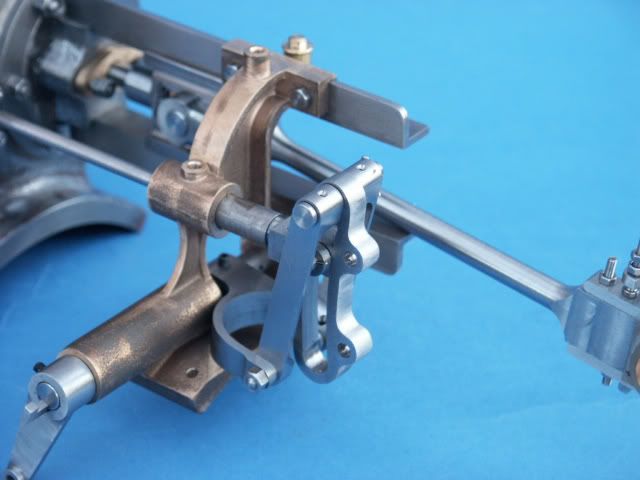
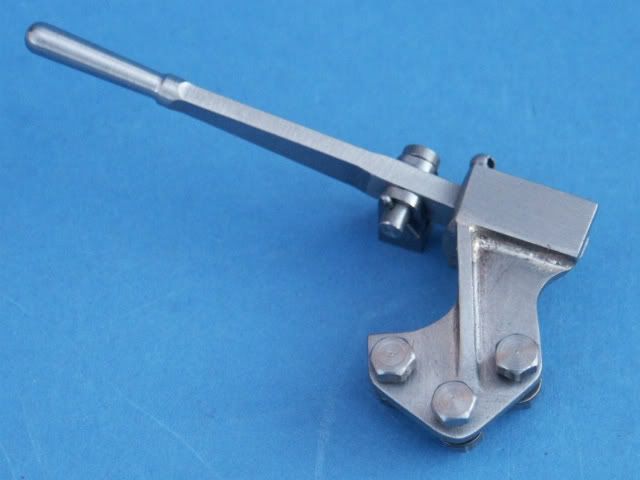
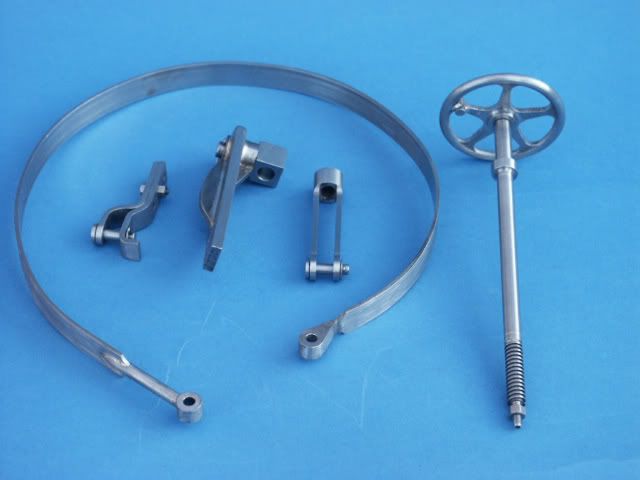
With all these bits done it was time to make something to work them with so did the reversing lever, quadrant etc

While I was doing levers the regulator one and its bracket were fabricated, took a while to work out how to approach this one but did the main bracket in two bits silversoldered together.
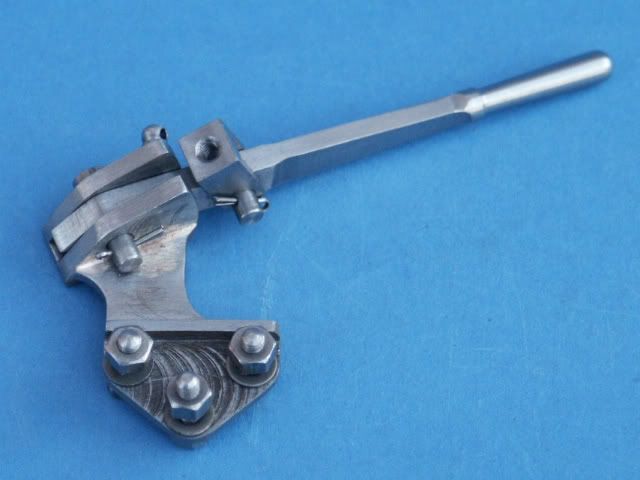
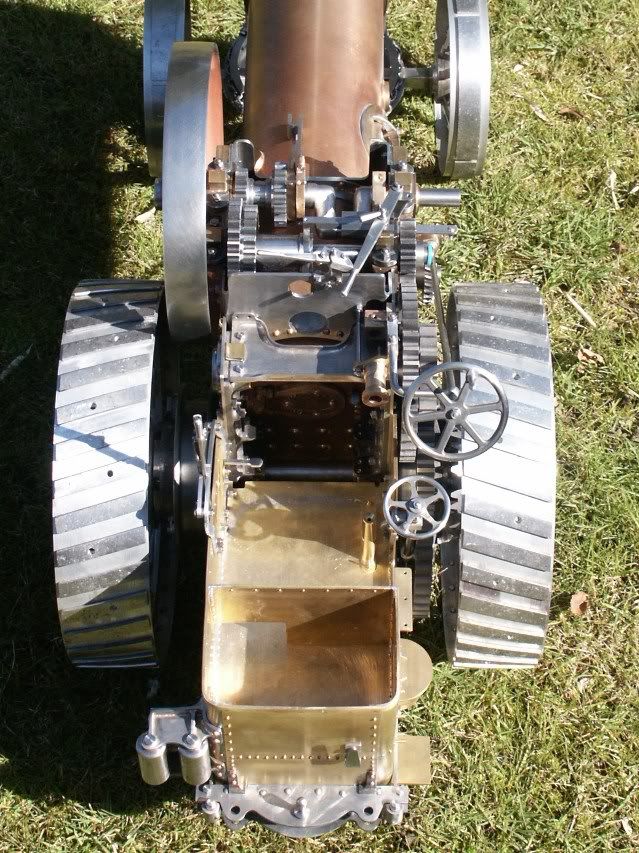
Oops, left some machining marks on that
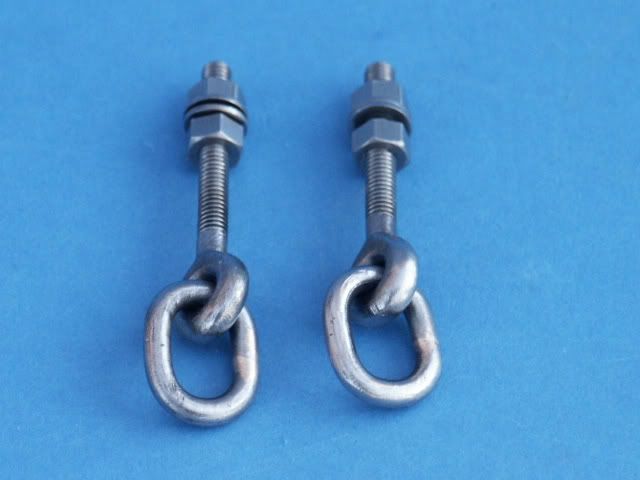
Used a bit of steel that I'd cut off one of the eccentric blanks to make the screw eyes for the steering chain and bent up the big links that go on the end. Not decided yet whether to make my own scale chain or just solder up the joints on some I got from MJ thats not quite the right shape link
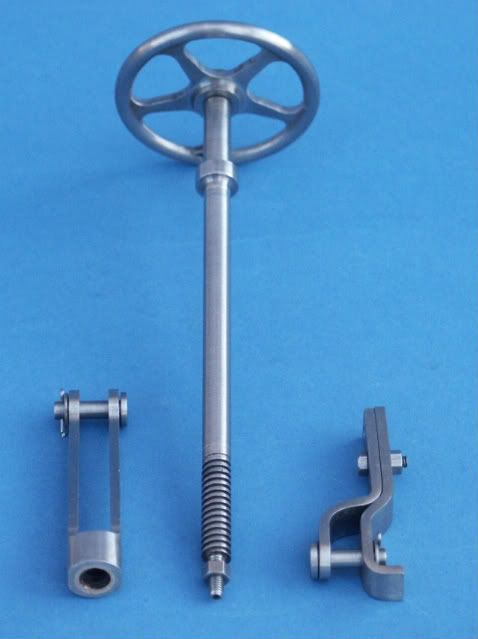
As I'd not screwcut on a lathe before I thought I would leave this 'til over the xmas hols. Quite pleased with how it all turned out. Also made the handwheel as MJ have not had this in stock for a few years, think the stainless steel does not flow well into the thin rim.
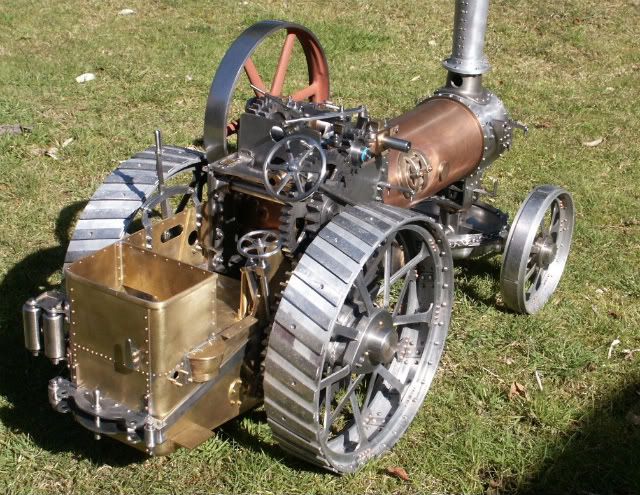
With all these bits done I could test fit onto the tender sides and then there were no more excuses for putting off riviting it all together, all 292 of them Hope my neighbours hadn't been out celibrating as I knocked most of then in on New Years Day.
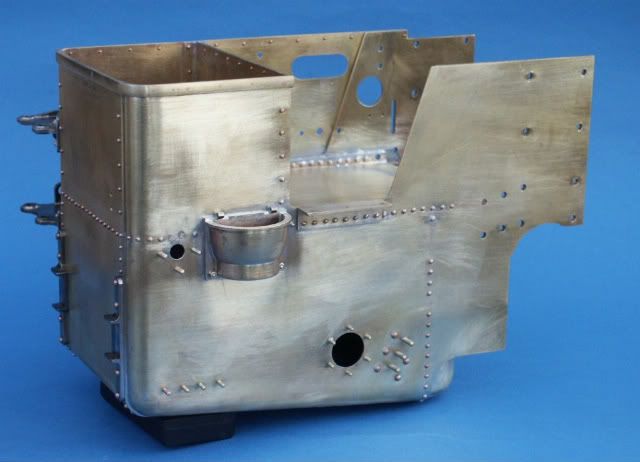
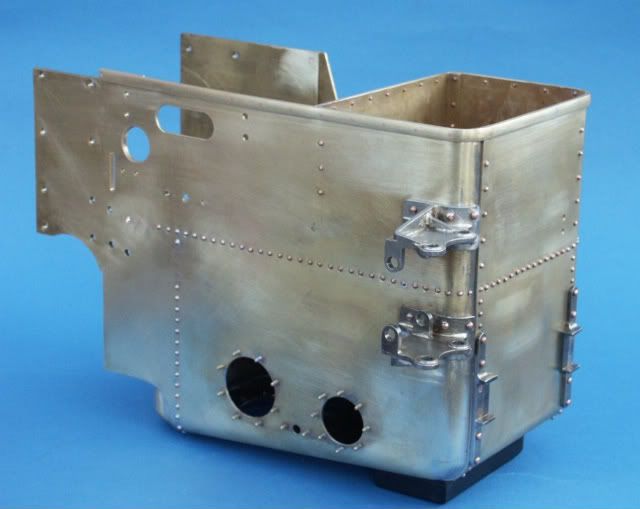
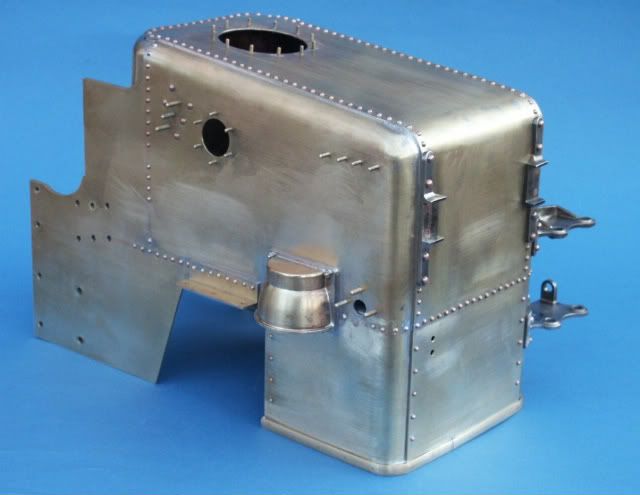
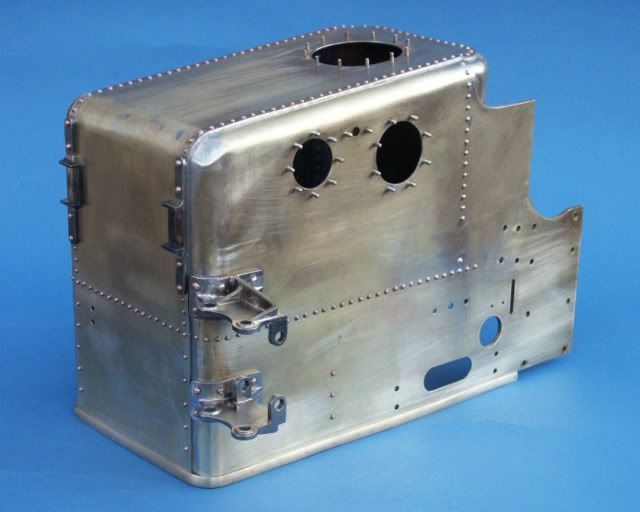
No thats not a dent in the bottom corner, just the way the light is catching it.
Next is to get the cylinder mounted and work towards running on air.
Jason
First job was to make a ball turner to do the curves on the conrod. I then used my new rotary table to complete the conrod and crosshead.
With this done I then moved onto the weightshaft bracket which is cast virtually to finished size so no room for error on the bore for the weight shaft. Lifting link, arm and rod were then tackled
The expansion link radius was small enough to do by hanging a bit of 1/4" flat off the side of the rotary table
Next on the list were the eccentrics, I did the pump one at the same time as its basically the same just a bit wider. The rods were milled from solid after sorting out an error on the drawings. Still have to drill the forked ends but will wait until the cylinder & weightshaft are mounted to get exact length.
With all these bits done it was time to make something to work them with so did the reversing lever, quadrant etc
While I was doing levers the regulator one and its bracket were fabricated, took a while to work out how to approach this one but did the main bracket in two bits silversoldered together.
Oops, left some machining marks on that
Used a bit of steel that I'd cut off one of the eccentric blanks to make the screw eyes for the steering chain and bent up the big links that go on the end. Not decided yet whether to make my own scale chain or just solder up the joints on some I got from MJ thats not quite the right shape link
As I'd not screwcut on a lathe before I thought I would leave this 'til over the xmas hols. Quite pleased with how it all turned out. Also made the handwheel as MJ have not had this in stock for a few years, think the stainless steel does not flow well into the thin rim.
With all these bits done I could test fit onto the tender sides and then there were no more excuses for putting off riviting it all together, all 292 of them
Hope my neighbours hadn't been out celibrating as I knocked most of then in on New Years Day.
No thats not a dent in the bottom corner, just the way the light is catching it.
Next is to get the cylinder mounted and work towards running on air.
Jason