Tramming tool

Home Model Engine Machinist Forum

Help Support Home Model Engine Machinist Forum:

This site may earn a commission from merchant affiliate links, including eBay, Amazon, and others.
Cedge said:
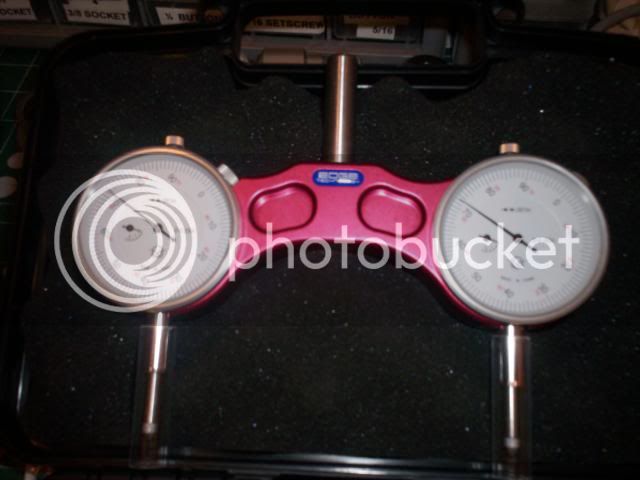
Well said Tin man.... the build was fun, the tool is proving useful and thats' about all the reasons I needed to have a go. It's not the only way to tram.... it's just another way. One should feel free to tram using a DTI, the Nano-Tram or Aunt Maggie's go to meeting knickers. The new tram tool is just how it's being done here.

Tramming is only worth the time it takes if you do it as accurately as you possibly can. Practice with which ever method you prefer, but learn to do it well.

Gerald....
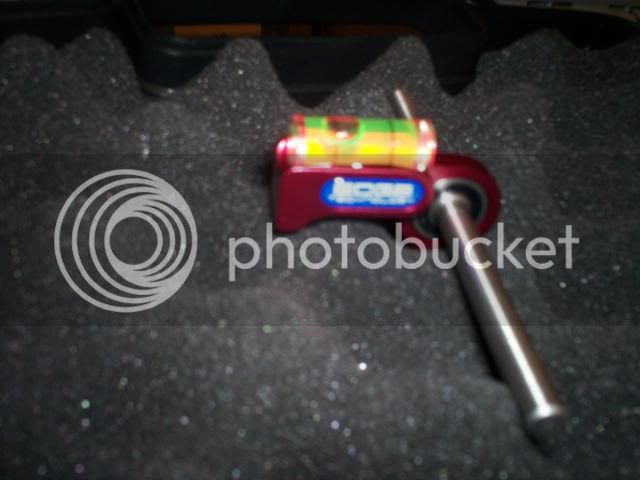
but that's how it doubles duty as a ball bearing fly cutter....LOL

Steve
Hi Steve,
I took a night school course in Machine Shop Basics years ago, and one of the guys complained to the instructor that even on the slowest speed he could not read the dials. Fortunately after the third time he started a lathe up with the chuck key in the chuck hes was given a refund and told never to come back.
Regards,
Gerald
 
Gerald...
I think I probably hired that guy once or twice...LOL

UPDATE:
After having time to play with the tramming tool, I'll have to give it both thumbs up. I had to tweak my design just a tiny bit. I noticed there was an inherent error in the shaft alignment of about .0001 that was making it annoying to hit the mark when reading the indicators.

This was solved by putting the tool back in the lath and turning the base again to true it to the shaft and then cutting a relief in the bottom surface. This gap assures that only the ends make surface contact during calibration. The deviation disappeared and the tool now lets me adjust the tram to my satisfaction in about 2 minutes or less.

Neat tool, works as advertised, makes an sometimes annoying job easier and saves time. I'm declaring it a keeper here.... one well worth the $20.00 it cost me to build.

Steve
 
I am a little lost as to why one would need to tram the bottom of the vise? I soend all day working as a machinist and I have found that if you tram in the mill off the table and then stone the bottom of the vise, you should not have any error if you are using a vise such as the Kurt.

Does anyone have a reason for doing this that I am not aware of? I have trammed the top of the vise before due to a set up that called for me having to rest the part there...but after that I had to remove the vise and re tram the head to the table.


All in all a great tool because acting like a Giraffe to read a DTI on an Indicol can be tough but as someone else said...the sweep you are testing is a little small for me.
 
Steve, You know how I am 'bout loosing things, When you bring this over I might just loose it till you're gone. ;)
But tell me this, I read about squaring the bar and all but if I were just to throw a bar of alum Rect in the mill. As long as I carfully drill and ream all three holes without removing the bar you don't need to machine the faces of the bar any do ya? Seems like you just need the arbor shaft and the holes for the indicators to me parallel to each other in X - Y. I have no issues at all tramming in a Bridgeport. But this seems like a very good way to do it.


Turk88 said:
I am a little lost as to why one would need to tram the bottom of the vise? I soend all day working as a machinist and I have found that if you tram in the mill off the table and then stone the bottom of the vise, you should not have any error if you are using a vise such as the Kurt.

Does anyone have a reason for doing this that I am not aware of?


Turk88, I depends on the kinda' work you are doing and how accurate you need to be. Where I work now and the stuff I do at home for pay is not super precision work. Vise on the table and parallels under the part. The last place I worked ,also first place, we never used parallels. We didn't even have them in the shop. When you set up a job, soft jaws were put in the vise and machined. The vise's were always indicating straight with table but jaws were still machined. It would definitely be worth the time to check the bottom of your vise against the table.
 
Turk
As a general rule, I machine in the vise, which effectively makes it the "work surface". By tramming to the work surface, any deviation from the vise and table top are canceled out.

I began by tramming the mill table and then installing the vise. I then checked the tram in the bottom of the vise, which to my surprise was within a half thou of the table for parallel. (advertised as plus or minus .0002) I gave the head a bump for luck and it settled in at zero.

I then checked the results with a 3 1/2 wide fly cut. Both sides of the cut were visible even with the smallest movement of the quill. The swirl was even from both sides and made a perfect cross hatch pattern across the length of the test cuts.

The most important change was in shimming the column. There is now less than .001 deviation from vertical, I'd remove that too, but I can't think of anything I have on hand that's thin enough to do it....LOL. Since the column is now physically restrained by stainless shims, I'll check it occasionally to make sure nothing has moved.

Steve

 
Turk88 said:
I am a little lost as to why one would need to tram the bottom of the vise? I

I agree with that, if the vise base and ways are not parallel, that needs to be rectified....I mean they should be parallel at least to within a thou which is as much as is reasonable to work to on one of these mills. Its not hard to fix if fixing it needs.

What you need are a pair of double sided gauges and then you can read from all angles including the back.

Four Indicators !! :big:

As a general rule, I machine in the vise, which effectively makes it the "work surface". By tramming to the work surface, any deviation from the vise and table top are canceled out.

not really, you should be able to depend on the top of the table being parallel to the dovetail. if there is any deviation from vise to table, tramming to vise will not get the mill head trammed to the plane of motion (the dovetail).....better to check/fix that the vise surfaces are parallel then you know the vise ways are an extension of the table's work surface. if there was this deviation, you'd have to tram to the table then shim the vise into tram - what a lot of bother! better just to make sure the vise is parallel and tram the table.

not that is necessarily the case with this one, but in general, I'm leery of various tramming devices, there's been lots of gimmicks over the years...they introduce sources of error, don't improve performance and you don't see experience pro's using them. here's my low tech device, big wide tramming circle using a granite parallel (a luxury I'll admit), tenths indicator and the better half's compact - don't tell her where its gone!

trammingmill.jpg
 
McG...
Easy now... I'm not trying to make the DTI method obsolete...LOL. I'm just sharing results of a different way to do it. Cat skinning... eh?

You are perfectly correct, assuming a dovetail problem, but then you'd have larger issues than simple tramming. Since the deviation is so small here, I have no problem working to the vise surface, but note that I did mention that I checked the table first.

Nothing wrong with the tried and true methods, but it never hurts to explore ideas as they come along. For the $20.00 spent, it was well worth the effort to give it a try. I've only shared my results, rather than suggesting everyone should build one. It worked for me and it's proving to be easy and efficient... that's all I was looking for.

Steve
 
2 of my Xmas presents. I must of been real good this year!
001.jpg

002.jpg


Merry Christmas Everyone!
Matt
 
Hey Matt, what's the smaller widget in the foreground with the level? Haven't seen one of those. Is it a lathe tool center height gauge? Got a link?
 
Matt, those are some very neat tools. I just trammed my mill last week, useing a pathetic assembly of poorly made import indicator rods with 'fine' adjustment, that wasn't 'fine' at all. :rant:

Pretty soon you'll have more trick stuff than Inspector Gadget. Thm:

Go, go gadget :big:

(Inspector Gadget was a television cartoon series)

-MB
 
1Hand...
Still using mine with great success. It's just easier to use and the accuracy has proven to be spot on.

Steve
 
When I got my first Mill I mentioned to a skilled machinist at work my concerns over getting the head perfectly vertical and he suggested the simple bent rod idea at the top.
It's not clear in the picture but the end that contacts the table has been turned to a cone with a flattened bottom:

IMGP0094.jpg


Although slow it works very well as it works over a large distance, about 600mm on my current mill. I made the one in the pic when I got my new mill a couple of months ago and then when I had a free minute made the other one in the picture which speeds things up a little. If I get two identical dial gauges I'll maybe make something similar to what's been shown.

IMGP0095.jpg


Vic.
 
Metal Butcher said:
Matt, those are some very neat tools. I just trammed my mill last week, useing a pathetic assembly of poorly made import indicator rods with 'fine' adjustment, that wasn't 'fine' at all. :rant:

Pretty soon you'll have more trick stuff than Inspector Gadget. Thm:

Go, go gadget :big:

(Inspector Gadget was a television cartoon series)

-MB

I loved that guy when I was a kid! People call me that now with all my prosthetic attachments I've made.
 
Cedge said:
1Hand...
Still using mine with great success. It's just easier to use and the accuracy has proven to be spot on.

Steve

I think your tramming tool is great. I've been wanting to build one for a while. So when the wife asked for a list for xmas, I had 2 DI's on there to build one with and some other stuff, and I came across this one while surfing one night. She took the list and this is what I got.

And, She got me, lucky her!!!....lol and an Ipod.

Matt
 

Latest posts

Back
Top