zeeprogrammer
Well-Known Member
- Joined
- Mar 14, 2009
- Messages
- 3,362
- Reaction score
- 13
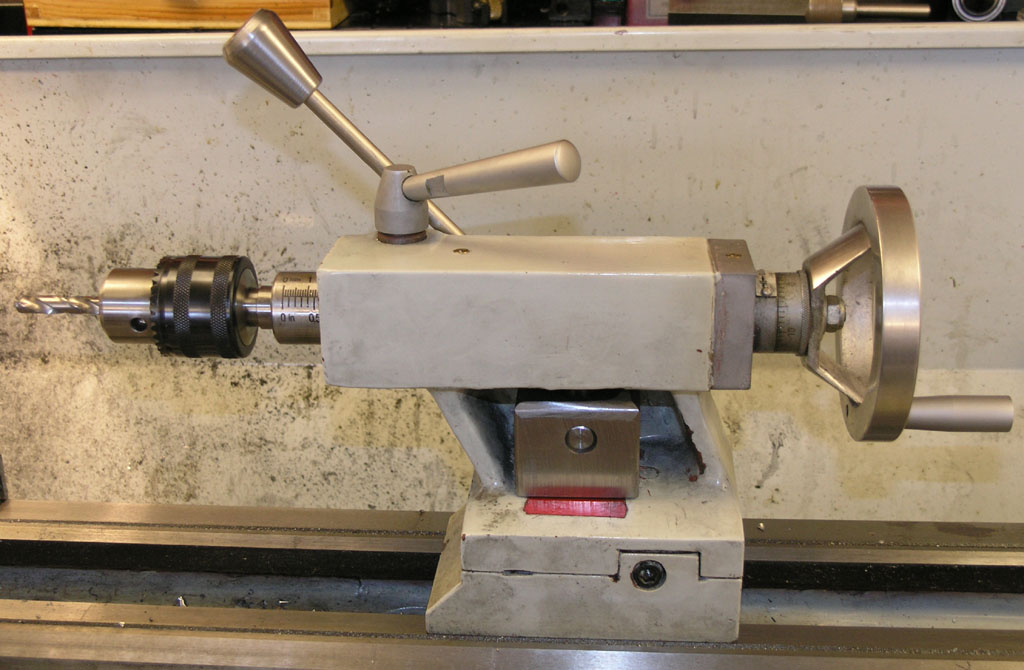
Added a tailstock cam lock for my 7x12 mini-lathe.
This has been done before...and some of you have even made your own...here's another store bought...
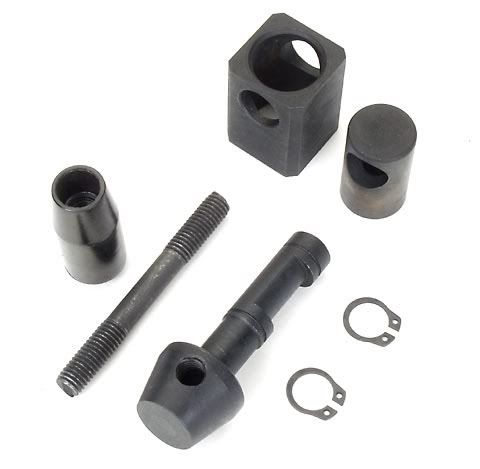
For $30 from LMS (way too high in my mind) you get the following...
It's 'easy' enough to install...but naturally I had my 'special' issues.
Started with drilling the hole in back. 1/8,1/4,3/8 to 1/2. Rats. My drill doesn't hold a 1/2. So I mounted it on my cheesy drill press and used the clamping kit from the mill to hold it down. Man what a racket! I had safety glasses on but went to a full face shield when I started having images of bits of drill bit coming at me.
Messy hole. Cam lock shaft still didn't fit. Hit the hole with a file.
Now for the retaining ring. I had been smart enough to get retaining ring pliers but dumb enough to get cheap ones. Didn't fit the clips. Filed the ends of the pliers down and good to go.
Installed the rest of it. Now it was time to test it! Nope. Nothing. Instructions suggest rotating the sleeve. It's better but I don't think it's tight enough.
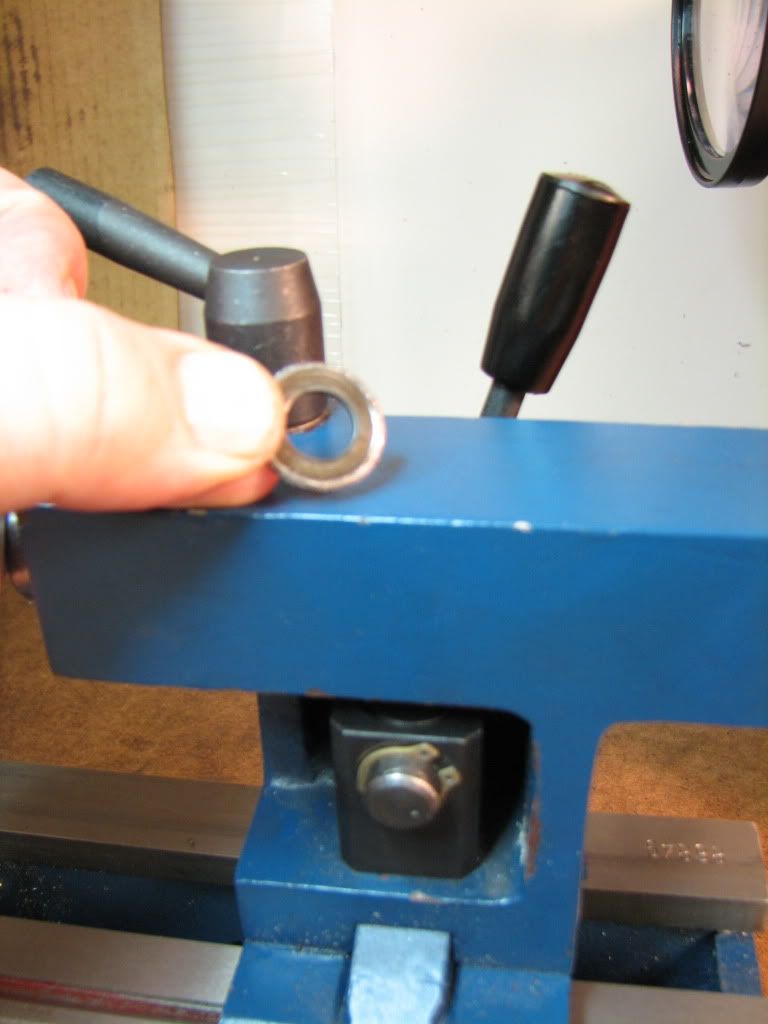
Well...just like a 'nop' helps in software, or a 'capacitor' helps in electronics...looks like a 'shim' under the sleeve should do the trick.
Also pictured is the original washer that sat under the nut. I think it's obvious I've been over-tightening. I seem to have a bad habit of using too strong a touch. Probably my biggest 'weakness'. :big:
This has been done before...and some of you have even made your own...here's another store bought...
For $30 from LMS (way too high in my mind) you get the following...
It's 'easy' enough to install...but naturally I had my 'special' issues.
Started with drilling the hole in back. 1/8,1/4,3/8 to 1/2. Rats. My drill doesn't hold a 1/2. So I mounted it on my cheesy drill press and used the clamping kit from the mill to hold it down. Man what a racket! I had safety glasses on but went to a full face shield when I started having images of bits of drill bit coming at me.
Messy hole. Cam lock shaft still didn't fit. Hit the hole with a file.
Now for the retaining ring. I had been smart enough to get retaining ring pliers but dumb enough to get cheap ones. Didn't fit the clips. Filed the ends of the pliers down and good to go.
Installed the rest of it. Now it was time to test it! Nope. Nothing. Instructions suggest rotating the sleeve. It's better but I don't think it's tight enough.
Well...just like a 'nop' helps in software, or a 'capacitor' helps in electronics...looks like a 'shim' under the sleeve should do the trick.
Also pictured is the original washer that sat under the nut. I think it's obvious I've been over-tightening. I seem to have a bad habit of using too strong a touch. Probably my biggest 'weakness'. :big: