Rocking Engine

Home Model Engine Machinist Forum

Help Support Home Model Engine Machinist Forum:

This site may earn a commission from merchant affiliate links, including eBay, Amazon, and others.

SBWHART

Project of the Month Winner!!!
Project of the Month Winner
Joined
Jan 17, 2009
Messages
887
Reaction score
81
When I was skiming through the John Tom drawings I saw the rocking engine: and thought it was a osilating engine and passed it by, the name intreged me so a few days later I went back for another look, that,s when I got hooked, I love novelty engines like this and its small size suites the type of work I like doing and it looked like It could be a weekend project:- as I'm going to retire in two weeks I thought they would make a nice presents for couple of work friends.

It's also a good delaying tactic to avoid assembling my locomotive I'm building, a change is as good as a rest.

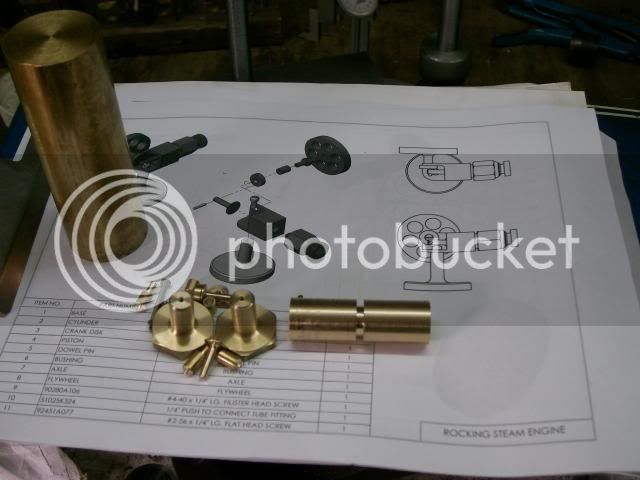
These are the drawings
http://www.john-tom.com/MyPlans/SteamPlans3/RockingSteamEngine/ROCKING STEAM ENGINEs.pdf

Any of you chaps made this engine ?

I'm a great beliver that its just as easy to make two of something

First job do all the turning bits.

100_2141.jpg


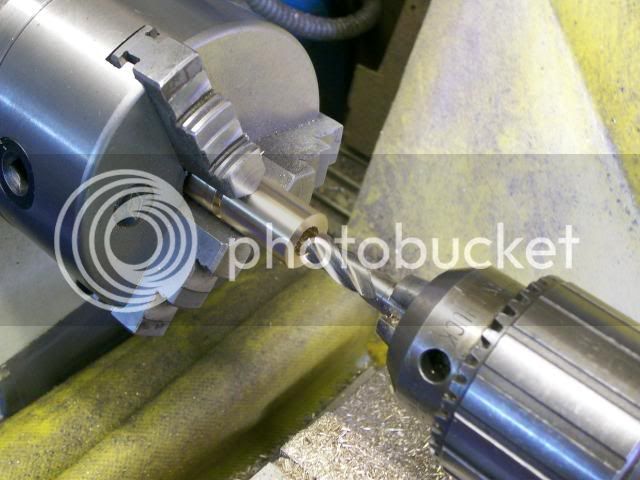
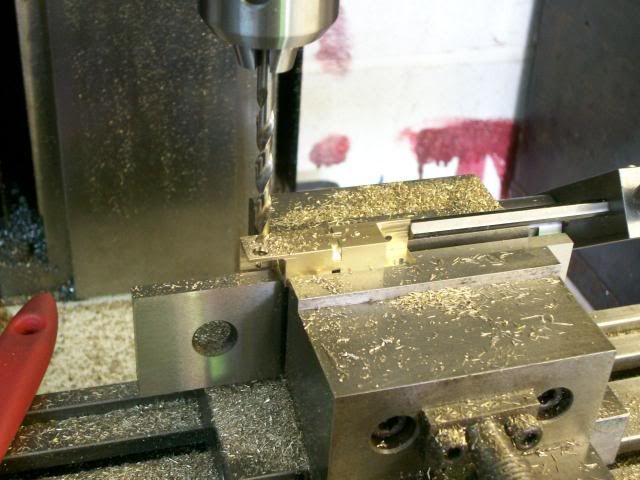
I made the two cylinders together to speed up the work, turned the OD of the cylinders to the size of the square diagonal, put a groove to show where the join would be, and used a 3/8" end mill to finish off the flat bottom hole.

100_2140.jpg


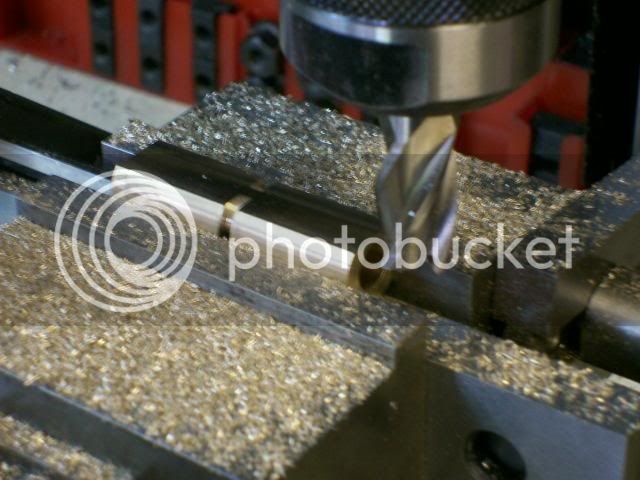
To mill the square set up in vice touch down on the job set DRO to zero mill off 1/2 the difference of the diameter and across flat size you want zero DRO, flip it over 90 deg with the flat against the vice jaw mill down to zero flip it over 90, mill off the remaining difference zero dro, flip it over finish off other side you've got a square.


100_2143.jpg


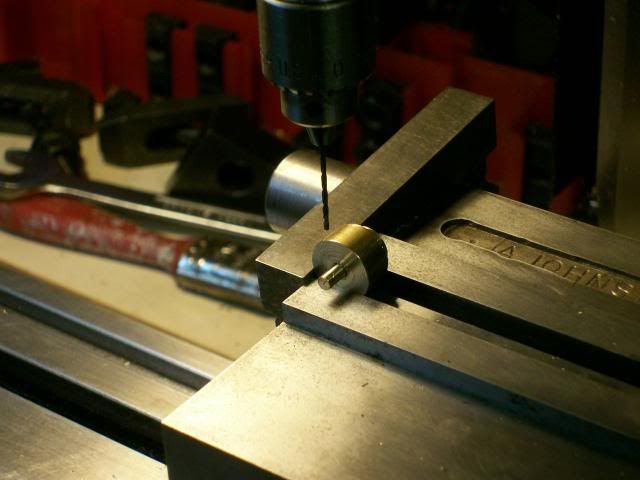
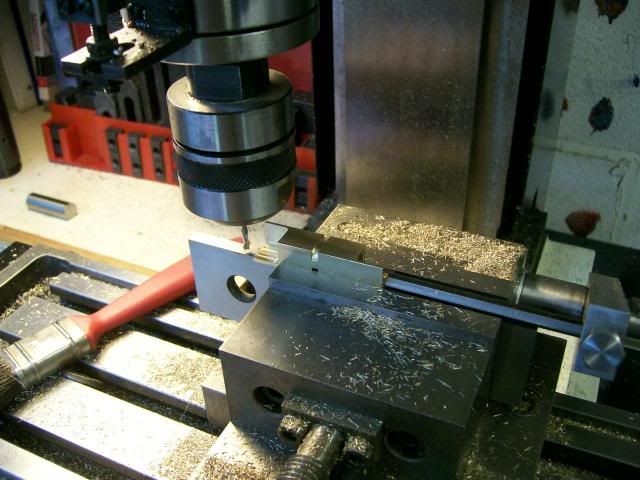
To mill out the pocket for the crank I used a long reach 1/8 slot drill set the job up in the mill with the vice stop, milled the first pocket out zeroing everything up, turned it round and making sure it was up against the stop and milled the seconf pocket working up to the zeros, the same routine was done for the crank and stand holes.

100_2146.jpg


100_2151.jpg


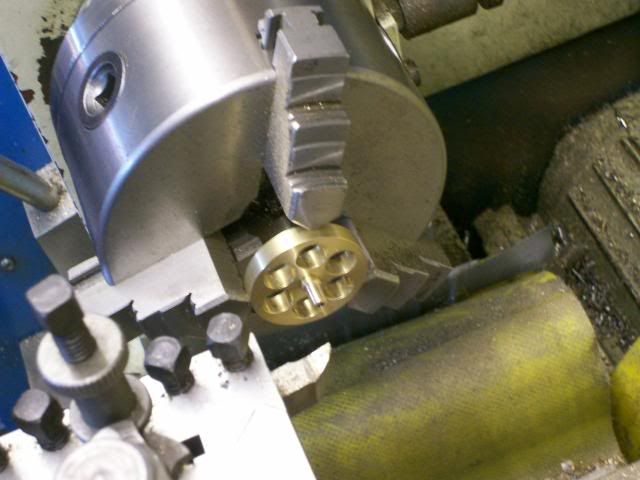
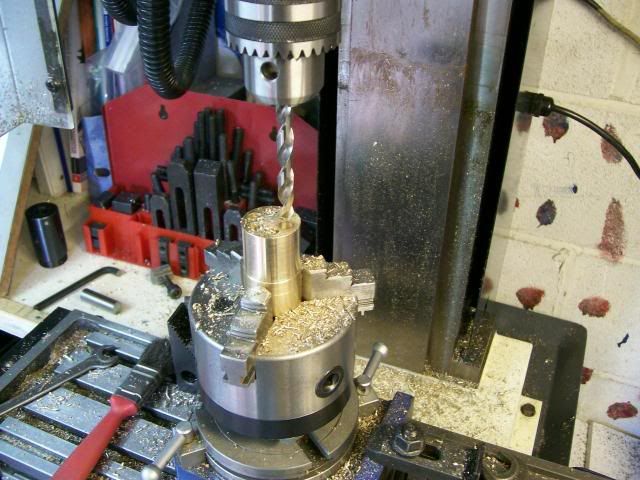
For the flywheel turned down the bar to size then transfered them over to the RT in the mill and drilled the spoke holes deep enough to make two fly wheels.

100_2153.jpg


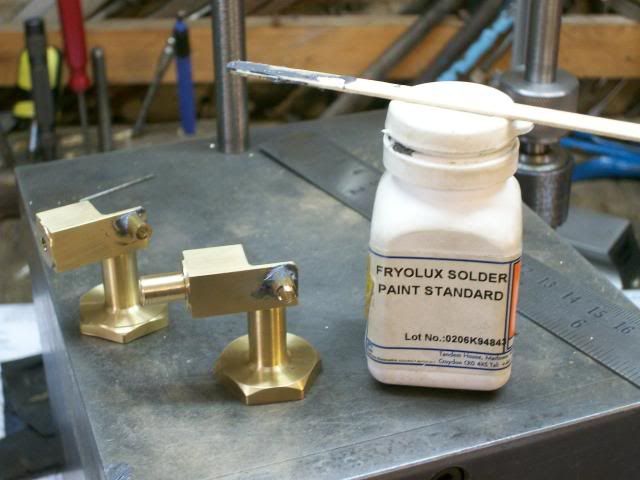
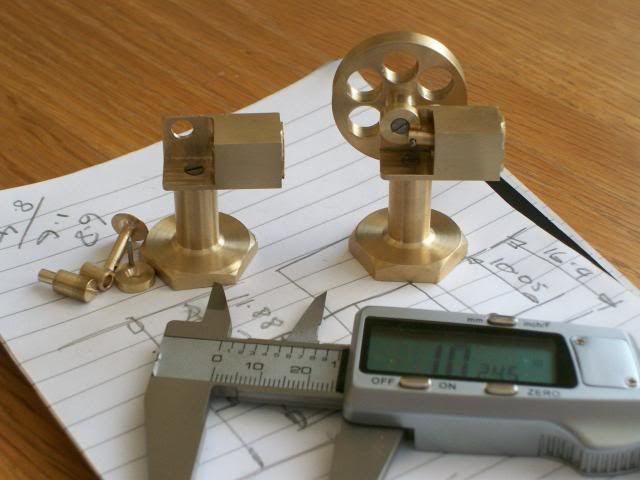
This is one engine finished off with the second waiting for the flywheel

100_2160.jpg


Does it work

NO :redface2:

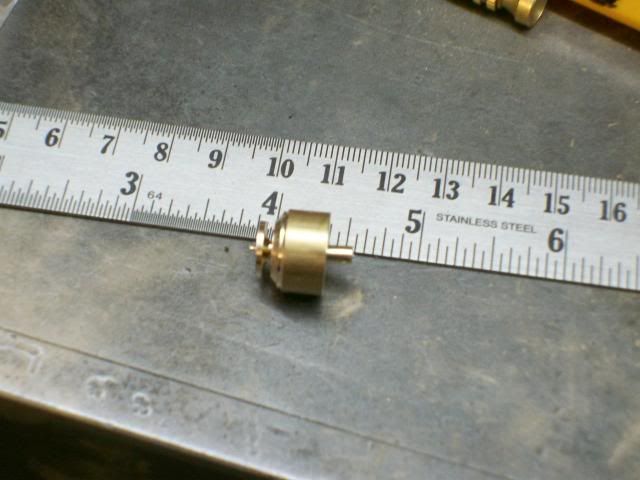
If you look at the photo showing the finished engine it sitting on a pad with a lot of figures on it, a quick measure and a calculation and yes I'd drilled the piston wrong and it was bottoming in the cylinder :wall: I'll just have to make again.

Slightly embarised

Stew
 
Not to worry, you will quickly put it right..... :)

Dave
 
Hi Stew Nice to see you on this site. Lots to see and learn here. I, like yourself am also a NEWBIE. I am retired from Bell Canada (14 years). Good luck on your upcoming retirement. Bill McKinley
 
SBWHART said:
I'd drilled the piston wrong and it was bottoming in the cylinder. I'll just have to make again.

Can't you just plug the hole and redrill in the correct location?
 
Hi Chaps

Bill my retirement comes after 45 years with the same company I started as an apprentice when I was fifteen, its been a long time coming, I've been digging the escape tunnel for the last ten years, thanks for your good wishes.

Rleete thanks for the suggestion, but as the crank hole is just 1.2 mm, I think I'll just make new it won't take too long

Cheers

Stew

 
Neat little engine. I made a replacement piston for an old aquarium air pump that worked the same way... well, the exact opposite way. ;D
 
Stew,
Here is a video I found a while ago on some engines and compressors using the same type piston:

[ame]http://www.youtube.com/watch?v=W5Imb5xO3qQ&feature=poptnjrf4a[/ame]

It took me a while to find it again but your build reminded me I'd seen it somewhere.
The exaggerated claims sound flaky of course :headbang:

Dave
 
Hi Chaps

Well I made a new piston and fitted it all together


AND


ITS A RUNNER

But


It'll only run upside down

:big: :big: :big:

What I've found that it ony needs a whisper of air any more and it just locks up in the forward position.

To get it running correct way up I think I need a better fit in the bearing, also the contact area on the bearing is only small so I'm thinking I may change the design to increase the contact area so you get a better fit without slop.

I've been adviced by a Chap on another forum that the drawings are a bit vauge as to fitting a sleeve between the cylinder frame and the fly wheel, we think that the intention is for this sleeve to be a press fit into the frame, I left mine lose, this would then act as a bearing and take the slop out of the system. So what I intend to do is sweat this sleeve in with soft solder I'll post a C o C of the change.

Even upside down it runs sweetly nice and slow with a puff, puff, puff, a real nice interesting engine well worth the effort of building.

Still trying but having fun

Stew
 
Well done Stew - nice engine!

It's been added to my to-do list as well. At the risk of sounding completely daft (which I just may be :big:) - I just could not figure out how it works until _just_ :idea: now!

Oh yes, congratulations on your upcoming retirement!

Regards, Arnold
 
Here's my version of this little guy...

TINY.jpg


I didn't want to faff about making a flat-bottom hole so I simply drilled a piece of 1/2" square brass through with a 3/8" drill, then made a brass cap for the outboard end and Loctited it in place.

It's a fun weekend project and the kids love it because they can make it work with breath power. It's a great little runner but, with that valving arrangement, its efficiency really sucks.
 
Sorry for hijacking your thread a bit Stew :-[

Thanks Marv - maybe I must take some time out of my other build and just make this one! - I think my efficiency probably sucks more than this little machine :big: - maybe a weekend's not enough!
OTOH - maybe I should just pull my finger from "you know where" & "Just do it" !

Regards, Arnold
 
arnoldb said:
Sorry for hijacking your thread a bit Stew :-[

Regards, Arnold

NO problem Arnold I enjoy getting feed back and banter going on these threads the more off topic the better (sorry Mr moderator)

Hi Marv thanks for showing your engine they are nice little fun jobs.

Stew
 
Marv: thanks for the pic
Stew: nice build as far as stirring Up banter I am watching you like a bird of prey ;D LOL
Arnold: took me a bit to see how this one works as well I think the Indiana Rog Temple of Steam site. site showed me. When I first saw the prints I was looking for the missing pages of parts.
Tin
 
Well got the little gem running right way up, not without a bit of trama, any way a little up date.

As you know I had a bit of trouble getting the piston crank drilled in the correct position so what I did is make a little drilling aid, it was a simple bush that I slipped the con rod through to grip the piston for drilling I was then able to pick the edge of the vice up and Zero my dials and index to the correct position for drilling, worked like a dream.

This is the bush with a piston in place

100_2163.jpg


And this is it in use

100_2169.jpg


Then instead of a lose bush thing that the drawing shows I made a bearing with a 4mm hole and shouldered to fit into the cylinder, I soft soldered this in place using solder paste, great stuff this for little jobs

100_2178.jpg


Turned down the spindle for a nice fit in this bearing.

100_2179.jpg


At first when I assembled it together it still wouldn't run right way up but it fiddled with it a bit tried a tighter fitting piston this didn't work, I'd gaven it a good oiling so stripped it down cleaned all this oil off and tried running it dry and away she went right way up wrong way up any way which.


:big: :big: :big: :big: :big: :big: :big: :big:

And just to make sure you guys are infected her's a vid

ROCKY I the movie


[ame]http://www.youtube.com/watch?v=23dc8D4MRr0[/ame]

Do you like the exit stage left


Have fun


Stew

 
Very nice job.
Not just the machine (beautiful work there) but also in giving 'projectitus' to several people. ;D
Please be more careful as I understand there is no cure. :big:
 
Must...resist...projectitus...

Great video. That wee beastie has more bark than I expected. I guess it is exhausting straight through...

Man, I could build one of those, mount a little fan on it, magnetic base, and drive all my coworkers crazy listening to it all day. ;D

No... must resist...
 
Stew,

Very nice. :bow: :bow:

SBWHART said:
Do you like the exit stage left

But................ where were you going. ??? ???

Best Regards
Bob
 

Latest posts

Back
Top