rudydubya
Well-Known Member
- Joined
- Nov 26, 2008
- Messages
- 337
- Reaction score
- 7
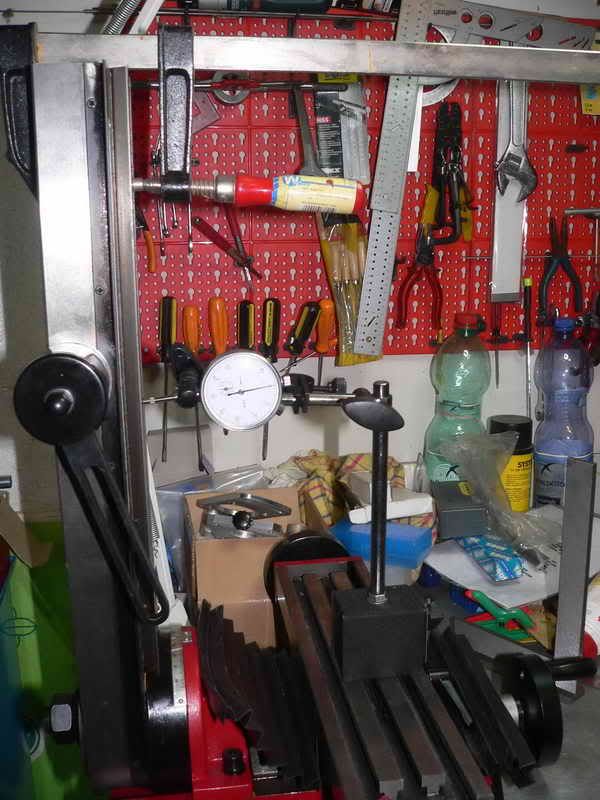
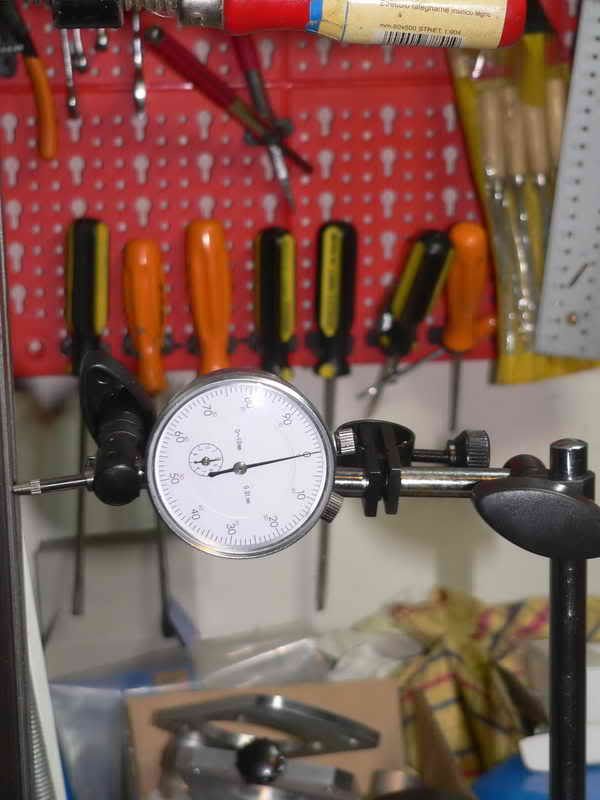
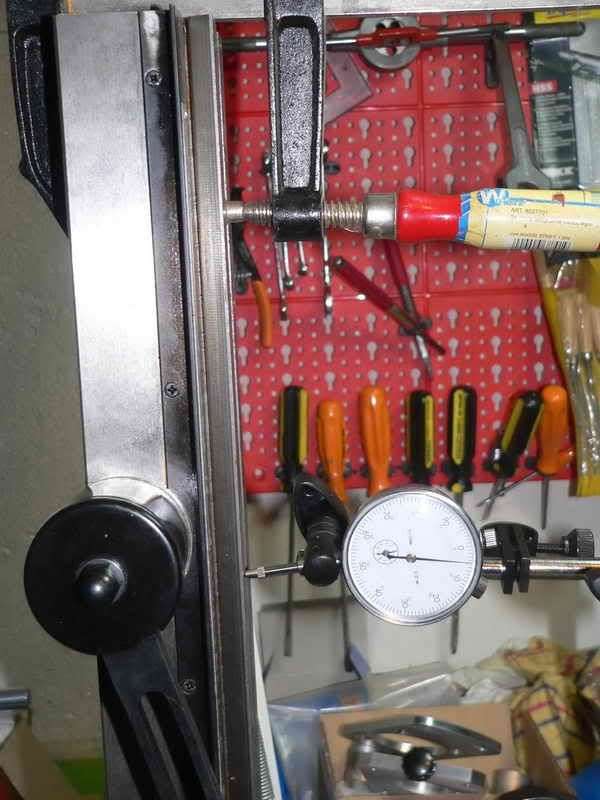
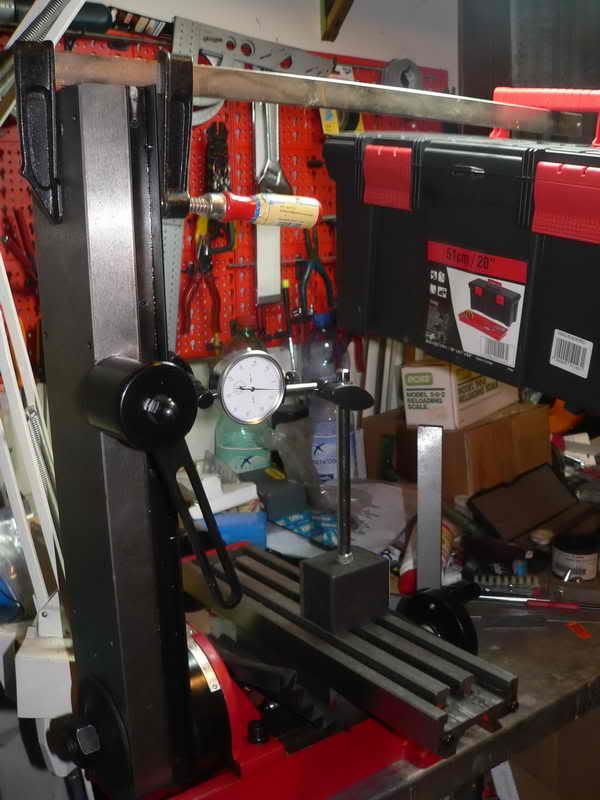
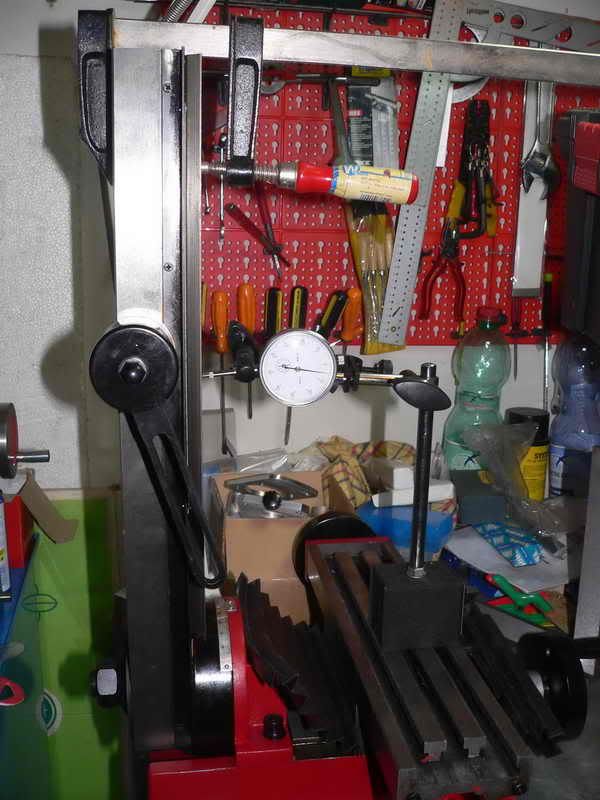
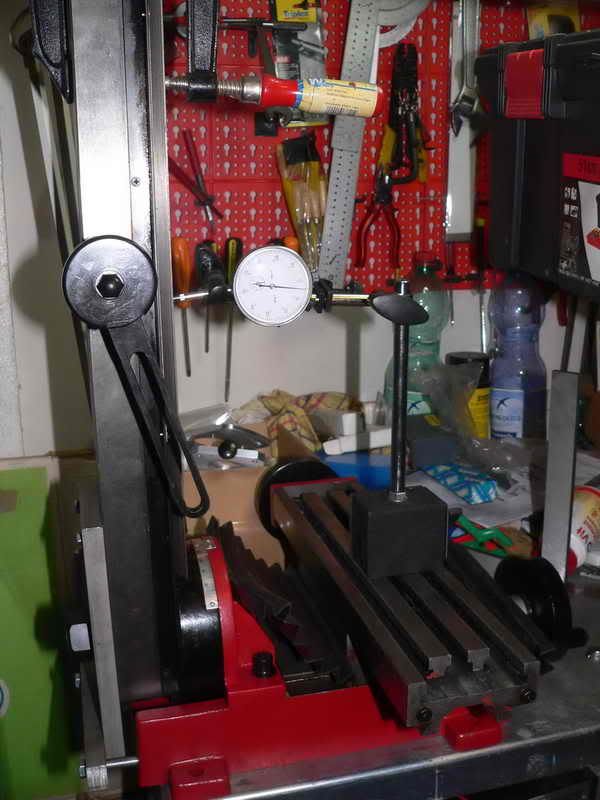
After I finished the spindle-column alignment on my Harbor Freight mini-mill (http://www.homemodelenginemachinist.com/index.php?topic=6007.0), I still didn't get a good tram in the Y-axis. It measured about .004 (all my measurements are in inches) out of alignment, as if the column was tilted to the front just a tad. I also had a significant flex in the column. With a firm push or pull on the motor or top of the column in the Y-direction, I could get almost +/- .010 (2.5 tads) of up and down movement of the spindle relative to the table. I wanted to fix, or at least reduce, the flex, and planned on correcting the column-table alignment while I was at it.
From what I had read about the column flex, the consensus was that the major cause was that big Belleville washer under the big nut at the back of the column (with maybe some compression of the column wall under the washer thrown in), and by replacing the washer with a flat plate you could reduce the flex. Some folks added angle brackets and braces to the plate to make the column even more rigid. I decided on a simple flat steel plate bolted to the back of the column to replace the washer and act as a reinforcement up the column axis.

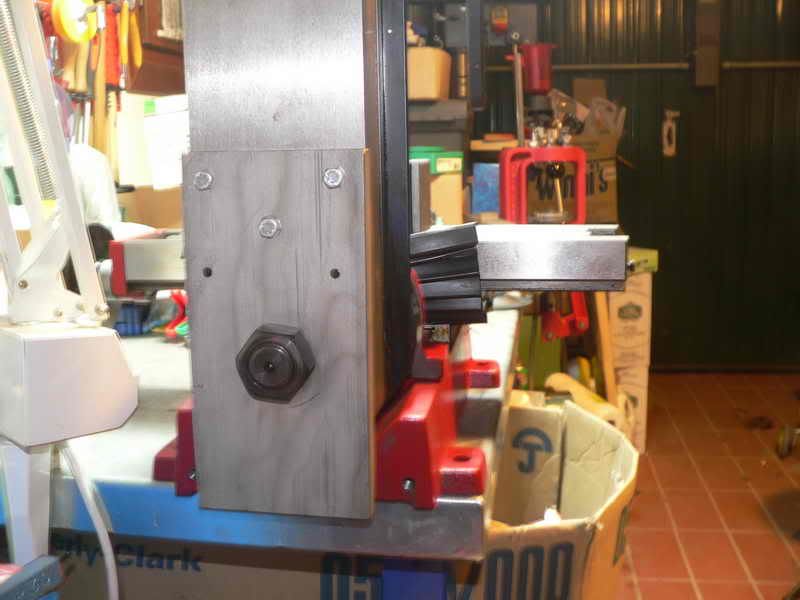
I made a column reinforcing plate (hereafter called a column plate) out of 3/4" thick, 4" wide steel, and drilled holes for some 3/8" bolts plus one 15/16" hole for the big pivot shaft. I used the center of the plate as a reference to locate the bolt holes. Most of you probably know I shouldn't have. The pivot shaft is not on the centerline of the column. It is centered on the ways, but the ways are shifted over about 1/4" on the gib side of the column. I never noticed it before. Must be a lesson in there somewhere. Anyway, my hole locations were far enough in from the sides of the plate to still work on the column, it's just a little off-center.

I match-drilled holes for the bolts into the back of the column, tapped them for 3/8" threads, and bolted the plate to the column. The flex was reduced to less than half of what it was, now about +/- .004, but still more than I wanted, and I hadn't fixed the Y-axis tram yet either.

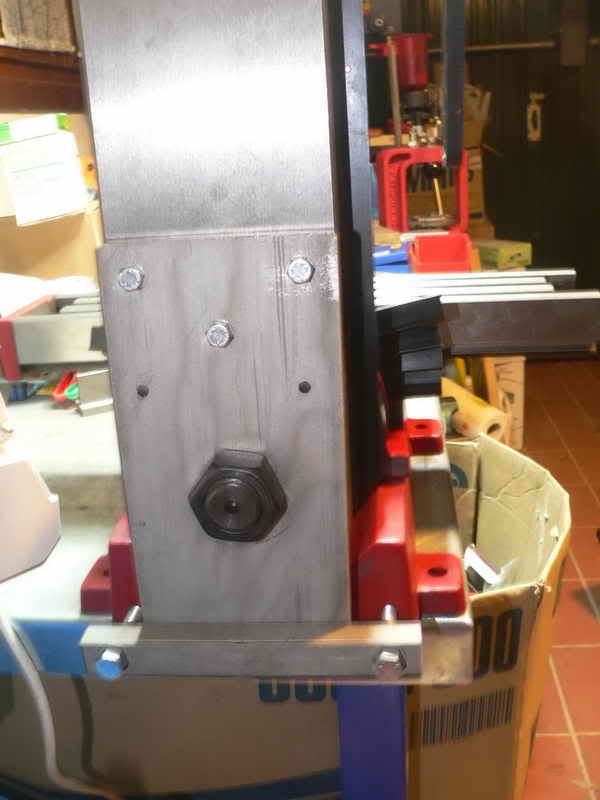
I drilled four holes in a piece of 1/2" thick, 1" wide steel, one at each end for 3/8" bolts, and two near the center for 7/16" bolts. The end holes were far enough apart to clear the edges of the column plate. This would be a pressure plate to push on the bottom of the column plate.

I drilled and tapped holes into the base of the mill itself to match the 3/8" outside holes in the pressure plate, and drilled and tapped through the column plate only for the 7/16" holes, not into be base.

I bolted the pressure plate to the base of the mill with the outside bolts and tightened them until the column was pulled in enough to tilt the column back and eliminate the .004 Y-axis tram error. I then inserted 7/16" bolts through the center holes and screwed them through the column plate until they were snug against the mill base. With the end bolts pulling on the column, and the middle bolts pushing on the column, the bottom of the column was locked in place and the flex was reduced to about +/- .0015.


Some final notes:
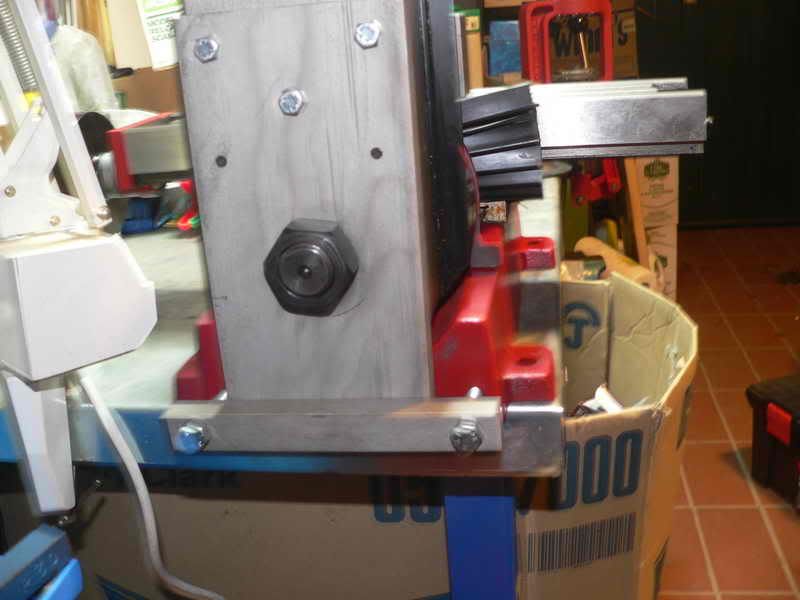
With the bolts in place, I can no longer rotate the column side-to-side to mill at an angle. I have never used that feature anyway, so it was not a concern to me. Also, my mill was trammed in the X-axis to my satisfaction before I drilled the holes at the bottom of the column plate, but I left plenty of clearance around the 7/16" bolts in the pressure plate to allow some slight angle adjustment for tramming, if necessary.
My mini-mill Y-axis alignment required the bottom of the column to be pulled in toward the base, so the 3/8" outside bolts were tightened first, as evenly as possible to avoid any twist. Then the inside 7/16" bolts were screwed in just tight enough to eliminate any flex. If the required correction was the other way, the center bolts would need to be screwed in first, pushing the bottom of the column away from the base, and then the outside bolts tightened to eliminate any flex.
If I were to do this mod over, I would use a thinner column plate, say 5/8" or 1/2" so the big nut would be sure to grab all of the pivot shaft threads. The 3/4" plate I used just barely allows that. Also, my plate was 12" long. If I were planning to fit my mill with an air spring kit like the one sold by Little Machine Shop, I would shorten to column plate to maybe 10" long so it wouldn't be in the way of the hole in the column required by the kit.
The remaining minor flex in the column assembly is probably due to bending of the pivot shaft and/or the pivot plate. I couldn't think of any practical way to eliminate it entirely.
Drilling into your mill might void any existing warranties. I never had an extended warranty on my mill, so it wasn't a concern.
I think that's about it, thanks for reading.
Rudy
From what I had read about the column flex, the consensus was that the major cause was that big Belleville washer under the big nut at the back of the column (with maybe some compression of the column wall under the washer thrown in), and by replacing the washer with a flat plate you could reduce the flex. Some folks added angle brackets and braces to the plate to make the column even more rigid. I decided on a simple flat steel plate bolted to the back of the column to replace the washer and act as a reinforcement up the column axis.

I made a column reinforcing plate (hereafter called a column plate) out of 3/4" thick, 4" wide steel, and drilled holes for some 3/8" bolts plus one 15/16" hole for the big pivot shaft. I used the center of the plate as a reference to locate the bolt holes. Most of you probably know I shouldn't have. The pivot shaft is not on the centerline of the column. It is centered on the ways, but the ways are shifted over about 1/4" on the gib side of the column. I never noticed it before. Must be a lesson in there somewhere. Anyway, my hole locations were far enough in from the sides of the plate to still work on the column, it's just a little off-center.

I match-drilled holes for the bolts into the back of the column, tapped them for 3/8" threads, and bolted the plate to the column. The flex was reduced to less than half of what it was, now about +/- .004, but still more than I wanted, and I hadn't fixed the Y-axis tram yet either.

I drilled four holes in a piece of 1/2" thick, 1" wide steel, one at each end for 3/8" bolts, and two near the center for 7/16" bolts. The end holes were far enough apart to clear the edges of the column plate. This would be a pressure plate to push on the bottom of the column plate.

I drilled and tapped holes into the base of the mill itself to match the 3/8" outside holes in the pressure plate, and drilled and tapped through the column plate only for the 7/16" holes, not into be base.

I bolted the pressure plate to the base of the mill with the outside bolts and tightened them until the column was pulled in enough to tilt the column back and eliminate the .004 Y-axis tram error. I then inserted 7/16" bolts through the center holes and screwed them through the column plate until they were snug against the mill base. With the end bolts pulling on the column, and the middle bolts pushing on the column, the bottom of the column was locked in place and the flex was reduced to about +/- .0015.


Some final notes:
With the bolts in place, I can no longer rotate the column side-to-side to mill at an angle. I have never used that feature anyway, so it was not a concern to me. Also, my mill was trammed in the X-axis to my satisfaction before I drilled the holes at the bottom of the column plate, but I left plenty of clearance around the 7/16" bolts in the pressure plate to allow some slight angle adjustment for tramming, if necessary.
My mini-mill Y-axis alignment required the bottom of the column to be pulled in toward the base, so the 3/8" outside bolts were tightened first, as evenly as possible to avoid any twist. Then the inside 7/16" bolts were screwed in just tight enough to eliminate any flex. If the required correction was the other way, the center bolts would need to be screwed in first, pushing the bottom of the column away from the base, and then the outside bolts tightened to eliminate any flex.
If I were to do this mod over, I would use a thinner column plate, say 5/8" or 1/2" so the big nut would be sure to grab all of the pivot shaft threads. The 3/4" plate I used just barely allows that. Also, my plate was 12" long. If I were planning to fit my mill with an air spring kit like the one sold by Little Machine Shop, I would shorten to column plate to maybe 10" long so it wouldn't be in the way of the hole in the column required by the kit.
The remaining minor flex in the column assembly is probably due to bending of the pivot shaft and/or the pivot plate. I couldn't think of any practical way to eliminate it entirely.
Drilling into your mill might void any existing warranties. I never had an extended warranty on my mill, so it wasn't a concern.
I think that's about it, thanks for reading.
Rudy
Last edited:


")