Power hack saw by D-M

Home Model Engine Machinist Forum

Help Support Home Model Engine Machinist Forum:

This site may earn a commission from merchant affiliate links, including eBay, Amazon, and others.

d-m

Well-Known Member
Joined
Mar 20, 2008
Messages
211
Reaction score
5
Hi all
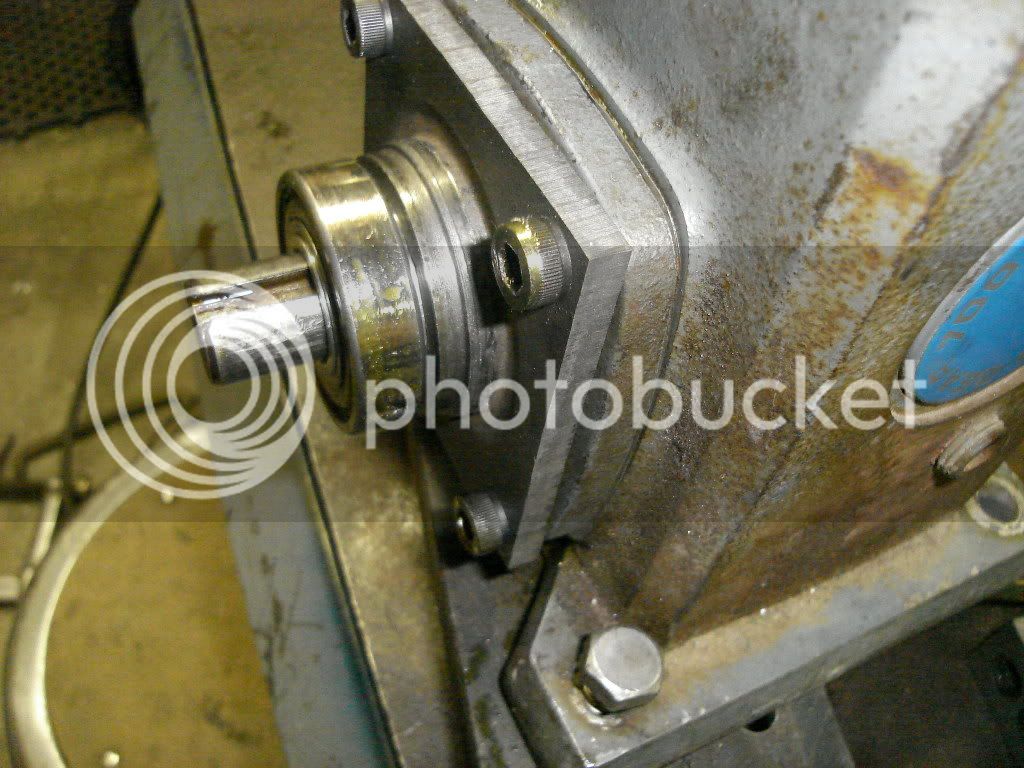
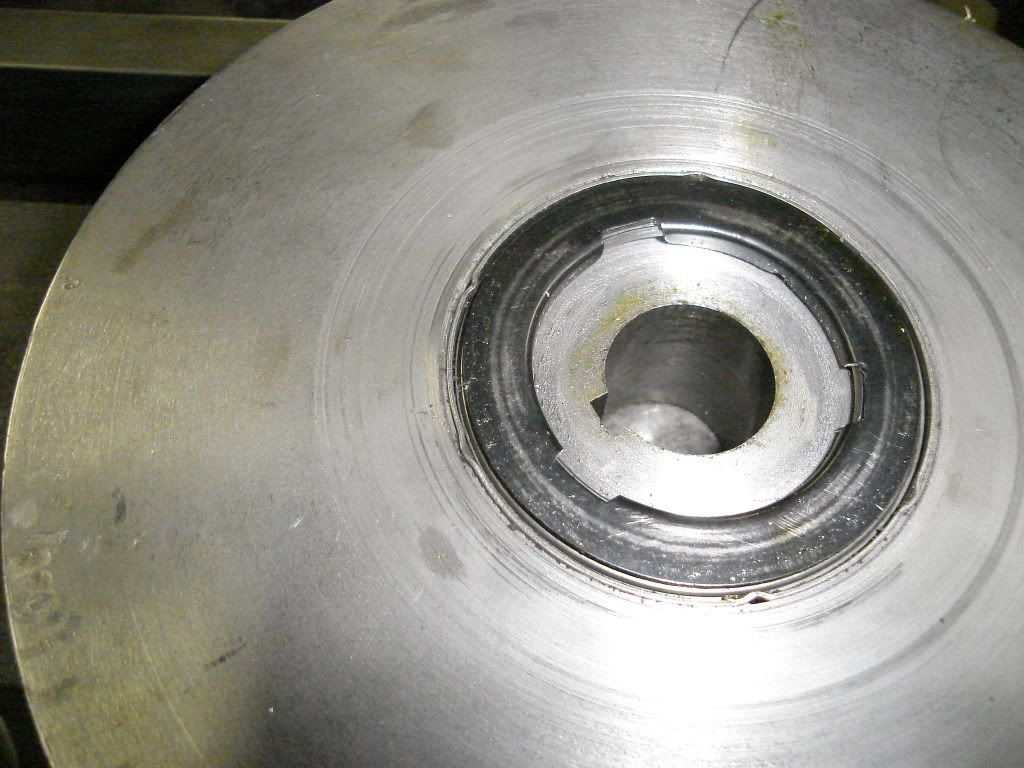
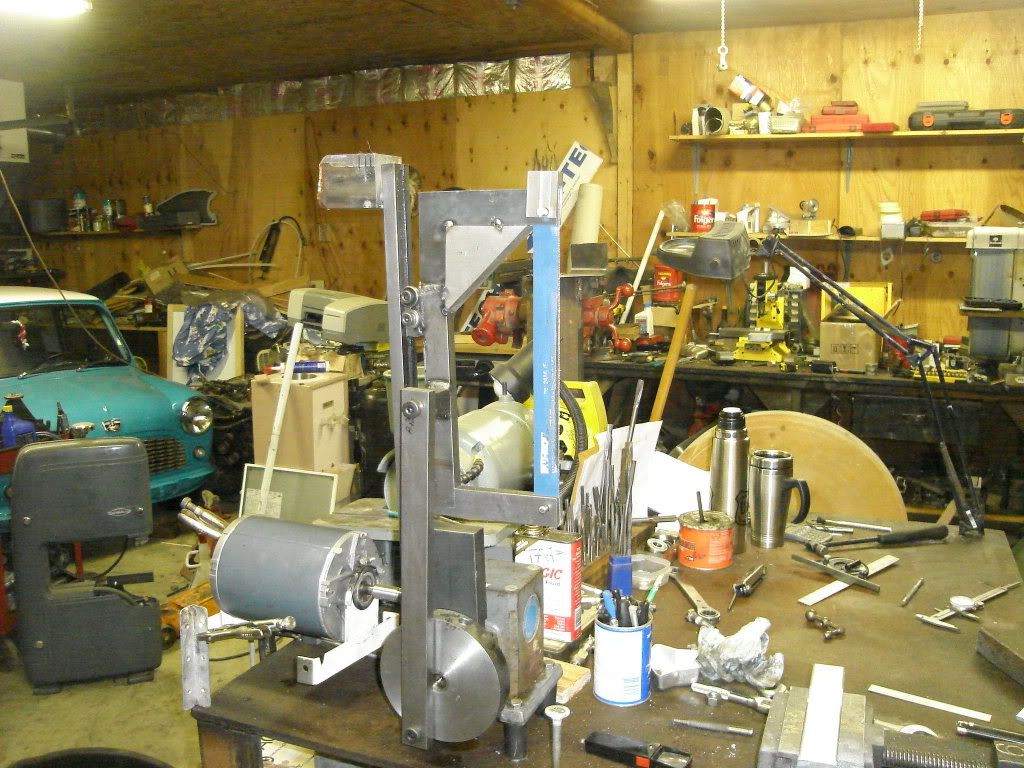
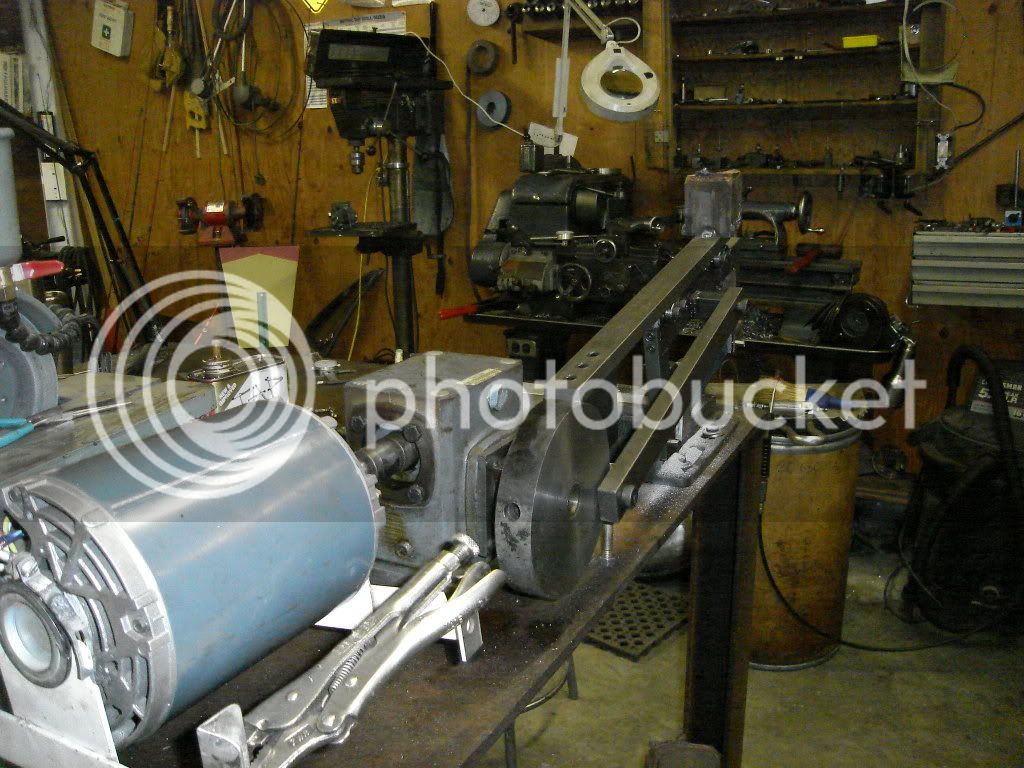
In what little time I have had between side work and my CNC conversion I have had a small project going on the side.Having wanted to do a build post but not having the time to show and write the post I took some pic's today hoping that will give you and ideal of how I thought this finger biter up. I was at a yard sale during the early spring and came across a50 to 1 Boston right angle gear reducer the price was right I took it home. It sat under the bench till about 5 weeks ago, I should add that I own a power hack saw the problem is it is stored at a friends house in Fla. and last time I was there we were unable to find it in the piles of junk (what a waste of a shop) so I have written it off. OK back to the build, I was looking at the gear reducer and the output shaft and started thinking that if I could use the face of the box for the blade arm that would help keep it square and make a good mount area and that is were the fun began. I had an old face plate that won't fit anything I own, I machined a plug from alum and threaded it to fit the 1.500 hole. then squaring it all up in my 4 jaw I and bored it .800. to clear the the .750 shaft then faced the hole thing down so the plate was .250 and machined the other side of the plug to press fit a bearing.Then drilled the hole pattern to match the gear reducer.
DSC03637.jpg

DSC03636.jpg


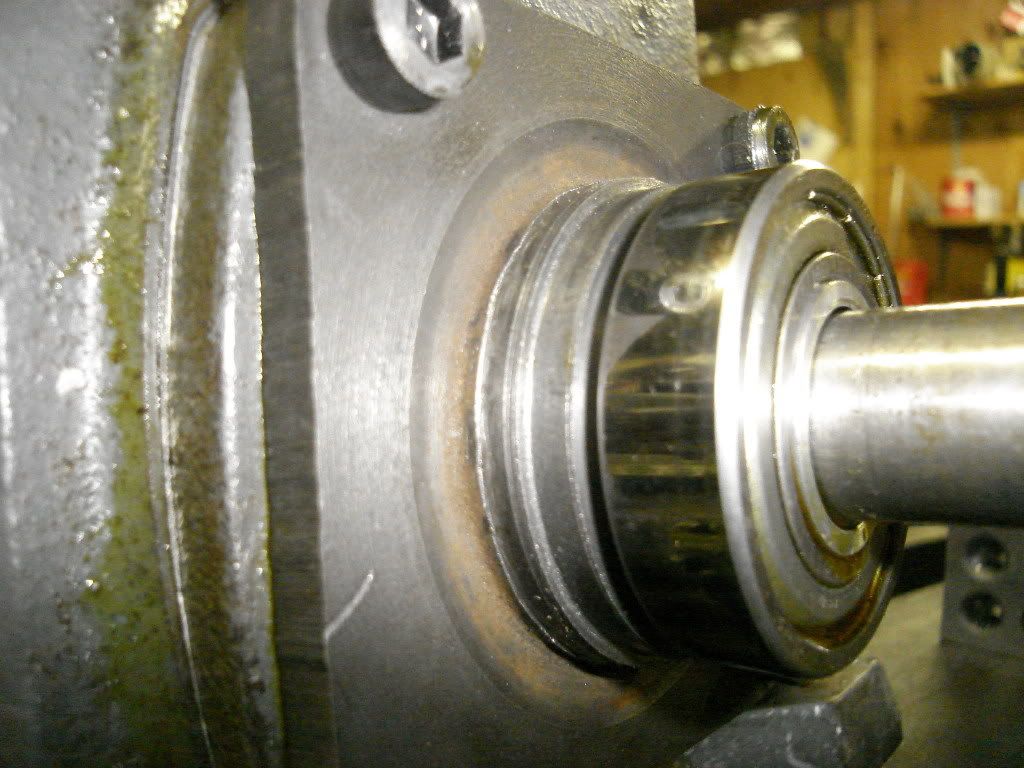
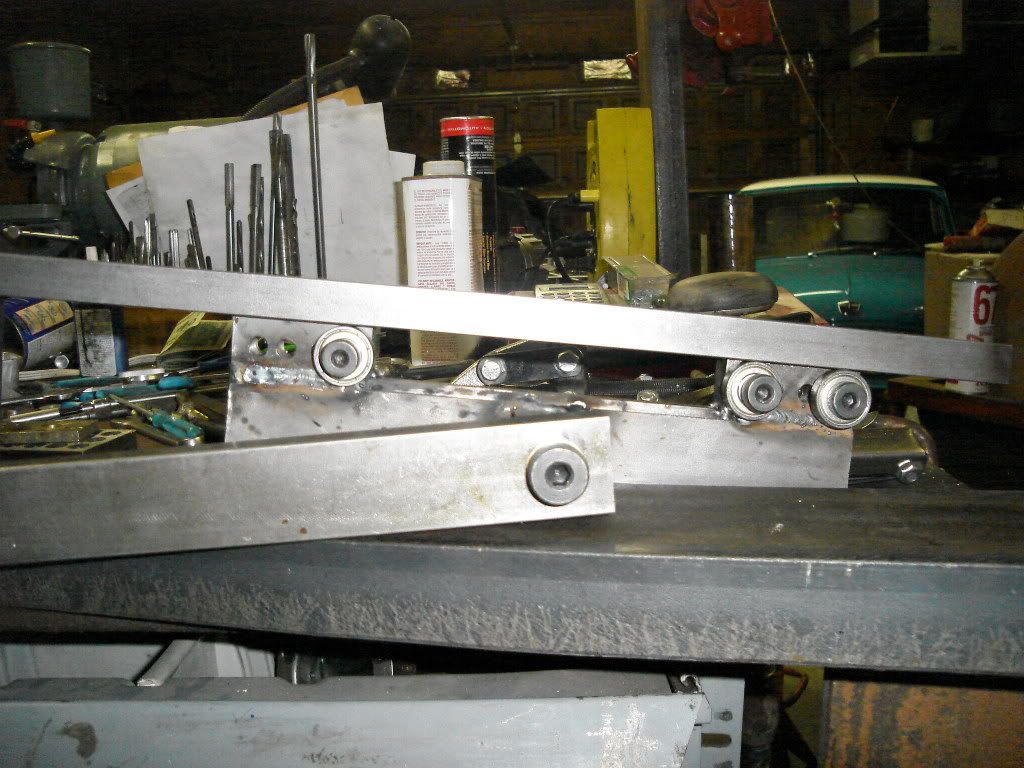
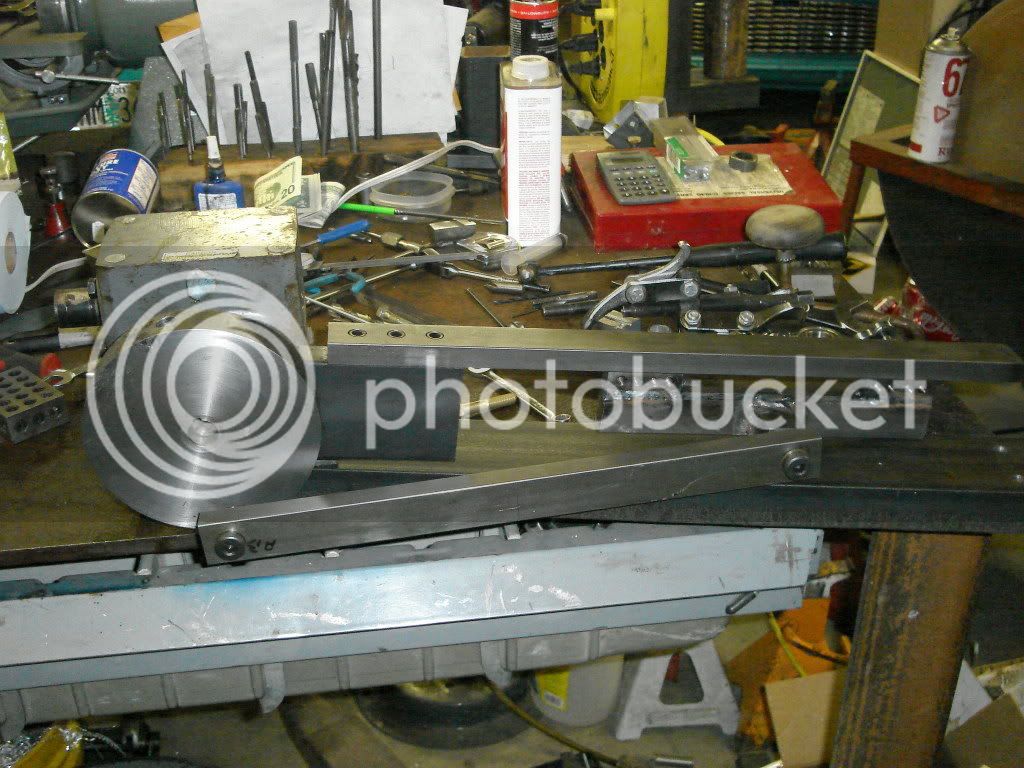
The next trick was to start on the saw arm taking a left over of 1.500 X 4.00 bar I started boring a hole for the bearing to fit in.I did this on the mill with a boring head I missed the mark for a press fit and had to drill and tap for grub screws
DSC03629-2.jpg


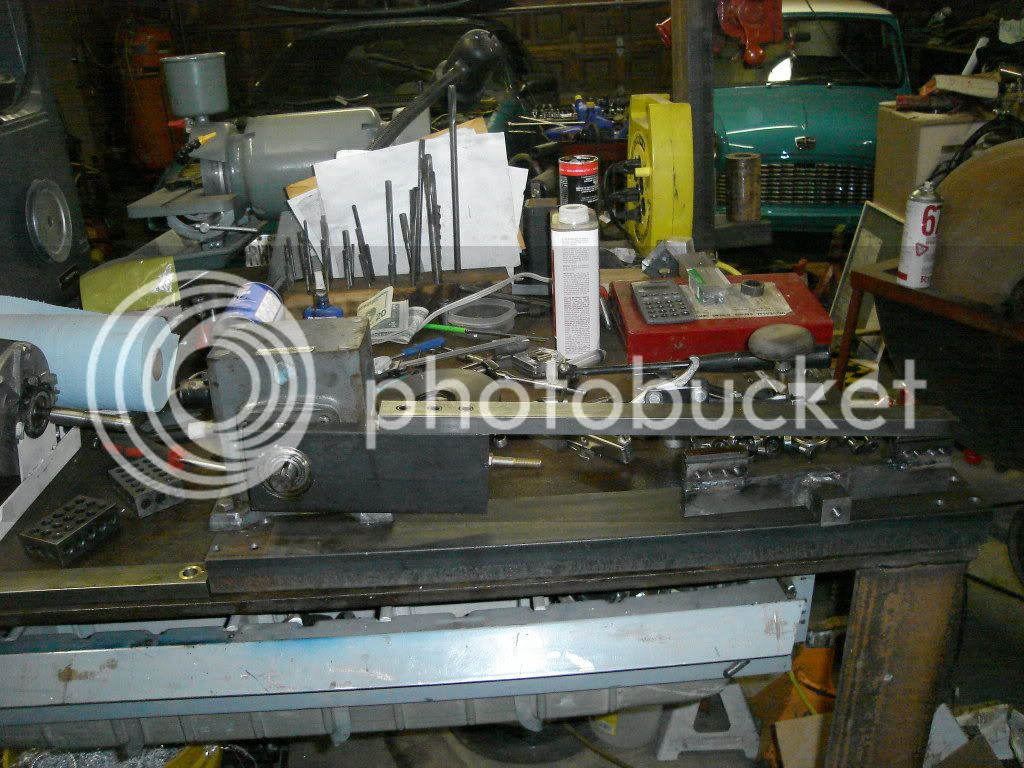
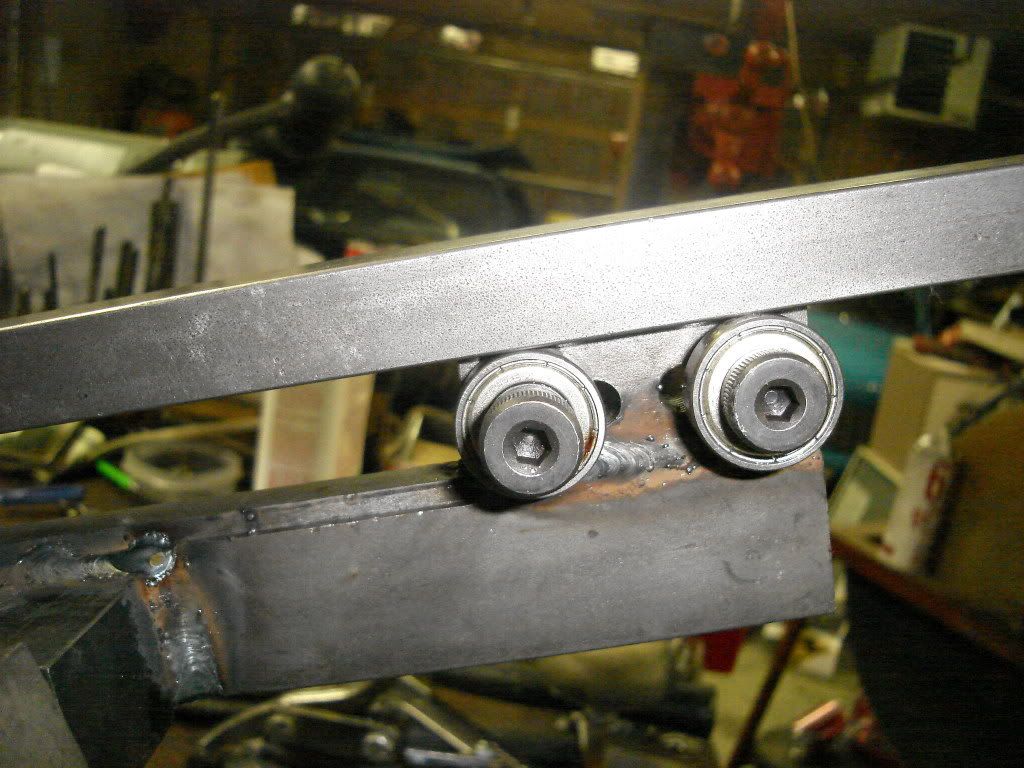
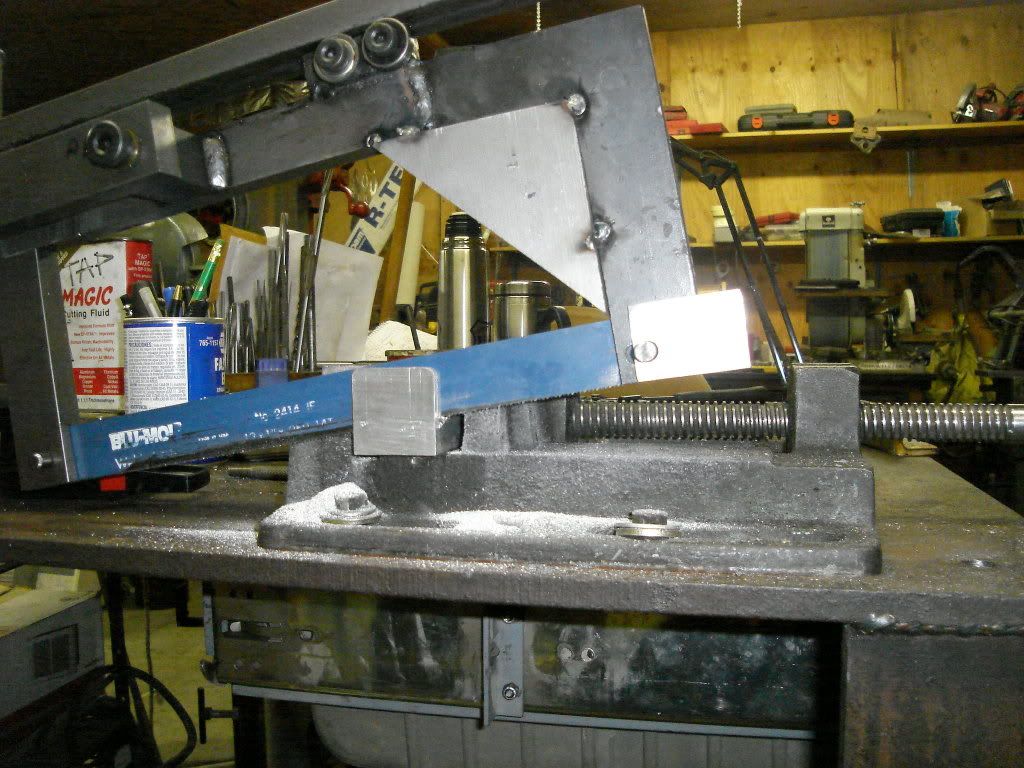
Then I drilled and taped for 3 5/16 cap screws and cut a nice 18" piece of flat bar 5/8X 1.250 and repeated the hole pattern. Then with a key cutter I made a T slot 15" long
DSC03632-1.jpg


OOps
I posted and was not done
So then I made the carriage doing an the T's to match a little sloppy welded some bar stock on edge drilled and taped for 5/16 sholder bolts an added some bearings
DSC03633.jpg

DSC03631-2.jpg

then made the drive plate I machined the plate to hold a torrington bearing (spelling?)so there would be no binding between the plate and swing arm.
DSC03635.jpg

then I made the drive arm with oi lite bushings again with shoulder bolts
DSC03630-2.jpg

And there it is mocked up for the pic now just waiting for my blades to show up this week and then I will start on the blade holder and base.
Hope you like and plz comment
dave
 
this is going to be interesting, I made one many years ago, used a lawnmower five speed transmission, drove it from the bottom and the out put shaft is where I put the flywheel, it worked by not good, that dog in the transmission makes for jerking on the center each time, you got the right Idea, looking forward to the build, Lathe Nut
 
I LIKE IT a power hacksaw designed and built to your preferences and ideas will follow with great interest.
Being an observer of many hacksaw designs and builds that covers from some beautiful and precise machines right down to the down right ugly and near useless in all shapes and sizes.
Here is one that I have turned up. Google "Popular Science Feb 1964 Hacksaw" and up pops a rather novel way to build one.
go to

Homemade power hacksaw for less than $20 - Feb 1964 - Google Books Result
books.google.co.nz/books?id=qS0DAAAAMBAJ...
Popular Science - Vol. 184, No. 2 - 232 pages - Magazine
1 1964 730639 730640 730641 730642 730643 730644 730645 730646 .... 166 POPULAR SCIENCE FEBRUARY 1964 Homemade power hacksaw for less ...

Being fascinated by this novel approach to the design and construction of it.
Started by using this as the basis to modify to my own design and construction of one


velocette.
I find it Funny that you brought this up because this is were this sorta started. I even went as far as getting all the iron for this saw including the engine rods. All the angle iron is cut and sitting on the shop floor next to the lathe. But when I got to looking at that gear reducer and then got the ideal that I am making now. Remember it may not even work!!! Like some things in life its a learning experience.I have tested it in a raw form things just mocked up hoping it wont BITE me when I plug it in so far really good. I have started on the blade holder and will get that done by next weekend and will do a trial cut. But I will have to put it away after next weekend as I need to get started on the motor mounting blocks for my cnc project.
Please post some pic's or give me a link so I can see your build as I love to steel ideals.LOL
Feel free to hijack this thread as it may be a few months before I get this finished.
Dave
 
Hi all
I Did not think I would get the saw this close to done this weekend especially afters last Wednesday, working in a vary odd position I pulled some muscles in my lower back. I was down till Saturday morning when I just could not sit any more. So here is the end of this saga with just a few small pieces for the saw to finish up I found my self needing to start on the base and vise. At that moment it hit me like a ton of bricks I have my vertical bad saw on my steel bench I don't need it as my horizontal saw tips up and I made a table for it. I quickly removed it and and set the power hack saw in its place to see how it would fit. With a little fiddling I had a plan Ill let the pic's finish the story.
DSC03642.jpg

This pic shows it in the storage position next to the magnifying glass is a bolt with a washer welded on that is the adjustable stop. You can also see the stands I placed under the gear drive.
DSC03641-1.jpg

Here in the work position.
DSC03640.jpg

And a pic of the vise mounted to the steel bench using drilled and taped holes in the bench.I still need to mess with some weights I added a POS to the top but still not heavy enough you can also see the gusset I added to the corner when I did my first trial cut it chattered really bad, I clamped some flat strap to it and it cured the issue at that point I tacked in the gusset and all was well. The only other thing that needs to be done is a motor mount and I am going to look for a 3450 RPM motor at 1725 it works out to 34.5 SPM I think that doubling it would be a good thing as it sorta slow. and a short clip of it working sorry the quality is really bad but you get the ideal.


Dave
 
Hi Dave
Sorry not to get to this before but I have been out of the workshop for a while. My Good Lady needed my Nursing for a few weeks. All on the mend now and taking charge again.

This is my effort at the plans for a POPULAR SCIENCE FEBRUARY 1964. HACKSAW

I Will attempt to load a video of it in action to "You Tube". With Many Thanks to Dave for his kind offer to “Hi Jack” his posting

[ame]http://youtu.be/PkT5Gauwv9M[/ame]


DSCF0359.JPG
 
Neat! Looks like it will only wear out half of the blade though. :)

Simon
 
Hi to Simon
The vice is 125 mm opening so the "Old Metal Muncher" has several packing pieces that allow the work piece to be

positioned anywhere in the cutting area. Plus a "Tooling Plate" that you can clamp very small pieces to and clamp it in the vice

Here is a couple of samples of the work done by this hacksaw cutting "Mild Steel Shafting" 60 mm dia

Eric

DSCF0357.JPG


DSCF0358.JPG
 
Back
Top