Novice problem on first (steam) engine

Home Model Engine Machinist Forum

Help Support Home Model Engine Machinist Forum:

This site may earn a commission from merchant affiliate links, including eBay, Amazon, and others.

jrlandau

Member
Joined
Oct 24, 2008
Messages
12
Reaction score
0
Location
Los Gatos, California
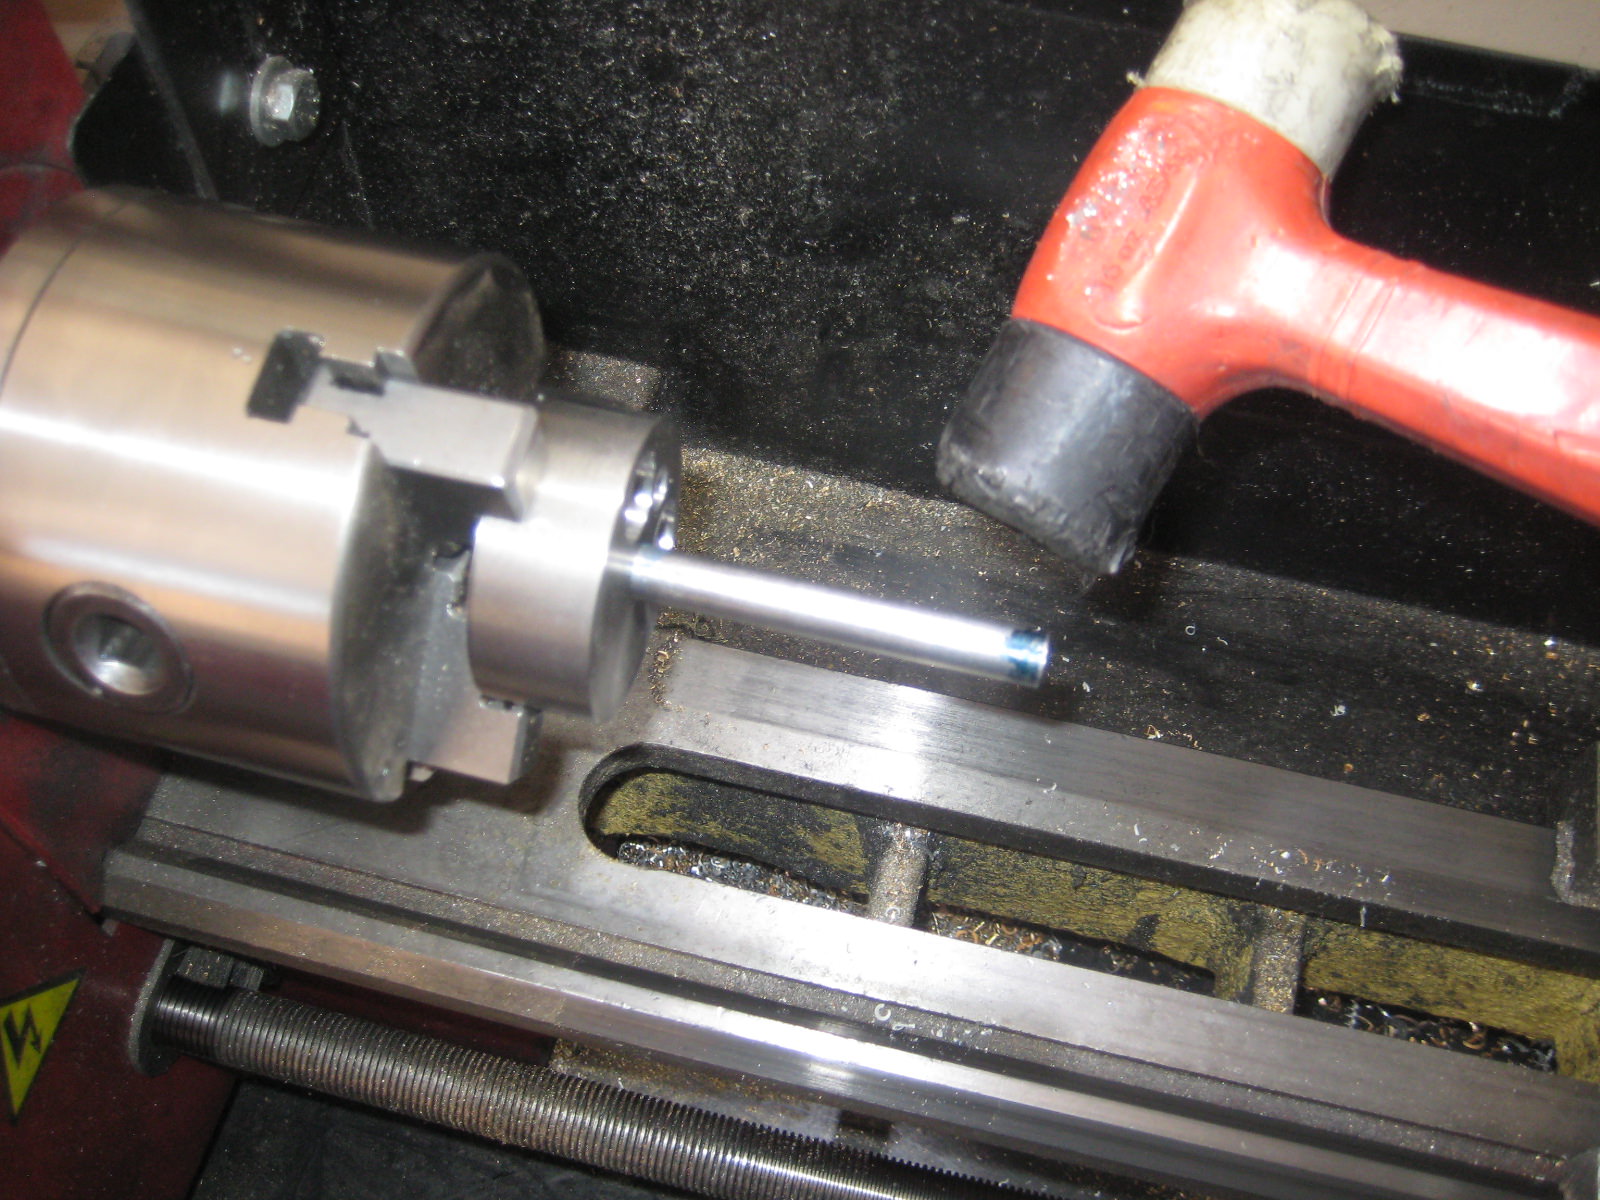
I'm building the SHAN steam engine from Model Engine Builder Issue 32, and I'm having difficulty assembling the parts I've made. I think the problem is that the piston and rod are not really perpendicular, so the rod doesn't fit the gland or the crosshead. According to the plan, the rod simply screws into the piston. I've attached a picture of the pair assembled, and also the relevant plans. My question is, how does one achieve that perpendicularity? Is it simply a matter of being more meticulous, or is there a jig I should make, or what?
 

Attachments

  • Shan Piston and Rod.jpg
    Shan Piston and Rod.jpg
    313.2 KB · Views: 61
  • Piston Build Notes.jpg
    Piston Build Notes.jpg
    33.8 KB · Views: 58
  • Piston Rod.png
    Piston Rod.png
    22.5 KB · Views: 55
  • Piston.png
    Piston.png
    43.4 KB · Views: 51
If you have threaded the piston and the rod in the lathe you should have a match for straightness assembled. You can lock the piston with shaft in the 3 jaw and slow spin and see if the shaft end is running eccentric. Then tap it into parallel with its piston with a soft mallet. This action may cock the piston in the lathe jaws too being only one inch diameter. Going to a finer thread -up of shaft and piston can decrease slop when joined together. I would start with a 2-3 inch long round stock piece squared up in the 3 jaw and drill/ tap knowing the center hole in piston is straight with its diameter. Turn it around and part off. A 2 in. machinist square may be the right size to check the perp. of the piston/shaft too.
MXxSIQy.jpg
 
Last edited:
The piston should run without wobble when the piston and rod are chucked in the lathe. If needed take a facing cut on each side to run true. This may solve the problem. Not sure about the gland. Usually a steam chest has a gland , not the cylinder. I imagine you are referring to the stuffing box, this does resemble a gland. Check to see if the thru hole in the stuffing box is centered . If it is off a small amount the piston rod will hang up. I have corrected this problem by boring for a threaded screw and Loctite in. Then with and endmill remove the slotted or phillips head on the screw.
Re-bore by centering a small spotting drill and a machine drill and reamer.
mike
 
The 'traditional' way to secure a piston to its rod in model engines was to thread the piston only half way and the other half would be plain, the same diameter as the piston rod.
Hold the piston in the drill chuck and the rod in the tailstock chuck and screw both together. The plain part of the piston should be a tight fit on the rod.
If you start off with the piston a little bit over diameter, it can be brought to size after attachment to the rod in a collet.

Dave
The Emerald Isle
 
As Dave says the usual method is to leave the piston a little oversize and then machine to finished size with it on the rod held in a collet or split bush so the rod is running dead true, piston does not get removed from rod after this is done. Cut the ring groove to finished size before assembly as the forces will be too high to cut when just holding by the rod.

Personally I prefer a smaller thread on the rod so there is a shoulder to tighten to and drill part way clearance, the rest tapped and leave a matching unthreaded section on the rod. If you have taps and dies I would also go for something finer pitch than #1/4-20 as it's easier to cut a finer pitch true if using a die.
 

Attachments

  • Thompstone 11R1 Piston.pdf
    53.3 KB · Views: 101
On top of everything else -- if you can't fix a part, don't be afraid to chuck it and start over.
 
On top of everything else -- if you can't fix a part, don't be afraid to chuck it and start over.
K1600_IMG_3743.JPG
Ha, ha! And then ending up with two, half finished model engines. :) ... plus a few really badly scrapped parts. I never had to redo a damaged part, it usually is much more efficient in the 2nd or 3rd approach. I did not notice the broken tap on the table, someone must have damaged it when I was grabbing a coffee.
I do not remember how that one happened. :)

I had bad luck with trying to use a dye for the thread on the rod. One dye died. I do not like them, they always make some sort of trouble. If you do not need concentric they are most times O.K. But even with a dye holder in the drill chuck I feel dyes wobble the part out of true. It is still sort of perpendicular, but not concentric anymore.

I like this method, I was able to do M3 threads on soft steel.


Greetings Timo
 
Last edited:
There's a whole thread out there that I started on how to thread a long rod without bending it, and I can't find it!

The upshot for using a die to thread a rod:
  • Make sure the rod is the correct size. Check Machinery's Handbook for the size thread you'll be cutting (or spelunk on the web -- die manufacturers list the best sizes)
  • Cut a lead-in on the rod, just about equal to the minor diameter of the thread and a couple of thread pitches long. This will help the die get started straight.
  • Make a die holder that'll go into a Jacob's chuck in your tail stock. Put it in the chuck lightly, so it can slide in and out. Use that to keep the die straight.
And -- all of the above will make a pretty straight thread, but if it needs to be really straight and you're not trying to thread something super long and thin, single-point turn it.
 
I bought several sizes of threaded rod. 2/56 , 3/48, 4/40, and 10/32. Threading a couple of inches or less is no problem. I turn the stock for 65% of thread instead of 75%. This helps a lot. I would rather buy 36" lengths of threaded rod than threading with a die. Do not recall the costs but was inexpensive. I may bought the pieces from Micro Fasteners.
 
  • Make sure the rod is the correct size. Check Machinery's Handbook for the size thread you'll be cutting (or spelunk on the web -- die manufacturers list the best sizes)
  • Cut a lead-in on the rod, just about equal to the minor diameter of the thread and a couple of thread pitches long. This will help the die get started straight.
  • Make a die holder that'll go into a Jacob's chuck in your tail stock. Put it in the chuck lightly, so it can slide in and out. Use that to keep the die straight.

I think that is good advice, bullit point 2 was probably my main mistake.
My die holder maybe not the best choice for small size.

I would add
  • do not use bad to machine stock
  • use tapping fluid, if not available at least some oil. ( the difference from dry to oil to special fluid I find very noticeable )
Bad cheap die was another point. ( I bought a cheap set long time ago, there was nothing esle available back then. Half of the dies are damaged, the other half I never used, because of their odd sizes )
The more expensive ones not only look nicer, they also worked much better.

For the cylinder rod a proper sized shoulder bolt with the head cut off, then changed to accomodate the cross head pin can be a good solution, if you do not want to machine everything from scratch.
 

Latest posts

Back
Top