More Rivets!

Home Model Engine Machinist Forum

Help Support Home Model Engine Machinist Forum:

This site may earn a commission from merchant affiliate links, including eBay, Amazon, and others.

Oldmechthings

Well-Known Member
Joined
Jan 10, 2008
Messages
153
Reaction score
12
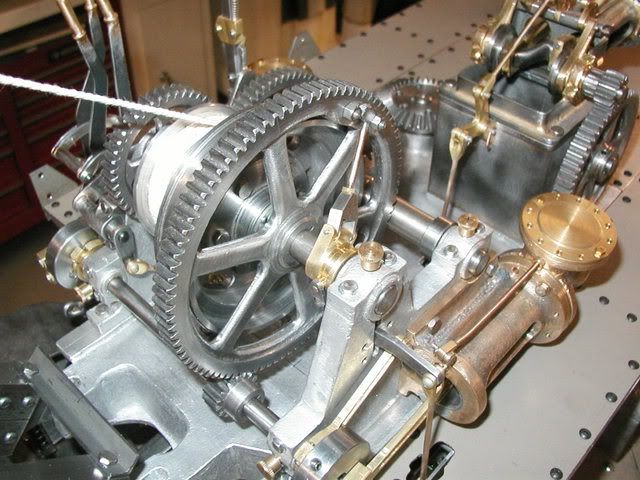
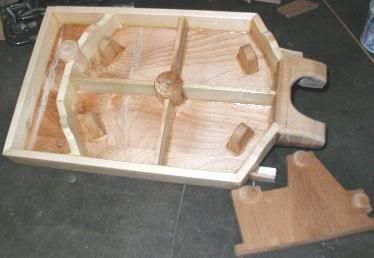
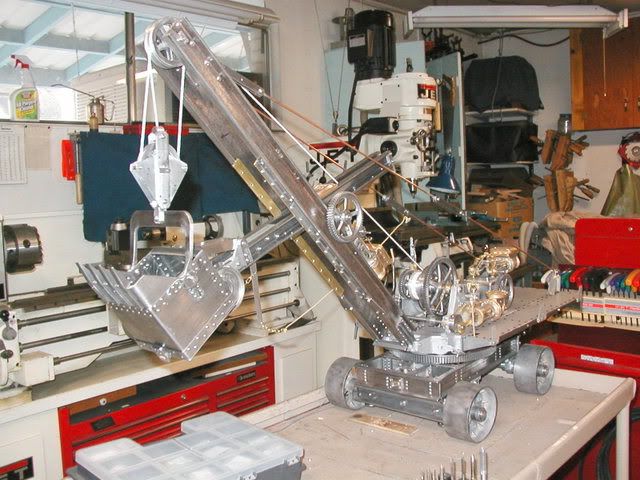
I better bring you up to date on the model steam shovel. As of today I have the bucket complete and operational. I put lots of rivets in it. Hopefully the same number as in the original. Oh!, and it has teeth too. It is always exciting when babies get teeth.

P2200003.jpg


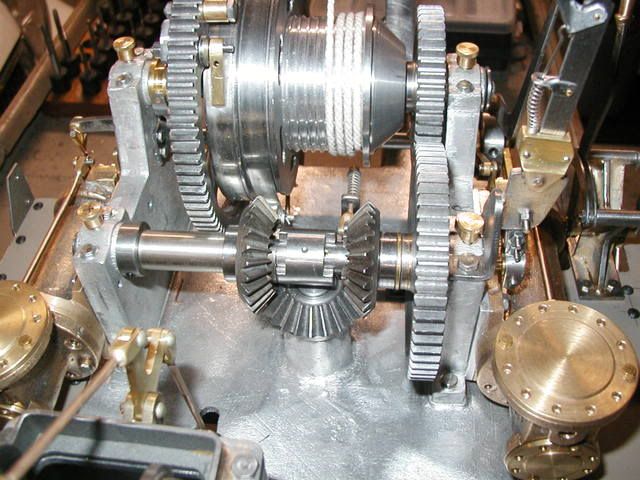
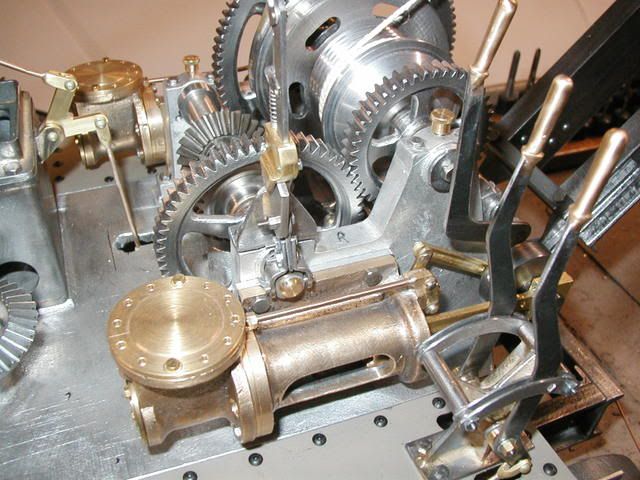
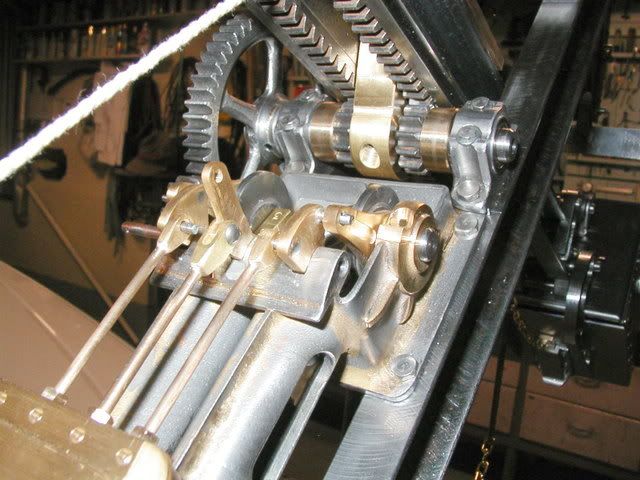
That almost finishes the "shovel" end of the machine, Now I need to move back towards the rear and work on the "Steaming" end.

P2200002.jpg


Rivets really set a model off, and I install a lot of them. There are dozens in that bucket alone. Rarely do I ever set one with a hammer. I always use a rivet press. It is so much faster, and easier, and I end up with a nice looking head on both ends. Shown below is my assortment of rivet presses.

P2150001.jpg


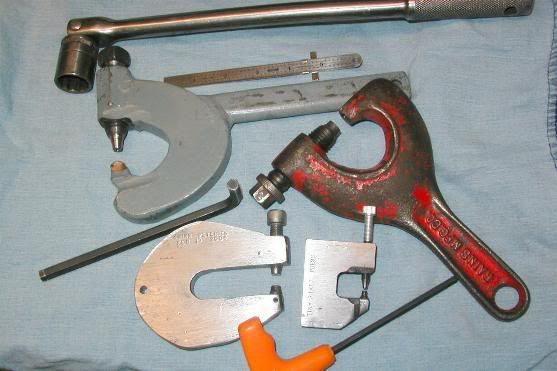
The red one is a commercially built one that my dad once used on the farm on his mowing machines. It will easily squeeze a 3/16" rivet. The gray one is one that I made out of 3/4" plate steel to install 1/8" rivets in the frame of a model steam roller, and I also used it to rivet the frame for the Steam Shovel shown above. The tiny little press was used to install hundreds of rivets in that Hay Press and a model Manure Spreader. For those rivets, snipped off 19 gage wire brads were used. They are about .035" diameter. They have heads that look like finishing nails, until after they are pressed and then they look like rivet heads. The press with the deep throat was made just last Friday, specifically to rivet the bucket together. For that I used 3/32" rivets.
All the presses have cups in the anvil and screw the shape of the head. If it is desired to change the shape of the head, just change the shape of the cup. For screws I use square head set screws or socket head screws because they are a little harder than a regular bolt. The last two presses I used a piece of tool steel for the anvil. That makes changing the shape very simple.
If pressing rivets seems a little strange, dig out your century old history books and see how they did it. Yes, they used jack hammers sometimes, but where ever it was feasible they used a press, big ones!
Birk
 
That's really cool, Birk!

I was wondering where the scale rivets came from. Using wire brads makes it easy. I can see where making up some small rivet presses would be really handy for the modeler to have.

Let me ask this: seems like there would be applications in steam where you want the rivets for appearance, but it has to be steam tight. Do you use silver solder or some such to seal them?

Best,

BW
 
Very cool !! Beautiful work !

How about more closeups of the engine side :)
 
Ok, here are some more close up pictures. You will note that it is missing some bolts, pins, etc., because it all has to come apart someday for painting.
A question was asked about sealing riveted boilers. Yes, they needed to be sealed with solder.
I should have mentioned that I shear rivets to length, if they are small ones, say 1/8" and under with one of those electrician's crimping tools that have holes to shear threaded screws off. I drilled a couple more holes in it with a carbide drill. For larger rivets I made a shear out of a automobile leaf spring that works the same way as the electrician's tool. Sawing is so slow, and clipping them with diagonal clippers leaves a wedge shape end.
Birk
P2200001.jpg


P2200002-1.jpg


P2200003-1.jpg


P2200004.jpg

 
Excellent photos Birk. The finished bucket looks great too. The rivets add the perfect touch. Love the close-ups too.
 
Ok Birk, were are you hiding the steam elves. ;D

Those machines look to clean in the background. Nobody can build a model to such excellence and not leave one chip behind. Much less have the time to clean and be so productive at the same time. It's got to be the steam elves. ;D

Truly a work of art there.

Is that base that is holding the large gear a casting? Looks like it.

By the way I now need to wipe the drool off the keyboard.

Bernd
 
Bernd
There are several castings in that little model. Rather than explain, just look at a couple more pictures. I've been making castings for models for about 40 years now, so it is nothing so special, just part of the job.
By the way I been at this model since last June (About 9 months so far)
Birk

P8030001.jpg


P8050001.jpg


P8210001.jpg


P7310001.jpg


P7310004.jpg

 
Great series, Birk! Thanks for the many pictures.

By the way, have you ever tried casting anything out of pennies? I know they have a lot of zinc in them. Just wondered if the alloy is useable in model building?

Chuck
 
very nice Birk and thanks for the larger format photo's - really helps us appreciate the workmanship. great models have authenticity and in full scale rivets abound - one reason why your work looks so good imo. I've done a limited amount of rivet setting, never with a press and am interested in learning more. are the rivets on the bucket steel? I assume they have to be like material to prevent galvanic action? when I've bought rivets from model engineering suppliers they seemed (iirc) to come in say 1/8 or 1/4 inch denominations - is there a step of cutting the rivet to the correct length based on head size and material thickness? is there a rule of thumb or formula to get the right length?

i think a neat press could be made using one of the cheapo air guns, seesaw foot switch controlling solenoid air valves for CC/CCW so both hands could hold the work.... maybe its gilding the lily....not sure how much of an armstrong operation pressing them is. if i had 10 to do not worth it, 100's?...well food for thought

The castings look great. I have some limited experience casting AL and am curious about the bronze - how different a process is it than AL? what alloy are you casting from - something specific or just whatever bronze/copper/brass bits that accumulate? Do you preheat the molds at all? I remember have trouble with the metal freezing and not getting enough detail....but maybe i just didn't have it hot enough. Certainly the results you're getting are fantastic

sorry for so many questions, but its great stuff you're posting and I, like I'm sure many here, would love to learn more about your techniques


Mcgyver
You are just like a little kid with so many questions. But that is the way they learn things.
Most of the time I use steel rivets, but I also have aluminum, copper, and brass. When you find them available at a bargain prices at flea markets etc. you don't quibble about material. If you want to just buy new ones, McMaster Carr has a fairly good selection, and they will sell to most anyone with a credit card on the Internet.
For length, I use the trial and error method, but after a while you can "guess" pretty close.
I'm pretty technical when it comes to casting alloys, You know, whatever I can find in scrap. I never buy new material. Yellow brass has zinc in it which burns off as your melting and pouring so it makes quite a mess. The darker red colors seem to be easier to work with. I got some aluminum bronze that has nasty shrinkage problems. Areas that are thicker will have noticeable shrinkage dimples. And it is hard to machine with a tensile strength up around 100,000 psi. However once you get it worked over it takes a nice polish, and it does not tarnish like regular brass, I really like it for gun parts like trigger guards, butt plates, etc.
Aluminum with a thousand alloys, for casting is basically the extruded kind that is reasonably soft and malleable, it will bend, and then the cast kind that is harder and brittle. What you put in the melting pot is about what you get back out again.
 
Great Thread Birk!

Machining parts from stock is pretty much the limit of my own skills.
Seeing yours go from wood patterns to finished parts on a model
is a real inspiration for me.

Amazing pictures.
I'm always looking forward to seeing more.

Rick

 
Wow. Learning how to cast is one of my goals. I don't think I will have a problem getting my wife's permission for a backyard furnace ;D She her self would like to learn blacksmithing :eek:

Eric
 
<drooooolinggggg> :p

Thanks for the closeups ! Veryyyyy nice work there Birk !
 
Great pictures Birk. Nice job on the patterns. I've got a Gingery furnace that I made and melted some aluminum and poured some ingots. Haven't tried pouring a mold yet.

Your one big inspiration to me. 8)

Bernd
 
:eek:
Birk, Your steam shovel is amazing! I can only imagine what it is like to have your skills and talent!

Steve
 
S_J_H
You have all the skills and talents that I have! You just have not got around to using all of them yet, but you will. Things in life come one step at a time.
Birk
 

Latest posts

Back
Top