Maryak 10

Home Model Engine Machinist Forum

Help Support Home Model Engine Machinist Forum:

This site may earn a commission from merchant affiliate links, including eBay, Amazon, and others.
Richard and Phil,

Thanks Guys :bow:

Another +44 C today so minimal shop time. :eek: :eek: ::) ::)

Best Regards
Bob
 

Sorry to hear about that.

I have been to Australia many times but never experienced 44!! :fan:

I am getting tired of the cold but I guess we can put a sweater on.

-Kevin.
 
44C!......geeese! ( That's 112F for us Yanks.....)

Sorry to hear about the casualty...It would appear that if you want to accomplish anything, a certain percentage of scrap is unavoidable.......I have a pair of camshafts to prove it!

Hang in there buddy! You'll get it done! I have complete faith. :)

Dave
 
Kevin and Dave,

Thanks for the commiserations.

Here is a picture of what happened,
smiley-sad058.gif
the why, I'm still pondering.
smiley-think005.gif
The only thing I can come up with is that the fin grooves were not quite deep enough and threw the drill off line.

IMG_0198.jpg


With this in mind I made them 0.010" deeper on cylinder No.2. 20-20 vision is commonly referred to as hindsight.
smiley-rolleyes003.gif


Cutting the fins.

IMG_0200.jpg


The fins are cut and the centre's drilled out.

IMG_0201.jpg


Too Hot for any more
sky3.gif


Bob

I think your theory is correct, looking at the 1st picture it would seem that the side of the drill closest to the cylinder I can see marks where the side of the drill touched the cylinder wall, given the rotation direction of the drill and the thinness (ie lack of axial support) of the top fin it would seem that the tip of the drill "walked" around the cylinder wall a bit prior to entering the second fin. Once it entered the second fin at an angle the game was lost.

As you say, if you make the fins a smidgin deeper then the drill shouldn't touch the wall and you should be OK

Rgds - Gavin
 
Bob,

my skills aint near yours but i do a similar operation on the touch holes for the BP rifles

i stuffed more ends this way than i can remember,

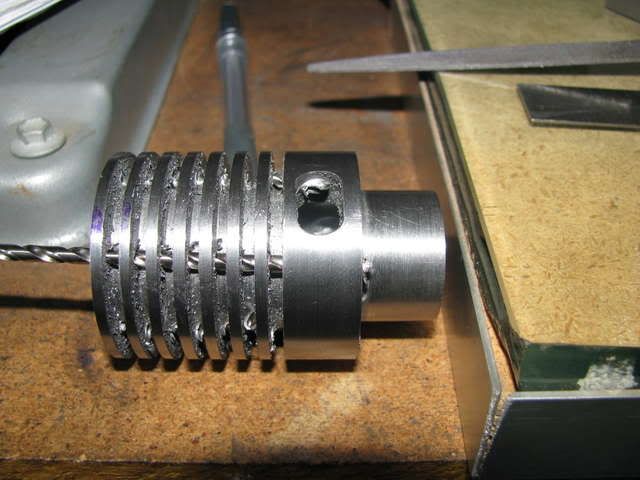
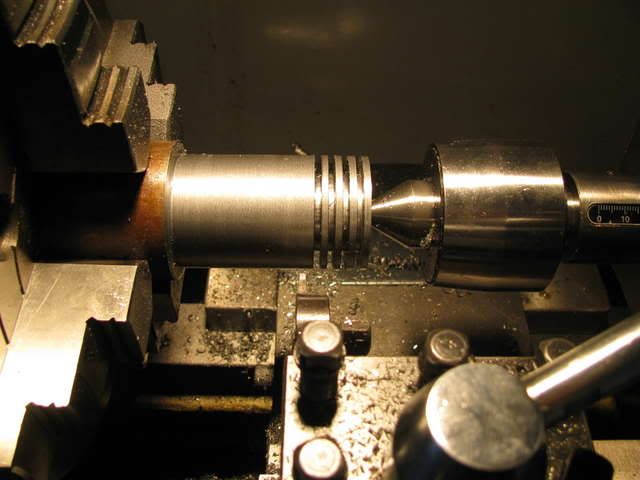
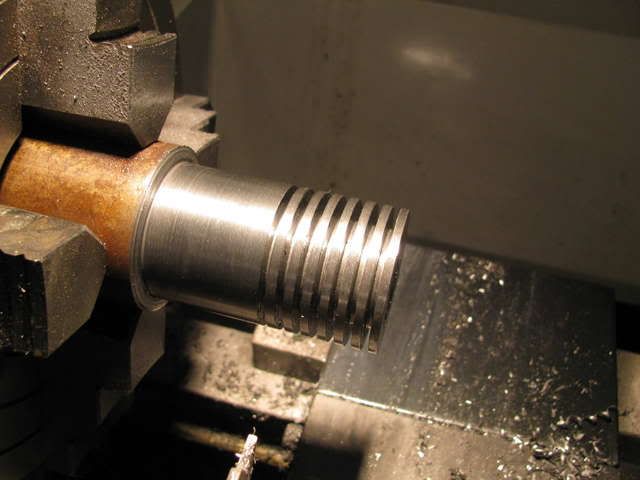
I did learn that a small end mill through the first 2-3 fins ( plates in my case) stopped 95% of the distortion

the end mill did not distort if it touched the body, it just milled a groove and i could adjust

drilling was lots easier and way more reliable after i learned this

dunno if it helps you, but maybe..

cheers

jack
 
Gavin & Jack,

Thanks for the recommendation and support. :bow:

Best Regards
Bob
 
Looks like the parting tool is behaving....praise be for small miracles....

It looks like the drill grabbed as it exited the surface on the back side. My hypothesis is that one flute grabbed due to the angle, and the deed was done.

The reason for the drill wonder is a little mystical. Watch you chips as they may pack up against the wall of the cylinder and push the drill sideways and down ( drills are amazingly flexible aren't they). Clear your chips often and clear off any hangers with a file as you go

I think your approach of making the grooves deeper should work just fine to help keep the drill wondering, though I would still peck at it with a short stubby screw machine drill or a center cutting end mill to make sure she's started out well and then keep the chips cleared.
 
Dave,

Thanks for the advice and support. :bow: :bow:

Best Regards
Bob
 
Bob, I don't know how i missed this build (maybe the size the sites getting! So many to read....)Anyhow smashing build and photo's Good honest reporting with plenty of photo's..........sorted! :bow:
 
Mike,

Thanks for your support and encouragement. :bow:

Good to see your Myford rebuild is coming along very nicely.

Best Regards
Bob
 
EOW again
wow.gif


Not a lot done - IT'S TOO DAMN HOT ::)

Turned down to the transfer port PCD.

IMG_0202.jpg


Drilling the transfer ports (again)

IMG_0203.jpg


Avagoodweekend.
 
;D ;)

Excellent progress Bob, despite the one or two irritations...... one things for sure though..... you will be a dab hand with the parting tool by the time you are finished.

Keep your eye open for a 14"dia x 6" pitch prop.... won't be long before you need it. :D :D ;D ;D

Keep up the great work.

Best regards.

SandyC ;) ;)
 
Sandy,

Thanks for your continued support. :bow:

Kvom,

You may well be correct, bit late for me now. In the void between my ears I developed a sequence and prioritised what I felt needed to be done to get the port relationships correct, then fit the holding down bolts around them. There is no valid reason I can think of for not reversing my sequence. Should I make a 3rd cylinder I'll definitely try your suggestion. Thanks :bow:

Best Regards
Bob
 
Its not usually a good idea to try and plunge a parting tool through all that intermittent cutting that would happen if the holes went in first.Probably get your arse squeaking a bit.It would be interesting to watch though,with the temperature as high as it is in Australia at the moment I would be sweating before I put a cut on let alone during it.If the tool is really rigid it might be ok.
Its a character building stuff so good luck.

best regards Steve C.
 
Scoop,

Yet another valid point :bow:

Suffice to say that things are a little iffy which ever way I go. There's still the option of an aluminium sleeve.

Best Regards
Bob
 
New Week - Still Hot +40 in the shop at 11:00

Here's what went down

The transfer and exhaust ports have been machined and the cylinder fitted to the crankcase.

IMG_0205.jpg


Boring the cylinder to 7/8" nominal ready for reaming later.

IMG_0206.jpg


Retreated to the shower.
 
Looking nice Bob....Sorry to hear about the continued heat....

Hang in there

Dave
 
Thanks Dave, :bow:

(the last one looked OK up to this point as well!!!)

Best Regards
Bob
 

Latest posts

Back
Top