Maryak 10

Home Model Engine Machinist Forum

Help Support Home Model Engine Machinist Forum:

This site may earn a commission from merchant affiliate links, including eBay, Amazon, and others.
Hi Bob,

Thanks for sharing that.

Let me see if I get this straight

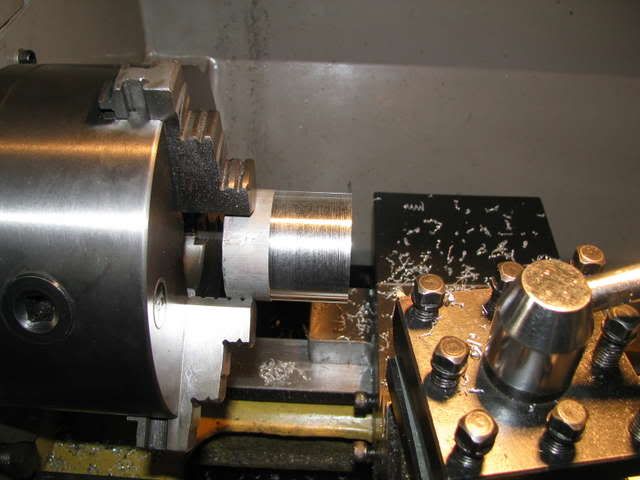
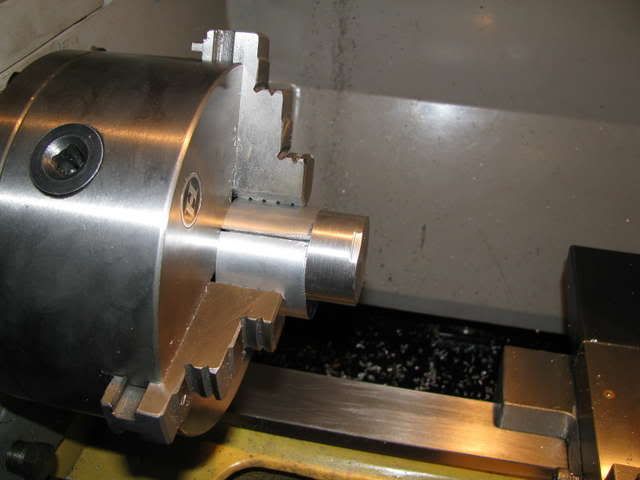
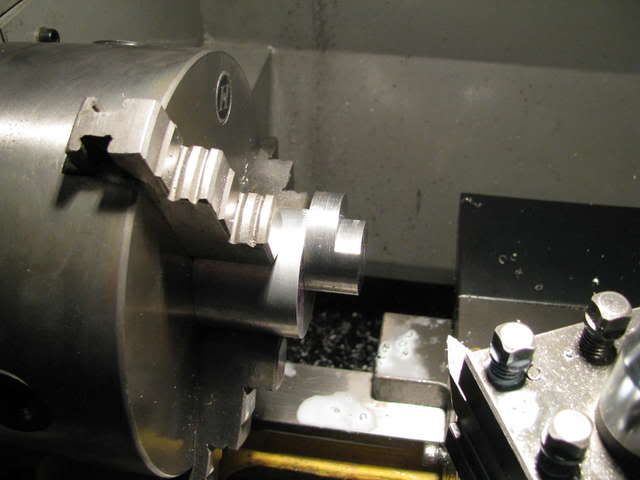
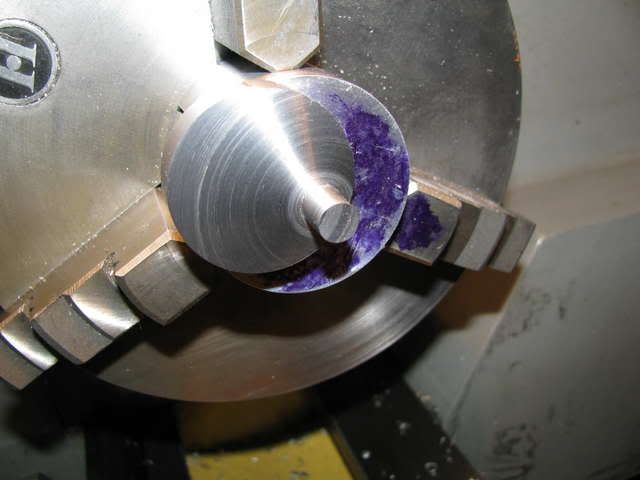
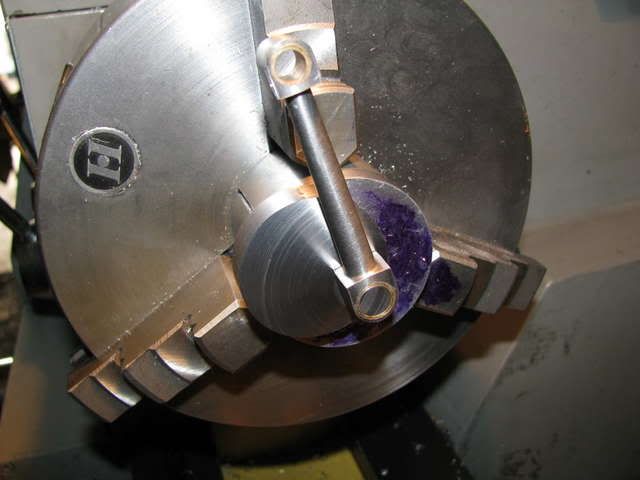
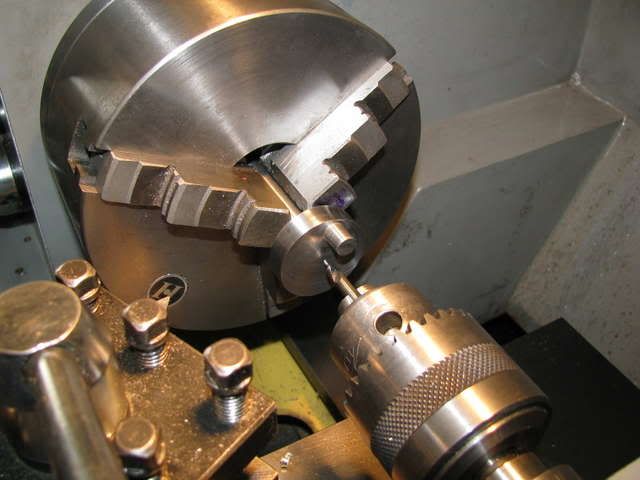
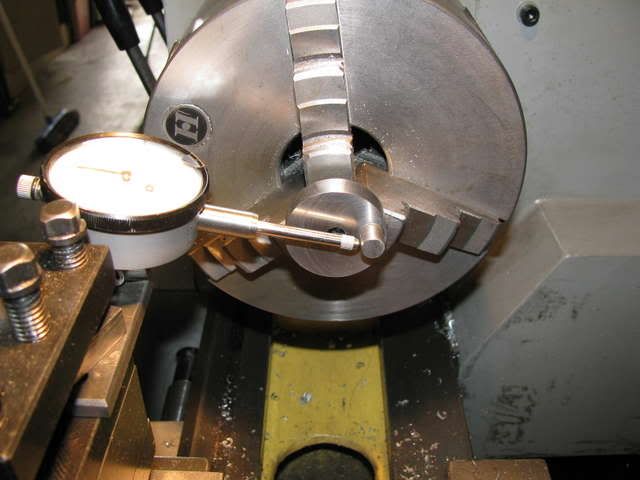
thats two threaded studs mounted to a plate at the Conrod center to center distance.

Grab each one in turn in the three jaw and round the end. The clamp is to keep the fixture clocked in the jaws?

I like it!

Dave
 
Paolo & Dave,

Thanks Guys. :bow: :bow:

Yes Dave, your explanation is spot on.

Best Regards
Bob
 
Nice rounding job Bob. Is that device that clamped to one of the chuck jaws serving as a rotation stop?

Cheers,
Phil
 
Thanks Phil,

The bolts through each end of the conrod are sized so that they just clear the chuck. The toolmakers clamp then secures the bolt to the chuck jaw giving a positive drive in either direction via the rotary table. The conrod is secured to the jig by a nut under the plate on the outer end, and the bolt in the chuck jaws is pushed hard down, using the quill, before the jaws are fully tightened.

Hope that explains it OK ???

Best Regards
Bob

 
Hi All,

Don't know why this is in "A Work In Progress"
wow.gif


The last 2 days have been a non-event. Still the money was nice; so I shouldn't complain. ::) ::)

Have a great weekend.

Best Regards
Bob
 
Steve,

Thanks for your support and kind words :bow: :bow:

I have no intention of giving up, I was just venting my spleen at how paying work was stuffing up my play time. ::) ::)

Best Regards
Bob
 
Bob,
I have that same problem now.
Are you saying I will still have the same problem even in retirement?? ??? :mad:

Cheers,
Kevin
 
ksouers said:
Bob,
I have that same problem now.
Are you saying I will still have the same problem even in retirement?? ??? :mad:

Cheers,
Kevin

If you are as rich as I am - YES
LolLolLolLol.gif


Best Regards
Bob
 
Hang in there buddy.....I had one of those weeks too.

Dave
 
Dave,

Thanks for your support I'm hanging
smiley-violent036.gif
:big: :big:

A little more progress with the crankshaft.

A lump of aluminium for the crankshaft jig.

IMG_0242.jpg


Setup to drill the offset for the crankpin in the jig.

IMG_0243.jpg


The jig drilled and reamed.

IMG_0244.jpg


Setup for machining the crankpin.

IMG_0245.jpg


Roughing out the crankpin.

IMG_0246.jpg


I have only been putting it off since 1995 ::) but my aching jaw saw me at the dentist, more to follow when I know how much pain I must endure. ::) ::)
 
Bob,

I like the idea of the jig rather than off-setting in 4-jaw (I found that difficult). How does the jig clamp the shaft though? Is it split?

Cheers,

Nick
 
NickG said:
Bob,

I like the idea of the jig rather than off-setting in 4-jaw (I found that difficult). How does the jig clamp the shaft though? Is it split?

Cheers,

Nick

Nick,

In my case the 4 jaw is too big to hold a 7/16" shaft at a 1/2" offset. The clamping is 2 fold:

1. A push fit, (to be cut off later).

2. A split jig, (see the 4th pic in my last post).

I was hoping to use a nut and spacer on the back of the jig but not enough room in the chuck annulus hence the push fit and split. I am also taking LIGHT cuts.

Thanks for your continued support and interest. :bow:

Best Regards
Bob
 
Nice technique Bob. You're inspiring some of us to push the envelope :bow: :bow:

Cheers,
Phil
 
Bob,

Don't know how I missed the split line! :-[

I will definitely be using this method on future engines of mine, seems pretty solid. I will have to combat my impatience though and take LIGHT cuts! :big: ;)

Nick
 
looking good as always bob.............and thanks for the photos and drawings :)

chuck
 
Slick fixture Bob! Like it alot!

Probably use that on my Seadog....Though I might use the 4 jaw.

How much is left to do friend?

Dave
 
Phil, Nick, Chuck & Dave,

Thanks guys for your kind words, support encouragement and interest. :bow: :bow: :bow: :bow:

Not a lot today as I am making a becket for a ships bell. Something different and it's not a love job.

So here's what I did get done.

The completed crank pin.

IMG_0247.jpg


The conrod fitted.

IMG_0248.jpg


Drilling the inlet port.

IMG_0249.jpg


The inlet port.

IMG_0250.jpg


Finding TDC so that I can locate the web cut away and cross drill the inlet at the correct angle.

IMG_0251.jpg


And so went another day in downtown Port Adelaide. ::)
 
I know I've slacked off this week and today won't be any different. I hate dentists, (only on a professional level), and have been putting off seeing one for some time.

Net result - had one of my big old molars removed yesterday and I am banned from my shop until Monday when I'm off the pain killers.

Best Regards
Bob
 
Back
Top